
Related Manuals for NETGEAR WNR834


Summary of Contents for NETGEAR WNR834
- Page 1 Wireless Router Setup Manual NETGEAR, Inc. 4500 Great America Parkway Santa Clara, CA 95054 USA December 2006 208-10074-01 v2.0...
- Page 2 © 2006 by NETGEAR, Inc. All rights reserved.
-
Page 3: Table Of Contents
Contents Getting to Know Your Wireless Router ................1 Unpacking Your New Router ..................... 1 Hardware Features ......................3 Positioning Your Wireless Router ..................4 Installing Your Wireless Router ..................5 Updating Your Router Firmware ..................6 Installing Your Router Using the Smart Wizard..............7 Using the Smart Wizard ..................... - Page 4 Related Documents......................35 Registration and Certifications.................... 37...
-
Page 5: Getting To Know Your Wireless Router
• Warranty and Support Information cards If any of the parts are incorrect, missing, or damaged, contact your NETGEAR dealer. Keep the carton, including the original packing materials, in case you need to return the product for repair. Getting to Know Your Wireless Router... - Page 6 To prepare your router for installation: Carefully peel off the protective film covering both sides of your router (see Figure Figure 1 Set up your wireless router by inserting the tabs of the stand (supplied with your router) into the slots on the bottom of your router as shown in Figure 2.
-
Page 7: Hardware Features
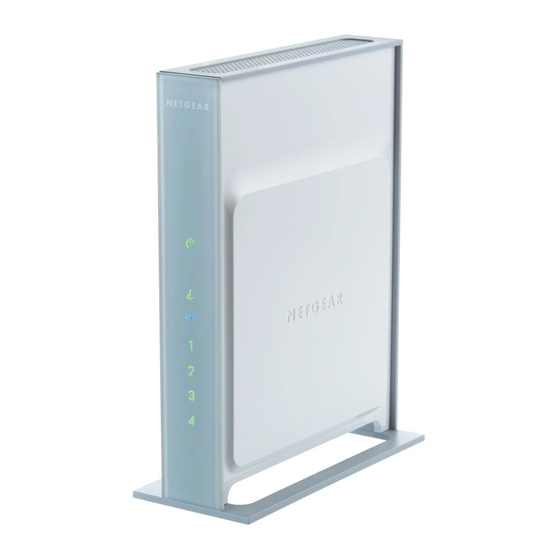
Hardware Features Before you install and connect your router, take a moment to become familiar with the front and back panels of the router—especially the LEDs on the front panel. Front Panel The various lights on the front panel indicate the operating status of the router. A description of LED behavior is included in Figure Power... -
Page 8: Positioning Your Wireless Router
1. Factory Default Restore setting. Press Restore for approximately 5 seconds to reset the router to the factory default settings. 2. Four Local Area Network (LAN) 10/100 Mbps Ethernet ports for connecting the router to your local computers. 3. Internet/Wide Area Network (WAN) Ethernet port for connecting the router to a cable or DSL modem. -
Page 9: Installing Your Wireless Router
connection can vary significantly depending on the physical placement of your router. For example, the thickness and number of walls the wireless signal must pass through may limit the range. For best results, place your router: • Near the center of the area where your computers and other devices will operate, preferably within line of sight to your wireless devices. -
Page 10: Updating Your Router Firmware
Updating Your Router Firmware NETGEAR is always improving the operability and features included with your router. To make it easy for you to best, most up to date features of your router, NETGEAR provides a variety of methods for updating your product. -
Page 11: Installing Your Router Using The Smart Wizard
Internet account. Using the Smart Wizard The NETGEAR Smart Wizard takes you through the procedure to connect your router, modem, and PC(s). It then helps you to configure your wireless settings and enable wireless security for your network. The Smart Wizard guides you through the setup process by automating many of the steps. -
Page 12: Accessing Your Router After Installation And Checking For New Firmware
The Smart Wizard guides you through installing your router, connecting your router to the Internet, configuring your wireless network settings, and selecting the optimum security protection for your network. If you choose not to select a security option during installation, you can always access the router’s user interface later to select a security option (see “Accessing Your Router After Installation and Checking for New Firmware”). - Page 13 Click Yes to check for new firmware (recommended). The router will automatically check the NETGEAR database for a new firmware image file. If no new firmware version is available, the message “No New Firmware Version Available” will display. (If you selected “No,” you can check for new firmware later;...
- Page 14 It is advisable to determine the firmware version currently running on your router before you check for updates on the NETGEAR website. Then go to the NETGEAR website and select the model number for this router. If a later version of the firmware is available, upload the firmware to your computer and upgrade your router.
- Page 15 Version shown on your Router Status screen. If a the version on the NETGEAR website is more recent, click on the version number. Then, click Right-click and Save to Download and save the file to a location on your hard disk.
- Page 16 Installing Your Router Using the Smart Wizard...
-
Page 17: Installing Your Router Manually (Advanced, Mac, And Linux Users)
Installing Your Router Manually (Advanced, Mac, and Linux Users) Before installing and connecting your router manually, review the list below and make sure that you have all of the necessary information. • Internet service connection through an Internet Service Provider (ISP). •... - Page 18 Disconnect the cable at the modem end only (B). You will connect it to the router later. Figure 7 Locate the Ethernet cable that came with your NETGEAR product. Securely insert one end of the Ethernet cable into your modem and the other end into the Internet port of the wireless router (C).
- Page 19 Figure 8 Locate the Ethernet cable (D) that is attached to your computer (see Step 3). Securely insert that cable into a LAN port on the router, such as LAN port 1 (E), as shown in Figure Figure 9 Connect any additional wired PCs to your router by inserting an Ethernet cable from a PC into one of the three remaining LAN ports.
-
Page 20: Verifying Your Connection
To start your network: Plug in and turn on the cable or DSL modem. Wait 2 minutes. Plug the power cord into your wireless router and into a power outlet. Wait 1 minute. Turn on your computer. It will take several minutes for your router to establish a connection with your computer and your Internet provider. -
Page 21: Setting Up Your Router For Internet Access
Setting Up Your Router for Internet Access When configuring your wireless router manually, you must log in to your wireless router to set it up initially and to make any changes to your wireless router’s settings later. The factory default state is restored when you use the Factory Restore button. See “Restoring the Default User Name and Password”... - Page 22 • Contact your ISP to verify that you have the correct configuration information. • Read “Troubleshooting” on page If problems persist, register your NETGEAR product and contact NETGEAR Technical Support. Installing Your Router Manually (Advanced, Mac, and Linux Users)
-
Page 23: Checking For New Firmware
The Firmware Upgrade Assistant screen will display. Click Yes to check for new firmware (recommended). The router will automatically check the NETGEAR database for a new firmware image file. If no new firmware version is available, Installing Your Router Manually (Advanced, Mac, and Linux Users) - Page 24 It is advisable to determine the firmware version currently running on your router before you check for updates on the NETGEAR website. Then go to the NETGEAR website and select the model number for this router. If a later version of the firmware is available, upload the firmware to your computer and upgrade your router.
-
Page 25: Configuring Your Wireless Settings And Security Options
Version shown on your Router Status screen. If a the version on the NETGEAR website is more recent, click on the version number. Then, click Right-click and Save to Download and save the file to a location on your hard disk. -
Page 26: Setting Up Your Wireless Computers
SSID you configured in the router. If they do not match, you will not get a wireless connection. Select a Security Option. NETGEAR strongly recommends that you implement security on your wireless network. Follow the instructions in the User Manual or the router help screens if you need assistance deploying the security feature appropriate to your needs. - Page 27 settings you selected in “Configuring Your Wireless Settings and Security Options” on page 21). To ensure optimum performance of your high-speed wireless router, each computer’s wireless adapter card should support the same technology as your router (see the online User Manual for more information). Check that the security settings on each wireless device match the security settings of the router.
- Page 28 Installing Your Router Manually (Advanced, Mac, and Linux Users)
-
Page 29: Troubleshooting
Troubleshooting If you have difficulties accessing the Internet, use the Basic Setup Checklist to make sure that you have connected and set up your router correctly. If your basic setup is correct, then look for your specific problem in one of the subsequent sections. Basic Setup Checklist The following items are the most common errors made when initially setting up a router. -
Page 30: Checking Basic Router Functions
Make sure that the power cord is properly connected to your router and that the power adapter is properly connected to a functioning power outlet. – Check that you are using the power adapter supplied by NETGEAR for this product. If the error persists, you have a hardware problem and should contact technical support. •... -
Page 31: Troubleshooting Login Problems
b. Clear the router’s configuration to factory defaults. This will set the router’s IP address to 192.168.1.1. This procedure is explained in “Restoring the Default User Name and Password” on page If the error persists, you might have a hardware problem and should contact technical support. •... -
Page 32: Obtaining An Internet Ip Address
• Internet Connection. The cable or DSL modem status lights indicate if the modem connection is successful or not. Check your modem documentation or call your Internet service provider for help with verifying that the modem has a successful connection. •... - Page 33 – Configure your router to spoof your computer’s MAC address. On the Basic Settings screen in the Router MAC Address section, select “Use this Computer’s MAC Address” and click Apply. Then restart your network in the correct sequence (see “Basic Setup Checklist”...
-
Page 34: Using The Ping Utility To Troubleshoot
Using the Ping Utility to Troubleshoot Most computers and routers have a diagnostic utility called ping that sends a request to a target device. The device then replies. The ping utility makes it easy to troubleshoot a network. Testing the Path from Your Computer to Your Router You can ping the wireless router to verify that the LAN path from your computer to your router is set up correctly. - Page 35 Testing the Path from a Computer to the Internet After verifying that the path between your computer and the wireless router works correctly, test the path from your PC to the Internet. To test the path using ping from a Windows PC: From the Windows task bar, click Start and select Run.
- Page 36 Troubleshooting...
-
Page 37: Default Configuration
Default Configuration Default Configuration Settings You can use the reset button located on the back of your device to reset all configuration settings to their factory defaults. This is called a hard reset. • To perform a hard reset, push and hold the reset button for approximately 5 seconds (until the TEST LED blinks rapidly). -
Page 38: Restoring The Default User Name And Password
Internet) traffic on port 80, the http port) Outbound (communications going out to Enabled (all) the Internet) Wireless Wireless Communication Enabled SSID Name NETGEAR Security Disabled Broadcast SSID Enabled Transmission Speed Auto Country/Region United States (North America only; otherwise varies... - Page 39 Related Documents This section provides links to reference documents you can use to gain a more complete understanding of the technologies used in your NETGEAR product. Document Link Internet Networking and http://documentation.netgear.com/reference/enu/tcpip/index.htm TCP/IP Addressing Preparing a Computer for http://documentation.netgear.com/reference/enu/wsdhcp/index.htm Network Access Glossary http://documentation.netgear.com/reference/enu/glossary/index.htm...
- Page 40 Related Documents...
- Page 41 In the interest of improving internal design, operational function, and/or reliability, NETGEAR reserves the right to make changes to the products described in this document without notice. NETGEAR does not assume any liability that may occur due to the use or application of the product(s) or circuit layout(s) described herein.
- Page 42 20cm between the radiator & your body. CE Statement Hereby, NETGEAR, declares that this device is in compliance with the essential requirement and other relevant provisions of the R&TTE Directives 1999/5/EC.