Table of Contents
Advertisement
Quick Links
Advertisement
Table of Contents

Related Manuals for NEFF C28MT27G0


Summary of Contents for NEFF C28MT27G0
- Page 1 Oven [en] User manual and installation instructions C28MT27G0...
-
Page 2: Table Of Contents
en Safety ¡ Keep the instruction manual and the Table of contents product information safe for future refer- ence or for the next owner. ¡ Do not connect the appliance if it has been USER MANUAL damaged in transit. Safety .............. 2 1.2 Intended use Preventing material damage ....... -
Page 3: Safety
Safety en Hot steam may escape when you open the 1.4 Safe use appliance door. Steam may not be visible, de- Always place accessories in the cooking com- pending on the temperature. partment the right way round. ▶ Open the appliance door carefully. → "Accessories", Page 11 ▶... - Page 4 en Safety ▶ Never operate an appliance with a cracked ▶ Do not leave food unattended while it is or fractured surface. heating in containers made of plastic, pa- ▶ Never pull on the power cord to unplug the per or other combustible materials. appliance.
- Page 5 Safety en The accessible parts of the appliance become Cookware and containers made from metal or hot during operation. cookware with metal edging may lead to ▶ Never touch these hot parts. sparks being formed during simple mi- ▶ Keep children at a safe distance. crowave operation.
-
Page 6: Preventing Material Damage
en Preventing material damage ing on baking trays and tins is destroyed and 1.7 Cleaning function noxious gases are released. WARNING ‒ Risk of fire! ▶ Never clean non-stick baking trays or bak- Loose food remnants, fat and meat juices ing tins using the cleaning function. may catch fire when the cleaning function is in ▶... -
Page 7: Environmental Protection And Saving En- Ergy
Environmental protection and saving energy en Never operate the appliance if the seal is damaged The universal pan and baking tray are not suitable for ▶ or missing. use with microwave-only mode. Using either of these Sitting or placing objects on the appliance door may may create sparks, which will damage the cooking damage it. -
Page 8: Familiarising Yourself With Your Appliance
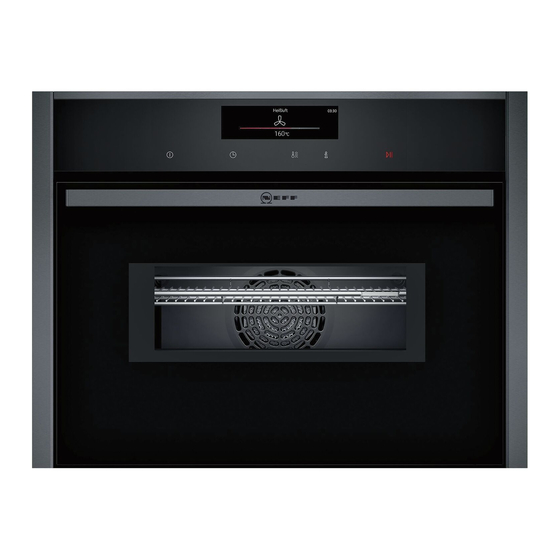
en Familiarising yourself with your appliance 4 Familiarising yourself with your appliance 4.1 Control panel You can use the control panel to configure all functions of your appliance and to obtain information about the operat- ing status. Display Buttons 4.2 Buttons The buttons are touch-sensitive areas. To select a function, press the corresponding button. Symbol Name On/off... -
Page 9: Microwave
Familiarising yourself with your appliance en Direction Direction Navigate upwards Swipe down on the dis- Navigate downwards Swipe up on the display play with your finger with your finger 4.4 Main menu The main menu provides an overview of your appliance's functions. Press the button to open the main menu. - Page 10 en Familiarising yourself with your appliance Symbol Type of heating Temperature Dough proving 35 - 55 °C For proving dough and culturing yoghurt. Dough will prove more quickly than at room temperature. The surface of the dough will not dry out. Preheat cookware 30 - 70 °C For heating cookware.
- Page 11 Accessories en Appliance door In microwave mode, when you close the appliance door, you have to press to continue. If you open the appliance door during operation, the operation stops. When you close the appliance door, the operation continues automatically. 5 Accessories Use original accessories.
- Page 12 You will find a comprehensive range of products for in operation. your appliance in our brochures and online: www.neff-international.com Accessories vary from one appliance to another. When purchasing accessories, always quote the exact product number (E no.) of your appliance.
- Page 13 Time-setting options en Press again to resume operation. a The heat-up indicator bar visualises the rising tem- perature. When the food is ready, press to switch the appli- 7.8 Cancelling operation ance off. Note: Some functions, e.g. cleaning functions, cannot be cancelled. 7.5 Changing the temperature Press and hold the button until the function that is ▶...
- Page 14 en Microwave Swipe left or right to select the required cooking ¡ You cannot use the delayed start function with every time. heating function. Once the cooking time has been set, press Place the food into the cooking compartment and start. close the appliance door.
- Page 15 Microwave en ATTENTION! Cookware and ac- Information cessories Operating the appliance without food in the cooking compartment may lead to overloading. Serving dishes You do not need to transfer Do not switch on the microwave unless there is food ▶ your food. inside.
- Page 16 en Microwave Swipe left or right to configure the settings for the Requirement: The cooking compartment must have "microwave" . cooled down. Press the bottom row to select the microwave Remove any food remnants from the cooking com- power setting. partment. a A microwave power setting and a cooking time ap- Dry the cooking compartment with a sponge.
- Page 17 Microwave programmes en Changing the cooking time a Once the cooking time has elapsed, an audible sig- nal sounds and the appliance stops heating. Press . Press any button to end the signal tone. Swipe left or right to change the cooking time. If necessary, set another microwave combination.
- Page 18 en Meat probe Press the bottom row. 10.5 Extending the cooking time a The recommended shelf position and cookware are Press "Extend cooking time". displayed. Swipe left or right to change the settings. to start the microwave programme. Press to start the appliance again for the extra a Once the cooking time has elapsed, an audible sig- cooking time.
- Page 19 Meat probe en Plug the meat probe into the socket on the left-hand 11.4 Setting the oven temperature and core side of the cooking compartment. temperature Notes The meat probe measures the temperature inside the ¡ If you remove the meat probe while the food is food between 30 °C and 99 °C.
-
Page 20: Childproof Lock
en Baking and roasting assistant 12 Baking and roasting assistant The baking and roasting assistant helps you to use Requirement: The cooking compartment must have your appliance to cook various dishes by suggesting cooled down. the optimal settings. Press to switch the appliance on. The baking and roasting assistant helps you to make Press ... -
Page 21: Rapid Heating
Rapid heating en Press the bottom row. Press the top row. Swipe left or right to select the "Automatic childproof Swipe left or right to select the "Automatic childproof lock". lock". Press the bottom row. Press the bottom row. Swipe right to set the lock to "Activated". Swipe left to set the lock to "Deactivated". -
Page 22: Basic Settings
en Basic settings Once the cooking time has elapsed, an audible sig- The appliance automatically switches off after ap- nal sounds. A note appears on the display confirm- prox. 10 to 20 minutes. ing that the operation has finished. The appliance stops heating up and responds again as usual out- 15.2 Cancelling Sabbath mode side of Sabbath mode. - Page 23 Home Connect en 17 Home Connect This appliance is network-capable. Connecting your ap- 17.1 Setting up Home Connect pliance to a mobile device lets you control its functions Requirements via the Home Connect app, adjust its basic settings ¡ The appliance is connected to the power supply and and monitor its operating status.
- Page 24 17.4 Software update 17.7 Declaration of Conformity Your appliance's software can be updated using the Constructa Neff Vertriebs-GmbH hereby declares that software update function, e.g. for the purposes of op- the appliance with Home Connect functionality meets timisation, troubleshooting or security updates.
-
Page 25: Cleaning And Servicing
Cleaning and servicing en 18 Cleaning and servicing Do not use cleaning products with a high alcohol To keep your appliance working efficiently for a long ▶ content. time, it is important to clean and maintain it carefully. Do not use hard scouring pads or cleaning ▶... - Page 26 en Cleaning and servicing Cooking compartment Area Suitable cleaning agents Information Enamel surfaces ¡ Hot soapy water Soak any heavily soiled areas and use a brush or steel wool. ¡ Vinegar water Leave the appliance door open to dry the cooking compartment after cleaning it.
- Page 27 Cleaning functions en 19 Cleaning functions cess releases vapours, which can irritate mucous mem- You can use the cleaning functions to clean the appli- branes. ance. Keep the kitchen well ventilated while the cleaning ▶ function is running. 19.1 Self-cleaning function Do not remain in the room for long periods. ▶...
- Page 28 en Rails After using the cleaning function, prepare the appli- Remove any accessories from the cooking compart- ance so that it is ready to use again. ment. → "Preparing the appliance for use following the ATTENTION! cleaning function", Page 28 Distilled water in the cooking compartment leads to corrosion.
- Page 29 Rails en Swivel the entire rail outwards and unhook it at Hook the rear retainers with the hook into the top the rear . hole and push them into the bottom hole . 20.2 Fitting the retainers 20.3 Attaching the rails The retainers may fall out when you detach the rails.
- Page 30 en Appliance door 21 Appliance door To clean the appliance door thoroughly, you can disas- Press the intermediate pane against the appliance semble the appliance door. with one hand while pushing the left- and right-hand retainers upwards. Do not detach the retainers ...
-
Page 31: Troubleshooting
Troubleshooting en Insert the intermediate pane into the retainer Push the front pane in at the bottom until you the bottom and push it in firmly at the top. hear it click into place. Push the left- and right-hand retainer downwards Open the appliance door slightly and remove the until the intermediate pane is clamped ... - Page 32 en Troubleshooting Fault Cause and troubleshooting The appliance cannot be Automatic childproof lock or childproof lock is activated switched on; appears on the Press and hold the button until "Childproof lock deactivated" appears on ▶ display. the display. Appliance will not start or cuts Different causes are possible.
-
Page 33: Disposal
Next time, set lower or higher values. ▶ Tip: A lot of information about the food preparation and corresponding set- ting values can be found on our website www.neff-international.com. 23 Disposal Find out here how to dispose of old appliances cor- This appliance is labelled in accord- rectly. - Page 34 en How it works ¡ If you are cooking bakes directly in the universal Roasting in cookware pan, place the universal pan into the cooking com- If you cover the cookware when you cook your food, partment at level 1. this will keep the cooking compartment cleaner. ¡...
- Page 35 How it works en Cooking, braising or steaming using the ¡ Use salt and seasoning sparingly. When cooking food using the microwave mode, most of the food's microwave mode natural flavour will be retained. ¡ Use microwave-safe cookware with a lid. Alternat- ¡...
- Page 36 en How it works Food Accessory/cook- Shelf pos- Heating Temperature in Microwave Cooking ware ition function °C power setting time in → Page 9 in W mins Bread, without a tin, 750 Universal pan 1. 210–220 1. 10–15 2. 180–190 2. 25–35 Loaf tin Bread, without a tin, Universal pan 1.
- Page 37 How it works en Food Accessory/cook- Shelf pos- Heating Temperature in Microwave Cooking ware ition function °C power setting time in → Page 9 in W mins Joint of pork without rind, Uncovered cook- 180 - 190 120 - 140 e.g. neck, 1.5 kg ware Fillet of beef, medium, Uncovered cook-...
- Page 38 en How it works Use the recommended settings when configuring After making the yoghurt, leave it to cool in the refri- the appliance settings. gerator for at least 12 hours. Recommended settings for desserts and compote Food Accessory/cook- Shelf pos- Heating Temperature in Microwave Cooking ware...
- Page 39 How it works en ¡ Remove frozen food from its packaging before you ¡ Stir or turn the food 1-2 times during defrosting. defrost it. Turn large items several times. Split the food into ¡ Use heat-resistant, microwave-safe cookware. smaller pieces as it defrosts. ¡...
- Page 40 en How it works Metal (e.g. a spoon in a glass) must be kept at least ▶ ATTENTION! 2 cm from the cooking compartment walls and the Metal touching the wall of the cooking compartment inside of the door. will cause sparks, which may damage the appliance or the inner door pane.
- Page 41 How it works en Recommended settings for baking Food Accessory/cookware Shelf posi- Heating Temperature in °C Cooking time tion function in mins → Page 9 Viennese whirls Baking tray 150–160 20–30 Viennese whirls Baking tray 140–150 25–35 Small cakes Baking tray ...
-
Page 42: Installation Instructions
en Installation instructions Recommended settings for cooking in combination with the microwave mode Food Accessory/cook- Shelf pos- Heating Temperature in Microwave Cooking ware ition function °C power setting time in → Page 9 in W mins Potato gratin Uncovered cook- 150 - 170 25 - 30 ware Cakes... - Page 43 Installation instructions en 26.3 Installation below a worktop WARNING ‒ Risk of fire! It is dangerous to use an extended power Observe the installation dimensions and the installation instructions when installing below a worktop. cord and non-approved adapters. ▶ Do not use extension cables or multiple socket strips.
- Page 44 en Installation instructions Hob type a raised in mm a flush in mm b in mm Gas hob Electric hob 26.5 Installation in a tall unit 26.6 Corner installation Observe the installation dimensions and the installation Observe the installation dimensions and the installation instructions when installing in a tall unit.
- Page 45 Installation instructions en Electrically connecting an appliance without a Screw the appliance into place. protective contact plug Note: Only a licensed professional may connect the ap- pliance. Damage caused by incorrect connection is not covered under the warranty. An all-pole isolating switch must be integrated into the permanent electrical installation according to the install- ation regulations.
- Page 48 Valid within Great Britain: Imported to Great Britain by BSH Home Appliances Ltd. Grand Union House Old Wolverton Road Wolverton, Milton Keynes MK12 5PT United Kingdom *9001621107* 9001621107 Constructa-Neff Vertriebs-GmbH Carl-Wery-Straße 34 010507 81739 München GERMANY...