Table of Contents
Advertisement
Available languages
Available languages
Quick Links
Advertisement
Table of Contents

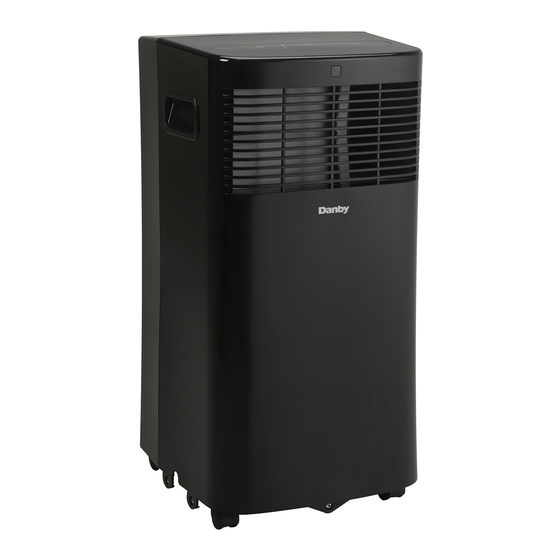
Related Manuals for Danby DPA060BACBDB


Summary of Contents for Danby DPA060BACBDB
- Page 1 OWNER’S USE AND CARE GUIDE GUIDE D’UTILISATION ET D'ENTRETIEN PORTABLE AIR CONDITIONER CLIMATISEUR PORTATIF MODEL • MODÈLE DPA060BACBDB / DPA080BACBDB DANBY PRODUCTS LIMITED, ONTARIO, CANADA N1H 6Z9 DANBY PRODUCTS INC., FINDLAY, OHIO, USA 45840 2016.12.01...
- Page 2 TO OBTAIN WARRANTY SERVICE YOU MUST PROVIDE A VALID PROOF OF PURCHASE. PLEASE STAPLE YOUR RECEIPT TO THIS PAGE FOR FUTURE REFERENCE. POUR OBTENIR LE SERVICE SUR GARANTIE, VOUS DEVEZ FOURNIR UNE PREUVE D’ACHAT VALIDE. VEUILLEZ AGRAFER VOTRE REÇU À CETTE PAGE POUR RÉFÉRENCE FUTURE.
-
Page 3: Table Of Contents
• Garantie Read and follow all safety rules and operating instructions before fi rst use of this product. Veuillez lire attentivement les consignes de sécurité et les instructions d’utilisation avant l’utilisation initiale de ce produit. Model Modèle • DPA060BACBDB / DPA080BACBDB... -
Page 4: Owner's Use And Care Guide
Welcome Welcome to the Danby family. We are proud of our quality products, and we believe in dependable service, like you will find in this Owner’s Use and Care Guide, and like you will receive from our friendly customer service department. Best of all, you will experience these values each and every time you use your Danby appliance. -
Page 5: Important Safety Information
Important Safety Information READ AND FOLLOW ALL SAFETY INSTRUCTIONS To prevent injury to the user or other people and property damage, the following instructions must be followed. Incorrect operation resulting from ignoring these instructions may cause harm or damage. SAFETY PRECAUTIONS ALWAYS DO THIS Your air conditioner should be used in such a way that it is protected from moisture, e.g. - Page 6 3. Knife or scissors 4. Saw (In the event that the window kit needs to be cut down in size because the window is too narrow for direct installation). See www.danby.com for general instruction guide Identifying Parts ELECTRICAL INFORMATION WARNING •...
- Page 7 Identifying Parts ACCESSORIES Ensure that all the accessories are included in the package and refer to the installation instructions for their usage. Note: All the illustrations in this man- ual are for explanatory purposes only. Your air conditioner may be slightly different.
-
Page 8: Features
Features ELECTRONIC CONTROL INSTRUCTIONS AND OPERATING MODES Mode Button: Press to select the desired mode. Modes will cycle in sequence with each press of the button; COOL, DRY, FAN. Light will indicate current mode. Fan speed can be chosen on COOL and FAN modes using the remote control. - Page 9 Operating Instructions OPERATING MODES Timer Operation Note: Timer function can only be activated by the remote control. This unit has two timer related functions: • Timer on: sets the amount of time after which the unit will turn on • Timer off: sets the amount of time after which the unit will turn off Timer On Function: •...
- Page 10 Operating Instructions REMOTE CONTROL INSTRUCTIONS • Use the remote control within a distance of 8 m (26 ft.) from the appliance, pointing it towards the receiver. Reception is confi rmed by a beep. ON/OFF: Turns the unit on or off MODE: Selects mode operation in the following order: SHORTCUT: Sets and activates...
- Page 11 Operating Instructions REPLACING THE REMOTE BATTERIES Your air conditioning unit comes with two AAA batteries. Place the bat- teries in the remote control before use. 1. Slide the back cover from the remote downward to expose the battery compartment. 2. Insert the batteries, ensure to match the (+) and (-) symbols on the ends of the batteries with the symbols inside the battery compartment.
-
Page 12: Installation Instructions
Visit www.danby.com for general instruction videos. Press the exhaust hose into the window slider adapter and unit adapter. The adapters will auto- matically clamp to the exhaust hose using internal elastic buckles. - Page 13 Installation Instructions INSTALLATION IN A DOUBLE-HUNG SASH WINDOW...
- Page 14 Installation Instructions INSTALLATION IN A SLIDING SASH WINDOW...
- Page 15 5 minutes. If the P1 error persists after plugging the unit back in, please call Danby consumer care for further toubleshooting op- tions. During the DRY mode, you may wish to set up the continuous drain option so that the unit will auto- matically drain collected water.
-
Page 16: Care And Maintenance
Care and Maintenance IMPORTANT 1. Be sure to unplug the unit before cleaning or servicing. 2. Do not use gasoline, paint thinner or other chemicals to clean the unit. 3. Do not wash the unit directly under a tap or using a hose. It may cause electrical damage. 4. -
Page 17: Troubleshooting
Occasionally, a minor problem may arise, and a service call may not be necessary- use this troubleshooting guide for a possible solution. If the unit continues to operate improperly, call an authorized service depot or Danby’s Toll Free Number for assistance. - Page 18 Nothing within this warranty shall imply that Danby will be responsible or liable for any spoilage or damage to food or other c ontents of this appliance, whether due Nothing within this warranty shall imply that Danby will be responsible or liable for any spoilage or damage to food or other to any defect of the appliance, or its use, whether proper or improper.
-
Page 19: Bienvenue
Bienvenue Bienvenue dans la famille Danby. Nous sommes fiers de la qualité de nos produits et nous croyons fermement au serv- ice par une assistance fiable. Vous le découvrirez à la lecture de ce guide facile d’utilisation et vous en aurez la confir- mation par notre service d’assistance à... -
Page 20: Consignes De Sécurité Importantes
Consignes de sécurité importantes LISEZ TOUTE L’INFORMATION DE SÉCURITÉ AVANT UTILISATION Pour votre sécurité : Lisez ces instructions attentivement avant d’utiliser l’appareil et conservez-les afi n de pouvoir vous y référer ultérieurement. PRÉCAUTIONS DE SÉCURITÉ SUIVEZ TOUJOURS CES CONSIGNES L’appareil doit être utilisé dans un endroit à l’abri de l’humidité, comme la condensation, les éclabous- sures d’eau, etc. - Page 21 POUR FENÊTRE 4. Scie (si la trousse pour fenêtre doit être coupée parce que la fenêtre est trop étroite pour une installation directe.) Voir www.danby.com pour obtenir un guide d’instrucions pour l’installation générale. Identifi cation des pièces RENSEIGNEMENTS RELATIFS À L’ÉLECTRICITÉ...
- Page 22 Identifi cation des pièces ACCESSOIRES Assurez-vous que tous les acces- soires sont inclus dans l’emballage et consultez la notice d’installation pour connaître leur utilisation. REMARQUE : Toutes les illustra- tions contenues dans ce manuel servent à des fi ns d’explication seulement.
-
Page 23: Caractéristiques
Caractéristiques INSTRUCTIONS RELATIVES AUX COMMANDES ÉLECTRONIQUES Bouton de Mode: Permet de sélectionner le mode de fonctionnement approprié. Chaque fois que vous appuyez sur le bouton, un mode est sélectionné dans l’ordre suivant : COOL, (RE- FROIDISSEMENT), DRY (DÉSHUMIDIFICATION) et FAN (VENTILATEUR). L’indicateur de mode correspondant au mode sélectionné... - Page 24 Consignes d’utilisation MODES DE FONCTIONNEMENT Fonctionnement du minuteur Remarque: La fonction de minuterie ne peut être activée que par la télécommande. Cet appareil possède deux fonctions liées à la minuterie: • Minuterie activée: défi nit le temps après lequel l’appareil s’allume •...
- Page 25 Consignes d’utilisation MANIPULATION DE LA TÉLÉCOMMANDE • Utilisez la télécommande à une distance de 8 mètres (26 pi.) ou moins de l’appareil, en l’orientant dans la direction du récepteur. La réception est con- fi rmée par un bip sonore. Bouton POWER (MARCHE/ARRÊT): Allume/éteint l’appareil Affi...
- Page 26 Consignes d’utilisation REMPLACER LES PILES DE LA TÉLÉCOMMANDE Votre climatiseur est livré avec deux piles AAA. Placez les piles dans la télécommande avant utilisation. 1. Faites glisser le couvercle arrière de la télécommande vers le bas pour exposer le compartiment des piles. 2.
- Page 27 Votre trousse de glissière pour fenêtre est conçue pour s’adapter à la plupart des fenêtres à ouver- ture horizontale ou verticale. Toutefois, vous devrez peut-être improviser ou modifi er certains aspects des procédures d’installation pour certains types de fenêtres. Voir www.danby.com pour obtenir une vidéo d’instructions générales.
-
Page 28: Consignes D'installation
Consignes d’installation INSTALLATION DANS UNE FENÊTRE À GUILLOTINE DOUBLE... - Page 29 Consignes d’installation INSTALLATION DANS UNE FENÊTRE COULISSANTE...
- Page 30 éteignez l’appareil et débranchez-le de la source d’alimentation pendant au moins 5 minutes. Si l’erreur P1 persiste après avoir branché l’appareil, veuillez appeler le service clientèle de Danby pour obtenir d’autres options de dépannage. Pendant le mode DRY, vous pouvez confi gurer l’option de vidange continue afi n que l’unité purge automatiquement l’eau collectée.
-
Page 31: Soins Et Entretien
Soins et entretien AVERTISSEMENT 1. Veillez à débrancher l’appareil avant de le nettoyer ou de procéder à son entretien. 2. N’utilisez pas d’essence, de diluant ou d’autres produits chimiques pour nettoyer l’appareil. 3. Ne lavez pas l’appareil directment sous le robinet ou à l’aide d’un tuyau : vous pourriez vous électrocuter ou causer un incendie. -
Page 32: Dépannage
De temps en temps, un problème est mineur et un appel de service peut ne pas être nécessaire. Utilisez ce guide de dépannage pour trouver une solution possible. Si l’unité continue de fonctionner incorrectement, appelez un dépôt de service autorisé ou le numéro sans frais de Danby pour obtenir de l’assistance. Tel: 1-800-26- (1-800-263-2629) PROBLÈME... - Page 33 Aucune partie de la garantie ne prévoit implicitement que le fabricant sera tenu responsable des dommages subis par les Nothing within this warranty shall imply that Danby will be responsible or liable for any spoilage or damage to food or other c ontents of this appliance, whether due aliments ou d’autres types de contenu, qu’ils soient causés par la défectuosité...
- Page 34 NOTES / REMARQUES : __________________________________________________________________________________________ __________________________________________________________________________________________ __________________________________________________________________________________________ __________________________________________________________________________________________ __________________________________________________________________________________________ __________________________________________________________________________________________ __________________________________________________________________________________________ __________________________________________________________________________________________ __________________________________________________________________________________________ __________________________________________________________________________________________ __________________________________________________________________________________________ __________________________________________________________________________________________ __________________________________________________________________________________________ __________________________________________________________________________________________ __________________________________________________________________________________________ __________________________________________________________________________________________ __________________________________________________________________________________________ __________________________________________________________________________________________ __________________________________________________________________________________________ __________________________________________________________________________________________ __________________________________________________________________________________________ __________________________________________________________________________________________...
- Page 35 NOTES / REMARQUES : __________________________________________________________________________________________ __________________________________________________________________________________________ __________________________________________________________________________________________ __________________________________________________________________________________________ __________________________________________________________________________________________ __________________________________________________________________________________________ __________________________________________________________________________________________ __________________________________________________________________________________________ __________________________________________________________________________________________ __________________________________________________________________________________________ __________________________________________________________________________________________ __________________________________________________________________________________________ __________________________________________________________________________________________ __________________________________________________________________________________________ __________________________________________________________________________________________ __________________________________________________________________________________________ __________________________________________________________________________________________ __________________________________________________________________________________________ __________________________________________________________________________________________ __________________________________________________________________________________________ __________________________________________________________________________________________ __________________________________________________________________________________________...
-
Page 36: Model Modèle
• Part Description • Numéro de pièce • Description de la pièce 1-800-26- (1-800-263-2629) Model • Modèle DPA060BACBDB / DPA080BACBDB Printed in China Danby Products Limited, Guelph, ON, Canada N1H 6Z9 Imprimé en Chine Danby Products Inc., Findlay, Ohio, USA 45840...