Table of Contents
Advertisement
Available languages
Available languages
PORTABLE AIR CONDITIONER
Owner's Manual.............................1 - 18
CLIMATISEUR PORTABLE
Manuel du propriétaire.................19 - 36
AIRE ACONDICIONADO PORTÁTIL
Manual del propietario.................37 - 54
www.Danby.com
*
*
DANBY PRODUCTS LIMITED, ONTARIO, CANADA N1H 6Z9
DANBY PRODUCTS INC., FINDLAY, OHIO, USA 45840
OWNER'S MANUAL
MANUEL DU PROPRIÉTAIRE
MANUAL DEL PROPIETARIO
MODEL • MODÈLE • MODELO
DPA050E2WDB-6
DPA050E2BDB-6
2020.11.11
Advertisement
Table of Contents

Related Manuals for Danby DPA050E2WDB-6


Summary of Contents for Danby DPA050E2WDB-6
- Page 1 Owner’s Manual......1 - 18 MODEL • MODÈLE • MODELO CLIMATISEUR PORTABLE Manuel du propriétaire....19 - 36 DPA050E2WDB-6 DPA050E2BDB-6 AIRE ACONDICIONADO PORTÁTIL Manual del propietario....37 - 54 DANBY PRODUCTS LIMITED, ONTARIO, CANADA N1H 6Z9 www.Danby.com DANBY PRODUCTS INC., FINDLAY, OHIO, USA 45840 2020.11.11...
- Page 2 2. Visit www.Danby.com to access self-service tools, FAQs and much more by searching your model number in the search bar. 3. For the Quickest Customer Service, please fi ll out the web form at www.danby.com/ support. Your submission will go directly to an expert on your particular appliance.
-
Page 3: Safety Requirements
Important Safety Information READ AND FOLLOW ALL SAFETY INSTRUCTIONS SAFETY REQUIREMENTS GROUNDING INSTRUCTIONS DANGER: Risk of fi re or explosion. Flammable This appliance must be grounded. Grounding refrigerant used. Do not damage the refrigerant reduces the risk of electrical shock by providing an circuit. -
Page 4: Read And Follow All Safety Instructions
Important Safety Information READ AND FOLLOW ALL SAFETY INSTRUCTIONS 5. Presence of fi re extinguisher: If any hot work is Any person involved with working on the refrigerant circuit should hold a current, valid certifi cate from to be conducted on the refrigeration equipment an industry accredited assessment authority which or any associated parts, appropriate fi... - Page 5 Important Safety Information READ AND FOLLOW ALL SAFETY INSTRUCTIONS Repairs to sealed components The following checks shall be applied to installations using fl ammable refrigerants: 1. During repairs to sealed components, all • The charge size is in accordance with the room electrical supplies shall be disconnected from size within which the refrigerant containing the equipment being worked upon prior to any...
- Page 6 Important Safety Information READ AND FOLLOW ALL SAFETY INSTRUCTIONS Cabling Removal and evacuation Check that cabling will not be subject to wear, When breaking into the refrigerant circuit to make corrosion, excessive pressure, vibration, sharp repairs or for any other purpose conventional edges or any other adverse environmental effects.
- Page 7 Important Safety Information READ AND FOLLOW ALL SAFETY INSTRUCTIONS Decommissioning Recovery Before carrying out this procedure, it is essential When removing refrigerant from a system, either for that the technician is completely familiar with the servicing or decommissioning, it is recommended equipment in all its detail.
-
Page 8: Installation Instructions
INSTALLATION INSTRUCTIONS ACCESSORIES REQUIRED TOOLS 1. Air outlet adapter 1. Medium sized Phillips screwdriver 2. Exhaust hose 2. Tape measure or ruler 3. Window slider adapter 3. Knife or scissors 4. 8 bolts 4. Saw (in the event that the window sliders need to 5. - Page 9 INSTALLATION INSTRUCTIONS INSTALLING THE WINDOW KIT The window kit can be used in either a hung window or a sliding window application. The images at the right are for a hung window. The steps for a sliding window are the same. 1.
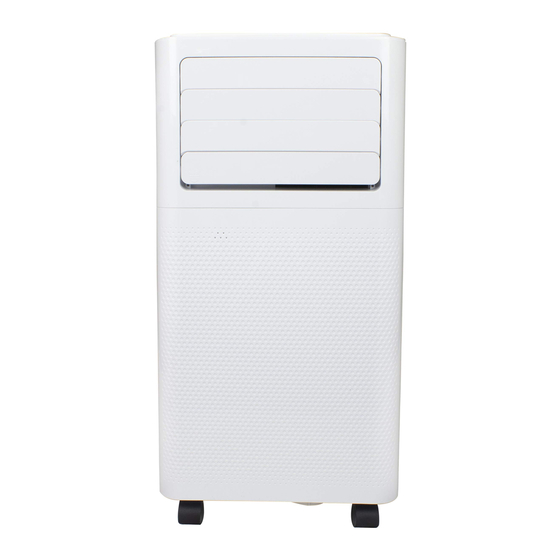
- Page 10 OPERATING INSTRUCTIONS FEATURES LOCATION Front Place the air conditioner on a smooth, level fl oor that is strong enough to support it and all included 1. Control panel accessories. 2. Handle (both sides) 3. Air exhaust Make sure the appliance is level to minimize noise 4.
- Page 11 OPERATING INSTRUCTIONS CONTROL PANEL OPERATING MODES 1. Timer button: Used to set the automatic timer. Cool Mode 2. Fan button: Used to choose the fan speed. • Press the mode button to choose cool mode. 3. Temperature control buttons: Used to increase or •...
-
Page 12: Child Lock
OPERATING INSTRUCTIONS TIMER CHILD LOCK The timer function can be used to turn the appliance The child lock can be activated by pressing the on or off after a period of time to conserve energy. temperature control buttons on the remote control at the same time for 3 seconds. -
Page 13: Remote Control
OPERATING INSTRUCTIONS REMOTE CONTROL 1. Power button: Used to turn the appliance on or off. 2. Turbo button: The turbo feature is not available on this model. 3. Temperature control buttons: Used to increase or decrease the set temperature. 4. Timer button: Used to set the timer function. 5. -
Page 14: Replacing The Remote Batteries
OPERATING INSTRUCTIONS REPLACING THE REMOTE BATTERIES This equipment has been tested and found to comply with the limits for a Class B digital device, pursuant to Part 15 of the FCC Rules. These limits This air conditioner comes with two AAA batteries. are designed to provide reasonable protection Place the batteries in the remote control before use. -
Page 15: Water Drainage
OPERATING INSTRUCTIONS WATER DRAINAGE When the internal drain pan becomes full the appliance will stop operating and the display will show error code “Ft”. The air conditioning or dehumidifying action will stop but the fan may continue to operate. Drain Plug 1. -
Page 16: Care And Maintenance
CARE & MAINTENANCE CLEANING LONG-TERM STORAGE • Unplug the appliance before cleaning or 1. Drain all water from the appliance. servicing. 2. Run the appliance on fan mode for half a day in • Clean the cabinet with a lukewarm damp cloth a warm room to dry the inside of the appliance and neutral detergent. -
Page 17: Frequently Asked Questions
FREQUENTLY ASKED QUESTIONS Can I leave my AC in place through the winter? This is not recommended. What are the standard wattage and amps used? Information pertaining to watts and amps can be found on the rating plate located on the side of the unit. When should I use the exhaust hose? The exhaust hose should be used in cool, dry, heat and auto modes. -
Page 18: Troubleshooting
TROUBLESHOOTING Appliance will not operate • Plug is not fully inserted into the wall outlet • Blown fuse or circuit breaker Insuffi cient cooling • Air fi lter is dirty • Blocked air fl ow • Appliance size is too small for application Noise •... - Page 19 Nothing within this warranty shall imply that Danby will be responsible or liable for any spoilage or damage to food or other c...
- Page 20 1. Lisez votre manuel du propriétaire pour obtenir de l’aide à l’installation, au dépannage et à la maintenance. 2. Visitez www.Danby.com pour accéder aux outils en libre-service, aux FAQ et bien plus encore en recherchant votre numéro de modèle dans la barre de recherche.
-
Page 21: Exigences De Sécurité
Consignes de sécurité importantes LIRE ET SUIVRE TOUTES LES INSTRUCTIONS DE SÉCURITÉ EXIGENCES DE SÉCURITÉ INSTRUCTIONS DE MISE À LA TERRE DANGER: Risque d’incendie ou d’explosion. Cet appareil doit être mis à la terre. La mise à Fluide frigorigène infl ammable utilisé. Ne pas la terre réduit le risque de choc électrique en endommager le circuit de réfrigérant. - Page 22 Consignes de sécurité importantes LIRE ET SUIVRE TOUTES LES INSTRUCTIONS DE SÉCURITÉ Toute personne impliquée dans le travail sur le circuit de fl uide frigorigène doit détenir un certifi cat 5. Présence d’extincteur: Si des travaux à chaud en cours de validité, délivré par une autorité doivent être effectués sur l’équipement de d’évaluation accréditée du secteur, attestant de sa réfrigération ou sur toute pièce associée, un...
- Page 23 Consignes de sécurité importantes LIRE ET SUIVRE TOUTES LES INSTRUCTIONS DE SÉCURITÉ Réparation de composants scellés Les contrôles suivants doivent être appliqués aux installations utilisant des réfrigérants infl ammables: 1. Lors de la réparation de composants scellés, • La taille de la charge est conforme à la taille de toutes les alimentations électriques doivent la pièce dans laquelle les pièces contenant le être débranchées de l’équipement utilisé...
- Page 24 Consignes de sécurité importantes LIRE ET SUIVRE TOUTES LES INSTRUCTIONS DE SÉCURITÉ Le câblage Enlèvement et évacuation Lorsque vous pénétrez dans le circuit de fl uide Vérifi ez que le câblage ne sera pas soumis à frigorigène pour effectuer des réparations ou à l’usure, à...
- Page 25 Consignes de sécurité importantes LIRE ET SUIVRE TOUTES LES INSTRUCTIONS DE SÉCURITÉ Déclassement Récupération Avant d’effectuer cette procédure, il est essentiel que Lorsque vous retirez du fl uide frigorigène d’un le technicien connaisse parfaitement l’équipement système, que ce soit pour un entretien ou une mise dans tous ses détails.
-
Page 26: Instructions D'installation
INSTRUCTIONS D’INSTALLATION ACCESSOIRES OUTILS REQUIS 1. Adaptateur de sortie d’air 1. Tournevis Phillips de taille moyenne 2. Tuyau d’échappement 2. Ruban à mesurer ou règle 3. Adaptateur de glissière de fenêtre 3. Couteau ou ciseaux 4. 8 boulons 4. Scie (dans le cas où les curseurs de fenêtre 5. - Page 27 INSTRUCTIONS D’INSTALLATION INSTALLATION DU TROUSSE DE FENÊTRE Le kit de fenêtre peut être utilisé dans une fenêtre suspendue ou dans une application de fenêtre coulissante. Les images à droite sont pour une fenêtre suspendue. Les étapes pour une fenêtre coulissante sont les mêmes. 1.
- Page 28 INSTRUCTIONS D’UTILISATION EMPLACEMENT CARACTÉRISTIQUES Avant Placez le climatiseur sur un plancher lisse et plat qui est assez solide pour le supporter et tous les accessoires inclus. 1. Panneau de contrôle 2. Poignée (deux côtés) Assurez-vous que l’appareil est à niveau pour 3.
-
Page 29: Panneau De Contrôle
INSTRUCTIONS D’UTILISATION PANNEAU DE CONTRÔLE MODES DE FONCTIONNEMENT 1. Bouton minuterie : Utilisé pour régler la Mode refroidissement (cool) minuterie automatique. • Appuyez sur le bouton de mode pour choisir le 2. Bouton du ventilateur : Utilisé pour choisir la mode froid. -
Page 30: Fonction De Minuterie
INSTRUCTIONS D’UTILISATION FONCTION DE MINUTERIE VERROUILLAGE ENFANT La fonction de minuterie peut être utilisée pour Le verrouillage d’enfants peut être activée en allumer ou éteindre l’appareil après un certain appuyant simultanément sur les boutons de contrôle temps afi n d’économiser de l’énergie. de la température de la télécommande pendant 3 secondes. - Page 31 INSTRUCTIONS D’UTILISATION TÉLÉCOMMANDE 1. Bouton d’alimentation : utilisé pour allumer ou éteindre l’appareil. 2. Bouton turbo : la fonction turbo n’est pas disponible sur ce modèle. 3. Boutons de contrôle de température : utilisés pour augmenter ou diminuer la température de consigne. 4.
- Page 32 INSTRUCTIONS D’UTILISATION REMPLACEMENT DES PILES DE LA Cet équipement a été testé et s’est avéré conforme aux limites d’un appareil numérique de classe TÉLÉCOMMANDE B, conformément à la partie 15 des règles de la FCC. Ces limites sont conçues pour fournir une Ce climatiseur est livré...
- Page 33 INSTRUCTIONS D’UTILISATION VIDANGE D’EAU Lorsque le bac de vidange interne devient plein, l’appareil sonne 8 fois et l’affi chage numérique affi chera le code d’erreur “Ft”. L’action de la climatisation ou de la déshumidifi cation s’arrête, mais le ventilateur peut continuer à fonctionner. Bouchon de vidange 1.
-
Page 34: Soins Et Maintenance
SOINS ET MAINTENANCE NETTOYAGE ENTREPOSAGE À LONG TERME • Débranchez l’appareil avant de le nettoyer ou 1. Égoutter toute l’eau de l’appareil. de l’entretenir. 2. Faites fonctionner l’appareil sur le mode • Nettoyez l’armoire avec un chiffon humide tiède Ventilateur pendant une demi-journée dans et un détergent neutre. -
Page 35: Questions Fréquemment Posées
QUESTIONS FRÉQUEMMENT POSÉES Puis-je laisser mon climatiseur en place pendant l’hiver? Ce n’est pas recommandé. Quels sont la puissance et les amplis standard utilisés? Les informations relatives aux watts et aux ampères se trouvent sur la plaque signalétique située sur le côté de l’appareil. -
Page 36: Dépannage
DÉPANNAGE L’appareil ne fonctionnera pas • La fi che n’est pas complètement insérée dans la prise murale • Fusible ou disjoncteur grillé Refroidissement insuffi sant • Le fi ltre à air est sale • Flux d’air bloqué • La taille de l’appareil est trop petite pour l’application Bruit •... - Page 37 Aucune partie de la garantie ne prévoit implicitement que le fabricant sera tenu responsable des dommages subis par les aliments ou Nothing within this warranty shall imply that Danby will be responsible or liable for any spoilage or damage to food or other c ontents of this appliance, whether due d’autres types de contenu, qu’ils soient causés par la défectuosité...
- Page 38 3. Para obtener el servicio al cliente más rápido, complete el formulario web en www. danby.com/support. Su envío irá directamente a un experto en su dispositivo en particular. Nuestros tiempos de respuesta promedio son entre 20 minutos y 2 horas, durante el horario comercial EST.
-
Page 39: Instrucciones De Conexion A Tierra
Importantes Instrucciones de Seguridad LEA Y SIGA TODAS LAS INSTRUCCIONES DE SEGURIDAD REQUERIMIENTOS DE SEGURIDAD INSTRUCCIONES DE CONEXION A TIERRA PELIGRO: Riesgo de incendio o explosión. Este aparato debe estar conectado a tierra. La Refrigerante infl amable utilizado. No dañe el puesta a tierra reduce el riesgo de descarga circuito de refrigerante. - Page 40 Importantes Instrucciones de Seguridad LEA Y SIGA TODAS LAS INSTRUCCIONES DE SEGURIDAD Cualquier persona involucrada en trabajar en el circuito de refrigerante debe tener un certifi cado 5. Presencia de extintor de incendios: Si se debe válido y vigente de una autoridad de evaluación realizar algún trabajo en caliente en el equipo acreditada de la industria que autorice su de refrigeración o en cualquier pieza asociada,...
- Page 41 Importantes Instrucciones de Seguridad LEA Y SIGA TODAS LAS INSTRUCCIONES DE SEGURIDAD Reparaciones a componentes sellados. Se aplicarán los siguientes controles a las instalaciones que utilizan refrigerantes infl amables: 1. Durante las reparaciones de componentes • El tamaño de carga está de acuerdo con el sellados, todos los suministros eléctricos se tamaño de la habitación dentro de la cual se deben desconectar del equipo en el que se...
- Page 42 Importantes Instrucciones de Seguridad LEA Y SIGA TODAS LAS INSTRUCCIONES DE SEGURIDAD Cableado Traslado y evacuación Al entrar en el circuito de refrigerante para realizar Compruebe que el cableado no esté sujeto a reparaciones o para cualquier otro propósito, se desgaste, corrosión, presión excesiva, vibración, deben utilizar procedimientos convencionales.
- Page 43 Importantes Instrucciones de Seguridad LEA Y SIGA TODAS LAS INSTRUCCIONES DE SEGURIDAD Desmantelamiento Recuperación Antes de llevar a cabo este procedimiento, Cuando se retira refrigerante de un sistema, ya sea es esencial que el técnico esté completamente para servicio o cierre, se recomienda que todos los familiarizado con el equipo en todo su detalle.
-
Page 44: Instrucciones De Instalación
INSTRUCCIONES DE INSTALACIÓN ACCESORIOS HERRAMIENTAS REQUERIDAS 1. Adaptador de salida de aire 1. Destornillador Phillips de tamaño mediano 2. Manguera de escape 2. Cinta métrica o regla 3. Adaptador deslizante de la ventana 3. Cuchillo o tijeras 4. 8 tornillos 4. - Page 45 INSTRUCCIONES DE INSTALACIÓN INSTALAR EL KIT DE VENTANA El kit de ventana se puede utilizar en una ventana suspendida o en una aplicación de ventana deslizante. Las imágenes de la derecha son para una ventana colgada. Los pasos para una ventana deslizante son los mismos.
-
Page 46: Instrucciones De Operación
INSTRUCCIONES DE OPERACIÓN UBICACIÓN CARACTERISTICAS Frente Coloque el acondicionador de aire en un piso liso y nivelado que sea lo sufi cientemente fuerte para soportarla y todos los accesorios incluidos. 1. Panel de control 2. Mango (ambos lados) Asegúrese de que el aparato esté nivelado para 3. -
Page 47: Panel De Control
INSTRUCCIONES DE OPERACIÓN PANEL DE CONTROL MODOS DE FUNCIONAMIENTO 1. Botón del temporizador: Se utiliza para Modo frío (cool) confi gurar el temporizador automático. • Presione el botón de modo para elegir el modo 2. Botón del ventilador: Se utiliza para elegir la frío. -
Page 48: Función De Temporizador
INSTRUCCIONES DE OPERACIÓN FUNCIÓN DE TEMPORIZADOR BLOQUEO INFANTIL La función de temporizador se puede usar para El bloqueo para niños se puede activar presionando encender o apagar el aparato después de un los botones de control de temperatura en el control período de tiempo para ahorrar energía. -
Page 49: Control Remoto
INSTRUCCIONES DE OPERACIÓN CONTROL REMOTO 1. Botón de encendido: se utiliza para encender o apagar el dispositivo. 2. Botón Turbo: la función turbo no está disponible en este modelo. 3. Botones de control de temperatura: se utilizan para aumentar o disminuir la temperatura establecida. - Page 50 INSTRUCCIONES DE OPERACIÓN REEMPLAZO DE LAS BATERÍAS REMOTAS Este equipo ha sido probado y cumple con los límites para un dispositivo digital de Clase B, de acuerdo con la Parte 15 de las Reglas de la FCC. Este aire acondicionado viene con dos pilas AAA. Estos límites están diseñados para proporcionar una Coloque las pilas en el control remoto antes de protección razonable contra interferencias dañinas...
- Page 51 INSTRUCCIONES DE OPERACIÓN EL DRENAJE DEL AGUA Cuando el recipiente de drenaje interno se llene, el aparato emitirá un pitido 8 veces y la pantalla digital mostrará el código de error “Ft”. La acción de aire acondicionado o deshumidifi cación se detendrá, pero el ventilador puede continuar funcionando.
-
Page 52: Cuidado Y Mantenimiento
CUIDADO Y MANTENIMIENTO LIMPIEZA ALMACENAMIENTO A LARGO PLAZO • Desconecte el aparato antes de limpiarlo o 1. Vacíe todo el agua del aparato. repararlo. 2. Haga funcionar el aparato en modo ventilador • Limpie el gabinete con un paño húmedo tibio durante medio día en una habitación caliente y detergente neutro. -
Page 53: Preguntas Frecuentes
PREGUNTAS FRECUENTES ¿Puedo dejar mi aire acondicionado en su lugar durante el invierno? No se recomienda. ¿Cuáles son las potencias y amperios estándar que se utilizan? La información relacionada con vatios y amperios se puede encontrar en la placa de clasifi cación ubicada en el costado de la unidad. -
Page 54: Solución De Problemas
SOLUCIÓN DE PROBLEMAS El aparato no funciona • El enchufe no está completamente insertado en el tomacorriente de pared • Fusible o disyuntor quemado Refrigeración insufi ciente • El fi ltro de aire está sucio • Flujo de aire bloqueado •... - Page 55 Los cargos por transporte desde y hacia el lugar en que se efectúe el servicio técnico no están cubiertos por esta garantía y son de responsabilidad del comprador. Nothing within this warranty shall imply that Danby will be responsible or liable for any spoilage or damage to food or other c ontents of this appliance, whether due Nada dentro de esta garantía implica que Danby será...
- Page 56 *Trademarks of Danby Products Limited and/or its subsidiaries Printed in China * Marques de commerce de Danby Products Limited et / ou de ses filiales Imprimé en Chine * Marcas comerciales de Danby Products Limited y / o sus subsidiarias...