Advertisement
Quick Links
FOR CAR USE ONLY/NUR FÜR AUTOMOBILGEBRAUCH/POUR APPLICATION AUTOMOBILE
UNIQUEMENT/SOLO PARA USO EN AUTOMÓVILES/PER IL SOLO UTILIZZO IN AUTOMOBILE
EN
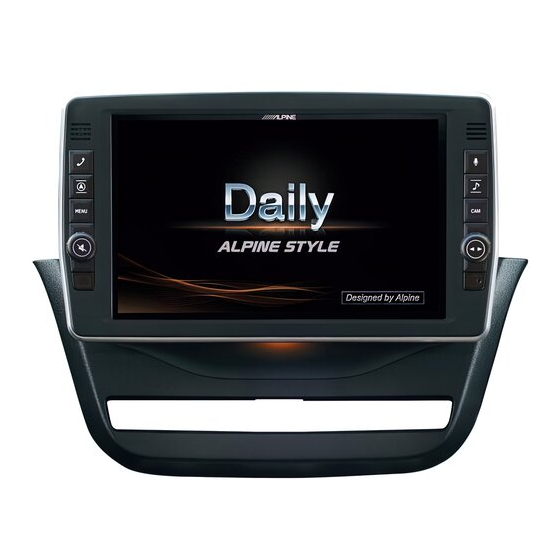
XXL PREMIUM INFOTAINMENT SYSTEM
DE
X903D-ID
Iveco Daily
FR
ES
IT
Installation Manual
Einbauanleitung
Manuel d'installation
Manual de instalación
Manuale di installazione
Advertisement

Related Manuals for Alpine XXL Premium X903D-ID


Summary of Contents for Alpine XXL Premium X903D-ID
- Page 1 FOR CAR USE ONLY/NUR FÜR AUTOMOBILGEBRAUCH/POUR APPLICATION AUTOMOBILE UNIQUEMENT/SOLO PARA USO EN AUTOMÓVILES/PER IL SOLO UTILIZZO IN AUTOMOBILE XXL PREMIUM INFOTAINMENT SYSTEM X903D-ID Iveco Daily Installation Manual Einbauanleitung Manuel d’installation Manual de instalación Manuale di installazione...
- Page 3 Failure to do so may result in damage to the physician immediately. unit and/or the vehicle. When in doubt, consult your Alpine dealer. DO NOT INSTALL IN LOCATIONS WHICH MIGHT HINDER VEHICLE OPERATION, SUCH AS THE STEERING WHEEL OR SHIFT LEVER.
- Page 4 Amperezahl aufweist. Andernfalls kann es zu Schäden am Gerät Andernfalls ist möglicherweise keine freie Sicht nach vorne gegeben, und/oder am Fahrzeug kommen. Wenden Sie sich im Zweifelsfall oder die Bewegungen des Fahrers sind so eingeschränkt, dass bitte an Ihren Alpine-Händler. Unfallgefahr besteht.
- Page 5 • X903D-ID au boîtier à fusibles, s'assurer que le fusible du circuit destiné au X903D-ID possède la bonne intensité. Sinon, l’appareil et/ou le véhicule risquent d’être endommagés. En cas de doute, consulter votre revendeur Alpine.
- Page 6 X903D-ID sea del amperaje adecuado. En caso contrario, Esto podría obstaculizar la visibilidad y dificultar el movimiento, etc. podría ocasionar daños a la unidad y/o al vehículo. Cuando no esté y provocar accidentes graves. seguro, consulte a su distribuidor Alpine.
- Page 7 Diversamente, la visuale del conducente può risultare ostruita o i suoi fusibili, verificare che il fusibile per il particolare circuito del movimenti ostacolati, causando gravi incidenti. dispositivo X903D-ID sia dell’amperaggio corretto. Diversamente, si possono provocare danni all’unità e/o al veicolo. In caso di dubbi, consultare il rivenditore Alpine.
- Page 8 Parts list (1-10) Teileliste (1-10) Liste de pièces (1-10) Lista de piezas (1-10) Elenco dei componenti (1-10)
- Page 9 1 AVN Unit 1 Boîtier AVN 1 Unità AVN 2 Display with Display 2 Écran avec câble 2 Display con cavo Cable 3 Boîtier et touches pour 3 Alloggiamento del 3 Display housing with keys l'écran display con tasti 4 Bracket for AVN Unit 4 Support pour boîtier AVN 4 Staffa per unità...
- Page 10 Required Tools (1-7) Werkzeuge (1-7) Outils nécessaires (1-7) Herramientas necesarias (1-7) Attrezzi necessari (1-7)
- Page 11 1 PH2 Screwdriver 1 Tournevis PH2 1 Cacciavite PH2 2 T10 Screwdriver 2 Tournevis T10 2 Cacciavite T10 3 T20 Screwdriver 3 Tournevis T20 3 Cacciavite T20 4 T25 Screwdriver 4 Tournevis T25 4 Cacciavite T25 5 Plastic Wedge 5 Clavette en plastique 5 Cuneo di plastica 6 8 mm Spanner 6 Clé...
- Page 12 Disconnection of battery Trennen der Batterie vom Bordnetz Déconnexion de la batterie Desconexión de la batería Distacco della batteria...
- Page 13 WARNING: ADVERTENCIA: Make sure to disconnect the cable from the Antes de proceder, asegúrese de desconectar negative battery terminal before proceeding. el cable del terminal negativo de la batería. Follow car manufacturer’s guidelines. Siga las instrucciones del fabricante del coche. WARNUNG: AVVERTENZA: Entfernen Sie das Kabel vom Minuspol der...
- Page 14 Installation (1‑4) Einbau (1‑4) Installation (1‑4) Instalación (1‑4) Installazione (1‑4)
- Page 15 1 Universal radio removal tool 1 Herramienta de extracción universal de unidad principal. 2 Factory radio with openings for release tool. 2 Radio de origen con aperturas para herramientas de extracción. 3 Pull out the radio using the universal removal tool. 3 Tire de la radio utilizando la herramienta de extracción universal.
- Page 16 Installation (5‑8) Einbau (5‑8) Installation (5‑8) Instalación (5‑8) Installazione (5‑8)
- Page 17 5 Remove the two screws of the upper 5 Retire los dos tornillos de la cubierta cover with a T25 screwdriver. superior con un destornillador T25. 6 Remove the cover with the switches. 6 Retire la cubierta con la botonera. 7 Unlock and remove the connector of the 7 Desbloquee y retire el conector de la placa switchpanel.
- Page 18 Installation (9‑12) Einbau (9‑12) Installation (9‑12) Instalación (9‑12) Installazione (9‑12)
- Page 19 9 Remove the 3 screws of the switchpanel 9 Retire los 3 tornillos de la botonera con un with a torx 20 screwdriver. destornillador Torx 20. 0 Take the switches from the cover. 0 Retire la botonera de la cubierta. ! Insert the supplied substitute to the top ! Inserte la cubierta sustitutiva cover.
- Page 20 Installation (13‑16) Einbau (13‑16) Installation (13‑16) Instalación (13‑16) Installazione (13‑16)
- Page 21 # Supplied faceplate with screws. # Panel frontal suministrado con tornillos. $ Original switchpanel. $ Botonera original. % Attach the original switchpanel with the 3 % Fije la botonera original con los 3 tornillos supplied screws. suministrados. ^ Faceplate with original switchpanel. ^ Panel frontal suministrado con la botonera original.
-
Page 22: Installation
Installation (17‑20) Einbau (17‑20) Installation (17‑20) Instalación (17‑20) Installazione (17‑20) - Page 23 & AVN metal brackets. & Soporte metálico para la unidad AUV. * Position the right bracket at the AVN unit. * Coloque el soporte derecho en la unidad AVN. ( Fix the right metal bracket with the supplied phillips head screws to the right ( Fije el soporte metálico derecho a la parte side of the ANV unit.
- Page 24 Installation (21‑24) Einbau (21‑24) Installation (21‑24) Instalación (21‑24) Installazione (21‑24)
- Page 25 - Before installing the AVN unit, check what - Antes de instalar la unidad AVN, compruebe cuál era la configuración was the original Radio configuration. original de radio. = Access the interface settings like this: = Accede a los ajustes de la interfaz de la Menu >...
- Page 26 Installation (25‑28) Einbau (25‑28) Installation (25‑28) Instalación (25‑28) Installazione (25‑28)
- Page 27 e Install the GPS antenna in a position that e Instale la antena de GPS en una posición allows good reception. Connect all en la que permita una buena recepción de harnesses to the unit and insert the ISO señal. Conecte todos los conectores a la connector.
- Page 28 Installation (29‑32) Einbau (29‑32) Installation (29‑32) Instalación (29‑32) Installazione (29‑32)
- Page 29 u Insert the modified top cover to the u Inserte la cubierta superior modificada en dashboard and attach it with the original el salpicadero. Fijar con los tornillos screws. originales. i Insert and lock the connector for the i Inserte y cierre el conector para los original switches.
- Page 30 Installation (33‑36) Einbau (33‑36) Installation (33‑36) Instalación (33‑36) Installazione (33‑36)
- Page 31 [ Monitor back cover [ Cubierta posterior de la pantalla. ] Insert the supplied PC board for the ] Inserte la placa de suministrada para la luz ambiental en la parte inferior del marco ambient light to the bottom of the display de la pantalla y conecte el conector frame and connect the small connector pequeño al cableado de la botonera.
- Page 32 Installation (37‑40) Einbau (37‑40) Installation (37‑40) Instalación (37‑40) Installazione (37‑40)
- Page 33 s Remove the microphone housing from s Retire la carcasa del micrófono de la the display rear cover. cubierta posterior de la pantalla. d Insert the microphone to the housing d Inserte el micrófono en la carcasa por la from the rear side. parte posterior.
- Page 34 Installation (41‑44) Einbau (41‑44) Installation (41‑44) Instalación (41‑44) Installazione (41‑44)
- Page 35 h Remove the microphone housing from h Retire la carcasa del micrófono del lado the opposite side of the display rear cover. opuesto de la cubierta posterior de la pantalla. j Insert the supplied foam. j Inserte la espuma suministrada. k Insert the housing with the foam into the display rear cover.
- Page 36 Installation (45‑48) Einbau (45‑48) Installation (45‑48) Instalación (45‑48) Installazione (45‑48)
- Page 37 ; Route the cables for keys and microphone ; Guíe los cables para las teclas y el as shown. Note the size of the connectors. micrófono tal y como se muestra. Observe el tamaño de los conectores. ' Display bracket with six screws. ' Soporte de la pantalla con 6 tornillos.
- Page 38 Installation (49‑52) Einbau (49‑52) Installation (49‑52) Instalación (49‑52) Installazione (49‑52)
- Page 39 c Tighten the 4 hexagonal screws halfway c Apriete los 4 tornillos hexagonales en la to the display. pantalla hasta la mitad. � Connect the remaining cables to the � Conecte el resto de los cables en la display. pantalla. b Location of connectors at AVN-Display.
- Page 40 Installation (53‑56) Einbau (53‑56) Installation (53‑56) Instalación (53‑56) Installazione (53‑56)
- Page 41 m Displayframe with keys. m Marco de la pantalla con teclas. , Conecte el cable de las teclas al conector , Connect the key cables to the key units. de las teclas. . Displayframe with key harness. . Marco de la pantalla con cableado de la / Insert the display frame from the bottom botonera.
- Page 42 Installation (57‑60) Einbau (57‑60) Installation (57‑60) Instalación (57‑60) Installazione (57‑60)
- Page 43 _ Blanking plugs and two screws for the _ Tapas y dos tornillos para la cubierta screen back cover. trasera de la pantalla. + Screw together the display frame and the + Atornille entre si el marco de la pantalla y display back cover.
- Page 44 Changing the Illumination Color of the Keys Farbe der Tastenbeleuchtung ändern Modification de la teinte d’éclairage des touches Cambio del color de iluminación de las teclas Variazione del colore di illuminazione dei tasti Color Presets Farbvoreinstellungen Présélections de teintes Rouge Red (dim) Rot (gedimmt) Rouge (atténué)
- Page 45 Twelve illumination presets are available to Hay doce ajustes preestablecidos de choose from. See table for details. To change iluminación disponibles para elegir. Consulte the illumination color, use the option LED la tabla para obtener más información. Para Color in the Interface Settings section of the cambiar el color de la iluminación, utilice la interface menu.
- Page 46 Connections: Anschlüsse: Raccordements: Conexiones: Collegamenti:...
- Page 47 Camera Direct Connector CAMERA INPUT ADAPTER Audio AUX IN (Left) Audio AUX IN (Right) Video AUX IN CAN Interface SPEED FAKRA Antenna REVERSE MICROPHONE CAN I/F Connector POWER BREAKOUT Display Power / Remote REMOTE CAMERA CONTROL...
- Page 48 Removal (1‑4) Ausbau (1‑4) Dépose (1‑4) Retirada (1‑4) Rimozione (1‑4)
- Page 49 1 To remove the unit, remove the display 1 Para quitar la unidad, retire la pantalla con with it‘s housing and the keys. su carcasa y las teclas. 2 Push both plastic hooks as shown in order 2 Empuje ambos ganchos de plástico tal y to disengage them from the metal como se muestra, para separarlos del bracket.
- Page 50 In some car configurations the tweeters of En algunas configuraciones del vehículo los the factory speakers are routed to the tweeters de los altavoces de origen están front channels and the woofers to the rear conectados a los canales delanteros y los channels.
- Page 51 IM_X903D-ID_R0...
- Page 52 Designed by Alpine Electronics (Europe) GmbH Printed in Italy ALPINE ELECTRONICS MARKETING, INC. ALPINE ELECTRONICS OF AUSTRALIA PTY. LTD. ALPINE ELECTRONICS GmbH Succursale France 1-7, Yukigaya-Otsukamachi, Ota-ku, 161-165 Princes Highway, Hallam 184, Allée des Erables Tokyo 145-0067, JAPAN Victoria 3803, Australia...