
Related Manuals for MTX RTU8P


Summary of Contents for MTX RTU8P
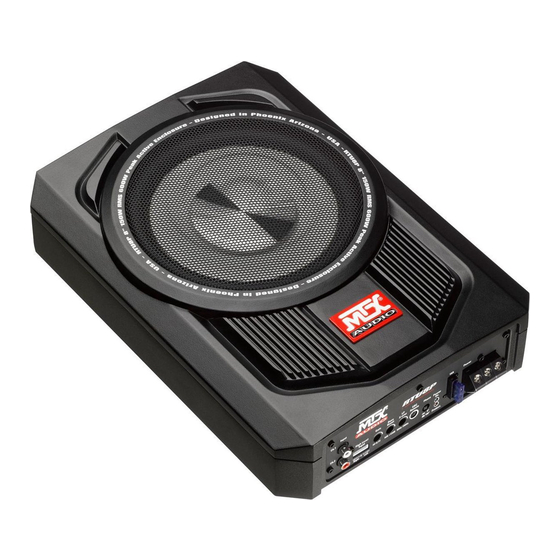
- Page 1 RTU8P 8“ 20cm Underseat Powered Enclosure 150W RMS - 600W Peak Designed by MTX in Phoenix, AZ - USA mtxaudio.eu twitter.com/MTXEurope facebook.com/MTXEurope...
-
Page 2: Specifications
RCA Inputs (Input) : These RCA inputs are used with source units that have RCA or Line level outputs. (Source units need a minimum level of 100mV output for proper operation of the amplifier). MTX recommends only high quality RCA cables to decrease the possibility of radiated noise entering the system. -
Page 3: Installation And Mounting
Bass remote control port (EBC Remote) : use this port to connect the optional MTX EBC. It alows you to control the output level siting at the front of the car. 15A Fuse (15A) : When the fuse blows, replace it with the same value. Never use a higher rated fuse ! Phase switch (Phase) : two positions are available - 0°... -
Page 4: Caractéristiques
Merci ! Merci d’avoir fait confiance à MTX en achetant un caisson amplifié hautes performances RTU8P. Une bonne installation avec des haut- parleurs MTX combinés à votre caisson actif MTX RTU8P donnera des résultats hallucinants. Elle vous permettra de tenir éveillé vos voisins pendant des heures (des nuits), de couper le souffle de vos amis et de renvoyer dans leur bac à... -
Page 5: Installation Et Montage
1. Déconnectez la masse de la batterie du véhicule. 2. Déterminez l’ e mplacement de votre MTX RTU8P. Pour un bon fonctionnement, il faut laisser de l’air devant la section amplificateur (pour son refroidissement) et devant le subwoofer. -
Page 6: Vielen Dank
Vielen Dank ! Vielen Dank, dass Sie sich für einen MTX Audio High End Aktivsubwoofer entschieden haben. Fachmännischer Einbau und eine Kombi- nation mit MTX Lautsprechern garantieren optimale Leistung und ein hervorragendes Klangerlebnis. Viel Spaß! Technische Daten : • Geschlossenes Aktivgehäuse (passt unter den Sitz) •... - Page 7 Sie Ihr System einschalten. 1. Klemmen Sie den Minuspol der Batterie ab. 2. Suchen Sie nach einem geeigneten Einbauort für Ihre MTX RTU8P. Bedenken Sie hierbei, dass ausreichen de Luftzufuhr am Kühlkörper vorhanden ist, um eine entsprechende Kühlung des Verstärkers sicherzustellen.
-
Page 8: Especificaciones
Muchas Gracias ! Gracias por elegir el producto MTX para un máximo de sonido en tu vehículo. Con los amplificadores, altavoces y subs MTX y conexiones StreetWires podrá eschuchar, sentir y experimentar la música como nunca antes y de la forma que el artista pretendía cuando se grabó. -
Page 9: Instalación Y Montaje
Instalación y montaje : MTX le recomienda que su nuevo MTX RTU8P sea instalado por un instalador autorizado MTX. Cualquier desviación en la instalación respecto de las especificadas en este manual de instrucciones puede causar serios daños serios al amplificador, altavoces incluso al sistema eléctrico del propio automóvil. Los daños causados por una instalación inapropiada e indebida NO quedan cubiertas por la garantía. - Page 10 Grazie ! Grazie per aver scelto MTX per ottenere il massimo dal vostro impianto audio. Un amplificatore MTX, abbinato a subwoofers ed alto- patlanti MTX, consente di ascoltare la musica proprio come nelle intenzioni dell’artista. Caratteristiche : • Custodia sigillata sottosopra •...
-
Page 11: Installazione E Montaggio
Installazione e Montaggio : MTX consiglia di appoggiarvi, per l’installazione dei suoi prodotti, a rivenditori Autorizzati. Se decidete di effettuare voi stessi l’installazione, seguite in modo rigoroso le istruzioni riportate di seguito. Una installazione non effettuata a regola d’arte può causare danni, anche gravi, sia al prodotto che all’impianto elettrico della vettura. - Page 12 Entradas RCA (Input) : Estas entradas são usadas com fontes que possuam saídas RCA ou de linha, com um sinal minímo de 100mV. A MTX recomenda o uso de cabos de par entrançado (tais como StreetWires) de forma a diminuir as possibilidades de ruído radiado entrar do sistema.
- Page 13 3 (GND) do amplificador MTX. 6. Conecte um fio remote turn-on da fonte até ao terminal 2 do amplificador MTX. Se a fonte não tiver um terminal remote dedicado, ligue ao terminal de antena activa.
- Page 14 Massa aansluiting (GND) : Een goede massa aansluiting is belangrijk voor maximale prestaties van de RTU8P. Een korte massa kabel met dezelfde dikte als de hoofd +12V aansluiting dient te worden gebruikt vanaf de RTU8P direct naar het chassis van de auto. Om een goede aansluiting op het chassis te maken dient de lak te worden weggeschuurd tot blank metal zichtbaar is op de plaats waar de massa kabel wordt aangesloten.
-
Page 15: Installatie En Montage
3. Trek een plus kabel vanaf de accu naar de MTX RTU8P. Zorg ervoor dat je een rubber of kunstof doorvoer gebruikt om de kabel veilig vanuit de motorruimte het interieur in te laten lopen. Laat de kabel door een bestaande kabelgoot lopen door het interieur naar de MTX RTU8P en sluit de kabel aan op de +12V aansluiting (1). -
Page 16: Технические Характеристики
Спасибо ! Спасибо, что выбрали усилители Mtx Audio Hi-Performance. Правильная установка, а также колонки и сабвуферы обеспечат непревзойдённый звук и долгие часы без сна для Ваших соседей, а также заставят Ваших друзей завидовать и не оставят шансов соперникам. Поздравляем! Наслаждайтесь лучшим звучанием с MTX Audio ! Технические... - Page 17 инсталляции не подлежат гарантийному обслуживанию. Перед включением системы, пожалуйста, проверьте все соединения. 1. Отсоедините минусовую клемму аккумуляторной батареи автомобиля. 2. Определите место монтирования активного сабвуфера MTX. Имейте в виду, что необходимо достаточное количество воздуха, чтобы обеспечить охлаждение системы. 3. Протяните силовой кабель от аккумуляторной батареи транспортного средства через перегородку моторного отсека, используя изолирующую...
- Page 18 Va multumim pentru achizitionarea unui amplificator audio MTX High-End. Instalarea corectă, impreuna cu difuzoarele și subwoof- erele MTX va vor oferi un sunet si o performanta de exceptie pentru nenumarate ore de trezire a vecinilor. Felicitări și sa vă bucurați de inalta experiența audio cu MTX!
- Page 19 1. Scoateti firul de minus de la baterie. 2. Determinati locul de montare al subwooferului activ in Bass Reflex RTU8P. Tineti cont de faptul ca trebuie sa circule suficient aer in jurul lui pentru a avea o racire buna. Prindeti-l corespunzator si asigurati-va ca nu interfereaza cu nici o instalatie a masinii (rezervor, fire, conducte de frane, etc).
- Page 20 Wprowadzenie Dziękujemy za wybór produktów MTX Audio. Połączenie wzmacniaczy i głośników MTX Audio z akcesoriami StreetWires pozwoli slyszeć, czuć i doświadczać muzykę w sposób zamierzony przez artystę. Cechy : • Obudowa ze szczelną obudową pod siedzeniem • Wejścia wysokiego i niskiego poziomu •...
- Page 21 5. Znajdź odpowednie miejsce do podłączenia masy. Przymocuj przewód do miejsca podłączenia masy a drugi koniec podłącz do terminala GND we wzmacniaczu – złącze 3. 6. Podłącz przewód wzbudzenia wzmacniacza (Remote) do terminala we wzmacniaczu MTX (złącze 2). Jeżeli Twoja jednostka sterująca nie ma dedykowanego wyjścia Remote możesz podłączyć przewód do przewodu sterowania elektryczna anteną.
- Page 22 On myös erittäin tärkeätä kytkeä liitokset tiukasti parhaan mahdollisen suorituskyvyn takaamiseksi. Suosittelemme vähintään 10mm2 virtajohtimen MTX RTU8P subwooferin kanssa. Herätevirtaliitin (Remote - Rem) : vahvistin kytkeytyy päälle, kun tähän liitäntään johdetaan 12V jännite. Tyypillisesti tämä jännite tu- odaan soittimen ”remote”...
- Page 23 5. Etsi hyvä maadoituspaikka auton rungosta ja poista siitä maali siten, että kontaktipinnassa on paljas metalli. Kiinnitä maadoitusliitin tiukasti tähän kohtaan ja kaapelin toinen pää MTX vahvistimen maadoitusliitäntään(GND). 6. Kytke herätevirtajohto soittimelta MTX -vahvistimen Remote -liittimeen. Mikäli soittimessasi ei ole erillistä “remote” -johtoa, voit tehdä kytkennän myös sähköantenniliitäntään (Power Antenna).
- Page 24 MTX is proud to be an American Audio Company since 1971. MTX is a proud member of Mitek Corp high quality consumer audio product lines. Designed and Engineered by Mitek in Phoenix - AZ, USA Assembled in PRC. © 2018 Mitek. All rights reserved.