Table of Contents
Advertisement
All about the
Use
of your
Welcome & Congratulations ...................................2
Important Safety Instructions .................................3
Features at a Glance ..............................................6
Before Setting Oven Controls .................................7
Setting Oven Controls ............................................8
www.frigidaire.com USA 1-800-944-9044
&
Wall Oven
TA B L E O F C O N T E N T S
www.frigidaire.ca Canada 1-800-265-8352
Care
Self-Cleaning .......................................................14
Care & Cleaning ..................................................16
Before You Call ..................................................18
Major Appliance Warranty ....................................20
Advertisement
Table of Contents

Related Manuals for Frigidaire FFET2725L


Summary of Contents for Frigidaire FFET2725L
-
Page 1: Table Of Contents
Welcome & Congratulations ...2 Important Safety Instructions ...3 Features at a Glance ...6 Before Setting Oven Controls ...7 Setting Oven Controls ...8 www.frigidaire.com USA 1-800-944-9044 & Care TA B L E O F C O N T E N T S Self-Cleaning ...14 Care &... -
Page 2: Welcome & Congratulations
Welcome & congratulations Product registration register Your Product The Product registration card should be filled in completely, signed and returned to Electrolux Major Appliances. serial Plate location Please record your model and serial numbers below for future reference. Model Number: Serial Number: Purchase Date: ©... -
Page 3: Important Safety Instructions
• Storage in or on Appliance—Flammable materials should not be stored in an oven. This includes paper, plastic and cloth items, such as cookbooks, plasticware and towels, as well as flammable liquids. - Page 4 Exposed fat and grease could ignite. • Do not touch a hot oven light bulb with a damp cloth. Doing so could cause the bulb to break. Disconnect the appliance or shut off the power to the appliance before removing and replacing the bulb.
- Page 5 • Do not clean the oven door gasket. The door gas- ket is essential for a good seal. Care should be taken not to rub, damage or move the gasket.
-
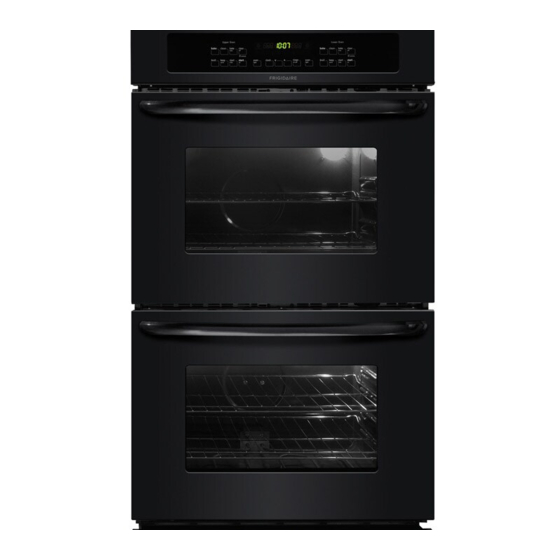
Page 6: Features At A Glance
Oven interior light with removable cover. Self-clean oven interior. Adjustable interior oven rack(s). Large 1-piece oven door handle. Full width oven door with window. 10. Self-clean lower oven interior. 11. Bottom trim. note The features shown for your appliance may vary... -
Page 7: Before Setting Oven Controls
Oven Vent Location The oven is vented at the center trim. When the oven is on, warm air is released through the vent. This venting is necessary for proper air circulation in the oven and good baking results. caution some models are equipped with a blower which runs in baking and self-cleaning mode to keep all internal components at a cool temperature. -
Page 8: Setting Oven Controls
This doesn’t change the way it operates. note All instructions are given for the UPPER oven. If LOWER oven is used the indicator lights will appear in the right portion of the display. 1. Bake Pad— Used to enter the normal baking mode temperature. -
Page 9: Setting The Clock
12 or 24 hour time of day operation. The clock has been preset at the factory for the 12 hour operation. When the wall oven is first plugged in, or when the power supply to the appliance has been interrupted, the timer in the display will flash. -
Page 10: Setting Oven Lockout Feature
Pressing clear off pad will cancel the Bake feature at any time. to change the Bake temperature 1. After the oven has already been set to bake and the oven temperature needs to be changed, press Bake pad. "uPPer" and "BAKE" will start flashing in the display. -
Page 11: Setting Delayed Timed Bake
Even when chilled, they should not stand in the oven for more than 1 hour before cooking begins, and should be removed promptly when cooking is completed. -
Page 12: Setting The Keep Warm Feature
3 hours. To set Keep Warm to turn ON automatically 1. Arrange interior oven racks and place food in oven. Set the oven properly for Timed Bake or Delayed Timed Bake. 2. Press Keep warm pad. "uPPer" and "Warm" will flash and "- - -"... - Page 13 Once the oven light is turned ON and the Sabbath feature is active, the oven light will remain ON until the Sabbath feature is turned OFF. If the oven light needs to be OFF, be sure to turn the oven light OFF before activating the Sabbath feature.
-
Page 14: Self-Cleaning
• Clean any soil from the oven frame, the door liner outside the oven door gasket and the small area at the front center of the oven bottom. -
Page 15: Adjusting The Oven Temperature
“uPPer” and “cln” will appear in the display and the clock will return to the time of day. 4. As soon as the control is set, the motor driven oven door lock will begin to close automatically. Once the door has been locked the “uPPer”, “door”... -
Page 16: Care & Cleaning
Rinse with clean water and dry. Use soap & water to thoroughly clean the top, sides and front of the oven door. Rinse well. You may use a glass cleaner on the outside glass of the door. do not immerse the door in water. -
Page 17: Care And Cleaning Of Stainless Steel
Special door care instructions - doors contain glass that can break. Read the following recommendations: 1. Do not close the oven door until all the oven racks are fully in place. 2. Do not hit the glass with pots, pans, or any other object. -
Page 18: Before You Call
BeFore You call Oven Baking For best cooking results, heat the oven before baking cookies, breads, cakes, pies or pastries, etc. There is no need to preheat the oven for roasting meat or baking casseroles. The cooking times and temperatures needed to bake a product may vary slightly from your previously owned appliance. - Page 19 Faulty installation Place oven rack in center of oven. Place a level on the oven rack. Contact installing agent if rack and cabinet cutout flooring are not level. Kitchen cabinet misalignment may make oven appear to be not level. Be sure cabinets are square and level.
-
Page 20: Major Appliance Warranty
maJor aPPliance WarrantY Your appliance is covered by a one year limited warranty. For one year from your original date of purchase, Electrolux will pay all costs for repairing or replacing any parts of this appliance that prove to be defective in materials or workmanship when such appliance is installed, used and maintained in accordance with the provided instructions.