Table of Contents
Advertisement
Quick Links
Advertisement
Table of Contents

Summary of Contents for BenQ T3300v
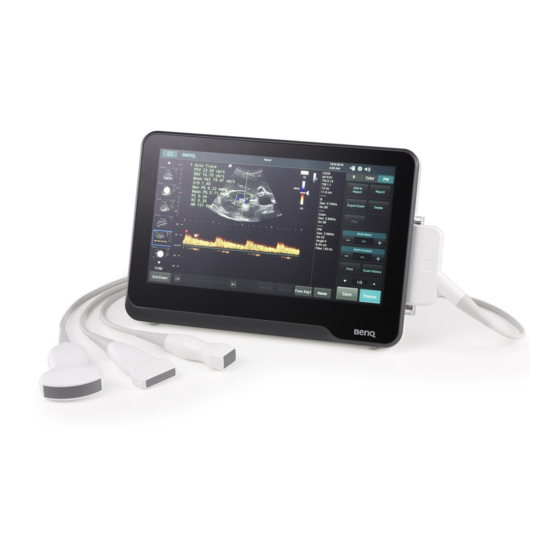
- Page 1 Vet Ultrasound System Quick Guide...
-
Page 2: Table Of Contents
Table of Contents I. Ultrasound System II. Transducer III. Accessories Using the System 1. Turning On/Off the System 2. Adding a New Patient 3. Selecting a Preset 4. Splitting the Imaging Screen 5. Adding Annotations 6. Adding Body Mark 7. Adding Measurements 8. -
Page 3: Ultrasound System
I. Ultrasound System No. Component Function Touch screen Display system information and allow you to perform operations using different gestures. Speakers Built-in speakers for playing sounds, which are software- controlled Transducer Connect a transducer to the system. connection socket Battery indicator When the system is connected to power: If the system is turned off or enters sleep mode, the battery indicator behaves in the following lighting... - Page 4 No. Component Function Power button Press and hold the Power button to turn on/off the system. Press the Power button to enter/exit sleep mode. VESA mounting Used to install the system on any VESA wall mounts, holes including the system cart. Ventilation slots Release excessive heat during operation to keep the system in a safe operating temperature.
-
Page 5: Transducer
II. Transducer... -
Page 6: Accessories
III. Accessories Carrying the System Installing the Transducer Holder... - Page 7 Connecting the Transducer...
-
Page 10: Using The System
Using the System 1. Turning On/Off the System Press and hold the Power button to turn on the system. The system enters the main screen or the user login screen after system startup. Press and hold the Power button until the Power off menu appears on the screen, then touch OK to turn off the system. - Page 13 System toolbar Display information about current battery level, volume, system storage, and network connection status. Touch anywhere on the system toolbar to open the Quick Setup menu for system configuration. Scan mode (image control) buttons When using duplex or triplex modes, touch the scan mode (image control) buttons here to display and adjust its corresponding image control settings - Image control settings Scan mode buttons...
- Page 14 Func Key1/Func Key2 buttons Assign each of these buttons as a shortcut to perform a function. The Func Key2 button is available only in real-time imaging modes. Ultrasound imaging area Display the 2D imaging window in all scan modes. By default, the top area is close to the region located near the transducer surface (near field).
- Page 15 Display the percentage of the system storage used. • : Storage usage empty • : Storage usage full Check and manage outgoing queues to the DICOM server. • : DICOM Disconnected • : DICOM Connected Set current date and time. Adjust the volume.
-
Page 16: Adding A New Patient
2. Adding New Patient On the imaging screen, touch > Patient Touch New Patient. Enter the patient information as much detailed as possible: Touch in a text entry field, and use the virtual keyboard to input contents. Touch Next on the keyboard to go to the next field. To finish and close the keyboard, touch The system saves patient information automatically when you touch Start Exam. - Page 17 1. On the imaging screen, touch > Preset. All the available presets compatible with the connected transducer display on the Preset screen.
- Page 18 2. Touch the preset to scan, and you will be redirected automatically to the real-time imaging screen.
-
Page 20: Adding Annotations
Adding Annotations On the real-time, frozen or review imaging screen, you can to add annotations to the ultrasound images in order to explain the anatomy. After you are done adding annotations, you can still move the annotated texts or arrows anytime by touching and dragging them to your desired location. - Page 21 Annot Text 1. Touch Annot. A virtual keyboard and a text cursor (I-beam) appear at the text home position. 2. Type the texts directly. Touch anywhere on the imaging area to finish inputs. 3. Drag the text cursor to where you want the new texts to be, and release it to place the texts. Setting the Text Home Position You can choose a specified position in the image display as the starting location, which is the text home position.
-
Page 22: Adding Measurements
2. A pictogram of the default body mark with a transducer indicator displays on the image. If you wish to change the body mark, select one from the BDMK menu that appears. 3. Touch anywhere on the image, drag the transducer indicator to the desired location on the body mark, then release your finger to place the indicator. - Page 23 measurement. The indicators/lines then turn green, and the final measured results (values) appear on the top left side of the imaging screen. • Two-finger tap on the scan area • Proceed with the next measurement • Touch Save to save the ultrasound image NOTES •...
-
Page 24: Saving And Printing The Image
Trace Manually trace an irregular shape. 1. Touch Trace. A crosshair cursor appears on the image. Touch anywhere on the imaging area to drag the cursor to where you want to start measuring and release it. 2. Touch anywhere on the imaging area to drag the cursor along the outline of the object to trace. 3. -
Page 25: Reviewing The Image
Saving an Image On the frozen imaging screen, touch Save to save the current frame as an image. The saved image will be displayed in the thumbnail list. Printing an Image On the frozen imaging screen, touch Print to print out the current image. Reviewing the Image On the real-time or frozen imaging screen, flick vertically on the thumbnail list to view the thumbnails of all the saved images/loops. - Page 26 Flick vertically on the thumbnail window and touch to select multiple images/loops as expected. – To quickly select all images, touch Select All. – To cancel all selections, touch Deselect All. Touch an action button. For example, touch Delete to delete all selected images/loops.
-
Page 27: Using Image Controls
4. Using Image Controls B mode Image Controls... -
Page 30: Color/Power Mode Image Controls
Color/Power Mode Image Controls Overview Color mode is used to detect the presence, direction, and relative velocity of blood flow by assigning color-coded information to these parameters. The color is depicted in a region of interest (ROI) that is overlaid on the 2D image. Non-inverted flow towards the transducer is assigned shades of red, and flow away from the transducer displays in shades of blue. -
Page 35: Troubleshooting
5. Troubleshooting Symptom Possible cause and corrective action • Battery fully discharged. Connect the AC power adapter. • Power adapter does not function correctly. > Check if the power adapter has green light illuminated. The system does not > Check if the AC plug is connected firmly and correctly to the power power on adapter and matches the plug type of your country. - Page 36 Symptom Possible cause and corrective action The system power reaches a critically low state and is not The Power button does connected to power. not function > Connect the system to power. • Ventilation slots are blocked. > Place the system in a well-ventilated area. >...