
Related Manuals for Carrier 42TVCA010


Summary of Contents for Carrier 42TVCA010
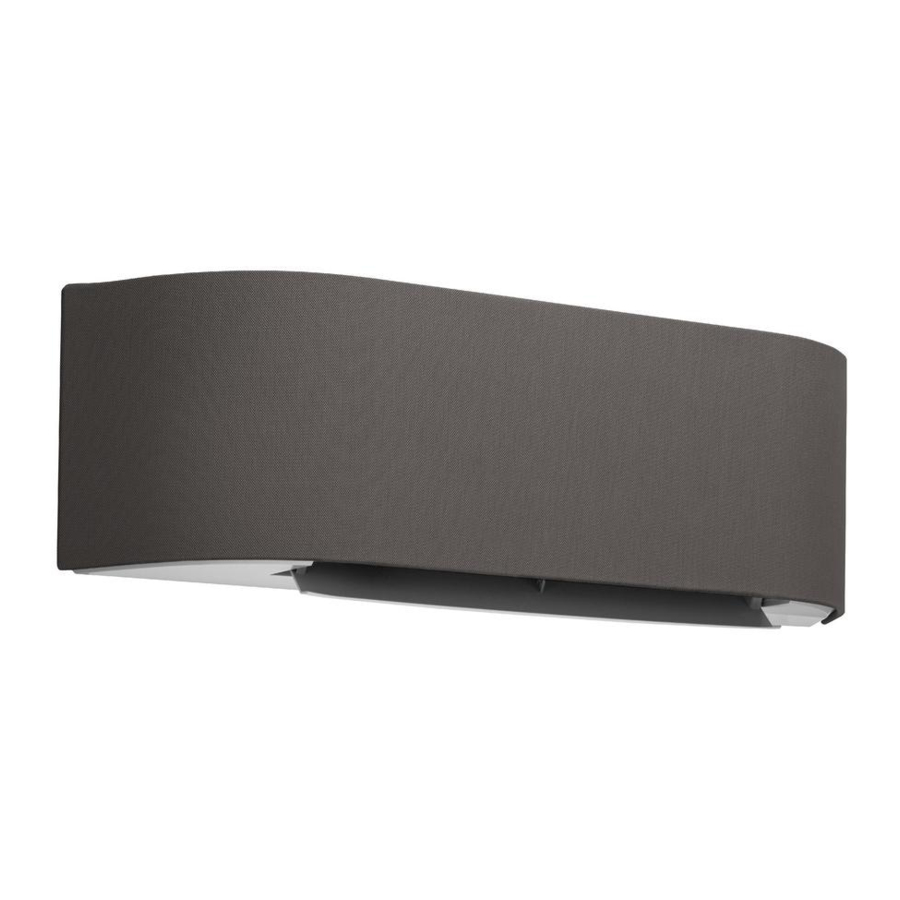
- Page 1 INSTALLATION MANUAL ENGLISH AIR CONDITIONER (SPLIT TYPE) ภาษาไทย Indoor unit 42TVCA010 42TVCA013 42TVCA018 Outdoor unit 38TVCA010 38TVCA013 38TVCA018 1129850104...
-
Page 2: Table Of Contents
สารบั ญ CONTENTS ข อ ควรระวั ง เพ อความปลอดภั ย PRECAUTIONS FOR SAFETY ..........1 ..........1 อุ ป กรณ เ สริ ม และชิ ้ น ส ว นในการติ ด ตั ้ ง ACCESSORY AND INSTALLATION PARTS ......5 ........5 ผั... -
Page 3: Precautions For Safety
PRECAUTIONS FOR SAFETY PRECAUTIONS FOR SAFETY Read the precautions in this manual carefully before This appliance is fi lled with R32. operating the unit. • Before installation, please read these precautions for safety carefully. • Be sure to follow the precautions provided here to avoid safety risks. The symbols and their meanings are shown below. - Page 4 DANGER • FOR USE BY QUALIFIED PERSONS ONLY. • TURN OFF MAIN POWER SUPPLY BEFORE ATTEMPTING ANY ELECTRICAL WORK. MAKE SURE ALL POWER SWITCHES ARE OFF. FAILURE TO DO SO MAY CAUSE ELECTRIC SHOCK. • CONNECT THE CONNECTING CABLE CORRECTLY. IF THE CONNECTING CABLE IS CONNECTED WRONGLY, ELECTRIC PARTS MAY BE DAMAGED.
- Page 5 • Do not use any refrigerant different from the one specifi ed for complement or replacement. Otherwise, abnormally high pressure may be generated in the refrigeration cycle, which may result in a failure or explosion of the product or an injury to your body.
- Page 6 CAUTION • Exposure of unit to water or other moisture before installation could result in electric shock. Do not store it in a wet basement or expose to rain or water. • After unpacking the unit, examine it carefully for possible damage. •...
-
Page 7: Accessory And Installation Parts
ACCESSORY AND INSTALLATION PARTS ACCESSORY AND INSTALLATION PARTS Indoor Unit Part name Part name Installation plate × 1 Wireless remote control × 1 Battery × 2 Remote control holder × 1 Ultra pure fi lter × 2 Mounting screw × 10 Flat head wood screw ×... -
Page 8: Installation Diagram Of Indoor And Outdoor Units
Refrigerant piping 108 mm 125 mm Liquid side : Ø6.35 mm 28 mm Air inlet Gas side : Ø9.52 mm (42TVCA010, 013) each : Ø12.70 mm (42TVCA018) Pipe insulating material Air outlet (polyethylene foam, 6 mm thick) 90 mm 600 mm... -
Page 9: Indoor Unit
INDOOR UNIT INDOOR UNIT • Space allows for moving range of the air inlet grille and horizontal louver Installation Place in operation above curtain rails, window cornice or other objects. (Unit : mm) • A place which provides the spaces around the indoor unit as shown in the diagram •... -
Page 10: Piping And Drain Hose Installation
• Cut off the pipe exist from inside of Front panel using a coping saw or an Piping and Drain Hose Installation equivalent tool. • The plastic burrs from the cutting process should be removed with a half round fi le or an equivalent tool. Piping and drain hose forming •... -
Page 11: Indoor Unit Fixing
How to remove the drain cap CAUTION • Clip the drain cap by needle-nose pliers and pull out. • Bind the auxiliary pipes (two), power supply and connecting cable with facing tape tightly. Connecting cable Installation plate Indoor unit Auxiliary pipes Cap drain •... -
Page 12: Drainage
Drainage CAUTION MOUNTING INDOOR UNIT TO THE INSTALLATION PLATE 1. Run the drain hose sloped downwards. • The lower part of indoor unit may fl oat, due to the condition of piping and installer cannot fi x it to the installation plate. In that case, use the NOTE screws provided to fi... -
Page 13: Outdoor Unit
OUTDOOR UNIT OUTDOOR UNIT Installation Place Refrigerant Piping Connection • A place which provides the spaces around the outdoor unit as shown in Flaring the diagram • A place which can bear the weight of the outdoor unit and does not allow 1. -
Page 14: Evacuating
Packed valve handling precautions Evacuating • Open the valve stem all the way out, but do not try to open it beyond the stopper. After the piping has been connected to the indoor unit, you can perform the air purge together at once. Pipe size of Packed Valve Size of Hexagon wrench AIR PURGE... -
Page 15: Electrical Works
ELECTRICAL WORKS ELECTRICAL WORKS Model 42TVCA010 42TVCA013 42TVCA018 Power source 50Hz, 220V Single phase Maximum running current 5.30A 6.30A 9.80A Circuit breaker rating H07RN-F or 60245 IEC66 Power supply cable H07RN-F or 60245 IEC66 (1.25 mm or more) (1.5 mm... -
Page 16: Power Supply And Connecting Cable Connection
Power Supply and Connecting Cable Connection Power Supply Input at Outdoor Unit Terminal Block Indoor Unit Outdoor Unit Connecting cable Terminal block Connecting cable connect to 1 2 3 Terminal block (1 2 3) Connecting cable Power cord Earth line Earth line Earth line Connecting cable... -
Page 17: Others
OTHERS OTHERS Gas Leak Test Test Operation To switch the TEST RUN (COOL) mode, press [RESET] button for 10 seconds. (The beeper will make a short beep.) Check places for the indoor unit. OPERATION / Check places for RESET Button the outdoor unit. -
Page 18: Decorative Fabric Installation
Decorative Fabric Installation The decorative fabric for cover on the air inlet grille of indoor unit was put in the accessories. User can use it as required. The method of installation is as follows. 1. Remove the air inlet grille. Open the air inlet grille upward and pull it toward you. -
Page 20: ข อ ควรระวั ง เพอความปลอดภั ย
ข อ ควรระวั ง เพอความปลอดภั ย ข อ ควรระวั ง เพอความปลอดภั ย อ า นข อ ควรระวั ง ในคู ม ื อ นี ้ อุ ป กรณ น ี ้ ต อ งเติ ม ด ว ย สารทํ า ความเย็ น R32 โดยละเอี... - Page 21 อั น ตราย ใช โ ดยผู ช ํ า นาญงานเท า นั ้ น • ป ด ตั ว จ า ยไฟหลั ก ก อ นการปฏิ บ ั ต ิ ง านที ่ เ กี ่ ย วข อ งกั บ ไฟฟ า ให แ นใจว า ได ป ด สวิ ต ช ไ ฟ •...
- Page 22 ห า มใช ส ารทํ า ความเย็ น ใดๆ ที ่ แ ตกต า งไปจากที ่ ร ะบุ ไ ว ใ ห ส ํ า หรั บ การเติ ม หรื อ การเปลี ่ ย น • มิ ฉ ะนั ้ น อาจมี แ รงดั น สู ง ผิ ด ปกติ แ พร ก ระจายเข า สู ว งจรการทํ า ความเย็ น ซึ ่ ง ทํ า ให ผลิ...
- Page 23 ข อ ควรระวั ง ถ า เครองถู ก นํ ้ า หรื อ ความชื ้ น ก อ นการติ ด ตั ้ ง อาจทํ า ให เ กิ ด ไฟฟ า ลั ด วงจรได • อย า เก็ บ เครองไว ใ นห อ งใต ด ิ น ที ่ ช ื ้ น หรื อ ให เ ครองถู ก ฝนหรื อ นํ ้ า หลั...
-
Page 24: อุ ป กรณ เ สริ ม และชิ ้ น ส ว นในการติ ด ตั ้ ง
อุ ป กรณ เ สริ ม และชิ ้ น ส ว นในการติ ด ตั ้ ง อุ ป กรณ เ สริ ม และชิ ้ น ส ว นในการติ ด ตั ้ ง ตั ว เคร องภายใน หมายเลข ช อชิ ้ น ส ว น หมายเลข... -
Page 25: ผั ง การติ ด ตั ้ ง ตั ว เคร องภายในและภายนอก
ช อ งรั บ อากาศ ด า นก า ซ 9.52 มม. Ø อย า งละชิ ้ น (42TVCA010, 013) 12.70 มม. Ø (42TVCA018) วั ส ดุ ท ี ่ ใ ช เ ป น ฉนวนท อ ช อ งระบายอากาศ... -
Page 26: ตั ว เคร องภายใน
ตั ว เคร องภายใน ตั ว เคร องภายใน สถานที ่ ต ิ ด ตั ้ ง เว น ที ่ เ พ อให ม ี ร ะยะในการเคล อนที ่ ข องหน า กากด า นหน า และระยะเคล อนที ่ ข อง •... -
Page 27: การติ ด ตั ้ ง ท อ น้ ํ า ทิ ้ ง และท อ ส ง
ตั ด ทางออกของท อ จากด า นในของแผงด า นหน า โดยใช เ ลอยฉลุ ห รื อ เครองมื อ ที ่ การติ ด ตั ้ ง ท อ น้ ํ า ทิ ้ ง และท อ ส ง • ใกล เ คี ย ง เสี... -
Page 28: การติ ด ตั ว เคร องภายใน
วิ ธ ี ก ารถอดจุ ก ป ด ท อ นํ ้ า ทิ ้ ง ข อ ควรระวั ง ใช ค ี ม ปากแหลมหนี บ จุ ก ป ด ท อ นํ ้ า ทิ ้ ง แล ว ดึ ง ออก •... -
Page 29: การระบายน้ ํ า
การระบายน้ ํ า ข อ ควรระวั ง การติ ด ตั ้ ง ตั ว เครองภายในไปยั ง แผ น ติ ด ตั ้ ง 1. ปล อ ยท อ น้ ํ า ทิ ้ ง ให ล าดลง ส ว นล า งของเครองภายในอาจลอยขึ ้ น มา เนองจากสภาพของระบบท อ และ •... -
Page 30: ตั ว เคร องภายนอก
ตั ว เคร องภายนอก ตั ว เคร องภายนอก สถานที ่ ต ิ ด ตั ้ ง การต อ ท อ ส ง สารทํ า ความเย็ น การบานท อ สถานที ่ ซ ึ ่ ง มี พ ื ้ น ที ่ โ ดยรอบตั ว เคร องภายนอกตามที ่ แ สดงไว ใ นผั ง การติ ด ตั ้ ง •... -
Page 31: การไล อ ากาศออก
ข อ ควรระวั ง ในการควบคุ ม วาล ว ร ว ม การไล อ ากาศออก เป ด ก า นวาล ว ออกตลอดทาง แต อ ย า เป ด เกิ น ตั ว สต อ ปเปอร • หลั ง ต อ ท อ ส ง เข า ตั ว เคร องภายใน คุ ณ สามารถไล อ ากาศพร อ มกั น ได ขนาดท... -
Page 32: การทํ า งานเกี ่ ย วกั บ ไฟฟ า
การทํ า งานเกี ่ ย วกั บ ไฟฟ า การทํ า งานเกี ่ ย วกั บ ไฟฟ า รุ น 42TVCA010 42TVCA013 42TVCA018 แหล ง จ า ยไฟฟ า เฟส 50Hz, 220V 1 กระแสไฟฟ า สู ง สุ ด... -
Page 33: แหล ง จ า ยไฟและการเช อมต อ สายเช อมต อ
แหล ง จ า ยไฟและการเช อมต อ สายเช อมต อ กํ า ลั ง กระแสไฟฟ า ของแหล ง จ า ยไฟที ่ บ ล็ อ คขั ้ ว ต อ ของตั ว เคร องภายนอก ตั ว เครองภายใน ตั ว เครองภายนอก สายเช... -
Page 34: ระบบอ นๆ
ระบบอ น ๆ ระบบอ น ๆ การทดสอบการรั ่ ว ของสารทํ า ความเย็ น การทดสอบ เพ อสลั บ ไปยั ง โหมด TEST RUN (COOL) กดปุ ม [RESET] ค า งไว น าน 10 วิ น าที (จะเกิ ด เสี ย งป บ สั ้ น ๆ) จุ... -
Page 35: การติ ด ตั ้ ง ผ า ตกแต ง
การติ ด ตั ้ ง ผ า ตกแต ง ผ า ตกแต ง สํ า หรั บ คลุ ม ที ่ ห น า กากด า นหน า ของตั ว เครองภายใน ซึ ่ ง เป น อุ ป กรณ เ สริ ม ผู... - Page 37 MEMO...
- Page 38 MEMO...
- Page 40 1129850104...