Advertisement
Quick Links
Read all instructions BEFORE assembly and USE of product.
KEEP INSTRUCTIONS FOR FUTURE USE.
Lea todas las instrucciones ANTES de armar y USAR este
producto. GUARDE LAS INSTRUCCIONES PARA USO FUTURO.
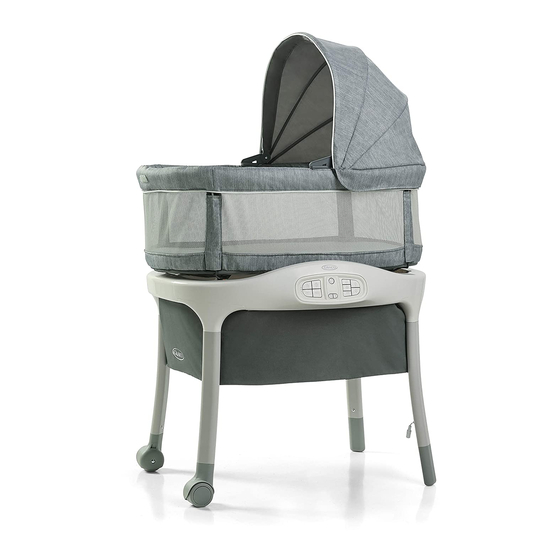
Sense2Snooze
Move 'n Soothe™ Bassinet
with Cry Detection™ Technology
Moisés Move 'n Soothe™
Sense2Snooze
with Tecnología Cry Detection™
©2019 Graco NWL0000990705C 11/19
Advertisement

Related Manuals for Graco Move'n Soothe Bassinet


Summary of Contents for Graco Move'n Soothe Bassinet
- Page 1 KEEP INSTRUCTIONS FOR FUTURE USE. Lea todas las instrucciones ANTES de armar y USAR este producto. GUARDE LAS INSTRUCCIONES PARA USO FUTURO. Sense2Snooze Move 'n Soothe™ Bassinet with Cry Detection™ Technology Moisés Move ‘n Soothe™ Sense2Snooze with Tecnología Cry Detection™ ©2019 Graco NWL0000990705C 11/19...
-
Page 2: Features • Características
1 WARNING • ADVERTENCIA Pages • Páginas 2 Features • Características Page • Página Parts List • Lista de Piezas 3 Assembly • Ensamblaje 10-18 Pages • Páginas Base Assembly • Ensamblaje de la Base Bassinet Assembly • Ensamblaje Moisés Canopy •Capota 4 Use •... - Page 3 • On soft bedding. Use ONLY mattress pad provided by Graco. NEVER add a pillow, comforter, or another mattress for padding. • Product can roll over on soft surfaces and suffocate child. Never place product on beds, sofas, cushions, or other soft surfaces.
- Page 4 • To reduce the risk of SIDS, • Do not move product with infant pediatricians recommend in it. healthy infants be placed on • ALWAYS place child in the their backs to sleep, unless center of bassinet. otherwise advised by your physician.
- Page 5 Changes or modifications not expressly approved by the party responsible for compliance could void the user’s authority to operate the equipment. This device complies with part 15 of the FCC Rules. Operation is subject to the following two conditions: (1) This device may not cause harmful interference, and (2) this device must accept any interference received, including interference that may cause undesired operation.
- Page 6 • En ropa de cama blanda. Use SOLAMENTE el colchón proporcionado por Graco. NUNCA agregue una almohada, edredón, u otro colchón como acolchado. • El producto puede darse vuelva sobre superficies suaves y el niño puede asfixiarse.
- Page 7 ADVERTENCIA • No use el producto como una • PELIGRO DE cama para automóvil. ESTRANGULAMIENTO: ¡Los cordones pueden causar la • Nunca ponga a un niño debajo estrangulación! No ponga del producto. artículos con un cordón • Para reducir el riesgo del SMIS, alrededor del cuello de un niño, los pediatras recomiendan que como por ejemplo los cordones...
- Page 8 ADVERTENCIA Los cambios o modificaciones no expresamente aprobados por la parte responsable del cumplimiento podrían anular la autoridad del usuario para usar el equipo. Este dispositivo cumple con la parte 15 de las Normas de la Comisión Federal de Comunicaciones (FCC por sus siglas en inglés). El funcionamiento está...
- Page 9 2-A Parts List • Lista de Piezas This model may not include some Este modelo podría no incluir algunas de features shown below. Check las características que se that you have all the parts for this indican a continuación. Verifique que model BEFORE assembling your tenga todas las piezas de este modelo product.
- Page 10 Base Assembly • Ensamblaje de la Base Plug Tomacorriente 1. Place base on floor with leg opening facing up as shown. 1. Ponga la base sobre el piso con las aberturas para las patas hacia arriba como se muestra. Plug Tomacorriente 2.
- Page 11 4. Insert leg into opening in base. CHECK leg is assembled by SNAP! pulling up on it. ¡CRAC! 4. Introduzca la pata en la abertura de la base. VERIFIQUE que la pata esté ensamblada tirando hacia arriba de ella. 5. Assemble other three legs as shown.
- Page 12 Base Connector Tubes • Tubos Conectores de la Base Screw Opening Abertura para el tornillo 1. Attach connector tube that requires a screw to the mounts SNAP! ¡CRAC! as shown. 1. Asegure el tubo del conector que requiere un tornillo a los montantes como se muestra.
- Page 13 3. Attach other connector tube to other mounts as shown. SNAP! ¡CRAC! 3. Conecte el otro tubo conector a los otros montantes como se muestra. SNAP! ¡CRAC! Bassinet Assembly • Ensamblaje Moisés 1. Place bassinet on floor with mattress facing down. 1.
- Page 14 3. Snap the wires into mounts on bottom of bassinet. 3. Trabe los cables en los montantes de la parte inferior del moisés. SNAP! ¡CRAC! SNAP! ¡CRAC! 4. Rotate bassinet support tubes open. 4. Gire los tubos de soporte del moisés para abrirlos.
- Page 15 5. Align the wires from the bassinet and the base to the same side. 5. Alinee los cables del moisés y de la base en el mismo lado. Plugs Enchufes 6. Attach bassinet connector tubes to base tubes as shown. SNAP! ¡CRAC! NOTE: Align plug end on bassinet...
- Page 16 7. Connect the wire underneath the bassinet to wire on frame. 7. Conecte el cable bajo el moisés al cable del armazón. 8. CHECK that bassinet is assembled to frame by pulling up on it. 8. VERIFIQUE que el moisés esté ensamblado con el armazón tirando hacia arriba de él.
- Page 17 Canopy • Capota NOTE: Canopy can be attached on either end of the bassinet, depending on the preferred orientation. NOTAS: La capota puede instalarse en ambos extremos del moisés, dependiendo de la orientación que prefiera. 1. Slide canopy ends onto mounts on bassinet until you hear a click.
- Page 18 Adjusting Canopy Direction • Ajuste de la Dirección de la Capota NOTE: Canopy can be attached on either end of the bassinet, depending on the preferred orientation. NOTAS: La capota puede instalarse en ambos extremos del moisés, dependiendo de la orientación que prefiera.
- Page 19 Proteja el cordón eléctrico. Colóquelo donde nadie camine encima de él ni resulte pinzado por muebles u otros artículos. Use SOLAMENTE el adaptador de corriente aprobado por Graco. ADVERTENCIA Peligro de estrangulación: Mantenga este cordón lejos del alcance de los niños.
- Page 20 1. Connect wall plug to cord on leg of bassinet. 1. Conecte el tomacorriente de pared al cable de la pata del moisés.
- Page 21 Bassinet Controls • Controles del Moisés Power Button White Noise Botón de encendido Control Brightness Ruido blanco Control de brillo Music Volume Up Speed Up Música Subir el Aumentar la volumen velocidad Speed Indicator LED Volume LED indicadora Down de la velocidad Bajar el volumen Vibration...
- Page 22 TO TURN BASSINET ON: Press power button ( ) on, and select desired motion to start the bassinet. Change speed if needed by pressing speed up ( ) for faster speeds or speed down ( ) for slower. Power LED lights to indicate that the unit is on.
- Page 23 (Speed Buttons) Speed Up Press Speed Up button ( ) to increase Acelerar la velocidad speed. Press Speed Down button Seat Speed Switch Increase Seat Speed Switch Increase Brightnes Brightness ( ( ) to decrease speed. There are 3 speeds. Press Speed Down button ( ) 3 times to turn speed off.
- Page 24 crease HOLD=CURRENT SETTING NEW PRESET 1 Vibration (high, low, o ) (Vibration Button) MANTENGA PRESIONADO Press Vibration button ( ) to choose = EL AJUSTEACTUAL SERÁ LA NUEVA vibration setting. User can also press PRECONFIGURACIÓN 1 and hold vibration button. The LEDs will quickly flash for low and will flash Preset 1 a few times more for high when the...
- Page 25 Bassinet Sound Controls • Controles de Sonido del Moisés Power Button Music (Music Button) Press Music button ( ) to turn music on. Power Button Music All 10 songs will play in turn and then start again with the first song. Skip a song by pressing the music button.
- Page 26 NT SETTING RESET 2 Nature Sounds (Nature Button) RESIONADO CTUAL Press Nature button ( ) to turn nature sounds on. URACIÓN 2 There are 10 nature sounds. The selected nature sound will play continuously until a different sound is selected. Skip to the next sound by pressing the nature button.
- Page 27 Music Music Music Music (Sound Volume Buttons) Sound Volume Up Press Volume Up button Aumento del volumen del increase volume. Press Volume sonido Down button ( to decrease volume. Volume (+) Volume (+) Volume (+) Volume (+) User can also press and hold volume buttons.
- Page 28 Power Button Music Power Button Music only low) (low, high, power only low) Preset Settings • Ajustes Preconfigurados Presets save the bassinet control settings to allow caregivers to save favorite Power Button Music settings. Las preconfiguraciones guardan los ajustes del moisés para que los cuidadores puedan guardar aquellos que son sus preferidos.
- Page 29 Problem Solving • Solución de problemas BASSINET WON’T OPERATE: 1. Not using original wall plug. 2. Baby too heavy or too active. (Discontinue use.) 3. If bassinet is not moving, check for obstacle blocking bassinet or that load is not over 20 lb (9 kg). BASSINET ISN’T MOVING SMOOTHLY: 1.
-
Page 30: Care And Maintenance
• FROM TIME TO TIME, CHECK YOUR PRODUCT for loose screws, worn parts, torn material, or stitching. Replace or repair the parts as needed. Use only Graco replacement parts. • TO CLEAN PRODUCT, wipe clean with damp cloth. • TO CLEAN MATTRESS COVER, see page 31. - Page 31 To Clean Mattress Cover • Cómo Limpiar la Funda del Colchón 1. Remove mattress from bassinet. 1. Saque el colchón del moisés. 2. Separate hook and loop tabs and remove mattress pad from mattress cover. See label on mattress cover for proper cleaning.
- Page 32 We currently do not accept product registrations from those living outside the United States of America. Para registrar su producto Graco desde dentro de los EE.UU., visítenos en línea en www.gracobaby.com/productregistration, o envíe la tarjeta de registro provista con su producto.