Mr. Heater MHVFRD10NG Operating Instructions And Owner's Manual
Unvented natural gas fired room heater
Hide thumbs
Also See for MHVFRD10NG:
- Operating instructions and owner's manual (16 pages) ,
- Operating instructions and owner's manual (16 pages)
Table of Contents
Advertisement
Quick Links
READ INSTRUCTIONS CAREFULLY: YOUR SAFETY IS IMPORTANT TO YOU AND TO OTHERS Read and
follow all instructions. Place instructions in a safe place for future reference. Do not allow anyone who has
not read these instructions to assemble, light, adjust or operate the heater.
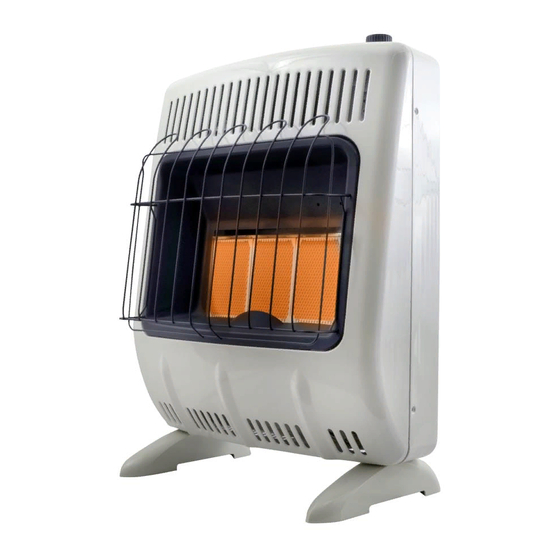
UNVENTED NATURAL GAS FIRED ROOM HEATER
WARNING: If the information in this manual is not followed exactly, a fire or explosion
may result causing property damage, personal injury, or loss of life.
- Do not store or use gasoline or other flammable vapors and liquids in the vicinity of this or any
other appliance.
- WHAT TO DO IF YOU SMELL GAS
• Do not try to light any appliance.
• Do not touch any electrical switch; do not use any phone in your building.
• Immediately call your gas supplier from a neighbor's phone. Follow the gas supplier's instructions.
• If you cannot reach your gas supplier, call the fire department.
- Installation and service must be performed by a qualified installer, service agency or the gas supplier.
This is an unvented gas-fired heater. It uses air (oxygen) from the room in which it is installed.
Provisions for adequate combustion and ventilation air must be provided. Refer to Fresh Air for
Combustion and Ventilation section on page 4 of this manual.
This appliance may be installed in an aftermarket permanently manufactured (mobile) home,
where not prohibited by local codes.
This appliance is only for use with the type of gas indicated on the rating plate. This appliance is
not convertible for use with any other gas.
Unvented Natural Gas Fired Room Heater
OPERATING INSTRUCTIONS
AND OWNER'S MANUAL
Plaque Heaters
MHVFRD10NG
INSTALLER: Leave this manual with the appliance.
CONSUMER: Retain this manual for future reference.
Mr. Heater, Inc., 4560 W. 160
Blue Flame Heaters
MHVFBF10NG
ST., CLEVELAND, OHIO 44135 · 800-251-0001
TH
1
Installation Instructions and Owner's Manual
Model #
MHVFRD10NG
MHVFBF10NG
Advertisement
Table of Contents

Related Manuals for Mr. Heater MHVFRD10NG


Summary of Contents for Mr. Heater MHVFRD10NG
- Page 1 This appliance is only for use with the type of gas indicated on the rating plate. This appliance is not convertible for use with any other gas. Mr. Heater, Inc., 4560 W. 160 ST., CLEVELAND, OHIO 44135 · 800-251-0001 Unvented Natural Gas Fired Room Heater...
-
Page 2: Warnings
SOCIAL MEDIA In order to provide the best service possible Mr. Heater is now giving you more ways to get in touch with us: WEBSITE: Mr. Heater’s full line of product are now at: www.mrheater.com FACEBOOK: Find us on Facebook TWITTER: Find us on twitter YouTube: There are now informational videos on Youtube. -
Page 3: Table Of Contents
PRECAUTIONS: 1. Either of the 10,000 BTU (2931 W) units (the DANGER: Carbon monoxide poisoning may lead to MHVFRD10NG or the MHVFBF10NG) may be installed death. in a bedroom, but shall not be installed in a bathroom Carbon Monoxide Poisoning: or any place where a strong wind would shut down the appliance. -
Page 4: Determining The Type Of Heater Location Space
SAFETY DEVICE c. Caulking or sealants are applied to areas such as joints around windows and door frames, between wall- This heater has a pilot with an Oxygen Depletion Sensor ceiling joints, between wall panels, at penetrations (ODS) safety shut off system. The ODS/pilot shuts off the for plumbing, electrical, and gas lines, and at other heater if there is not enough fresh air. -
Page 5: Installation
3. Add the Btu/hr of all the fuel-burning appliances in the space such as, Vent–free heater, Gas water heater, Gas furnace, Vented gas heater, Gas fireplace logs, and Other gas appliances* (30.5 cm)12” *Do not include direct-vent gas appliances. Direct-vent draws combustion air from the outdoors and vents to the outdoors. -
Page 6: Fastening Heater To Wall
CHECK GAS TYPE CAUTION: If you install the heater in a home garage: Use only natural gas. If your gas supply is not natural gas, • Heater pilot and burner must be at least 18 inches do not install heater. Call dealer where you bought heater above floor . - Page 7 Attaching Mounting Bracket to Wall are in hardware package. The hardware package is provided with heater. Use holes on each end of mounting bracket to attach Drill holes at marked locations using 5/16” drill bit. bracket to wall. These holes are 16 inches apart. Attach For solid walls (concrete or masonry), drill at least mounting bracket to wall in one of two following ways.
-
Page 8: Floor Mounting Away From Wall
4. If installing bottom mounting screw into hollow CONNECTING TO GAS SUPPLY or solid wall, install wall anchors. Follow steps 1 WARNING: A qualified service person must connect through 4 under Attaching to Wall using Anchor. heater to gas supply. Follow all local codes. If installing bottom mounting screw into wall stud, WARNING: This appliance requires a 3/8”... - Page 9 Low Pressure Test Pressure Equal To or Less Than ½ psig (3.5 kPa) HEATER CABINET 1. Close equipment shutoff valve (see figure 13) 3/8” NPT Pipe Nipple Pressure 2. Pressurize supply piping system by either using Regulator Ground Joint Union compressed air or opening main gas valve on or near gas Nipple meter.
-
Page 10: Operating Your Heater
When lighting the pilot, follow these instructions a qualified service person or gas supplier for repairs. exactly. 8. FOR MHVFRD10NG: B. BEFORE LIGHTING smell all around the appliance area • Turn control knob to “HI” to light heater. Leave on “HI”... -
Page 11: Cleaning And Maintenance
INSPECTING BURNER using compressed air no greater than 30 psig. Check pilot flame pattern and burner flame pattern often. This can be done by using a vacuum cleaner in the blow position or using compressed air in a can. If using canned PILOT FLAME PATTERN air please follow the directions on the can. -
Page 12: Troubleshooting
TROUBLESHOOTING NOTE: All troubleshooting items are listed in order of operation and likely occurrence. WARNING: Only a qualified service person should service and repair heater. CAUTION: Never use a wire needle, or similar object to clean ODS/pilot. This can damage ODS/pilot unit. Make sure grille guard is in place before running heater. - Page 13 OBSERVED SYMPTOM POSSIBLE CAUSE REMEDY Turning control knob to HI position when Turn control knob to LO position and let warm up for a minute burner is cold Air in gas line Operate burner until air is removed from line have gas line Heater produces a checked by local gas company whistling noise when...
-
Page 14: Parts List And Diagram
PARTS LIST AND DIAGRAM MODEL: MHVFBF10NG ITEM PART DESCRIPTION ITEM PART DESCRIPTION 80055 Regulator Mounting Bracket 80121 Wire Guard Floor Mounting Feet (Beige) 80058 Front Panel (Beige) 80051 80214 Floor Mounting Feet (White) 80201 Front Panel (White) Regulator Connection 80038 Glass Back Panel (Beige) 80052... - Page 15 PARTS LIST AND DIAGRAM MODEL: MHVFRD10NG ITEM PART DESCRIPTION ITEM PART DESCRIPTION 80040 Wire Guard Regulator Connection Front Panel (Beige) 80051 80036 Wall Mounting Bracket 80201 Front Panel (White) Back Panel (Beige) 80052 80177 Back Panel (White) 80022 Reflector 80115...
-
Page 16: Warranty
Mr. Heater, Inc. warrants its heaters and accessories to be free from defects in material and workmanship for a period of 1 year from date of purchase. Mr. Heater, Inc. will repair or replace this product free of charge if it has been proven to be defective within the 1-year period, and is returned at customer expense with proof of purchase to Mr.