Table of Contents
Advertisement
Advertisement
Table of Contents

Related Manuals for Zte Z233V


Summary of Contents for Zte Z233V
- Page 1 Z233V User Manual...
- Page 2 About This Manual Thank you for choosing this ZTE mobile device. In order to keep your device in its best condition, please read this manual and keep it for future reference. Copyright Copyright © 2016 ZTE CORPORATION All rights reserved.
- Page 3 Google and Android are trademarks of Google, Inc. ® The Bluetooth trademark and logos are owned by the Bluetooth SIG, Inc. and any use of such trademarks by ZTE Corporation is under license. microSDHC Logo is a trademark of SD-3C, LLC. ®...
- Page 4 WARNING: This product contains a chemical known to the State of California to cause cancer, birth defects or other reproductive harm. Version No.: R1.0 Edition Time: September 22, 2016 Manual No.:...
-
Page 5: Table Of Contents
Contents Getting Started ............10 Getting to Know Your Phone ..........10 Knowing the Keys ............12 Installing the micro-UIM Card and microSDHC Card (Not Included) ................13 Removing the micro-UIM Card and microSDHC Card ..16 Charging the Battery ............16 Extending the Battery Life .......... - Page 6 Monitoring the Phone Status ..........27 Checking Notification Icons ..........28 Checking External Screen Icons ........28 Entering Text ..............29 Opening and Switching Apps ........... 31 Connecting to Networks and Devices ....32 Connecting to Mobile Networks ........32 Connecting to Bluetooth Devices ........
- Page 7 Editing Contacts ............... 51 Working With Groups ............53 Messages ............... 56 Opening the Messages Screen ........56 Sending a Message ............56 Replying to a Message ............. 57 Forwarding a Message ............. 58 Copying a Message ............58 Changing Message Settings ..........58 Calendar ..............
- Page 8 Gallery ..............67 Opening Gallery ............... 67 Working With Albums ............67 Working With Pictures ............68 Playing Videos ..............69 Music ............... 70 Viewing Your Music Library ..........70 Playing Music ..............70 Managing Playlists ............72 Video Player ............73 Opening the Video Library ..........
- Page 9 Calculator ................ 79 Weather ................79 Downloads ............... 80 File Manager ..............80 Settings ..............82 Profiles................82 General Settings .............. 82 Device ................85 Personal ................87 Troubleshooting ............. 89 For Your Safety ............94 General Safety ..............94 Radio Frequency (RF) Energy ..........
-
Page 10: Getting Started
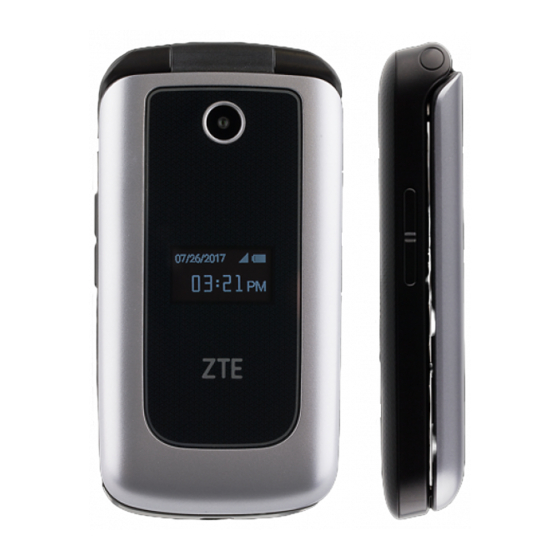
Getting Started Getting to Know Your Phone Earpiece Internal screen Navigation keys (Up/Down/Left/Right Center key key) Left soft key Right soft key Send key Power/end key Recent apps key Clear key Camera key * key Vibration mode key Main microphone Charging/ micro-USB jack... - Page 11 External screen Camera Auxiliary microphone Headset jack Speaker Volume key Back cover...
-
Page 12: Knowing The Keys
Knowing the Keys Function Press and hold to turn on or off airplane Power/end key mode, power off or restart the phone. Press to end a call, reject an incoming call or cancel dialing. Press to return to the home screen. ... -
Page 13: Installing The Micro-Uim Card And Microsdhc Card (Not Included)
Function Camera key Press in the home screen or app list screen to activate the camera. Clear key Press or hold to delete characters on the left of the cursor when entering text or numbers. Press and hold in the home screen to ... - Page 14 cards, or any non-standard micro-UIM card cut from a UIM card. You can get a standard micro-UIM card from your service provider. 1. Insert your fingernail into the slot at the bottom left of the back cover and lift it up gently. 2.
- Page 15 3. Insert the battery by aligning the metal contacts on the battery with the metal contacts in the battery compartment. Gently push down on the battery until it clicks into place. 4. Replace the back cover.
-
Page 16: Removing The Micro-Uim Card And Microsdhc Card
Removing the micro-UIM Card and microSDHC Card Power off your phone before installing or removing the micro-UIM card and microSDHC card. 1. Open the back cover and remove the battery. 2. A soft block beside the card slot keeps the card in place. Press the soft block down and slide the micro-UIM card or microSDHC card out. - Page 17 WARNING! Use only ZTE-approved chargers and cables. The use of unapproved accessories could damage your phone or cause the battery to explode. 1. Connect the adapter to the charging jack. 2. Connect the charger to a standard AC power outlet. If the phone is on, you’ll see a charging icon, such as...
-
Page 18: Extending The Battery Life
after charging the phone for at least 20 minutes. Contact the customer service if you still cannot power on the phone after prolonged charging. Extending the Battery Life Active applications, screen brightness levels, Bluetooth usage and GPS functionality can drain your battery. You can follow the helpful tips below to conserve your battery power: ... -
Page 19: Getting To Know The Home Screen
settings before using it. Select the language and then follow the prompts to set up your phone. Getting to Know the Home Screen The home screen is the starting point for your phone’s applications, functions, and menus. Status bar Open the app list Contacts Messages... -
Page 20: Personalizing
Personalizing Changing the System Language 1. From the home screen, select > Settings > General settings > Language & input > Language. 2. Select the language you need. Setting the Date and Time 1. From the home screen, select > Settings > General settings >... -
Page 21: Changing Ringtone And Notification Sound
Changing Ringtone and Notification Sound You can customize the default incoming call ringtone and the default notification sound. 1. From the home screen, select > Settings > Profiles. 2. Select General and press the Left soft key. 3. Select Phone ringtone or Default notification ringtone and press the Center key. -
Page 22: Adjusting Volume
Adjusting Volume 1. From the home screen, select > Settings > Profiles. 2. Select General and press the Left soft key. 3. Select the slider below Media volume, Alarm volume, Ring volume or Notification volume. 4. Press the Left/Right key to adjust the volume. NOTE: You can adjust the media volume when a media application is in use by pressing the Volume key. -
Page 23: Applying New Wallpapers
NOTE: To restore normal sound settings, press or hold the Volume up key. Applying New Wallpapers You can set the wallpaper for the home screen. 1. From the home screen, select > Settings > General settings > Display > Wallpaper. 2. -
Page 24: Protecting Your Phone With The Anti-Theft Feature
CAUTION: Remember the PIN you set. Otherwise, you will have to contact the customer service and upgrade the phone software to use the phone. Protecting Your Phone With the Anti-Theft Feature If your phone is lost or stolen, you can use the Anti-Theft feature to lock your phone, erase all data in your phone, or make the phone sound the alarm remotely. - Page 25 The trusted email address can receive the new number if the micro-UIM card on your lost phone is changed. It can also control the lost phone remotely by sending certain commands. 6. Enter your name in the security email content and press the Center key.
- Page 26 NOTE: The command must be listed in the email subject. To turn off the Anti-Theft feature: 1. From the home screen, select > Settings > Personal > Security > Anti-Theft. 2. Select the on/off switch and press the Center key. 3.
-
Page 27: Knowing The Basics
Knowing the Basics Monitoring the Phone Status The status bar at the top of the home screen provides phone and service status icons on the right side. Below are some of the icons you may see. No signal 2G connected Signal strength 3G connected Mobile data in use... -
Page 28: Checking Notification Icons
Checking Notification Icons The status bar at the top of the home screen provides notification icons on the left. Below are some of the icons you may see. New SMS New MMS USB connected Wired headset Missed call connected Call in progress Song playing Checking External Screen Icons You can also check the phone status and notification alerts with... -
Page 29: Entering Text
Entering Text {Change Input Mode or Language When you are in a field that allows characters to be entered, the text input mode indicator is shown on the right side of the status bar. You can enter text using the following input modes: T12 abc, T12 Abc, T12 ABC, abc, Abc, ABC, and number input. - Page 30 Hold the Clear key to delete all entered text to the left of the cursor. {Enter Letters (abc / Abc / ABC) Press a number key (2 ~ 9) multiple times until the preferred letter is shown on the screen. Press once to enter the first letter on the keypad;...
-
Page 31: Opening And Switching Apps
Opening and Switching Apps Open an App 1. Press the Power/end key if the current screen is not the home screen. 2. Select by pressing the Center key. 3. Use the Navigation keys and the Center key to select and open an app. -
Page 32: Connecting To Networks And Devices
Connecting to Networks and Devices Connecting to Mobile Networks Control Mobile Data Use To enable or disable data access: 1. From the home screen, select > Settings > General settings > Mobile networks. 2. Select Mobile Data and press the Center key to turn on or off the switch. -
Page 33: Connecting To Bluetooth Devices
1. From the home screen, select > Settings > General settings > Mobile networks > Access Point Names. 2. Select > New APN. 3. Select each item to enter the information you get from your service provider. 4. Select > Save to complete. NOTE: To set the APN to default settings, select >... - Page 34 Change the Device Name 1. From the home screen, select > Settings > General settings > Bluetooth. 2. Turn on the Bluetooth switch if Bluetooth is off. 3. Select > Rename this device. 4. Edit the name and press the Center key. Pair With Another Bluetooth Device 1.
- Page 35 that device. Forget (Unpair With) a Bluetooth Device You can make your phone forget its pairing connection with another Bluetooth device. To connect to the device again, you need to search it and enter or confirm a passkey again. 1. From the home screen, select >...
-
Page 36: Connecting To Your Computer Via Usb
card is installed, received files are stored automatically in a dedicated folder (Bluetooth, for instance). You can access them with the File Manager app. Connecting to Your Computer via USB You can connect your phone to a computer with a USB cable and transfer music, pictures, and other files in both directions. - Page 37 NOTE: To make your phone connect to the computer automatically using the selected connection type, select Don’t ask me again and press the Center key to check it. Disconnect Your Phone From the Computer To disconnect the phone from the computer, simply unplug the USB cable when you’re finished.
-
Page 38: Phone Calls
Phone Calls You can place calls from the Recent Calls app, the Contacts app, or other apps that display contact information. Placing and Ending Calls Place a Call by Dialing 1. Press the Power/end key to access the home screen. 2. -
Page 39: Answering Or Rejecting Calls
Answering or Rejecting Calls When you receive a phone call, you can answer or reject the call, or reject it with a text message. Answer a Call When you receive a phone call, press the Send key or the Center key to answer the call. NOTE: You can also answer a call by opening the phone flip. -
Page 40: Working With The Call History
screen. Working With the Call History The call history is a list of all the calls you've placed, received, or missed. It provides a convenient way to redial a number, return a call, or add a number to your contacts. To open the call history, select >... -
Page 41: Calling Your Contacts
key to view more call information. While viewing the call details, you can: Select > Remove from call log to delete the entry. Select > Edit number before call to edit the number in the dialer before calling it. Select >... -
Page 42: Using Options During A Call
password. 3. Follow the voice prompts to listen to and manage your voicemail messages. NOTE: Set Voicemail for how to set your voicemail service. For detailed information, please contact the service provider. Using Options During a Call During a call, the following options are available. ... -
Page 43: Managing Multi-Party Calls
Managing Multi-party Calls When the call waiting and three-way call features are available, you can switch between two calls or set up a conference call. NOTE: The call waiting and three-way call features need network support and may result in additional charges. Please contact your service provider for more information. -
Page 44: Adjusting Your Call Settings
1. Place the first call. 2. Once you have established the connection, select > Add call and dial the second number. (This puts the first caller on hold.) 3. When you’re connected to the second party, select > Merge calls. If one of the people you called hangs up during your call, you and the remaining caller stay connected. - Page 45 Set Voicemail 1. From the home screen, select > Settings > Device > Call settings > Carrier Setting > Voicemail. 2. Configure the following voicemail settings. Service: Select the voicemail service provider. Your carrier is the default. Setup > Voicemail number: View the voicemail number. ...
- Page 46 you press and hold the * key in the dialer. Check Setup Plus Code Replacement to enable this feature, and select Replace Code of Plus Code to change the code. Set Phone Flip Action You can answer or end/reject a call by opening or closing the phone flip.
- Page 47 TTY HCO: Users who can hear, but cannot talk, may use this mode to listen to conversation of the other party, and respond via text messages. TTY VCO: Users who can talk, but cannot hear, may use this mode to talk through the phone and receive responses via text messages.
-
Page 48: Contacts
3. Select Call duration and press the Center key to set the wait time before the phone answers the call automatically; Select Auto answer conditions and press the Center key to set the auto answer condition for your wired or Bluetooth headset. Edit Quick Response to Rejected Callers 1. -
Page 49: Adding A New Contact
tab to access your contact list. 2. In the search field below, input the contact name, phone number or any information the contact has to search for it. The contacts matched will be listed. Adding a New Contact From the home screen, select >... -
Page 50: Importing, Exporting, And Sharing Contacts
tab to access your contact list. Select Set up my profile and press the Center key. Edit your profile information. Select > Done. Importing, Exporting, and Sharing Contacts You can import/export contacts from/to the phone storage or the microSDHC card. This is especially useful when you need to transfer contacts between different devices. -
Page 51: Editing Contacts
2. Select > Import/Export > Export to storage. 3. The phone will prompt you with the name of the vCard file and the directory in which the file will be saved. Press the Center key to create the file. Share Contacts 1. - Page 52 2. Select > Multi-Select. 3. Check the contact you want to remove and then select > Delete. 4. Press the Center key to confirm. Join Contacts You can merge all the separate information of a contact into one entry in the contacts list. 1.
-
Page 53: Working With Groups
your phone. 1. From the home screen, select > Contacts. 2. Select a contact you have merged and want to separate, and then press the Center key. 3. Press the Center key. 4. Select > Separate. 5. Press the Center key to confirm. Working With Groups View Your Contact Groups From the home screen, select... - Page 54 tab. Select > Create group to create a new group. Select the Group’s name field and enter the group name. Select below MEMBER and press the Center key, and then check the contacts you wish to be the group members. Select >...
- Page 55 Select a group and press the Center key. Select > Edit group. Select the group name to edit it, or select below MEMBER or RINGTONE to add more members or change the ringtone. Select > Save. NOTE: To remove group members, open a group in the tab and select >...
-
Page 56: Messages
Messages You can use Messages to exchange text messages (SMS) and multimedia messages (MMS). Opening the Messages Screen From the home screen, select > Messages. The Messages screen opens, where you can create a new message or open an ongoing message thread. ... -
Page 57: Replying To A Message
To remove a recipient, press the Clear key. 3. Select the text box at the bottom and enter the content of your text message. 4. If you want to send a multimedia message, select > Insert attach or > Add subject to attach a file or subject to the message. -
Page 58: Forwarding A Message
Forwarding a Message 1. On the Messages screen, open the thread that has the message you want to forward. 2. Select the message and press the Center key. 3. Select Forward in the menu that opens and press the Center key. 4. -
Page 59: Calendar
Calendar To open Calendar, select > Calendar from the home screen. You can use the calendar, set appointments, and view events. Viewing Your Calendars and Events Change Calendar Views You can view your calendars in different forms. The app offers three view types: Month, Week and Agenda. -
Page 60: Creating An Event
switch to Agenda view. Then open an event to view its details. Creating an Event 1. In any Calendar view, select > New event. 2. Enter the event details and press the Left soft key. Editing, Deleting or Sharing an Event 1. -
Page 61: Web Browser
Web Browser Use Browser to view web pages and search for information. Opening the Browser From the home screen, select > Browser to launch the web browser. The browser also opens when you open a web link - for example, in a text message. To visit a website: 1. -
Page 62: Adding A Website To Bookmarks
> Homepage in the Browser screen. 1. Open the Browser app. 2. Select > Settings > Set homepage. 3. Enter the URL and press the Center key to set it as the homepage. Adding a Website to Bookmarks 1. Open the Browser app. 2. -
Page 63: Changing Browser Settings
Changing Browser Settings You can configure a number of settings to customize the way you browse the web. To open the Browser settings screen, select > Settings in the browser screen. -
Page 64: Camera
Camera You can use your phone to take photos and record videos. Photos and videos are stored on the microSDHC card you have installed or in the phone storage. You can copy them to your computer or access them in the Gallery app. Capturing a Photo 1. -
Page 65: Recording A Video
To use the filter, select > Filter and choose one. To change white balance scenario, photo brightness or ISO, select > White balance/Brightness/ISO and make the adjustment. To set the camera and camcorder options, select > Settings. To view pictures and videos you have taken, press the ... -
Page 66: Customizing Camera/Camcorder Settings
during recording. 4. Press the Center key or the Camera key to start recording. You can also press the Left soft key to pause or resume recording. 5. Press the Center key or the Camera key again to stop recording. Customizing Camera/Camcorder Settings Before capturing a photo or a video, you can select... -
Page 67: Gallery
Gallery Opening Gallery From the home screen, select > Gallery to view albums of your pictures and videos. Working With Albums When you open the Gallery, all pictures and videos on your phone are displayed in a number of albums by default. Scroll up and down to see them all. -
Page 68: Working With Pictures
2. Select > Multi-select. 3. Select the items you want to delete and press the Center key to highlight them. 4. Select > Delete. 5. Press the Center key to confirm. Working With Pictures Select a picture in an album and press the Center key to view... -
Page 69: Playing Videos
When viewing a picture, the following features are available. Press the Center key to view the picture in full screen. Press the Left key or the Right key to see more pictures or videos. Select > Delete to delete the picture. ... -
Page 70: Music
Music From the home screen, select > Multimedia > Music to play audio files stored on your phone. Viewing Your Music Library From the home screen, select > Multimedia > Music and your music library is displayed. All your audio files are cataloged according to the information stored in the files. - Page 71 The playback screen shows the track information and album artwork (if available). The following options are available. To pause or resume the playback, press the Center key. To skip songs, press the Left key or the Right key. ...
-
Page 72: Managing Playlists
To check the track information, select > Track Info. To return to the music screen, press the Right soft key. To close the Music app, select > Exit. Managing Playlists Create playlists to organize your music files into sets of songs, so that you can play the songs you like in the order you prefer. -
Page 73: Video Player
Video Player Use the Video app to manage your video library and watch videos. Opening the Video Library From the home screen, select > Multimedia > Video to view your video library, where your video files are displayed in a list. -
Page 74: Managing Video Files
To view the file details, select > Details. Managing Video Files Delete Video Clips 1. Select > Multi-Select in the video library. 2. Check the videos you want to delete. 3. Select > Delete and press the Center key to confirm. Share Video Clips 1. -
Page 75: Fm Radio
FM Radio With the FM radio, you can search for radio channels, listen to them, and save them on your phone. Note that the quality of the radio broadcast depends on the coverage of the radio station in your area. The wired headset works as an antenna, so always connect the headset when using the radio. -
Page 76: Deleting A Saved Channel
3. Select a channel and press the Center key to listen to it. In the main FM radio screen, you can press the Up key or the Down key to adjust the channel frequency, or press the Left key or the Right key to switch to other channels. Deleting a Saved Channel 1. -
Page 77: Sound Recorder
Sound Recorder Sound Recorder enables you to record voice memos and listen to them whenever you like. Recording a Voice Memo 1. From the home screen, select > Multimedia > Sound Recorder. 2. Press the Center key to start recording. During recording, press the Center key to pause or continue the recording. -
Page 78: More Apps
More Apps Clock From the home screen, select > Clock. The Clock app allows you to check local time in places around the world, set alarms, and use timers. Set a New Alarm 1. Select the tab in the Clock app. 2. -
Page 79: Calculator
Use the Stopwatch and Countdown Select the tab in the Clock app to use the stopwatch or the countdown timer. Stopwatch allows you to record lap times, while countdown allows you to set a time and count down to zero. Calculator From the home screen, select >... -
Page 80: Downloads
the Center key to turn on the switch. To add a city: 1. Select > Manage city in the Weather app. 2. Select > Add city. 3. Enter the city name and press the Center key. 4. Select the city you need from the search results and press the Center key. - Page 81 Select folders and files and press the Center key to access stored items. Select an item and select to access more options. Select > New folder to create a new folder in the current directory.
-
Page 82: Settings
Settings From the home screen, select > Settings. The Settings app contains most of the tools for customizing and configuring your phone. Profiles You can set and edit an appropriate profile depending on your current environment. 1. From the home screen, select >... - Page 83 Bluetooth From the home screen, select > Settings > General settings > Bluetooth. You can turn Bluetooth on or off and configure your Bluetooth connections. See Connecting to Bluetooth Devices. Location From the home screen, select > Settings > General settings >...
- Page 84 settings > Mobile networks to control mobile data use or set access point names. See Connecting to Mobile Networks. Display From the home screen, select > Settings > General settings > Display to configure the following options. Brightness level: Set the brightness of the display. ...
-
Page 85: Device
Language and Input From the home screen, select > Settings > General settings > Language & input to configure options related to system language, input methods and speech output. Language: Select a language for your system. Keyboard & input methods: Configure text input settings. ... - Page 86 You can check how much data has been used during the time cycle you set, set data usage warning and limit, see what apps have been using mobile data, or restrict background data for individual apps. NOTE: The data usage is measured by your phone, and your carrier’s data usage accounting may differ.
-
Page 87: Personal
settings to set the call options. See Adjusting Your Call Settings. Accessibility From the home screen, select > Settings > Device > Accessibility to configure accessibility plug-ins and services on your phone. About Phone From the home screen, select > Settings > Device > About phone to view the phone status and other information, or select Software Update to check for the phone software updates. - Page 88 screen. Set up SIM card lock: Lock SIM card: Activate or deactivate the PIN lock to require PIN before accessing the micro-UIM card. Change SIM PIN: Change the PIN used to access the micro-UIM card. NOTE: Put all your confidential passwords in a safe place for future use.
-
Page 89: Troubleshooting
Troubleshooting If you encounter problems while using the phone, or if it performs abnormally, you can refer to the chart below. If your particular problem cannot be resolved using the information in the chart, contact the dealer where you purchased the phone. Problem Possible causes Possible solution... - Page 90 Problem Possible causes Possible solution End the call and dial The network link quality again. You may be is poor on the part of switched to a your service provider. better-quality network link or phone line. Echo or noise End the call and dial The quality of the phone again.
- Page 91 Problem Possible causes Possible solution The standby time is related to your service provider system configuration. The same If you are located in an phone used with area where signaling is different service weak, temporarily power providers’ systems will off the phone. not provide exactly the same length of standby time.
- Page 92 Problem Possible causes Possible solution Cannot turn Battery power has been Recharge the phone’s your phone depleted. battery. The micro-UIM card Take the micro-UIM card malfunctions or is to your service provider damaged. for testing. micro-UIM The micro-UIM card is Insert the micro-UIM card error inserted improperly.
- Page 93 Problem Possible causes Possible solution Contact your service provider. If the service You have entered an provider provides the PIN Code incorrect PIN code three micro-UIM card’s PUK blocked consecutive times. code, use the PUK code to unlock the micro-UIM card.
-
Page 94: For Your Safety
For Your Safety General Safety Don’t make or receive handheld calls while Don’t use at gas driving. Never text stations. while driving. Keep your phone at Your phone may least 15 mm away produce a bright or from your body while flashing light. -
Page 95: Radio Frequency (Rf) Energy
Keep away from Avoid contact with pacemakers and other liquids. Keep your electronic medical phone dry. devices. Turn off when asked to Do not attempt to in hospitals and disassemble your medical facilities. phone. Turn off when told to in Only use approved aircrafts and airports. - Page 96 of 15 mm. Although the SAR is determined at the highest certified power level, the actual SAR level of the device while operating can be well below the maximum value. This is because the phone is designed to operate at multiple power levels so as to use only the power required to reach the network.
-
Page 97: Fcc Regulations
SAR compliance for body-worn operation is based on a separation distance of 15 mm between the unit and the human body. Carry this device at least 15 mm away from your body to ensure RF exposure level compliant or lower to the reported level. -
Page 98: Hearing Aid Compatibility (Hac) Regulations For Mobile Phones
limits for a Class B digital device, pursuant to part 15 of the FCC Rules. These limits are designed to provide reasonable protection against harmful interference in a residential installation. This equipment generates, uses and can radiate radio frequency energy and, if not installed and used in accordance with the instructions, may cause harmful interference to radio communications. - Page 99 interference with hearing aids or cochlear implants, digital wireless phones sometimes do because of electromagnetic energy emitted by the phone's antenna, backlight, or other components. Your phone is compliant with FCC HAC regulations (ANSI C63.19- 2011). While some wireless phones are used near some hearing devices (hearing aids and cochlear implants), users may detect a buzzing, humming, or whining noise.
-
Page 100: Ctia Requirements
about return or exchange policies, consult your service provider or phone retailer. M-Ratings: Phones rated M3 or M4 meet FCC requirements and are likely to generate less interference to hearing devices than phones that are not labeled. M4 is the better/higher of the two ratings. - Page 101 qualified with the system per CTIA Certification Requirements for Battery System Compliance to IEEE 1725. Use of an unqualified battery or charger may present a risk of fire, explosion, leakage, or other hazard. Do not short circuit a battery or allow metallic conductive objects to contact the battery terminals.
-
Page 102: Distraction
{{{Distraction {Driving Full attention must be given to driving at all times in order to reduce the risk of an accident. Using a phone while driving (even with a hands free kit) can cause distraction and lead to an accident. You must comply with local laws and regulations restricting the use of wireless devices while driving. - Page 103 operations or lower image quality. Clean your phone and its accessories with a soft material such as cleaning cloth for eyeglass lenses. Do not use alcohol or other corrosive substances for cleaning or allow them to get inside. Do not expose your phone or its accessories to open flames or lit tobacco products.
- Page 104 Please check local regulations for disposal of electronic products. Do not carry your phone in your back pocket as it could break when you sit down. {Small Children Do not leave your phone and its accessories within the reach of small children or allow them to play with it.
- Page 105 {Normal Use Position When placing or receiving a phone call, hold your phone to your ear, with the bottom toward your mouth. {Air Bags Do not place your phone in the area over an air bag or in the air bag deployment area as an airbag inflates with great force and serious injury could occur.
-
Page 106: Electrical Safety
Use the special features which are designed to minimize the times of pressing buttons, such as Message Templates and Predictive Text. Take frequent breaks to stretch and relax. {Emergency Calls This phone, like any other wireless phone, operates using radio signals, which cannot guarantee connection in all conditions. -
Page 107: Radio Frequency Interference
rings, or allow them to contact or short-circuit the charging jack terminals. Never puncture the surface of the phone with sharp objects. {Connection to a Car Seek professional advice when connecting a phone interface to the vehicle electrical system. {Faulty and Damaged Products Do not attempt to disassemble the phone or its accessories. - Page 108 {Pacemakers Pacemaker manufacturers recommend that a minimum separation of 15 cm be maintained between a mobile phone and a pacemaker to avoid potential interference with the pacemaker. To achieve this, use the phone on the opposite ear to your pacemaker and do not carry it in a breast pocket. {Hearing Aids People with hearing aids or other cochlear implants may experience interfering noises when using wireless devices or...
-
Page 109: Explosive Environments
Consult the airline staff about the use of wireless devices on board the aircraft and enable airplane mode of your phone when boarding an aircraft. Interference in Vehicles Please note that because of possible interference to electronic equipment, some vehicle manufacturers forbid the use of mobile phones in their vehicles unless a hands-free kit with an external antenna is included in the installation. -
Page 110: Specifications
Specifications Handset specifications are shown in the following table. Handset standard LTE/CDMA Dimensions 4.26" (H) x2.18" (W) x 0.73" (D) Weight 4.59 oz. (with battery) Display 2.8 inch 240×320 Camera 2 MP Internal memory ROM: 4 GB, RAM: 512 MB Removable Supports microSDHC card up to memory card... - Page 111 Bluetooth NOTE: The phone’s talk time and idle time are based on ideal working environments. The use of extended backlighting, browser, and network conditions can reduce battery life and talk/idle time.