Table of Contents
Advertisement
Advertisement
Table of Contents

Related Manuals for JVC LX-NZ3


Summary of Contents for JVC LX-NZ3
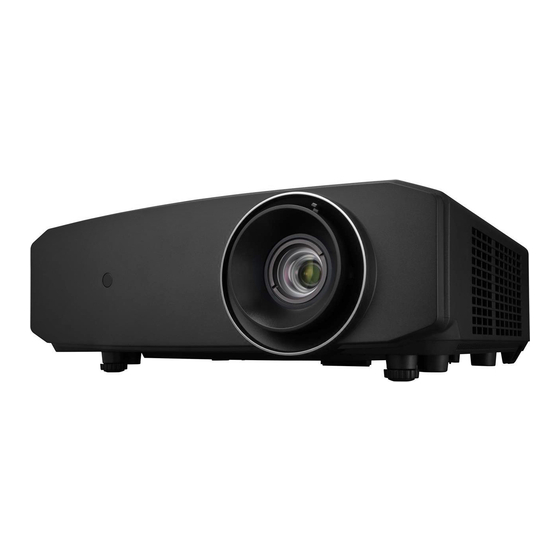
- Page 1 USER MANUAL DLP PROJECTOR LX-NZ3...
-
Page 2: Table Of Contents
Table of contents Safety precautions....3 Light source information ... 33 Getting to know the light source hour Important safety instructions ............33 ..........4 Extending light source life....33 Indicators ........34 Overview ....... 9 Troubleshooting ......35 Shipping contents......9 Specifications...... -
Page 3: Safety Precautions
• Consult the dealer or an experienced radio/TV technician for help. Declaration of Conformity Model Number: LX-NZ3BG, LX-NZ3WG, LX-NZ3BK, LX-NZ3WK Trade Name: JVC Responsible party: JVCKENWOOD USA Corporation Address: 500 Valley Road, Suite 203 Wayne, NJ 07470 Telephone Number: 973-317-5000 This device complies with Part 15 of the FCC Rules. -
Page 4: Important Safety Instructions
Dear Customer, This apparatus is in conformance with the valid European directives and standards regarding electromagnetic compatibility and electrical safety. European representative of JVCKENWOOD Corporation is: JVCKENWOOD Deutschland GmbH Konrad-Adenauer-Allee 1-11, 61118 Bad Vilbel, GERMANY Information for Users on Disposal of Old Equipment and Batteries [European Union only] These symbols indicate that equipment with these symbols should not be disposed of as general household waste. - Page 5 8. Do not place liquids near or on the projector. Liquids spilled into the projector will void your warranty. If the projector does become wet, disconnect it from the power outlet and contact to have the projector repaired. 9. Do not look straight into the projector lens during operation. It may harm your sight. RG2 IEC 62471-5:2015 10.
- Page 6 crucial internal parts. To prevent the projector from possible damage, do not use the projector for at least 2 hours when there is a sudden change in temperature. Avoid volatile liquids Do not use volatile liquids, such as insecticide or certain types of cleaner, near the projector. Do not have rubber or plastic products touching the projector for a long time.
- Page 7 The APERTURE LABEL is located on the top cover. APERTURE LABEL WARNING LASER RADIATION AVOID DIRECT EYE EXPOSURE CLASS 3R LASER PRODUCT CAUTION Do not look into the lens while in use. Light source specifications 95 W Laser diodes x 1 Wavelength 449 - 461 nm Maximum output is 64 mW Beam divergence angle from lens of this unit...
- Page 8 CAUTION Use of controls or adjustments or performance of procedures other than those specified herein may result in hazardous radiation exposure. Location information of the label LASER CAUTION LABEL IEC62471-5 Location information of the icon As with any bright light source, do not stare into the beam, RG2 IEC62471-5:2015 Important safety instructions...
-
Page 9: Overview
Overview Shipping contents Carefully unpack and verify that you have the items below. Some of the items may not be available depending on your region of purchase. Please check with your place of purchase. Some of the accessories may vary from region to region. Projector Remote control and batteries User manual CD... -
Page 10: Projector Exterior View
Projector exterior view Front and upper side view 1. Vent (heated air exhaust) 2. Front IR remote sensor 3. Zoom ring Adjusts the size of the projected image. 4. Projection lens 5. Control panel (See "Control panel" for details.) 6. Lens shift knob (Left/Right) Adjusts the horizontal position of the projected image. -
Page 11: Controls And Functions
Controls and functions Control panel 8. POWER indicator light POWER Lights up or flashes when the projector is Toggles the projector between standby under operation. mode and on. 9. Keystone keys ( 2. Top IR remote sensor 3. TEMPerature warning light Launches the Keystone window. -
Page 12: Remote Control
Remote control 8. OK Activates the selected On-Screen Display (OSD) menu item. 9. MENU Displays the menu, or hides the menu if it is displayed. 10. BRIGHTNESS Displays the setting bar for brightness adjustment. POWER Toggles the projector between standby mode and on. - Page 13 Installing/replacing the remote control battery 1. To open the battery cover, turn the remote control over to view its back, press on the finger grip on the cover and slide it up in the direction of the arrow as illustrated. 2.
-
Page 14: Installation
Installation Choosing a location Before choosing an installation location for your projector, take the following factors into consideration: • Size and position of your screen • Electrical outlet location • Location and distance between the projector and the rest of your equipment You can install your projector in the following ways. -
Page 15: Obtaining A Preferred Projected Image Size
Obtaining a preferred projected image size The distance from the projector lens to the screen, the zoom setting, and the video format each factors in the projected image size. To shift the lens, turn the knobs on the projector to shift the projection lens in any direction within the allowable range depending on your desired image position Front projection... - Page 16 Size of the projected Screen size Projection distance (E) image (F) Offset Offset Offset (A) (C, D) Shortest Longest Diagonal Height Width (Wide) (Tele) Inch Inch Inch Inch Inch Inch Inch Inch 131 332 177 80.9 205 30.1 139 354 189 86.3 219 32.1 148 376 201...
-
Page 17: Connection
Connection When connecting a signal source to the projector, be sure to: 1. Turn all equipment off before making any connections. 2. Use the correct signal cables for each source. 3. Make sure the cables are firmly inserted. In the connection illustrations shown below, cables are not included with the projector (see "Shipping contents"). -
Page 18: Operation
Operation Starting up the projector 1. Plug the power cable into the projector and a power outlet. Turn on the power outlet switch (where fitted). The POWER indicator light on the projector lights orange after power has been applied. Please use the supplied power cable to avoid possible dangers such as electric shock and fire. -
Page 19: Selecting An Input Source
Selecting an input source The projector can be connected to multiple equipment at the same time. However, it only displays one full screen at a time. When starting up, the projector automatically searches for the available signals. If you want the projector to always automatically search for the signals: •... -
Page 20: Adjusting The Projected Image
Adjusting the projected image Adjusting the projection angle The projector is equipped with 2 adjuster feet. These adjusters change the image height and projection angle. Screw the feet in or out as appropriate to aim and level the projection angle. Do not look into the lens while the If the screen and the projector are not perpendicular to each other, the projected image becomes vertical trapezoidal. -
Page 21: Menu Functions
Menu Functions About the OSD Menus To access the OSD menu, press MENU. Using the OSD menu Main menu icon main menu PICTURE Highlight Picture Mode User Mode Settings Status Brightness Contrast Sub-menu Color Tint Press BACK to Sharpness go back to the Advanced Reset Current Picture previous... -
Page 22: Picture Menu
PICTURE menu Submenu Functions and Descriptions Selects a preset picture mode to suit your operating environment and input signal picture type. The preset picture modes are described as below: • Natural: With well-balanced color saturation and contrast with a low brightness level, this is most suitable for video images. - Page 23 Submenu Functions and Descriptions Makes the picture look sharper or softer. The higher the value, the sharper the Sharpness picture becomes. The lower the value, the softer the picture becomes. • Select Gamma Gamma refers to the relationship between input source and picture brightness. •...
- Page 24 Submenu Functions and Descriptions • 3D Color Management Provides six sets (RGBCMY) of colors to be adjusted. You can select any of them to adjust its color range and saturation. 1. Press OK to display the 3D Color Management window. 2.
-
Page 25: Display Menu
Submenu Functions and Descriptions • HDR Settings • Auto/HDR10 / HLG/ The projector supports HDR imaging sources. It can automatically detect the dynamic range of the source, and optimize settings to reproduce contents under wide range of light conditions. If the input source is not defined with dynamic range, you can Advanced also manually select HDR10, HLG or SDR for it. -
Page 26: Installation Menu
Submenu Functions and Descriptions Conceals the poor picture quality in the four edges. Overscan The greater the value, the more portion of the picture is concealed while the Adjustment screen remains filled and geometrically accurate. Setting 0 means the picture is 100% displayed. -
Page 27: System Setup: Basic Menu
Color Allows you to select which logo screen displays during projector start-up. You Splash Screen can choose JVC logo screen, Blue screen, or Black screen. Prevents unnecessary projection when no signal is detected for a long time. Auto Power Off "Setting Auto Power Off"... -
Page 28: System Setup: Advanced Menu
If you forget the password, seek help from the local JVC service center. You may be required to provide proof of purchase documentation to verify that you are an authorized user of the projector. - Page 29 Submenu Functions and Descriptions Resolution Displays the native resolution of the input source. Color System Displays input system format. MaxCLL Displays the Maximum Content Light Level detected. MaxFALL Displays the Maximum Frame Average Light detected. Light Source Displays the number of hours the light source has been used. Usage Time Shows the firmware version of your projector.
-
Page 30: Osd Menu Structure
OSD menu structure The OSD menus vary according to the signal type selected. Main menu Submenu Options Picture Mode Natural/Cinema/Dynamic/User 1/User 2 Load Settings Natural/Cinema/Dynamic/User 1/User 2 User Mode Settings Rename User Mode Brightness Contrast Color Tint Sharpness 1.8/2.0/2.1/2.2/2.3/2.4/2.6/Contrast Priority/ Select Gamma Brightness Priority Preset... - Page 31 Main menu Submenu Options Language Norsk Background Color Green/Black/Blue Splash Screen Black/Blue/JVC Disable/5 min/10 min/15 min/ SYSTEM Auto Power Off 20 min/25 min/30 min SETUP: Basic Direct Power On Off/On Center/Top-Left/Top-Right/ Menu Position Bottom-Right/Bottom-Left Menu Settings Always On/5 sec/10 sec/15 sec/20 sec/25...
-
Page 32: Maintenance
Maintenance Care of the projector Cleaning the lens Clean the lens whenever you notice dirt or dust on the surface. Before cleaning any part of the projector, turn it off using the proper shutdown procedure (see "Shutting down the projector"), unplug the power cable, and let it cool down completely. •... -
Page 33: Light Source Information
Light source information Getting to know the light source hour When the projector is in operation, the duration (in hours) of light source usage is automatically calculated by the built-in timer. To obtain the light source hour information: 1. Press MENU. INSTALLATION >... -
Page 34: Indicators
Indicators There are 3 indicators which show the status of the projector. Check the following information about the indicator lights. If there is anything wrong, turn the projector off and contact your dealer. Light Status & Description Power events Stand-by mode Orange Green Powering up... -
Page 35: Troubleshooting
Troubleshooting Problem Cause Remedy Plug the power cable into the AC inlet on the rear of the projector, and plug the There is no power from the power power cable into to the power outlet. If the cable. The projector does power outlet has a switch, make sure that not turn on. -
Page 36: Specifications
Specifications Projector specifications All specifications are subject to change without notice. Optical Input terminals Resolution Computer input 1920 x 1080 RGB input 3840 x 2160 with e-shift D-Sub 15-pin (female) x 1 Display system Video signal input Single-chip DLP system SD/HDTV signal input Digital - HDMI x 2 Lens... -
Page 37: Dimensions
Dimensions 405 mm x 341 mm x 145.8 mm (15 7/8" x 13 1/2" x 5 3/4") (W x D x H) Unit: mm (inches) 405 (15 7/8") 100.8 Ceiling mount screws: M4 Length = 8 mm Maintenance... -
Page 38: Timing Chart
Timing chart Supported timing for PC input Horizontal Pixel Refresh rate Format Resolution Frequency Frequency (Hz) (KHz) (MHz) 720 x 400 720 x 400_70 70.087 31.469 28.3221 VGA_60 59.940 31.469 25.175 VGA_72 72.809 37.861 31.500 640 x 480 VGA_75 75.000 37.500 31.500 VGA_85... - Page 39 SXGA_60 60.020 63.981 108.000 1280 x 1024 SXGA_75 75.025 79.976 135.000 SXGA_85 85.024 91.146 157.500 1280 x 960_60 60.000 60.000 1280 x 960 1280 x 960_85 85.002 85.938 148.500 1360 x 768 1360 x 768_60 60.015 47.712 85.500 WXGA+_60 55.469 88.75 (Reduce Blanking) 1440 x 900...
- Page 40 Supported timing for HDMI (HDCP) input Vertical Horizontal Pixel Format Resolution Frequency Frequency Frequency (Hz) (KHz) (MHz) VGA_60 59.940 31.469 25.175 VGA_72 72.809 37.861 31.500 640 x 480 VGA_75 75.000 37.500 31.500 VGA_85 85.008 43.269 36.000 720 x 400 720 x 400_70 70.087 31.469 28.3221...
- Page 41 1280 x 960_60 60.000 60.000 1280 x 960 1280 x 960_85 85.002 85.938 148.500 1360 x 768 1360 x 768_60 60.015 47.712 85.500 WXGA+_60 55.469 88.75 (Reduce Blanking) 1440 x 900 WXGA+_60 59.887 55.935 106.500 1400 x 1050 SXGA+_60 59.978 65.317 121.750 1600 x 1200...
- Page 42 Vertical Horizontal Pixel Frequency Timing Resolution Frequency (Hz) Frequency (KHz) (MHz) 480i 720 (1440) x 480 59.94 15.73 480p 720 x 480 59.94 31.47 576i 720 (1440) x 576 15.63 576p 720 x 576 31.25 720/50p 1280 x 720 37.5 74.25 720/60p 1280 x 720...
-
Page 43: Warranty And Copyright Information
Warranty and Copyright information Warranty warrants this product against any defects in material and workmanship, under normal usage and storage. Proof of purchase date will be required with any warranty claim. In the event this product is found to be defective within the warranty period, ’s only obligation and your exclusive remedy shall be replacement of any defective parts (labor included).