
Related Manuals for Videonics TM-2000

Summary of Contents for Videonics TM-2000
- Page 1 Videonics Video TitleMaker 2000 MODEL TM-2000 INSTRUCTION MANUAL VIDEONICS The Video Editing Company...
- Page 2 MODEL TM-2000 INSTRUCTION MANUAL TM-2000 Video TitleMaker 2000 Instruction Manual • MANL-0526-02 • © 1994 Videonics, Inc. The Videonics logo, Thumbs Up, and Videonics Video TitleMaker are registered trademarks of Videonics, Inc. TM-2000 and MX-1 Digital Video Mixer are trademarks of Videonics.
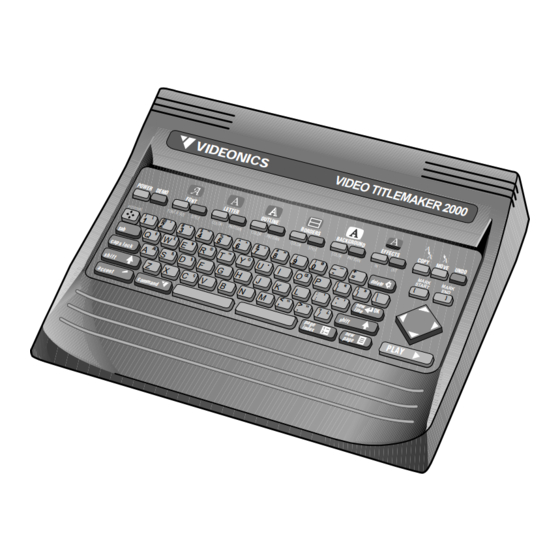
- Page 3 VIDEONICS POWER DEMO FONT FONT & SIZE STYLE POSITION ¡ ´ ¢ £ Æ ß caps lock shift accent command 1. POWER key turns unit on. POWER light illuminates when power is on. When unit is off, video is passed from VIDEO IN to VIDEO OUT as long as power supply is plugged into live outlet.
- Page 4 12. DELETE. Erases marked text, if any. Otherwise, erases character before the cursor. 13. MARK START and MARK END. Mark text to modify, delete, copy, or move it. Position cursor before first character and press MARK START. Position after last character and press MARK END.
-
Page 5: Table Of Contents
Contents Chapter 1 • Introduction ... 1 In a Hurry? ... 1 Helpful Hints ... 1 What is a Video Titler? ... 1 What is the TitleMaker 2000? ... 1 Basic Applications ... 2 Equipment ... 3 Chapter 2 • QuickStart ... 4 Chapter 3 •... - Page 6 Contents Changes ... 46 Copying Characteristics ... 47 Chapter 13 • Fonts, Sizes, and Styles... 48 Font and Size ... 48 Upper-Case-Only and Fonts and Mixed Fonts ... 49 Hints on Using Fonts and Sizes ... 49 Title Style ... 49 Hints on Using Styles ...
-
Page 7: Chapter 1 • Introduction
VIDEONICS TITLEMAKER 2000 Chapter 1 • Introduction Congratulations on your purchase of the Videonics Video TitleMaker 2000. With the TitleMaker 2000, you can add brilliant, full color titles to all your videos. Its wide choice of fonts, sizes, styles, colors, borders, backgrounds, fades, wipes, scroll, crawl, and more make the TitleMaker 2000 a creative tool for anyone who uses video. -
Page 8: Basic Applications
PAGE 2 • Create and hold over 8000 characters of text, divided into hundreds of pages. Divide your pages into projects. • Copy and move text, to revise titles without retyping. • Position text anywhere on the page, including automatic centering. •... -
Page 9: Equipment
VIDEONICS TITLEMAKER 2000 to combine the presentation with video footage, such as shots of a new product or of the factory sites. Equipment Your Video TitleMaker comes with: • Power supply • This manual • Product registration card. You may need to purchase cables to connect audio and video equipment to the TitleMaker. -
Page 10: Chapter 2 • Quickstart
PAGE 4 Chapter 2 • QuickStart Whether you’re a video expert looking for just the basic steps or a beginner who wants instant gratification, this chapter will have you titling in minutes! This chapter describes just the basics. Many features and applications are skipped or mentioned only briefly. - Page 11 VIDEONICS TITLEMAKER 2000 Power On/Off Press POWER and the power light comes on. You should see a screen (called the POWER Editing Screen) on the OUTPUT monitor, similar to the one in the illustration below. Press POWER again to turn power off. Titles are retained in the TitleMaker 2000’s memory even if the unit is unplugged.
- Page 12 PAGE 6 Pages Titles are divided into pages. A page is a screenful of titles. You create a new page by pressing the NEW PAGE key. In this example, we page typed “Sherlock Holmes,” then NEW PAGE, then “221B Baker Street.” That produces the following Editing Screen and Play Screens: Sherlock Holmes...
- Page 13 VIDEONICS TITLEMAKER 2000 PAGE 7 Moving the Cursor If you want to add text somewhere other than where the cursor is, use the arrow keys to move the cursor. Hold SHIFT as you press the UP or DOWN arrow keys to move a page at a time.
- Page 14 PAGE 8 • Add borders and change their type, color, and pattern. • Use effects to start and end a page of titles. • Make text scroll and crawl. Each menu works the same way: If there are sub-menus, use MARK START to switch between sub-menus.
- Page 15 VIDEONICS TITLEMAKER 2000 Making Titles Come and Go In a production, you may want superimposed titles to appear for a while, then disappear. To do this, place blank pages with video backgrounds between pages of titles. Create a page of superimposed titles. At the end of the page, press NEW PAGE but don’t type anything on this page.
- Page 16 PAGE 10 VIDEONICS TITLEMAKER 2000 Playing the Pages When the pages are complete, move the cursor to the start of the first page and press PLAY. Shortcut: To play all the pages in the project, press COMMAND + PLAY. Each page will be displayed, in sequence, using the selected durations and effects.
-
Page 17: Chapter 3 • Connections
VIDEONICS TITLEMAKER 2000 Chapter 3 • Connections Connections: Overall Concept VIDEONICS VIDEO TITLEMAKER 2000 The first diagram (1) shows a typical video production setup. The TitleMaker 2000 is connected between a video source (A), which plays the picture to which you will add titles, and a recorder (C), which will record the results. -
Page 18: Types Of Input And Output Jacks
PAGE 12 B An OUTPUT monitor. The monitor will be connected to a recording VCR in most cases. Required connections depend on the VCR. You can use any arrangement that will allow you to view tapes played on the VCR. C A Record VCR. -
Page 19: In And Out Markings
VIDEONICS TITLEMAKER 2000 output. In other words: Use S-video (Y/C) jacks if your source and re- corder are both equipped with them; use only the composite (RCA-style) jacks if either lacks S-video jacks. If you are using the S-video output jacks, you must use S-video for the input. -
Page 20: Connection Diagram
PAGE 14 Connection Diagram This diagram shows the connections for a typical titling setup. The sec- tions that follow provide detailed instructions. AUDIO VIDEO Connecting Power Connect the power supply (C) to the POWER input and plug it into a working power outlet. -
Page 21: Connecting Outputs And Monitors
VIDEONICS TITLEMAKER 2000 • To assure reliable storage of titles, always press POWER and be sure the power light is out before you unplug the power supply. Here’s why: Titles are retained by the built-in lithium battery when you turn the power off. Even when the unit is unplugged, all titles remain intact, including all settings and formatting. - Page 22 PAGE 16 AUDIO IN or to an external amplifier and speakers. Set the OUTPUT monitor’s input switch. Important: If the television/monitor you are using has an input selection switch, set it so it is displaying the correct input. For instance, if you have connected to the monitor’s VIDEO 1 input jack, you would choose VIDEO 1 as your input.
-
Page 23: Connecting A Video Source
VIDEONICS TITLEMAKER 2000 only has an RF (cable/antenna) jack, you will need a spare VCR or an RF modulator to convert the RCA-style output to RF.) Test the PREVIEW connection (if used). Turn the PREVIEW monitor on. Press DEMO. You should see a series of titles. -
Page 24: Troubleshooting Hints
PAGE 18 S-video output and the composite (RCA) input, an on-screen warning appears to remind you to use the S-video input. Test the input connections. Press POWER to turn the TitleMaker 2000 off. The input video is passed through to the output, so you should see the input video on the OUTPUT monitor. -
Page 25: Connecting Editing Equipment
VIDEONICS TITLEMAKER 2000 Chapter 4 • Connecting Editing Equipment The TitleMaker 2000 is compatible with a wide range of editing equipment, such as edit controllers, video processors, and video mixers. It can be connected in a variety of ways, depending on what you plan to do and what equipment you have. -
Page 26: Single-Source Editing Setup
PAGE 20 VIDEONICS THUMBS UP ™ Video Editor In the first setup, the camcorder (A) is connected through Thumbs Up (E) and the TitleMaker 2000 (C) to the recorder (D). In the second setup, the camcorder (A) is connected through a Digital Video Mixer (B) to the TitleMaker 2000 (C) and it is connected to the recorder (D). -
Page 27: Use With Video Processors
VIDEONICS TITLEMAKER 2000 Use with Video Processors A video processor or enhancer may be used as well. Processors are generally connected directly to the camcorder output so they adjust the video before titles are added. Multiple Source Editing with a Video Mixer Advanced editing combines video from more than one source. - Page 28 PAGE 22 GPI Cable A special cable is required. You can buy a Thumbs Up-to-TitleMaker GPI trigger cable from Videonics (part number CBLA-0034-01) or you can buy or make your own. The cable has a stereo male 3.5 mm sub-mini-plug at each end and three wires connect each terminal of one plug to the corresponding terminal of the other.
-
Page 29: Chapter 5 • Using The Demo
VIDEONICS TITLEMAKER 2000 Chapter 5 • Using the Demo The built-in demo is a convenient way to learn what the unit can do. Using the Demo To display the TitleMaker 2000’s built-in demo, turn the unit on and press the DEMO key. The OUTPUT monitor will display a series of titles that describe the unit’s features and applications and demonstrates the kind of effects you can generate. -
Page 30: Using The Demo To Create Titles
PAGE 24 VIDEONICS TITLEMAKER 2000 Using the Demo to Create Titles Instead of creating a new set of titles from scratch, you can start with the demo as raw material. To do this, copy the demo into the Editing Screen as described above. -
Page 31: Chapter 6 • Typing Titles
VIDEONICS TITLEMAKER 2000 Chapter 6 • Typing Titles Creating titles is as simple as typing with the TitleMaker 2000’s full keyboard with upper and lower case, plus special and accented characters. The Editing Screen and Cursor the number of the page (B), the number of the project to which the page belongs (A), the effects that will be used to start and end the page (C and E) and how long the page... -
Page 32: Typing Titles
PAGE 26 Hold COMMAND while you press the UP arrow to go to the top of the first page of text; use COMMAND-DOWN arrow to go to the end of the last page. You can move between projects (explained in Chapter 8) by pressing COMMAND and SHIFT as you press the UP or DOWN arrow. -
Page 33: Columns (Tabs)
VIDEONICS TITLEMAKER 2000 Columns (Tabs) The TAB key is a “smart tab,” designed to make it easy to create columns of information. It works by aligning with the next blank space in the previous line of text. Example: Type a line of text, using spaces to separate the words: Name Now press NEW LINE/OK and type a second line, using the TAB key between words. - Page 34 PAGE 28 In the following list: • “+” indicates that keys are pressed together; you don’t press the “+” key. • Capital letters are used for clarity; you don’t press SHIFT unless it is indicated. Character Keys ç ACCENT + C Ç...
- Page 35 VIDEONICS TITLEMAKER 2000 ACCENTED (LANGUAGE) CHARACTERS The accents above the 2, 3, 4, 5, 6, and 7 keys are used with other letters to make accented letters. For instance, to type ü, you would use ACCENT + 4, followed by the letter U. The capitalized version (Ü) would be displayed using ACCENT + 4, followed by SHIFT + U.
-
Page 36: About Pages
PAGE 30 Chapter 7 • Pages Titles are displayed as pages. Each page is played one at a time. A variety of effects can be used to play the pages. About Pages The TitleMaker 2000 will hold over 8000 characters. They can be divided into pages. -
Page 37: Page Symbols
VIDEONICS TITLEMAKER 2000 Page Symbols A set of page symbols starts each page: • The first symbol (A) indicates the current project (described in the next section). The number indicates the number of the project to which the page belongs. •... -
Page 38: Deleting A Page
PAGE 32 Press NEW LINE/OK to exit the Page Index and return to the Editing Screen. Deleting a Page To delete an entire page and its contents, use the Editing Screen to locate the page. Position the cursor after the very last character of the previous page and press MARK START. -
Page 39: Inserting A Page
VIDEONICS TITLEMAKER 2000 Inserting a Page To add a new page, or divide a page into two pages, position the cursor at the desired location and press NEW PAGE. A new set of page symbols will appear at that point and the new page will inherit the characteristics of the page before it. -
Page 40: Chapter 8 • Projects
PAGE 34 Chapter 8 • Projects You can set up separate titling projects. Each project is stored independently and can be changed without affecting other projects. About Projects With its ability to hold over 8000 characters and retain them even when power is disconnected, the TitleMaker 2000 can hold the titles for many different titling tasks at once. -
Page 41: Viewing Projects
VIDEONICS TITLEMAKER 2000 Viewing Projects The Editing Screen shows one project at a time. The Page Index screen shows all pages and all projects in a list. In both cases, the page symbols always include a project symbol. The number after the project symbol indi- cates the number of the project that includes the page. -
Page 42: Moving Between Projects
PAGE 36 MARK END) and press DELETE. This leaves the project empty. If you have not named the now-empty project, it will be deleted the next time you leave the Page Index screen but if it has been named, it will be saved until you explicitly delete it or delete its name. -
Page 43: Chapter 9 • Changing Titles
VIDEONICS TITLEMAKER 2000 Chapter 9 • Changing Titles You can easily make changes to the text on the screen. You can delete or insert new text, reposition it, and more. You can even copy or move a section of text without retyping. Undo Suppose you delete text and then realize you prefer the way it was. -
Page 44: Marking Whole Lines And
PAGE 38 • Position the cursor after the last letter you wish to change and press MARK END ( ). You can change the markings — simply move the cursor to a new place and press MARK START or MARK END again and the start or end point will move to the new location. -
Page 45: Moving And Copying Text
VIDEONICS TITLEMAKER 2000 Moving and Copying Text Suppose you want to move some text elsewhere on the screen. Or you’d like to copy some text so it appears in two or more places. Or you’d like something to appear many times on a page. You could retype it — but fortunately, there’s an easier way. - Page 46 PAGE 40 Oops? Note that UNDO does not reverse a copy or move operation. However, you can undo the operation by immediately moving the cursor back to the original location and pressing MOVE. Memory If this appears when you copy text, it means the copy filled all of memory.
-
Page 47: Chapter 10 • Positioning Text
VIDEONICS TITLEMAKER 2000 Chapter 10 • Positioning Text You can automatically center each line of text or you can position it against either the right or left edge of the screen. You can also adjust the vertical position of the text on each page, centering the text or positioning it at the top or bottom of the page. -
Page 48: Additional Positioning Hints
PAGE 42 You can vertically position many pages at once by marking text, then adjusting the position. Any page that contains any marked text will be changed. Additional Positioning Hints You can fine-tune the horizontal positioning by adding spaces to the front of each line, or using tabs (see the section, “Tabs,”... -
Page 49: Chapter 11 • How To Use Menus
VIDEONICS TITLEMAKER 2000 Chapter 11 • How to Use Menus Fonts, colors, and other characteristics are defined using menus, which show all the available choices. Concept FONT FONT & SIZE STYLE COLOR The keys in the top row are called menu keys because when you press one, you see a menu on the screen. -
Page 50: Using The Menus
PAGE 44 Using the Menus LETTER COLOR PATTERN Using a menu is simple: • Position the cursor in the line you want to change, or mark the text you want to change. Press the appropriate menu key. If there are sub-menus containing additional choices, use MARK START to determine which sub-menu is active (see the previous section, “Sub- menus”). -
Page 51: How Characteristics Affect Text
VIDEONICS TITLEMAKER 2000 Chapter 12 • How Characteristics Affect Text Some characteristics affect lines and others affect pages. This chapter describes what is affected and gives strategies for efficiently creating titles with the characteristics you desire. Concept The term characteristics refers to all the ways titles can be modified — font, colors, effects, scrolling, etc. -
Page 52: Changes
PAGE 46 Margaret-Bourke White Alfred Stieglitz Harold Edgerton Jerry Uels mann Henri-Cartier Bresson No text has been marked, so the font and color change is applied only to the line that contains the cursor. Note: In the Editing Screen, several pages can appear on the screen at once. The background and borders of the entire screen will always be displayed using just one set of patterns and colors —... -
Page 53: Copying Characteristics
VIDEONICS TITLEMAKER 2000 PAGE 47 Copying Characteristics You can copy characteristics, such as color, font, effects, etc. from one area of text to another. Mark the text you want to change. Move the cursor so it’s immediately after a letter that has the desired characteristic. Press the appro- priate menu key (LETTER COLOR, for instance). -
Page 54: Fonts, Sizes, And Styles
PAGE 48 Chapter 13 • Fonts, Sizes, and Styles TitleMaker 2000 offers a wide variety of ways to add flair to your titles. You can independently change font, size, and style, for hun- dreds of combinations. Font and Size The first menu key brings up the FONT &... -
Page 55: Hints On Using Fonts And Sizes
VIDEONICS TITLEMAKER 2000 line is doubled vertically, and the last line is doubled in both directions. Upper-Case-Only Fonts, Mixed Fonts Some of the fonts have only upper case letters. Whether you type upper or lower case letters, only upper case will be displayed on the screen. If you later change to a font that has upper and lower case, the letters will appear as you typed them. -
Page 56: Hints On Using Styles
PAGE 50 The menu is divided into three sub-menus. Use MARK START to activate the desired sub-menu and the arrow keys to highlight the desired choice. Each line of titles you have typed can use a different style. You can choose any combination —... - Page 57 VIDEONICS TITLEMAKER 2000 • Some combinations will make the text harder to read or less attractive. For instance, if you use the spacing option to place letters closer together, the edges of shadows, outlines, or bold letters may be clipped. If letter spacing is set too tight, letters will be clipped, as in the bottom sample.
-
Page 58: Chapter 14 • Colors
PAGE 52 Chapter 14 • Colors The Video TitleMaker provides over a million colors! In a gaudy mood? You can use rainbow letters with blue outlines on a red tinted video background with green and white patterned borders! Letters, backgrounds, outlines, and borders can be independently colored. The colors can be combined with patterns, including your moving video. -
Page 59: Using The User Colors
VIDEONICS TITLEMAKER 2000 colors a screenful at a time. Press COMMAND + UP jumps to the first of the pre-defined colors; COMMAND + DOWN jumps to the first user-defined color. Press NEW LINE/OK or PLAY and the line or page you had selected uses the color you highlighted. -
Page 60: Hints On Using Colors
PAGE 54 row to highlight the first pre-defined color (which is just below the last user color). The palette will hold up to 64 user colors. When there are 64 and you add another, the color closest to the newly created one will be removed. When a user color is removed from the palette, there is no effect on titles that use the color. -
Page 61: Chapter 15 • Patterns
VIDEONICS TITLEMAKER 2000 Chapter 15 • Patterns With the TitleMaker 2000, you’re not limited to plain solid colors. A variety of patterns, including moving “animated” patterns can be used. They can be colored and changed, for thousands of interesting variations. Finally, you can mix video into the background pattern or color for a “transparent pattern”... -
Page 62: Selecting Different Rainbow And Pixel Patterns
PAGE 56 Selecting Different Rainbow and Pixel Patterns If you selected a rainbow or pixel pattern using the top sub-menu, you can choose from a variety of styles. Use MARK START to make the second sub- menu active and use the arrow keys to highlight different pattern numbers. The patch at the bottom shows you the style you have highlighted. - Page 63 VIDEONICS TITLEMAKER 2000 • When using complex patterns, pay special attention to the choice of title style and size, to avoid making the titles hard to read. Note that complex patterns may not be apparent when used as outlines or shadows. •...
-
Page 64: Chapter 16 • Borders
PAGE 58 Chapter 16 • Borders Borders can be used to separate titles or to add an interesting graphic element. They can use any of the TitleMaker 2000’s colors and patterns. You can place a horizontal border line above or below any line BORDERS BORDERS of text. -
Page 65: Complex Borders
VIDEONICS TITLEMAKER 2000 anywhere in the line and use the menu to select the box. A box will appear around that line. Placing a Line Above, Below, or Between Text Lines You can add a horizontal border line between any two lines of text. Place the cursor on one of the text lines and use the “line above”... -
Page 66: Removing Borders
PAGE 60 Removing borders To remove borders, mark the text and choose the no-border symbol (A) in the BORDER menu. VIDEONICS TITLEMAKER 2000... -
Page 67: Effects, Scrolls, And Crawls
VIDEONICS TITLEMAKER 2000 Chapter 17 • Effects, Scrolls, and Crawls Effects provide interesting transitions between pages of titles. They include simple cuts, fades, wipes, slides, scroll, and crawl. TitleMaker 2000 includes a variety of transition effects. You can use one effect to introduce a page of titles and a separate effect to end the page. -
Page 68: Transition Effects: Cuts, Fades, Slides, And Wipes
PAGE 62 Transition Effects: Cuts, Fades, Slides, and Wipes • A cut (D) makes the page appear or disappear instantly, without any transition. The speed setting doesn’t affect a cut. • A fade (E) causes one page to fade away, then makes the next one fade in. •... -
Page 69: Displaying The Page
VIDEONICS TITLEMAKER 2000 Displaying the Page The third sub-menu (C, previous page), which appears only in the Effects In menu, determines how the title is displayed after the In-Effect is per- formed. You can display the page for a fixed amount of time, cause it to remain until it is manually continued, or use a scroll or crawl. -
Page 70: Scroll And Crawl Notes
PAGE 64 done at the end of a movie. The color, font, and other characteristics of each line will be preserved. Borders will scroll as well. • In a crawl, the titles turn into a single line of text and move across the screen from right to left, until they disappear at the left edge of the screen, Francisco Francisco... - Page 71 VIDEONICS TITLEMAKER 2000 PAGE 65 • When pages use different background or border colors and patterns, most effects will happen in two steps. For example, suppose you use fades to change from titles on a red background to titles on a green background. The titles on the first page will fade first, leaving the red background.
-
Page 72: Chapter 18 • Superimposing Titles
PAGE 66 Chapter 18 • Superimposing Titles Titles can be superimposed over any video source. Superimposed titles are often used in professional productions to identify people, places, times, settings — or the score of the game! They can also be used for subtitles or just as a way to play credits with an interesting back- ground. -
Page 73: Making Titles Come And Go
VIDEONICS TITLEMAKER 2000 Making Titles Come and Go You can make superimposed titles appear for a while, then disappear. You can make them appear using an effect, such as a fade or slide, then cause them to disappear using another effect. To do this, place blank pages with video backgrounds between pages of titles. -
Page 74: Chapter 19 • Playing Titles
PAGE 68 Chapter 19 • Playing Titles You can play titles many ways. Like a VCR, TitleMaker 2000 allows you to play titles in forward or reverse, at various speeds. After you have created and edited your titles using the Editing Screen, you are ready to play them. -
Page 75: Playing Some Pages
VIDEONICS TITLEMAKER 2000 Playing Some Pages To start playing from any page, be sure no text is marked (press UNDO if there are marks). Position the cursor on the desired page (using either the Editing Screen or the Page Index) and press PLAY. Play will begin at the cursor location. - Page 76 PAGE 70 live presentation, you would probably want each page to remain on the screen as you discuss it, moving on to the next page when you are ready. You can define a project so that it always plays manually; or you can temporarily make a project play manually.
-
Page 77: Continuous Play (Video Billboard)
VIDEONICS TITLEMAKER 2000 Continuous Play (Video Billboard) You can play all the screens in sequence, again and again, like a slide projector with a circular tray and an automatic timer. This makes the TitleMaker 2000 into an automatic “video billboard,” useful for point-of- purchase display, cable television stations, hotel lobbies, bars, or any other application that requires a running program of video titles. -
Page 78: Chapter 20 • Editing, Presentations, And Other Applications
PAGE 72 Chapter 20 • Editing, Presenta- tions, and Other Applications Video titles are useful for more than just video editing. The high- quality titles, versatile play modes, projects and 8000-character capacity make the TitleMaker 2000 perfect for a wide variety of applications. - Page 79 VIDEONICS TITLEMAKER 2000 Titles and Video Editing Titles greatly enhance an edited video. For instance, they can be used to help tell the story, to introduce changes of time or place, to identify people or settings, and to add credits. The TitleMaker 2000 is the ideal companion for editing equipment of all kinds.
- Page 80 PAGE 74 • View your original tape and visualize where titles will go. A “storyboard” (diagrams on paper that show how scenes, titles, and effects unfold) is a helpful aid. • Design the titles and create the pages you will need, in the order they will have in the final production.
-
Page 81: Presentations
VIDEONICS TITLEMAKER 2000 • Set up your titles, page by page, remembering to insert a blank page with VIDEO background anywhere you want titles to disappear. • When Thumbs Up creates the production, it sends a GPI trigger event to the TitleMaker at the moments you indicated. - Page 82 PAGE 76 • Include taped material where appropriate. For instance, after presenting the reasons your company has built a new facility, you can play a tape showing the facility. Add a blank page with plain video background at that point in the presentation so the video can be seen. You can add titles and effects designed to play over the video.
-
Page 83: Live Titles
VIDEONICS TITLEMAKER 2000 INSTRUCTIONS FOR MAKING REMOTE TRIGGER BUTTON Tools required: • A soldering iron and solder • Wire cutters • An electric drill. Parts required: • A 4-inch piece of 3/4-inch PVC pipe (C) and two end caps (B and E) •... -
Page 84: Chapter 21 • Preview
PAGE 78 Chapter 21 • Preview An optional preview monitor is useful for live titling applications, allowing you to change titles without disrupting the live output. About Preview Imagine a restaurant with monitors that normally play sports videos. A TitleMaker 2000 is used to add phone messages, menu specials, and an- nouncements to the screens, using superimposed scrolling and crawling titles. -
Page 85: Advanced Techniques, Shortcuts, And Command Keys
VIDEONICS TITLEMAKER 2000 Appendix A • Advanced Techniques, Shortcuts, and Command Keys Here are some hints and techniques that will become useful as you become experi- enced with the TitleMaker 2000. When “+” appears between the names of two buttons, press both keys at the same time. Capacity •... -
Page 86: Erasing Memory And Resetting Unit
PAGE 80 Erasing Memory and Resetting Unit • You can erase everything in a project by pressing COMMAND + SHIFT + DELETE. The trashcan symbol appears to warn you everything is about to be erased. Press NEW LINE/OK to confirm you really want to erase everything. -
Page 87: Moving In The Color Menu
VIDEONICS TITLEMAKER 2000 Moving In the Color Menu • In the bottom sub-menu (with the color palette), use SHIFT with the arrow keys to move the highlight a screenful of bars at a time. • In the bot- menu, use + UP to first pre- Use COM-... -
Page 88: Play Modes
PAGE 82 • Press COMMAND + SHIFT + COPY to copy the English language demo into a new project. • Press COMMAND + SHIFT + MOVE to copy the international demo into a new project. Play Modes • The current project is always the one played. To play another project, use COMMAND + SHIFT + UP/DOWN to switch projects. -
Page 89: Appendix B • Font Listing
VIDEONICS TITLEMAKER 2000 Appendix B • Font Listing TitleMaker 2000 includes 92 font/size combinations with a complete set of characters, includ- ing accented and pictorial char- acters. Character Set All fonts include the following characters except some fonts which include capital letters only. A B C D E F G H I J K L M N O P Q R S T U V W X Y Z abcdefghi j kl m nopqrstuvwxyz 1234567890... -
Page 90: Font Sample
PAGE 84 VIDEONICS TITLEMAKER 2000 Font Sample TitleMaker 2000 includes 23 fonts in four sizes (plain, doubled verti- cally, doubled horizontally, doubled vertically and horizontally). Here is a sample of each font. -
Page 91: Special Characters
VIDEONICS TITLEMAKER 2000 SPECIAL CHARACTERS Refer to Chapter 6 for a complete listing, with explanations. The following special characters are entered by pressing ACCENT and the indicated character at the same time. For instance, ACCENT + C indi- cates you press C and ACCENT together. + indicates that two keys are pressed together;... - Page 92 PAGE 86 To Type: Press: ACCENT + 2 , , , , ACCENT + 2 , , , , ACCENT + 2 ACCENT + 3 , , , , ACCENT + 3 , , , , ACCENT + 3 ACCENT + 4 , , , , ACCENT + 4 , , , ,...
-
Page 93: Index
Index ACCENT 6 ACCENT key 27 accented characters 27, 82 adding a page 32 advanced techniques 76 characters antenna 12 appearing and disappearing 65 choices 43 applications 2, 70 clearing all 77 arrow keys 7, 25, 43 color bars 53 audio 15 color control bars 53 Color menus 52... - Page 94 General Purpose Interface major changes 37 16, 21, 72 manual play 67 GPI 16, 21 MARK END 38, 43 GPI trigger 72 MARK START 37, 43 guided tour 23 marking text 37 marks 37 half-scroll 61 memory 40, 76 highlights 43, 52 hints memory capacity 76 1, 11, 13, 18, 19,...
- Page 95 TAB key 26 warning television 15 text wide cursor 38 copying 39 wipe 61 editing 7 wipes 60 entering 6, 25 wiring 11 modifying 7 moving 39 revising 37 Y/C 4, 12, 15 typing 25 text color 52 Thumbs Up 20, 22, 70 title generator definition 1 Title Style menu 49...