Table of Contents
Advertisement
Quick Links
User Manual
DuraFon UHF
Long Range Dual Mode Radio Phone
Handset with Analog UHF 2-Way Radio
Table of Contents
Safety Instructions ........................................................................................ 4
General Safety Instructions ...................................................................... 4
Product Safety Instructions ...................................................................... 4
Battery Safety Instructions ...................................................................... 6
Regulatory Information ................................................................................ 7
Equipment Checklist ................................................................................... 11
Handset Illustration .................................................................................... 12
Handset Features ....................................................................................... 14
Basic Handset Features .......................................................................... 14
Additional Handset Features ................................................................. 16
Administrator Features (Register to PRO base) ..................................... 19
Charger Illustration .................................................................................... 20
Charger Features ........................................................................................ 21
Getting Started ........................................................................................... 22
Handset and Charger Installation .......................................................... 22
Basic Operations ......................................................................................... 23
Operation Modes ................................................................................... 23
A. Base Operation Modes .................................................................. 23
B. Handset Operation Modes ............................................................ 23
Menu Tree (Register to PRO base only) ................................................. 24
Making a Telephone Call ........................................................................ 25
Making an 2-Way/ Intercom Call ........................................................... 25
A. Handset to Handset Calls .............................................................. 26
Making a Broadcast via 900MHz ............................................................ 26
A. Handset to Handset Calls ............................................................. 26
Making a Broadcast via UHF .................................................................. 27
A. Handset to UHF walkie-talkie ....................................................... 27
Scanning via UHF .................................................................................... 27
Monitoring via UHF ................................................................................ 28
Redial ..................................................................................................... 29
Receiving a Telephone Call .................................................................... 29
Receiving an Intercom Call ..................................................................... 29
Ending a Call ........................................................................................... 30
Adjusting Voice Volume in Phone mode ............................................... 30
~2~
Advertisement
Table of Contents

Related Manuals for EnGenius DuraFon UHF

Summary of Contents for EnGenius DuraFon UHF
-
Page 1: Table Of Contents
Table of Contents User Manual Safety Instructions ..................4 General Safety Instructions ..............4 Product Safety Instructions ..............4 DuraFon UHF Battery Safety Instructions ..............6 Long Range Dual Mode Radio Phone Regulatory Information ................7 Equipment Checklist ................... 11 Handset with Analog UHF 2-Way Radio Handset Illustration .................. -
Page 2: Safety Instructions
Adjusting Volume in Walkie-Talkie ............30 Safety Instructions Placing a Call On Hold ................31 Mute ....................... 31 Caution: Your wireless telephone gives you freedom and flexibility to Do Not Disturb (Silent Ring) ..............31 stay in touch while you move around. However, when using your phone equipment, safety instructions should be followed to avoid the risks of Key Guard .................... -
Page 3: Battery Safety Instructions
Changes or modifications to this product not expressively approved by the 16. Do not use the product to report a gas leak while in the vicinity of the leak. manufacturer will void the warranty and the FCC authorization to operate the 17. -
Page 4: Regulatory Information
Regulatory Information and (2) this device must accept any interference received, including interference that may cause undesired operation. SPR-922U1 IMPORTANT NOTE: FCC Radiation Exposure Statement: FCC ID: A8J-SPR922U1 This equipment complies with FCC radiation exposure limits set forth for an IC: 10103A-SPR922U1 uncontrolled environment. - Page 5 - Reorient or relocate the receiving antenna. This device has been designed to operate with an antenna having a maximum - Increase the separation between the equipment and receiver. gain of 2 dBi (900MHz). Antenna having a higher gain is strictly prohibited per - Connect the equipment into an outlet on a circuit different from that to regulations of Industry Canada.
-
Page 6: Equipment Checklist
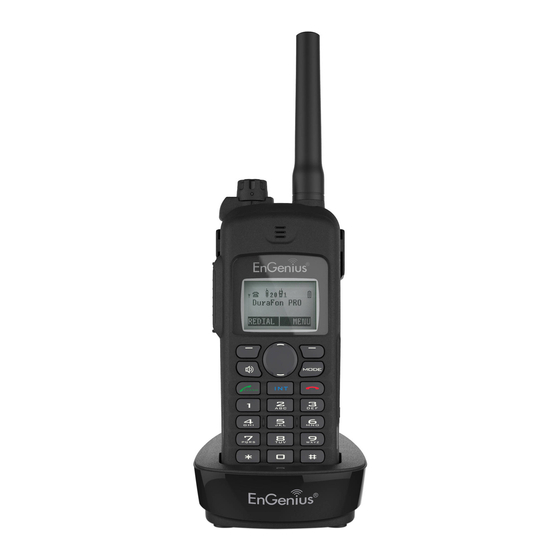
Equipment Checklist Handset Illustration In a Handset package, please find the following components: Handset x 1 Handset Antenna x 1 2300mA Li-ion Battery x 1 Antenna Charger x 1 Charger AC/DC Adaptor x 1 Clip Fastener x 1 Belt Clip x 1 Quick Guide and Warranty Card Knob (Power/Volume) -
Page 7: Handset Features
Handset Features Basic Handset Features 1. 4-line LCD (Liquid Crystal Display) (1) (2) (3) (4) (5) (6,7) (8) (9) DuraFon PRO REDIAL MENU a. The LCD display has LED (Light Emitting Diode) for backlighting. b. The 1 line of LCD consists of icons. Icons explanation from left to right (1) RSSI (Receive Signal Strength Indicator) During a call, the number of bars is proportional to the radio signal... -
Page 8: Additional Handset Features
Indicates charging when in charger cradle. d. The 2 and 3 lines of the LCD, maximum 14 characters each, display 8. Up( ) /Down( ) Scrolling Keys status, message, menu selections, or user-editable alphanumerical a. Scroll through records and menu selections. characters. - Page 9 Caller ID Dial from display Displays incoming call phone number and name on the LCD (needs Caller ID d. During the stand-by mode, you can enter the phone book by pressing service from local telephone company) scrolling key Phone book transfer via air Call waiting with caller ID i.
-
Page 10: Administrator Features (Register To Pro Base)
Charger Illustration 23. Repeater Operation (Register to PRO base) In order to get better range performance for handset to handset calls(intercom and broadcast), install a repeater and make the calls via repeater is able to extend the range of handset to handset calls. Administrator Features (Register to PRO base) Handsets 10 and 11 are designated administrators. -
Page 11: Charger Features
Charger Features Getting Started Handset and Charger Installation DC In Connects to Charger AC Adaptor. Plug the transformer end of the Charger AC/DC adaptor into a standard AC electric power outlet, plug the other end into the “DC In” jack on the back of Handset Charging Slot the Charger. -
Page 12: Basic Operations
Basic Operations Menu Tree (Register to PRO base only) Operation Modes Both the base station and handset have levels of operation at which time only Main menu Sub-menu certain procedures of functions can be performed. 1.Dialed 1.KeyGuard 2.Received A. Base Operation Modes 3.Missed IDLE mode- this is the default mode. -
Page 13: Making A Telephone Call
Release “PTT” key to end the broadcasting Broadcasting a group of handsets The EnGenius Industrial Cordless Phone System offers private, Intercom/ 2-way Enter the Group ID and then press “PTT” key radio calls independence of base station. Intercom/ 2-way communication can be PA paging placed from or to base stations and handsets. -
Page 14: Making A Broadcast Via Uhf
Start to speak the message to be broadcasted once Enter programming mode via pressing and hold MODE 10 4 you hear the “beep” sound; the speakerphone of key while turning the radio on. Scan Channel destination handsets will be opened up Press “MODE”... -
Page 15: Redial
Redial If the handset is on the charger cradle (ringer will be temporarily switched to “Ring” if it has been set to “Vibrate”), lift the handset and start conversation. Press REDIAL (Left) soft key. If the handset is not on the cradle, press any key (except , and the SILENT The LCD shows the last phone number dialed. -
Page 16: Placing A Call On Hold
Placing a Call On Hold Key Guard When a call is in progress, it can be put on hold by To prevent accidental dialing, you can press MENU (Right) 10 1 DuraFon PRO pressing the HOLD (Right) soft key. soft key, then press “1” to select KeyGuard option. The You have a Call on hold handset keypad is locked. -
Page 17: Battery Recharge And Replacement
Programming Mode in Walkie-Talkie After the displayed number chosen, press the key to call back. End/PTT To save and exit Battery Recharge and Replacement Channel : MODE FREQ End/PTT Charge the battery when one or several of the following happen: Up/Down or number To save and exit to select Channel 1~5... -
Page 18: Advanced Operations
1. To enter programming mode, press and hold MODE key while turning the In certain situations, you may want to change a handset’s ID. For example, radio on. you want to change a particular handset from a user to an administrator (ID 10 a. -
Page 19: Handset Group Subscription
1. Advanced registration functions can be performed by administrator handsets e. Proceeding the handset registration process for new handsets. (ID 10 and 11) only. Notes: 2. Administrator handsets can perform advanced registration function as long as 1. De-registration by the administrator will disable a handset’s ability to use the it is within range with the base station. -
Page 20: Call Transfer (Register To Pro Base Only)
Call Transfer (Register to PRO base only) key. Two handsets and one phone line can now talk simultaneously. Any one party can drop out of the 3-way While a telephone call is in progress, you can place the call on hold and conferencing, leaving the remaining two parties still transfer the call. -
Page 21: Call Waiting (Register To Pro Base Only)
Re: When turns on the Base Select, you must enter 2-digit Base for all your lines and not subscribe to the Call Waiting feature. ID after press key. Auto Attendant (AA) (Register to PRO base only) Notes: 1. Because this setting allows handset manually select the base station, the 1. -
Page 22: Aa Configuration By Administrator (Register To Pro Base Only)
ID 10 or 11). Consult with the wired PBX manual for operation 4, and press softkey to turn AA On/Off.If turning off the instructions and correct key sequence for transfer calls to the operator AA may be useful when: from an extension - The line is not used by a group of people. -
Page 23: Line Selection (Register To Pro Base Only)
It will first show Line 1 and line status. If you wish to dedicate line 1 to a 2. From an administrator handset (Handset 10 or 11), press MENU(Right) soft key. specific handset or group, you need to press OK. To dedicate lines 2-4 use 3. - Page 24 When name you are looking for. completed, press SAVE soft key to confirm your selection. c. For example, you are looking for “EnGenius”, and then press the number once. d. Use scrolling key to locate the exact record you Notes: are looking for.
- Page 25 Notes: 9. Dial from display: Character Table: a. Press TALK or Intercom to dial the phone number or Handset Characters and Orders ID displayed. ‘ + , . * ( ) & 1 A B C 2 10. To transfer phonebook: D E F 3 To transfer phonebook, both parties have to enter the G H I 4...
-
Page 26: Programmable Pbx Options (Register To Pro Base Only)
Programmable PBX Options (Register to PRO base only) Notes: 1. This feature would be useful if the DuraFon PRO base unit is When DuraFon PRO base unit installed behind the PBX adjunct to a PBX system. system, it is feasible to pre-program some PBX features 2. -
Page 27: Repeater Operation
( “01” ~ “07” for Group ID: “10” ~ “99” for Handset ID: “00” for all). Notes: The greeting message : “Please enter the extension number” a. The repeater must work with PRO system. If there is no entry after 5 seconds, the broadcast will be b. -
Page 28: Uhf Frequencies And Codes
UHF Frequencies and Codes Display Frequency Display Frequency Display Frequency Number (MHz) Number (MHz) Number (MHz) These freqency display number is same as Motorola CLS/CPL frequency 464.5000 461.3125 466.1625 position. Each bandwidth is used 12.5KHz. 464.5500 461.3375 466.1875 467.7625 461.3625 466.2125 467.8125 462.7625... -
Page 29: Menu Operations (Register To Pro Base Only)
Display Digital Display Digital Display Digital Number Code Number Code Number Code Menu Operations (Register to PRO base only) Main menu Sub-menu 1.Dialed 1.KeyGuard 2.Received 3.Missed 2.PhoneBook 1.Ring Volume 3.Call Logs 2.Ring Tone 3.Key Volume 4.Key Tone 4.Sound 1.Dial Prefix 2.Group Select 5.Settings 3.Base Select... - Page 30 2. Caller ID service is required from your local phone 1. Press MENU (Right) soft key while the phone is in standby. company in order to receive phone numbers, names and time stamps on incoming calls. The Received and 2. Press to lock keypad (see Key Guard).
- Page 31 ii. Press and confirm to clear the three call logs (Called, Received, and Or press TX ONE (right softkey) to transfer a specific entry to Missed). another handset(s). Press to edit the name of Custom or Line: Press 2-digit handset ID or group ID, then select all PBX options e-1.
-
Page 32: Technical Specifications
Re: When broadcast setting “Off”, there is an icon indicated in the display, Technical Specifications side of the battery icon. Press to turn Name Tag On/Off. Walkie-Talkie General Specifications Phone Mode i. Press (Left softkey) to turn on the name tag function, when receiving Mode the incoming calls, the LCD will show the name which stored in Frequency Range... -
Page 33: Index
FCC Part 68 Statement Index Handset Charging Slot, 21 2-WAY INTERCOM, 15 Handset Features, 14, 16 This equipment complies with Part 68 of the FCC rules and the requirements Handset Group Subscription, 38, adopted by the ACTA. On the bottom of DuraFon PRO base station is a label that 3-Way Conferencing, 39 contains, among other information, a product identifier in the format US: Handset ID, 14, 27, 29, 30, 36,... -
Page 34: Industry Canada Statement
Company: Senao Networks, Inc. Industry Canada statement: Address: 3F, No. 529, Chung Cheng Rd., Hsintien, Taipei, Taiwan, R.O.C. This device complies with ISED’s licence-exempt RSSs. Operation is subject to the Tel no.: 886-3-328-9289 following two conditions: (1) This device may not cause harmful interference, and (2) this device must accept any interference received, including interference that If the equipment is causing harm to the telephone network, the telephone company may cause undesired operation.