ESI ESRTP5 User And Installation Instructions Manual
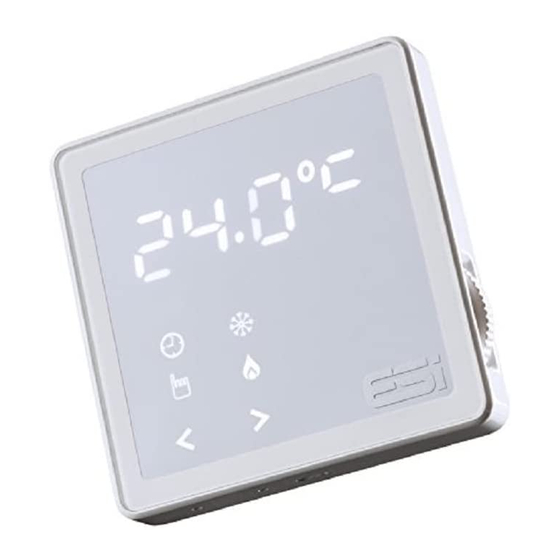
Programmable room thermostat
with tpi, delayed start & landlord service
Hide thumbs
Also See for ESRTP5:
- Installation instructions manual (18 pages) ,
- User instructions (20 pages)

Related Manuals for ESI ESRTP5


Summary of Contents for ESI ESRTP5
- Page 1 ESRTP5 Programmable Room Thermostat with TPI, Delayed Start & Landlord Service User and Installation Instructions...
- Page 3 INDEX User Instructions Quick Operating Guides Display and Button Functions Quick Command Guide Setting the Time and Date (tINE) Operation Modes 3.1.1: Auto 3.1.2: Manual 3.1.3: Off / Frost Protection All Day Mode (AL) Holiday Mode (HOLI) Main Menu Copy Function (CoPy) Backlight On/Off (LIGH) Resetting the Unit (rESE) Programme Settings (ProG)
- Page 4 INDEX Installation Instructions Technical Specification Parameter Settings Thermostat Technical Settings Installation 7.1.1: Installation Safety Instructions 7.1.2: General Safety Instructions 7.1.3: Warning Notices 7.1.4: Maintenance 7.2.1: Fitting the Programmable Room Thermostat 7.2.2: Installing the Programmable Room Thermostat 7.2.3: Wiring Diagram Technical Settings (tEcH) Quick Comand Guide Menu Technical Settings (tEcH) Landlord Service (SEr)
- Page 5 User Instructions N.B Please note, when first powered or in the event of a power loss the time will be flashing and the time and date will need to be set. Use the > dial to adjust the hour then press .
- Page 6 1. Quick Operating Guides 1.1 Display and Bu�on Func�ons : Temperature, time and data display : WiFi working status (for ESRTP5WIFI WiFi model only) : RF working status (for ESRTP5RF RF model only) : Auto operation mode : Off / Frost protection mode : Manual operation mode : Flame symbol when system calling for heat : Cancels and returns to the previous menu...
-
Page 7: Quick Command Guide
1.2 Quick Command Guide... - Page 8 2. Setting the Time and Date (tINE) N.B Please note, when first powered or in the event of a power loss the time will be flashing and the time and date will need to be set. Follow steps 2 - 6 to set the time on first setup. Changes between summer and winter time are handled automatically by the unit.
-
Page 9: Operation Modes
3. Operation Modes Operation Modes: AUTO, MAN, Press > in homescreen to choose operation mode. 3.1.1. AUTO - In Auto mode, choose All Day mode. See section 3.2 for details. - In Auto mode, choose Holiday mode. See section 3.3 for details. In Auto mode, if All Day mode or Holiday mode is not selected, Auto mode will be used. - Page 10 3.1.2. MAN Permanent manual override of set temperature. > 1. In Homescreen, press to select MAN 2. Turn the dial to adjust temperature > 3. Press to confirm setting and return to homescreen Permanent set temperature range: 5 - 35 C.
- Page 11 Heating under All Day mode will be on until 23:59 that day. At 23:59, the unit will exit All Day mode and return to Auto mode. Set temperature range: 5 - 35 C. Default: 21 3.3. Holiday Mode (HOLI) > 1.
- Page 12 4. Main Menu > In the homescreen, press and hold for 3 seconds then release to enter main menu. Use the dial to choose between tINE, ProG, > < CoPy, tEcH and rESE. Press to enter desired setting. Press return to Homescreen. 4.1.
- Page 13 LIGH setting range: Off/On. Default: Off N.B. It is recommended to leave this setting in the default OFF mode as heat generated by the thermostat’s power supply and LED will affect temperature measurement. A deviation of up to 3.5°C may occur, which will be calibrated automatically by the unit within 30 minutes of first connecting the thermostat.
- Page 14 5. Programme Settings (ProG) 5.1. Factory Pre-Set Programme This unit has been designed to be a simple to use thermostat, requiring minimal user intervention with a pre-programmed heating profile. The pre-set heating times and temperatures will suit most people (see table below). Operation setting range: 5/2 day, 7 day, 24 Hour.
- Page 15 5.2. Setting the Operation Mode (5/2 day, 7 day, 24hr) (ProG) > 1. Press and hold for 3 seconds until the display shows tINE. > Turn the dial until display shows ProG then press 2. Use the dial to move between 24hr, 7 day or 5/2 day operation. 24 hr operation is shown by 24Hr 7 day operation is shown by 7day 5/2 day operation is shown by 5-2d...
- Page 16 5.3.2. 7 Day > Choose 7 day operation (see 5.2 for details). Then press Turn the dial to select the day to programme (Mon-Fri) then > press > Turn the dial to choose the program (P1-P6). Then press enter time setting Turn the dial to adjust the time (10 minutes increments).
-
Page 17: Installa�On Instruc�Ons
Installa�on Instruc�ons... -
Page 18: Technical Specification
6. Technical Specification 6.1 Parameter Settings All Day Mode All day mode temperature 5 C-35 C (Default: 21 Holiday Mode Holiday mode temperature C-35 C (Default: 7 Holiday mode days 1-99 days (Default: 1 day) Default Mode Temporary set temperature C-35 C (Default: 21 Program event start time 00.00-24.00 (See 5.1 for details) - Page 19 Service OFF or 1-4 (Default: Off) (See 9.1 for SERS details) Service DATE 28-366 days (Default 365 days) Other Functions Operation MODE Auto, Manual, Off (Default: Auto) Temperature calibration C-3.0 C (Default: 0 SWING C-2.0 C (Default: 1 Display backlight Off/On (Default: Off) 6.2 Thermostat Technical Settings Power supply...
-
Page 20: Installation
7. Installation 7.1.1. Installation Safety Instructions The unit must be installed by a suitably qualified person in accord- ance with the latest IEE Wiring Regulations. Isolate mains supply before commencing installation. Please read all instructions before proceeding. Ensure that the fixed wiring connections to the mains supply is via a fuse rated at not more than 3 Amps and Class ‘A’... - Page 21 WARNING: DO NOT FIT THE RECEIVER TO A BACK PLATE THAT IS LIVE. SWITCH OFF MAINS BEFORE FITTING BACK PLATE AS LIVE AND NEUTRAL CONTACTS MAY TOUCH WHILE MOUNTING RECEIVER ON PLATE AND DAMAGE THE PRODUCT. 7.1.4 Maintenance Always isolate the mains supply before commencing any work, servicing or maintenance on the system.
- Page 22 7.2.2 Installing the Programmable Room Thermostat 1. Use a flat headed screwdriver to press the fastener at the top of the unit, then gently loosen from the unit, unhooking from top to bottom. Fix the 35mm back box, terminals at the top, onto a 2 flange metal back box with 2 BM3.5x23 screws.
- Page 23 Route the wires through the back of the wall plate. Fit the wires to the wall-plate in accordance with the relevant diagram and in accordance with I.E.E. regulations. 4. Fit the unit onto back-plate securing from top to bottom. Ensure an appropriate fuse is fitted to the circuit before recon- necting to the mains supply.
- Page 24 8. Technical Settings: 8.1.Quick Command Guide...
- Page 25 8.2 Menu Technical Settings (tEcH) > Press and hold until the display shows tINE. Turn the dial < > until display shows tEcH then press & together to enter > Use the dial to choose between the below, then press enter:- dS: Delayed Start.
- Page 26 9. Landlord Service (SEr) 9.1 Setting the Landlord Service (SErS) To set the landlord service, enter the landlord service settings > (see section 8.2). Use the dial to select SErS then press > Use the dial to enter the password 0000, using to move to >...
- Page 27 9.2 Setting the Due Date (DAtE) To set the due date, enter the landlord service settings (see section > 9.1) and use the dial to select DAtE then press . Use the dial to set > the due date (between 28-366 days) then press to confirm and return to landlord service settings.
- Page 28 WARNING: Interference with sealed parts renders the guarantee void. In the interests of continuous product improvement we reserve the right to alter designs, specifications and materials without prior notice and cannot accept liability for errors.
- Page 32 ESi Controls Limited sales@esicontrols.co.uk www.esicontrols.co.uk Version 6.9.3...