Table of Contents
Advertisement
Quick Links
Advertisement
Table of Contents

Related Manuals for Crosley CR83


Summary of Contents for Crosley CR83
- Page 1 CR83 The Arlington Instruction Manual 910-251700-001...
-
Page 2: Warranty
Crosley Radio to service the product. This warranty does not cover products sold AS IS or consumables (such as fuses or batteries). This warranty is valid only in the United States. -
Page 3: Important Safety Instruction
IMPORTANT SAFETY INSTRUCTION General PLEASE READ CAREFULLY ALL THE FOLLOWING IMPORTANT SAFEGUARDS THAT ARE APPLICABLE TO YOUR EQUIPMENT 1. Read Instructions - All the safety and operating instructions should be read before the product is operated. . Retain instructions - The safety and operating instructions should be retained for future reference. Troubleshooting 3. -
Page 4: Connecting Optional Equipment
WARNING: Connecting Optional Equipment TO PREVENT FIRE OR SHOCK HAZARD, DO NOT EXPOSE THIS APPLIANCE TO RAIN OR MOISTURE. DO NOT REMOVE COVER. External Speakers Auxiliary Outputs PILOT LAMPS SOLDERED IN PLACE. NO USER SERVICEABLE PARTS INSIDE. REFER SERVICING TO QUALIFIED SERVICE PERSONNEL. - Page 5 CD Operation Welcome Table of Contents Thank you for purchasing the Crosley Arlington (CR83). Before operating this unit, please read this Repeat Playback Getting Started Programmed Playback manual thoroughly and retain it for future reference. Control Locators....... 4,5 To repeat a single track, choose the track that Unpacking.........
-
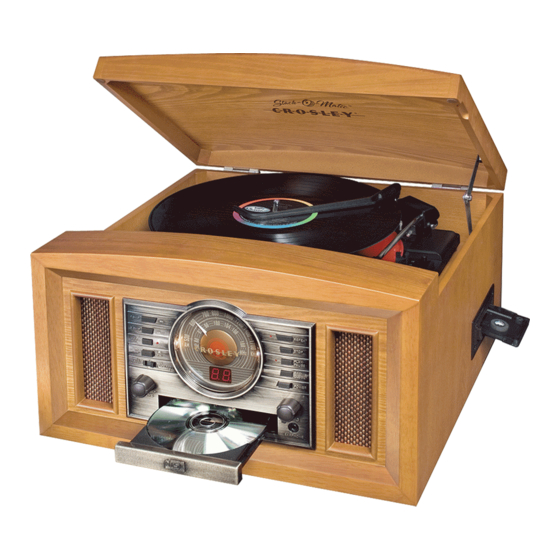
Page 6: Control Locators
Control Locators CD Operation Playing A CD Unit Controls Skip Forward And Skip Reverse Speakers Press the FORWARD SKIP BUTTON (3) or the Slide the FUNCTION SWITCH (8) to the CD Tuner Dial BACKWARD SKIP BUTTON (4) to select a track. position. - Page 7 Cassette & Radio Operation Control Locators Radio Operation Cassette Operation Unit Controls Turntable Supension Screw Slide the FUNCTION SWITCH (8) to the TAPE Slide the FUNCTION SWITCH (8) to the position. Center Spindle RADIO position. Tension Arm Tone Arm Insert a prerecorded tape through the CASSETTE Press the AM/FM BUTTON (7) to the desired DOOR (21).
-
Page 8: Getting Started
Getting Started Turntable Operation Unpacking Turntable Features Power Source To stop playback manually, move the TURNTABLE SWITCH (28) to the “OFF” position. Gently lift Selectable 33/45/78 rpm speeds. the TONE ARM (25) from the record and return Unwind the AC POWER CORD (35) at the back Remove packing materials from unit.