Table of Contents
Advertisement
NOTE:
Please read all instructions
carefully before using this
product
Magnetic Resistance
Table of Contents
Recumbent Bike
Safety Notice
AMZ-587R
Hardware Pack
Assembly Instruction
Parts List
Warranty
Ordering Parts
Model
AMZ-587R
Retain This
Manual for
Reference
190626
®
IMPEX
INC.
ASSEMBLY &
2801 S. Towne Ave, Pomona, CA 91766
OWNER'S
Tel: (800) 999-8899 Fax: (626) 961-9966
MANUAL
www.marcypro.com
support@impex-fitness.com
Advertisement
Table of Contents

Related Manuals for Impex Circuit Fitness AMZ-587R


Summary of Contents for Impex Circuit Fitness AMZ-587R
- Page 1 AMZ-587R Hardware Pack Assembly Instruction Parts List Warranty Ordering Parts Model AMZ-587R Retain This Manual for Reference 190626 ® IMPEX INC. ASSEMBLY & 2801 S. Towne Ave, Pomona, CA 91766 OWNER'S Tel: (800) 999-8899 Fax: (626) 961-9966 MANUAL www.marcypro.com support@impex-fitness.com...
-
Page 2: Table Of Contents
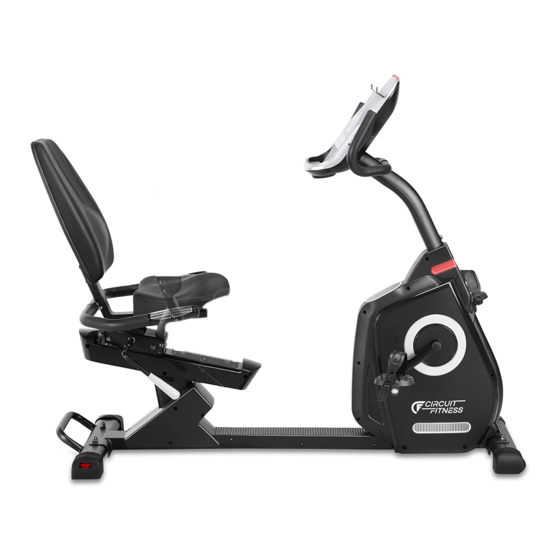
BEFORE YOU BEGIN Thank you for selecting the CIRCUIT FITNESS Magnetic Resistance Recumbent Bike ® AMZ-587R by IMPEX INC. For your safety and benefit, read this manual carefully before using the bike. As a manufacturer, we are committed to provide you complete customer satisfaction. -
Page 3: Important Safety Notices
PHYSICIAN. THIS IS ESPECIALLY IMPORTANT FOR INDIVIDUALS OVER THE AGE OF 35 OR PERSONS WITH PRE-EXISTING HEALTH PROBLEMS. READ ALL INSTRUCTIONS BEFORE USING ANY FITNESS EQUIPMENT. IMPEX INC. ASSUMES NO RESPONSIBILITY FOR PERSONAL INJURY OR PROPERTY DAMAGE SUSTAINED BY OR THROUGH THE USE OF THIS PRODUCT. -
Page 4: Warning Label Placement
WARNING LABEL PLACEMENT The Warning Labels shown here has been placed on the Rear Stabilizer. If the labels are missing or illegible, please call customer service at 1-800-999-8899 for replacement. Apply the labels in location shown. © IMPEX INC. www.marcypro.com... -
Page 5: Hardware Pack
Hex Nut M10 Allen bolt M8 x 1” Curved washer M5 x 1” Round head bolt Stopper Allen Bolt M8 x ⅝” M8 x 2” Carriage Bolt Hex nut M8 Allen key L4 Allen key L6 Box Wrench © IMPEX INC. www.marcypro.com... -
Page 6: Component For Assembly
COMPONENTS FOR ASSEMBLY NO.1 NO.7 NO.15 NO.14 NO.8 NO.2/3 NO.16 NO.30 NO.13 NO.10/11 © IMPEX INC. www.marcypro.com... -
Page 7: Important Assembly Instruction
STEP 1 1. Attach the Front Stabilizer (#3) with Carriage Bolts (#4), Flat Washers (#5) and Hex Nuts (#6) to the Main Frame (#1). 2. Thread the Stopper (#24) into the Sliding Frame from the bottom. © IMPEX INC. www.marcypro.com... - Page 8 STEP 2 Attach the Rear Stabilizer (#2) with Carriage Bolts (#4), Flat Washers (#5) and Hex Nuts (#6) to the Main Frame. © IMPEX INC. www.marcypro.com...
- Page 9 1. Connect Middle computer wire (#17) to the Lower computer wire (#18). 2. Connect Front extension hand pulse wire (#19) with Middle extension hand pulse wire (#20). 3. Attach the Front Post (#7)to the Main Frame, secure with Allen Bolts (#21) and Curved washers (#22). © IMPEX INC. www.marcypro.com...
- Page 10 STEP 4 1. Connect the hand pulse wire (#19) to the computer, and computer wire (#17) to the computer. 2. Secure the computer (#8) to the Front post with Screws (pre-assembled on the Computer) (#9) . © IMPEX INC. www.marcypro.com...
- Page 11 STEP 5 Secure the Quick Release handle (#16) with Round Bolts (#23) to the Rear Sliding Frame. © IMPEX INC. www.marcypro.com...
- Page 12 STEP 6 Secure the Seat Pad (#13) to the Main Frame with Allen Bolts (#26). © IMPEX INC. www.marcypro.com...
- Page 13 STEP 7 Insert the Backrest Support(#15) to the Rear Sliding Frame, secure with Allen Bolt (#26). © IMPEX INC. www.marcypro.com...
- Page 14 1. Secure the Handlebar (#12) to the back of the Seat with Curved washers (#22) and Hex Nuts (#28). 2. Connect Hand pulse wire (#20) to the Hand pulse wire (#29) on the Handlebar (#29). 28 22 © IMPEX INC. www.marcypro.com...
- Page 15 STEP 10 Thread the Left Pedal (#11) to the Left Crank(#25L) STEP 11 Thread the Right Pedal (#10) to the Right Crank (#25R) © IMPEX INC. www.marcypro.com...
- Page 16 STEP 12 Insert the Adapter to the inlet in the Chain Cover, and the Auxiliary Line to the computer. © IMPEX INC. www.marcypro.com...
-
Page 17: Exploded Diagram
EXPLODED DIAGRAM © IMPEX INC. www.marcypro.com... -
Page 18: Parts List
Middle extension hand pulse wire Allen bolt M8 x 1” Curved washer Round Bolt M5 x 1” Stopper Crank Allen Bolt M8 x ⅝” Carriage Bolt M8 x 2” Hex Nut M8 Hand Pulse Wire Adapter Auxiliary Line © IMPEX INC. www.marcypro.com... -
Page 19: Care And Maintenance, Weight Capacity & Dims
8. Assembled Dimension (L x W x H): 55” x 24.8” x 48.5” OPERATING NOTES 1.Adjustment of the Seat position. Pull up on the Quick Release Handle to adjust forward/backward. Push down to lock the seat into position. 2.Thread the Stopper (#24) to ensure the bike is level. © IMPEX INC. www.marcypro.com... -
Page 20: Computer
4 PROGRAM selection. ADVANCE 4 PROGRAM selection. SPORTY 4 PROGRAM selection. CARDIO Target HR training mode. WATT PROGRAM WATT constant training mode. USB Port Power only, does not provide data transfer. Use to charge your mobile devices. © IMPEX INC. www.marcypro.com... -
Page 21: Exercise Guidelines
Use UP or DOWN Arrow to select workout: Manual (Drawing 2)→ Beginner(Drawing 3) → Advance (Drawing 4) → Sporty(Drawing 5) → Cardio(Drawing 6) → Watt(Drawing 7) Drawing 2 Drawing 3 Drawing 4 Drawing 5 Drawing 6 Drawing 7 © IMPEX INC. www.marcypro.com... - Page 22 Use UP or DOWN Arrow to set TIME. Press START/STOP key to start workout. Use UP or DOWN Arrow to adjust load level. Press START/STOP key to pause workout. Use RESET to exit to main menu. Drawing 14 © IMPEX INC. www.marcypro.com...
- Page 23 F1, F2…. to F6. F1 is the best, F6 is the worst (Drawing 20). User may keep exercising to improve the heart rate recovery status. (Press the RECOVERY button again to return the main display.) Drawing 19 Drawing 20 © IMPEX INC. www.marcypro.com...
- Page 24 1. After 4 minutes without pedaling or pulse input, console will enter into power saving mode. Press any key may wake the console up. 2. When computer act abnormal, please plug out the adaptor and plug in again. © IMPEX INC. www.marcypro.com...
- Page 25 EXERCISE GUIDELINES Using your RECUMBENT BIKE will provide you with several benefits, it will improve your physical fitness, tone muscle and in conjunction with calorie controlled diet help you lose weight. 1. The Warm Up Phase This stage helps get the blood flowing around the body and the muscles working properly. It will also reduce the risk of cramp and muscle injury.
- Page 26 This stage should last for a minimum of 12 minutes though most people start at about 15-20 minutes 3. The Cool Down Phase This stage is to let your Cardio-vascular System and muscles wind down. This is a repeat of the warm up exercise e.g.
-
Page 27: Warranty
No other warranty beyond that specifically set forth above is authorized by IMPEX. IMPEX is not responsible or liable for indirect, special or consequential damages arising out of or in connection with the use or performance of the product or other damages with respect to any economic loss, loss of property, loss of revenues or profits, loss of enjoyments or use, costs of removal, installation or other consequential damages or whatsoever natures.