Table of Contents
Advertisement
Quick Links
NOTE:
Please read all
instructions carefully
before using this product
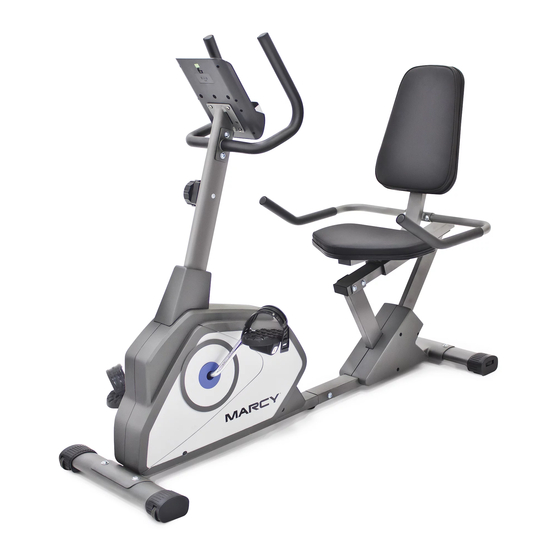
Magnetic-Resistance
Recumbent Bike
Table of Contents
Safety Notice
NS-40502R
Hardware Pack
Assembly Instruction
Parts List
Warranty
Ordering Parts
Model
NS-40502R
Retain This
Manual for
Reference
140912
ASSEMBLY &
®
IMPEX
INC.
OWNER'S
2801 S. Towne Ave, Pomona, CA 91766
MANUAL
Tel: (800) 999-8899 Fax: (626) 961-9966
www.impex-fitness.com
support@impex-fitness.com
Advertisement
Table of Contents

Related Manuals for Impex MARCY NS-40502R


Summary of Contents for Impex MARCY NS-40502R
- Page 1 NS-40502R Hardware Pack Assembly Instruction Parts List Warranty Ordering Parts Model NS-40502R Retain This Manual for Reference 140912 ASSEMBLY & ® IMPEX INC. OWNER'S 2801 S. Towne Ave, Pomona, CA 91766 MANUAL Tel: (800) 999-8899 Fax: (626) 961-9966 www.impex-fitness.com support@impex-fitness.com...
-
Page 2: Table Of Contents
BEFORE YOU BEGIN Thank you for selecting the MARCY Magnetic-Resistance Recumbent Bike NS- ® 40502R by IMPEX INC. For your safety and benefit, read this manual carefully before using the bike. As a manufacturer, we are committed to provide you complete customer satisfaction. -
Page 3: Important Safety Notices
BEFORE BEGINNING ANY EXERCISE PROGRAM, CONSULT YOUR PHYSICIAN. THIS IS ESPECIALLY IMPORTANT FOR INDIVIDUALS OVER THE AGE OF 35 OR PERSONS WITH PRE-EXISTING HEALTH PROBLEMS. READ ALL INSTRUCTIONS BEFORE USING ANY FITNESS EQUIPMENT. IMPEX INC. ASSUMES RESPONSIBILITY PERSONAL INJURY PROPERTY DAMAGE SUSTAINED BY OR THROUGH THE USE OF THIS PRODUCT. -
Page 4: Warning Label Placement
WARNING LABEL PLACEMENT The Warning Labels shown here has been placed on the Rear Stabilizer. If the labels are missing or illegible, please call customer service at 1-800-999-8899 for replacement. Apply the labels in location shown. © IMPEX INC. www.impex-fitness.com... -
Page 5: Hardware Pack
Allen Bolt M8 x 2” Curve Washer Ø ⅝” Allen Bolt M8 x ⅝” Carriage Bolt M8 x 1 ⅝” Acorn Nut M8 Flat Washer Ø ¾” Leverage Knob Quick Release Lock Knob Crossing Wrench Allen wrench © IMPEX INC. www.impex-fitness.com... - Page 6 COMPONENTS FOR ASSEMBLY © IMPEX INC. www.impex-fitness.com...
-
Page 7: Assembly Instructions
• NOTE: It is strongly recommended that two or more people assemble this machine to avoid possible injury. STEP-1 A.) Attach the Front Stabilizer (#3) to the Main Frame (#1). Secure it with two M8 x 2” Allen Bolts (#2), and two Ø 5/8” Curve Washers (#4). © IMPEX INC. www.impex-fitness.com... - Page 8 C.) Attach the Rear Stabilizer (#7) to the Rear Support Frame. Secure them together with two M10 x 2” Allen Bolts (#2) and two Ø 5/8 Curve Washers (#4). D.) Securely tighten all Bolts and Nuts. E.) Thread the Leverage Knob (#39) to Main Frame from bottom to stabilize the Bike on floor. © IMPEX INC. www.impex-fitness.com...
- Page 9 I.) Attach Right and Left Seat Post Cover (#22 & #23) to each side of Seat Post (#40). Secure Left Cover (#23) with three ST5 x ⅝” Self Tapping Screws (#24). Secure right Cover (#22) with two ST5 x ⅝” Self Tapping Screws (#24). © IMPEX INC. www.impex-fitness.com...
- Page 10 © IMPEX INC. www.impex-fitness.com...
- Page 11 B.) Attach the Sear Support to Seat Post (#40) and secure them with eight M8 x ⅝” Allen Bolts (#21). C.) Place the Seat Pad (#45) onto the Seat Support. Secure the Seat Pad with four M x ⅝” Allen Bolts (#21). © IMPEX INC. www.impex-fitness.com...
- Page 12 A.) Attach the Handle (#13) to Seat Support (#43). Securely tighten it with two M8 x 1 ⅝” Carriage Bolts (#28), two Ø 5/8” Curve Washers (#4), and two M8 Acorn Nuts (#29). B.) Attach the Backrest Board (#44) to the Seat Support. Secure it with four M8 x ⅝” Allen Bolts (#21). © IMPEX INC. www.impex-fitness.com...
- Page 13 STEP-6 A.) Thread the Left Pedal (#37) counterclockwise into the Crank (#17). B.) Thread the Right Pedal (#36) clockwise into the Crank on the other side. © IMPEX INC. www.impex-fitness.com...
-
Page 14: Exploded Diagram
EXPLODED DIAGRAM © IMPEX INC. www.impex-fitness.com... -
Page 15: Parts List
Tension Knob/Upper Tension Cable Lower Tension Cable Upper Computer Wire Lower Computer Wire Right Pedal Left Pedal Flat Washer Ø ¾” Leverage Knob Seat Post Sliding Frame Quick Release Lock Knob Seat Support Backrest Board Seat Pad © IMPEX INC. www.impex-fitness.com... -
Page 16: Care, Maintenance And Storage
Lock Knob and securely fasten the Knob to lock the Seat Support. TRANSPORT The Bike has a pair of roller wheels on Front Stabilizer End Cap. To move, carefully hold and tilt the bike, and then roll. © IMPEX INC. www.impex-fitness.com... -
Page 17: Computer
10. When the batteries are removed, all the functional values will reset to zero. Note: Please note all values on this computer are approximate and they are for comparison purpose only. Do not use these values for any medical or rehabilitation purpose. © IMPEX INC. www.impex-fitness.com... -
Page 18: Exercise Guidelines
The rate of work should be sufficient to raise your heartbeat into the target zone shown on the graph below. This stage should last for a minimum of 12 minutes though most people start at about 15-20 minutes © IMPEX INC. www.impex-fitness.com... - Page 19 The important factor here is the amount of effort you put in. The harder and longer you work the more calories you will burn. Effectively this is the same as if you were training to improve your fitness, the difference is the goal. © IMPEX INC. www.impex-fitness.com...
-
Page 20: Warranty
IMPEX. IMPEX is not responsible or liable for indirect, special or consequential damages arising out of or in connection with the use or performance of the product or other damages with respect to any economic loss, loss of property, loss of revenues or profits, loss of enjoyments or use, costs of removal, installation or other consequential damages or whatsoever natures.