Table of Contents
Advertisement
9A07509300
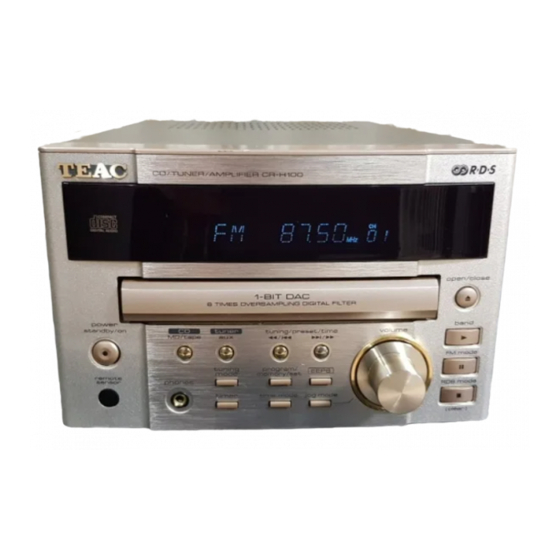
CR - H100
˛
CD/Tuner/Amplifier
OWNER'S MANUAL
MANUEL DU PROPRIETAIRE
BEDIENUNGSANLEITUNG
MANUALE DI ISTRUZIONI
MANUAL DEL USUARIO
Thanks for buying a TEAC. Read this manual carefully to get the best performance from this unit.
Nous vous remercions pour l'achat d'un appareil TEAC.
Lire ce manuel avec attention pour obtenir les meilleures performances possibles de cet appareil.
Vielen Dank für den Kauf dieses TEAC-Geräts.
Bitte lesen Sie diese Anleitung sorgfältig durch, um die Leistungs-fähigkeit dieses Geräts optimal nutzen zu können.
Grazie per aver acquistato un prodotto TEAC.
Leggere attentamente questo manuale per ottenere le migliori prestazioni da questo apparecchio.
Enhorabuena por la adquisición de un TEAC.
Lea detenidamente este manual a fin de obtener el mejor rendimiento de esta unidad.
Advertisement
Table of Contents

Related Manuals for Teac CR-H100


Summary of Contents for Teac CR-H100
- Page 1 MANUALE DI ISTRUZIONI MANUAL DEL USUARIO Thanks for buying a TEAC. Read this manual carefully to get the best performance from this unit. Nous vous remercions pour l’achat d’un appareil TEAC. Lire ce manuel avec attention pour obtenir les meilleures performances possibles de cet appareil.
- Page 2 <CAUTION <ACHTUNG <OBSERVERA <ADVARSEL ADVARSEL - USYNLIG LASERSTRÅLING VED ÅBNING, NÅR SIKKERHEDSAFBRYDERE ER UDE AF FUNKTION. CLASS 1 LASER PRODUCT UNDGÅ UDSÆTTELSE FOR STRÅLING. VAROITUS! SUOJAKOTELOA EI SAA AVATA. LAITE SISÄLTÄÄ LUOKAN 1 LASERLAITE LASERDIODIN, JOKA LÄHETTÄÄ (NÄKYMÄTÖNTÄ) SILMILLE VAARALLISTA LASERSÄTEILYÄ. KLASS 1 LASERAPPARAT ADVARSEL - USYNLIG LASERBESTRÅLING NÅR DENNE DELEN ER ÅPEN OG SIKKERHETSSPERREN ER UTKOBLET.
- Page 3 IMPORTANT (for U.K.Customers) DO NOT cut off the mains plug from this equipment. If the plug fitted is not suitable for the power points in your home or the cable is too short to reach a power point, then obtain an appropriate safety approved extension lead or consult your dealer.
-
Page 4: Before Use
Before Use Avant Utilisation Read this before operation Lire ceci avant de faire fonctionner l'appareil < Place the amplifier on a hard flat surface. < The ventilation holes should not be < Placer l'amplificateur sur une surface covered. Make sure there is at least 50 cm plate rigide. -
Page 5: Prima Dell'uso
Vor der Benutzung Prima dell'Uso Antes de poner el equipo en funcionamiento Lesen Sie dies vor der Benutzung Si prega di leggere prima di porre in funzione Lea estas instrucciones antes de poner el equipo en funcionamiento < Stellen Sie den Verstärker auf eine solide, <... -
Page 6: Remote Control Unit
Remote Control Unit Télécommande Using the Remote Control Unit Utilisation de la télécommande Le boîtier de télécommande fourni permet The provided Remote Control Unit allows la commande à distance de l'appareil. the unit to be operated from a distance. Pour l'utilisation boîtier When operating the remote control unit,... -
Page 7: Mando A Distancia
Fernbedienung Telecomando Mando a distancia Benutzung der Fernbedienung Uso del Telecomando Utilización del mando a distancia Mit der mitgelieferten Fernbedienung Il telecomando in dotazione consente di El mando que se suministra permite kann das Gerät aus einiger Entfernung operare l'unità a distanza. Nell'usare il accionar el equipo a distancia. -
Page 8: Compact Disc
Compact Disc Disques Compacts Handling the Discs Manipulation des disques This unit has been designed specifically Cet appareil a été conçu spécialement for sound reproduction from compact pour la reproduction des disques discs bearing the "?" mark. No other audionumériques portant la marque discs can be used. -
Page 9: Disco Compacto
Compact Disc Compact Disc Disco compacto Handhabung der Discs Maneggiamento dei Compact Disc Utilización de los discos Das Gerät wurde speziell für die Questa unità è stata realizzata Este equipo sido diseñado Musikwiedergabe von CDs konstruiert, die appositamente per la riproduzione sonora específicamente para reproducir el sonido mit "?"... - Page 10 < When you press the PLAY button(y) of R-H100 or MD-H100 , the input selector of the CR-H100 is set to "TAPE" or "MD" automatically. < When you select "TAPE" or "MD" with the input selector of the CR-H100, the tape or MD will be played automatically.
- Page 11 H100 sind eine bequeme Fernbedienung utile, qui fonctionne en liaison avec le und AI-Direktabspielfunktionen möglich. TEAC R-H100 ou MD-H100; < Indem Sie die POWER-Taste des CR-H100 < Quand on appuie sur la touche PLAY(y), drücken, schalten alle le sélecteur d’entrée sur le R-H100 ou...
- Page 12 AI: directa de AI; < Premendo il tasto POWER del CR-H100 è < Pulsando el botón POWER del CR-H100, possibile accendere/mettere in standby puede encender/poner en esper todo el tutte le unità...
- Page 13 Connection of antennas and speakers CAUTION: Do not plug the power cord of any component into AC outlets and do not turn their POWER switches on until all connections have been performed. AM Loop Antenna FM ANTENNA FM outdoor antenna To stand the antenna Connect the lead-type on a surface, fix the...
- Page 14 Connexions de antennes et haut-parleurs AVERTISSEMENT: Ne pas brancher aucun composants et ne pas les allumer jusqu'à temps que toutes les connextions soit faites. Antenne FM extérieure Antenne cadre AM ANTENNE FM Pour poser l'antenne Branchez sur une surface, fixer la l'antenne FM sur le griffe dans la rainure.
- Page 15 Anschluß von Antennen und Lautsprechern VORSICHT: Stecken Sie kein Netzkabel eines Geräts in eine Steckdose und schalten Sie keinen Netzschalter eines Geräts ein, bis alle Anschlüsse hergestellt sind. UKW-ANTENNE UKW-Außenantenne Mittelwellen-Ringantenne Schließen Sie die UKW- Befestigen Sie die Kralle in Antenne Schlitz, Antennenanschluß...
- Page 16 Collegamento di antenne e diffusori ATTENZIONE: Non inserire il cavo elettrico di alcun componente nelle prese a CA e non accendere alcun interruttore POWER se prima non si sono completati tutti i contatti. Antenna AM a Telaio ANTENNA FM Antenna FM per esterni Per appoggiare quest'antenna Collegare l'antenna FM a su una superficie, fissare...
- Page 17 Conexión de antenas y altavoces PRECAUCIÓN: No enchufe el cable de alimentación de ningún componente a tomas de CA y no pulse los interruptores de encendido (POWER) en tanto no haya efectuado todas las conexiones. Antena de cuadro de AM ANTENA DE FM Antena exterior de FM Para poner la antena en...
-
Page 18: Basic Operation
Basic Operation Fonctionnement de base How to change the source Pour changer de source Press the CD/MD/TAPE or TUNER/AUX Appuyez sur la touche CD/MD/TAPE ou button (or the CD, TUNER, MD, TAPE or TUNER/AUX (ou sur la touche CD, TUNER, AUX button of the remote control unit) to MD, TAPE ou AUX de la télécommande) select the source. -
Page 19: Einfache Bedienung
Einfache Bedienung Funzionamento di Base Instrucciones básicas Ändern der Quelle Come cambiare la sorgente audio Cómo cambiar la fuente Drücken Sie die taste CD/MD/TAPE oder Premere il tasto CD/MD/TAPE o Pulse los botones CD/MD/TAPE o TUNER/AUX (oder CD, TUNER, MD, TAPE TUNER/AUX (oppure i tasti CD, TUNER, TUNER/AUX (o los botones CD, TUNER, oder AUX der Fernbedienung), um eine... - Page 20 Basic Operation Fonctionnement de base EEPS (Electronic EQ Preset System) Système électronique de préréglage EQ (EEPS) To enjoy different sound, press the EEPS button. Pour changer de type de sonorité , appuyez sur la touche EEPS. Every time the EEPS button is pressed, the Chaque pression sur la touche EEPS permet mode is changed as follows: de modifier le mode d'écoute de la façon...
-
Page 21: Einfacher Betrieb
Einfacher Betrieb Funzionamento di Base Instrucciones básicas EEPS EEPS (Electronic EQ Preset System) EEPS (Sistema de preajuste electrónico de ecualización) (Electronisches EQ Voreinstellungssytsem) Per avere un suono diverso, premere il tasto EEPS. Para disfrutar de un sonido distinto, pulse Drücken Sie die EEPS-Taste, um die el botón EEPS. -
Page 22: Repeat Playback
Repeat Playback Lecture répétée Every time the REPEAT 1/ALL button is Chaque pression sur la touche REPEAT 1/ALL pressed, the mode is changed as follows: permet de changer de mode selon l'ordre indiqué ci-après : REPEAT REP OFF REPEAT REP OFF REPEAT.A REPEAT.A Repeat one track [REPEAT] Répéter une plage [REPEAT]... - Page 23 Wiederholte Abspielung Ripetizione del Playback Repetición de la reproducción Jedesmal, wenn die Taste REPEAT 1/ALL Ogni volta che si preme il tasto REPEAT Cada vez que se pulsa el botón REPEAT gedrückt wird, wird der Modus wie folgt 1/ALL, la modalità cambia nel modo 1/ALL, la modalidad cambia de la siguiente geändert: seguente:...
-
Page 24: Listening To Cds
Listening to CDs Lecture des disques cmpacts To stop playback Pour arrêter la lecture. Press the STOP button(H ) to stop Pour arrêter la lecture, appuyez sur la playback. touche STOP(H) . To suspend playback temporarily (pause Pour arrêter provisoirement la lecture du mode) disque en cours (mode pause). - Page 25 Abspielen von CDs Ascolto dei CD Escucha de CD Beenden des Abspielens Per fermare il playback Para detener la reproducción Drücken Sie die STOP-Taste (H), um das Premere il tasto STOP(H) per fermare il Pulse el botón STOP(H) para detener la Abspielen zu beenden.
- Page 26 Listening to CDs Lecture des disques cmpacts "TRACK: 00" will be displayed if no disc is set. S'il n'y a pas de disque dans le lecteur, l'indication "TRACK: 00" s'affiche Appuyez sur la touche CD pour Press the CD button to select "CD". sélectionner le "CD".
- Page 27 Abspielen von CDs Ascolto dei CD Escucha de CD Auf dem Display erscheint "TRACK: 00", wenn Se non si imposta un brano particolare, sul La pantalla indica "TRACK: 00" si no se ha sich keine CD im Gerät befindet. display appare "TRACK:00" introducido ningún disco.
-
Page 28: Shuffle Playback
Shuffle Playback Lecture aléatoire Press the SHUFFLE [RANDOM] button in the Appuyez sur la touche SHUFFLE [RANDOM] n stop or play mode. mode arrêt (stop) ou en mode lecture (play). The tracks will be played randomly. Les pistes seront sélectionnées et lues de façon aléatoire. -
Page 29: Reproducción Aleatoria
Playback a Caso Reproducción aleatoria Abspielen in beliebiger Reihenfolge Drücken Sie im Stoppmodus oder im Premere il tasto SHUFFLE [RANDOM] nella Pulse el botón SHUFFLE [RANDOM] Abspielmodus Taste SHUFFLE modalità stop o play. hallándose en la modalidad de parada o de [RANDOM]. -
Page 30: Lecture Programmée
Program Playback Lecture programmée < < This function allows you to program up to 32 Cette fonction vous permet de programmer tracks for playback in any desired order. jusqu'à 32 plages dans l'ordre de votre < Shuffle playback and intro check function choix. -
Page 31: Reproducción Programada
Playback-Programm Playback Programmato Reproducción Programada < < < Mit dieser Funktion können Sie bis zu 32 Questa funzione vi permette di programmare Esta función le permite programar hasta 32 Tracks zum Abspielen in jeder beliebigen fino a 32 brani per il playback nell'ordine che pistas para reproducirlas siguiendo el orden Reihenfolge einprogrammieren. -
Page 32: Program Playback
Program Playback Lecture programmée To Modify the Program Modification du programme 1. Press the CLEAR button. 1. Appuyer sur la touche CLEAR. 2. Press the PROGRAM button. 2. Appuyer sur la touche PROGRAM. Every time the PROGRAM button is A chaque poussée sur la touche pressed, the programmed steps are PROGRAM, les étapes programmées shown in the display one after another. - Page 33 Abspielen eines Programms Playback Programmato Reproducción Programada Modifizieren eines Programms Per Modificare il programma Para modificar el programa 1. Drücken Sie die CLEAR-Taste. 1. Premere il tasto CLEAR. 1. Pulse el botón CLEAR. 2. Drücken Sie die PROGRAM-Taste. 2. Premere il tasto PROGRAM. 2.
-
Page 34: Ecoute Radio
Listening to the Radio Ecoute radio Appuyez sur la touche TUNER pour Press the TUNER button to select sélectionner le "TUNER". "TUNER". Press the BAND button to select FM or Appuyez sur la touche BAND pour sélectionner FM ou AM. Appuyez sur le bouton TUNING MODE et Press the TUNING MODE button and sélectionnez le mode MANUAL... -
Page 35: Ascolto Della Radio
Radio hören Ascolto della Radio Escucha de la radio Drücken Sie die Taste TUNER, um Premere il tasto TUNER per selezionare Pulse el botón TUNER para seleccionar "TUNER" auszuwählen. "TUNER".. "TUNER". Drücken Sie die Taste BAND, um UKW Premere il tasto BAND per selezionare Pulse el botón BAND para seleccionar oder Mittelwelle auszuwählen. - Page 36 How to Preset Broadcast Préréglage automatique des Automatically stations < Sélectionnez la bande et appuyez sur le < Select the band and press the MEMORY button for more than 1.5 second. bouton MEMORY pendant plus d’1,5 seconde. Then broadcasting will be automatically Cette bande est automatiquement received, and well-received stations will sélectionnée.
- Page 37 Automatische Vorwahl von Come Preimpostare Cómo preajustar automáticamente Sendern Automaticamente le Trasmissioni la emisión de radio < Wählen Sie das Band und drücken Sie < Selezionare la banda e premere il tasto < Seleccione la banda y pulse el botón länger als 1.5 Sekunden die MEMORY- MEMORY per più...
- Page 38 RDS (Radio Data System) RDS is a broadcasting service which allows Le RDS est un service radio qui permet aux stations émettrices de diffuser des informations stations to send additional information along complémentaires parallèlement à l'émission with the regular radio program signal. RDS radio elle-même.
- Page 39 RDS ist ein Service der Radiostationen, der es den Radio Data System è un servizio radiofonico El sistema RDS es un servicio de radiodifusión Sendern erlaubt, Informationen zusätzlich zum che permette alle emittenti di trasmettere mediante el que las emisoras transmiten normalen Radioprogramm auszustrahlen.
- Page 40 RDS (PTY) RDS (PTY) NEWS : brief announcements, events, public NEWS (nouvelles) : communiqués, événements, opinion, reports, actual situations. sondages, reportages, situations AFFAIRS : a kind of suggestion including vécues. practical announcements other AFFAIRS (informations générales) : suggestions than news, documents, discussion, diverses, telles que des annonces analysis and so on.
- Page 41 RDS (PTY) RDS (PTY) RDS (PTY) NEWS : kurze Ansagen, Ereignisse, NEWS : annunci brevi, eventi, interviste, NEWS : mensajes, convocatorias, opinión öffentliche Meinungen, Reportagen, resoconti, cronache dal vivo. pública, informes. aktuelle Situationen. AFFAIRS : proposte che comprendono annunci AFFAIRS : temas de actualidad, documentos, AFFAIRS : Stellungnahmen, Nachrichten, die diversi dalle notizie, documenti, debates, análisis, etc.
-
Page 42: Temporisation De Veille
Setting the Clock Réglage de l'horloge Press the TIME MODE button. Appuyez sur la touche TIME MODE. The time display becomes active, and L'affichage de l'heure devient actif, et "hour" blinks. l'indication hour clignote. Every time the TIME MODE button is Chaque pression sur la touche TIME pressed, the mode is changed as follows: MODE permet de changer de mode selon... -
Page 43: Come Impostare L'orologio
Einstellen der Uhr Come impostare l'Orologio Ajuste del reloj Drücken Sie die Taste TIME MODE. Premere nuovamente il tasto TIME MODE. Pulse el botón TIME MODE Das Zeitdisplay wird aktiv und die Stunden Il display dell'orario si attiva e Se activa la pantalla del tiempo, y "hour" blinken. -
Page 44: Setting The Timer
Setting the Timer Réglage de la temporisation (Timer) Réglez l'heure sur l'horloge avant de régler la Adjust the clock before setting timer. temporisation. Press the TIME MODE button twice. Appuyez 2 fois sur le bouton TIME CODE Set the ON TIME(hour) by pressing the Réglez l'heure de début à... -
Page 45: Ajuste Del Temporizador
Einstellen des Timers Come Impostare il Timer Ajuste del temporizador Stellen Sie die Uhr ein, bevor Sie den Timer Regolare l'orologio prima di impostare il Ajuste el reloj antes de ajustar el einstellen. timer. temporizador. Drücken Sie zweimal die Taste TIME Premere due volte il tasto TIME MODE. -
Page 46: Troubleshooting
Output Power ....20 W/ch (0.5 %,1 kHz) call your dealer or TEAC service center. Input Sensitivity ... . 200 mV/22k ohms Frequency Response . -
Page 47: Guide De Dépannage
Section AMPLIFICATEUR voir si on peut trouver soi-même la solution avant de contacter le revendeur ou le centre de service client TEAC. Puissance de sortie ... 20W/ch (0.5 %,1 kHz) Sensibilité... -
Page 48: Fehlersuche
Problem selbst beseitigen können, bevor Sie Ihren Händler oder das Ausgangsleistung ..20 W pro Kanal (0.5 %,1 kHz) TEAC Service Center anrufen. Eingangsempfindlichkeit . . . 200 mV/22k Ohm Frequenzbereich ... 20 Hz bis 40.000 Hz (+1/-3dB) Verstärker... - Page 49 Uscita di Potenza ..20 W/can. (0.5 %,1 kHz) assistenza TEAC. Sensibilità in Ingresso ..200 mV/22k ohm Risposta di Frequenza .
-
Page 50: Especificaciones
Sección AMPLIFICADOR resolverlos personalmente sin llamar al distribuidor o al servicio técnico de TEAC. Potencia de salida ..20 W/canal (0.5 %,1 kHz) Sensibilidad de entrada ..200 mV/22k ohmios Respuesta en frecuencia . - Page 51 Notes Design and specifications are subject to change without notice. Illustrations may differ slightly from production models. Remarque Des améliorations peuvent produire des changements dans les caractéristiques et fonctions sans préavis. Les illustrations peuvent différer légèrement des modèles de production. Anmerkungen Das Design und die Spezifikationen können ohne Vorankündigung geändert werden.
- Page 52 7733 Telegraph Road, Montebello, California 90640 Phone: (323) 726-0303 TEAC CANADA LTD. 5939 Wallace Street, Mississauga, Ontario L4Z 1Z8, Canada Phone: (905) 890-8008 TEAC MEXICO, S.A. De C.V Campesions 184, Col.Granjas Esmeralda, 09810, Mexico Phone: (525) 581-5500 TEAC UK LIMITED 5 Marlin House, Croxley Business Park, Watford, Hertfordshire, WD18 8TE, U.K.