Table of Contents
Advertisement
Available languages
Available languages
Quick Links
ALL-METAL DRIVE
®
MODELOS
Mercury Beehive IB_20SEPM1 (LA).indd 1
Mercury Beehive IB_20SEPM1 (LA).indd 1
ALL-METAL DRIVE
®
BLST4126R, BLST4134, BLST4655, BLSTBESTE,
BLSTBESTR, BLST4655B, BLST4655Z,
BLSTBPST, BLST4126, BLST4128, BLST4129,
MODELS
BLST4093, BLST4125, BLST4127, BLST4127B,
Manual de Instrucciones
LICUADORA CLÁSICA
LEA TODAS LAS INSTRUCCIONES ANTES DE USAR ESTE APARATO
Instruction Manual
CLASSIC BLENDER
READ ALL INSTRUCTIONS BEFORE USING THIS APPLIANCE
Manual de Instruções
LIQUIDIFICADOR CLÁSSICO
LEIA TODAS AS INSTRUÇÕES ANTES DE USAR ESTE APARELHO
BLST4127Z, BLST4090
ALL-METAL DRIVE
®
ALL-METAL DRIVE
ALL-METAL DRIVE
®
®
9/29/20 10:35
9/29/20 10:35
ALL-METAL D
Advertisement
Table of Contents

Related Manuals for Oster BLST4126R


Summary of Contents for Oster BLST4126R
- Page 1 ® ALL-METAL DRIVE ALL-METAL DRIVE ® ® ALL-METAL DRIVE ALL-METAL DRIVE ® ® BLST4126R, BLST4134, BLST4655, BLSTBESTE, BLSTBESTR, BLST4655B, BLST4655Z, MODELOS BLSTBPST, BLST4126, BLST4128, BLST4129, MODELS BLST4093, BLST4125, BLST4127, BLST4127B, BLST4127Z, BLST4090 Manual de Instrucciones LICUADORA CLÁSICA LEA TODAS LAS INSTRUCCIONES ANTES DE USAR ESTE APARATO...
-
Page 2: Precauciones Importantes
No opere ningún electrodoméstico que tenga el cable o enchufe dañado, si no funciona correctamente, se ha dejado caer o está dañado de cualquier otra forma. Lleve el artefacto al Centro de Servicio Autorizado de Electrodomésticos Oster más cercano para su revisión, reparación o ajuste eléctrico o mecánico. ®... - Page 3 15. Siempre opere la licuadora con la tapa en su lugar. Siempre espere hasta que todas las piezas móviles se hayan detenido antes de retirar la tapa. 16. Cuando licúe líquidos calientes, retire la copa de alimentación. Tenga cuidado con el vapor. 17.
-
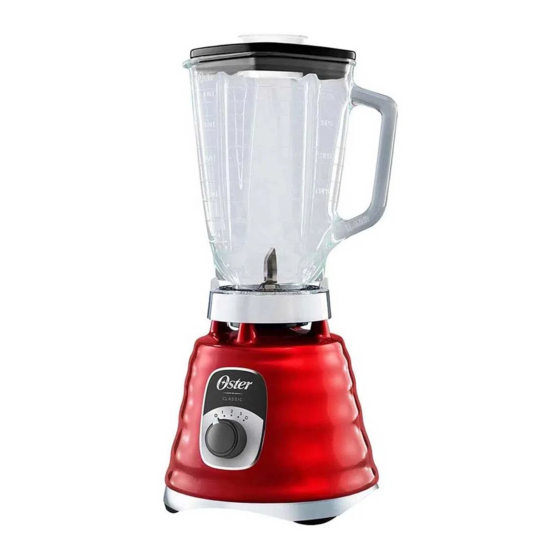
Page 4: Desc Ri Pc I Ón Del A Rtefac To
DESC RI PC I ÓN DEL A RTEFAC TO Accesorios Incluidos En Modelos Selectos* Solamente Para Los NOTA: Partes 5 y 6 no Modelos De Brasil son disponibles para Brasil 1. Copa de alimentación 8. Panel de control - Depende del modelo 2. - Page 5 CONOCIENDO SU LICUADORA OSTER® SU PRODUCTO INCLUYE LA SIGUIENTE TECNOLOGÍA Y CARACTERÍSTICAS: MOTOR DURADERO - Su licuadora tiene un motor potente con el exclusivo sistema de acople metálico, para mayor durabilidad. Solamente para los modelos BLSTBESTE/BLSTBESTR: Un motor potente con tecnología reversible para licuar de forma más homogénea y uniforme.
- Page 6 ENSAMBLANDO EL VASO 1. Invierta el vaso de manera que la abertura pequeña quede hacia arriba. (Figura 1) 2. Coloque el anillo sellador sobre la abertura del vaso. (Figura 2) 3. Coloque la cuchilla en el vaso. (Figura 3) 4. Coloque la parte inferior enroscable sobre las cuchillas y el anillo sellador y gírela en el sentido de las agujas del reloj para apretarla.
- Page 7 AJUSTANDO EL VASO 1. Para ajustar la parte inferior del vaso, coloque el vaso ensamblando con cuidado en el anillo de la base del motor con el asa y el tope del vaso enfrente del freno derecho. 2. Usando el asa del vaso, gire hacia la izquierda hasta donde sea posible. Esto asegurará...
- Page 8 Modelos con palanca + tecnología reversible (BLSTBESTE/BLSTBESTR) El control manual le permite controlar completamente y aprovechar al máximo los beneficios de la tecnología de motor reversible de su licuadora e incluye: • Licuado continuo (palanca hacia arriba): El motor girará las cuchillas hacia la izquierda, a velocidad constante. • Licuado Reversible o Función de Pulso (palanca hacia abajo): Manteniendo la palanca hacia abajo el motor girará...
- Page 9 CÓMO ENSAMBLAR EL ACCESORIO PICADORA (BLST4129 Y BLST4125) 1. Invierta la base del accesorio picadora. 2. Inserte el tazón del accesorio picadora. 3. Cerciórese de alinear los hoyuelos de la parte inferior del tazón picadora con las muescas de bloqueo localizadas en la base del accesorio.
- Page 10 CÓMO ENSAMBLAR EL ACCESORIO MINI VASO (BLST4129 Y BLST4125) ADVERTENCIA: NO PROCESE ALIMENTOS O LÍQUIDOS CALIENTES EN EL MINI VASO. 1. Gire la tapa del mini vaso hacia la izquierda para sacarla. 2. Coloque dentro del mini vaso los alimentos que desee procesar. 3.
- Page 11 RECOMENDACIONES PARA LICUAR • Coloque primero las porciones líquidas en el vaso, a menos que la receta indique lo contrario • Para triturar hielo: Triture 6 cubos de hielo o aproximadamente 0,5 L (2 tazas) de hielo de cada vez. •...
- Page 12 C UI DADO Y MAN TE NI MI EN TO DE SU LICUADO RA O ST ER ® DESPUES DE UTILIZARLA: 1. Levante el vaso y sepárelo de la base, quite la tapa y vacíe el vaso. 2. Si es necesario, utilice una espátula de goma para retirar los restos de alimentos de los lados del vaso.
-
Page 13: Important Safeguards
Avoid any contact with blade or moveable parts. DO NOT operate any appliance with a damaged cord or plug or after the appliance malfunctions, or is dropped or damaged in any manner. Take the appliance to the nearest Authorized Oster Appliance Service Center for ®... - Page 14 For models with mini jars or Blend-N-Go portable cups: 19. Make sure the jar is correctly placed onto the base before using the appliance. 20. Do not blend carbonated, hot or boiling liquids and ingredients, as this may create pressure buildup. Only blend non-carbonated liquids and ingredients that are at room temperature or cooler.
-
Page 15: Appliance Description
APPL IA NC E DE SCRI PTIO N Accessories Included In Select Models* For Brazil NOTE: Parts 5 & 6 are Models Only not available for Brazil 1. Filler cap 8. Control Panel (depending on model) 2. Lid 8a. Rotary dial with 3 speeds 3. -
Page 16: Ge Tt I Ng To K N Ow
GE TT I NG TO K N OW YO UR O ST ER ® BLEN DER YOUR PRODUCT INCLUDES THE FOLLOWING TECHNOLOGY AND FEATURES: DURABLE MOTOR - Your blender has a powerful motor with exclusive All-Metal Drive system for extra durability. For models BLSTBESTE/BLSTBESTR only: A powerful motor with reversible technology for more even and consistent blending. - Page 17 ASSEMBLING THE JAR 1. Turn jar upside down so the small opening is at the top. (Figure 1) 2. Place sealing ring over jar opening. (Figure 2) 3. Place blade into jar. (Figure 3) 4. Place threaded jar bottom over blade and turn clockwise to tighten. (Figure 4) 5.
- Page 18 MANUAL CONTROLS Models with rotary dial control 1. Turn dial to desired speed and blend ingredients to desired consistency. 2. T urn dial to the off “O” position to stop the blender and turn blender off. 3. To use the PULSE function: • To use PULSE if dial is on the off to the left of the dial position, turn dial to speed 1 for a brief desired length of time and turn it right back to the off “O” position.
- Page 19 HOW TO ASSEMBLE THE FOOD CHOPPER ACCESSORY (BLST4129 Y BLST4125) 1. Place the base of the food chopper attachment facing up. 2. Insert food chopper attachment bowl. 3. Ensure to align dimples on bottom of food chopper bowl to locking grooves located on food chopper attachment base. Turn bowl counterclockwise until it locks into place.
- Page 20 HOW TO ASSEMBLE THE MINI JAR ACCESSORY (BLST4129 Y BLST4125) WARNING: DO NOT PROCESS FOOD OR HOT LIQUIDS IN THE MINI JAR. 1. Twist the mini-blend jar lid counterclockwise to remove it. 2. Place food to be processed in the mini-blend jar. 3.
- Page 21 C A RING FO R AN D MA IN TA IN I NG YOUR O S TE R B L EN D E R ® AFTER USE: 1. Lift the jar straight up from the base, remove the lid and empty the jar.
-
Page 22: Precauções Importantes
Não utilize nenhum eletrodoméstico que esteja com o fio ou o plugue danificado, ou que tenha apresentado algum defeito ou que esteja avariado de alguma maneira. Não tente trocar ou emendar o fio. Leve o aparelho a Assistência Técnica Credenciada Oster mais próxima para revisão, conserto ®... - Page 23 15. Sempre use o liquidificador com a tampa em seu lugar. Espere sempre que todas as peças em movimento tenham parado totalmente antes de retirar qualquer tampa. 16. Quando bater líquidos quentes, retire a sobre tampa. Tome cuidado com o vapor.
-
Page 24: Descrição Do Aparelho
DESCRIÇ ÃO DO APA R EL H O Acessórios Incluídos Nos Modelos Selecionados* Somente Para Os NOTA: As partes 5 e 6 Modelos Do Brasil não estão disponíveis para o Brasil 1. Copinho de acesso para adicionar ingredientes 8. Painel de controle (depende do modelo) em seu liquidificador 8a. - Page 25 CONCEITOS BÁSICOS DO SEU LIQUIDIFICADOR OSTER® SEU PRODUTO INCLUI A SEGUINTE TECNOLOGIA E CARACTERÍSTICAS: MOTOR DURÁVEL - Seu liquidificador possui um motor potente com o exclusivo sistema de All-Metal Drive para melhor durabilidade. Somente para os modelos BLSTBESTE/BLSTBESTR: Um motor potente com tecnologia reversível para liquefazer de maneira mais homogênea e uniforme.
- Page 26 SOMENTE PARA OS MODELOS DO BRASIL: 1. V ire a jarra de boca para baixo para que a abertura pequena fique em cima. Coloque o anel de vedação sobre a abertura da jarra. 2. Coloque o conjunto da lâmina integrada com a base com rosca da jarra sobre o anel de vedação e a jarra. Gire no sentido horário enquanto empurra para baixo para apertar. Certifique-se de que o conjunto da lâmina esteja bem apertado na jarra antes de usar.
- Page 27 CONTROLES MANUAIS Modelos com botão rotativo 1. Gire o botão colocando-o na velocidade desejada e bata os ingredientes até atingir a consistência desejada. 2. G ire o botão colocando-o na posição de desligado “O” para desligar o liquidificador. 3. Para usar a função pulsar: • Para usar a função pulsar quando o botão estiver na posição de desligado da esquerda, gire o botão para a velocidade baixa “I” e mantenha aí...
- Page 28 COMO MONTAR O ACESSÓRIO PICADOR DE COMIDA (BLST4129 E BLST4125) AVISO: NÃO PROCESSE ALIMENTOS OU LÍQUIDOS QUENTES NA MINI JARRA. 1. Coloque a base do acessório picador de comida em uma superfície plana com o eixo virado para cima. 2. Encaixe o recipiente do acessório picador de comida em sua base.
- Page 29 COMO MONTAR O ACESSÓRIO MINI JARRA (BLST4129 E BLST4125) AVISO: NÃO PROCESSE ALIMENTOS OU LÍQUIDOS QUENTES NA MINI JARRA. 1. Gire a tampa da mini jarra para a esquerda para retirá-la. 2. Coloque os alimentos que deseja processar dentro da mini jarra. 3.
- Page 30 CUIDANDO E MANTENDO SEU LIQUIDIFICADOR OSTER ® APÓS O USO: 1. Levante a jarra e separe-a da base, tire a tampa e esvazie a jarra. 2. Caso seja necessário, use uma espátula de borracha para remover os alimentos que ficarem grudados na jarra. IMPORTANTE: DESLIGUE SEU LIQUIDIFICADOR DA TOMADA ANTES DE LIMPÁ-LO.
- Page 31 P o r t u g uê s 1 0...
- Page 32 The following information is intended for Mexico only. A informação a seguir é somente para o México. LICUADORA OSTER ® MODELOS: BLST4126R, BLST4126R-013, BLST4134, BLST4134-013, BLST4655, BLST4655-013, BLSTBESTE, BLSTBESTE-013, BLSTBESTR, BLSTBESTR-013, BLST4655B, BLST4655B-013, BLST4655Z, BLST4655Z-013, BLSTBPST, BLSTBPST-013, BLST4126, BLST4126-013, BLST4128,...