
Related Manuals for Philips E Sries


Summary of Contents for Philips E Sries
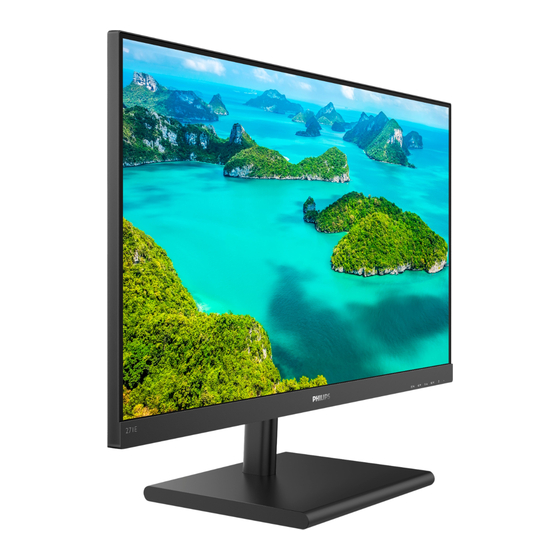
- Page 1 E line 271E1/272E1/ 275E1/278E1 241B8 www.philips.com/welcome User manual Customer care and warranty Troubleshooting & FAQs...
-
Page 2: Table Of Contents
5. Technical Specifications ... 19 5.1 Resolution & Preset Modes ..24 6. Power Management ....25 7. Customer care and warranty .. 26 7.1 Philips’ Flat Panel Monitors Pixel Defect Policy .....26 7.2 Customer Care & Warranty ..29 8. Troubleshooting & FAQs ..30 8.1 Troubleshooting ......30... -
Page 3: Important
DC power cord for normal operation. notes regarding the operation of your • Please use approved power cord monitor. provided by Philips all the time. If The Philips guarantee applies provided your power cord is missing, please the product is handled properly for... - Page 4 1. Important • If your monitor gets wet, wipe it with screen for a constant period of time by : dry cloth as soon as possible. • Looking at something varying • If foreign substance or water gets in distances after a long period your monitor, please turn the power focusing on the screen.
-
Page 5: Notational Descriptions
1. Important that will not disappear and cannot be 1.2 Notational Descriptions repaired. The damage mentioned above The following subsections describe is not covered under your warranty. notational conventions used in this document. Service • The casing cover should be opened Notes, Cautions and Warnings only by qualified service personnel. -
Page 6: Disposal Of Product And Packing Material
From the planning, design and production stages, Philips emphasizes the important of making products that can easily be recycled. At Philips, This marking on the product or on end-of-life management primarily its packaging illustrates that, under... -
Page 7: Setting Up The Monitor
Top Victory Investments Ltd., and Top Victory Investments Ltd. is the warrantor in relation to this product. Philips and the Philips Shield Emblem are registered trademarks of Koninklijke Philips N.V. and are used under license. - Page 8 2. Setting up the monitor 275E1/275E1S/278E1/278E1A: Use only 27xE1 the AC/DC adapter model: Philips 1. Place the monitor face down on soft ADPC2065 and smooth surface taking care to avoid scratching or damaging the Install base stand screen. 27xE1S 1. Place the monitor face down on soft...
- Page 9 2. Setting up the monitor Connecting to your PC 272E1SA 271E1S DisplayPort input HDMI input HDMI input VGA input VGA input Audio in HDMI audio out Audio out AC/DC power input AC/DC power input Kensington anti-theft lock Kensington anti-theft lock 271E1SD 275E1/275E1S HDMI input...
- Page 10 2. Setting up the monitor 278E1 Connect to PC 1. Connect the power cord to the back of the monitor firmly. 2. Turn off your computer and unplug its power cable. 3. Connect the monitor signal cable to the video connector on the back of your computer.
-
Page 11: Operating The Monitor
2. Setting up the monitor 272E1SA/278E1A 2.2 Operating the monitor Front view product description 271E1S/271E1SD/275E1/275E1S/278E1 Switch monitor’s power ON and OFF. Access the OSD menu. Confirm the OSD Switch monitor’s power adjustment. ON and OFF. Adjust the OSD menu. Access the OSD menu. Confirm the OSD Adjust the speaker volume. - Page 12 On-Screen Display. You can use On-Screen Display (OSD) is a feature in this as a reference when you want to all Philips LCD monitors. It allows an end work your way around the different user to adjust screen performance or adjustments later on.
- Page 13 2. Setting up the monitor Main menu Sub menu LowBlue Mode 1, 2, 3,4 Off Input VGA(271E1S/271E1SD/272E1SA/275E1/275E1S) DVI(271E1SD) HDMI 1.4(271E1S/271E1SD/272E1SA/275E1/275E1S) 1 HDMI 2.0(278E1/278E1A) 2 HDMI 2.0(278E1/278E1A) DisplayPort(272E1SA/275E1/275E1S/278E1/278E1A) Picture MPRT(271E1S/ On, Off 271E1SD/272E1SA) MPRT Level 0~20 (271E1S/271E1SD/272E1SA) Picture Format Wide Screen, 4:3 (271E1S/271E1SD/272E1SA/275E1/275E1S) Brightness 0~100...
- Page 14 2. Setting up the monitor Resolution notification 27xE1 This monitor is designed for optimal performance at its native resolution, 1920×1080@60Hz(271E1S/271E1SD/272E 1SA), 2560×1440@60Hz(275E1/275E1S), 3840×2160@60Hz(278E1/278E1A). When the monitor is powered on at a different resolution, an alert is displayed on screen: Use 1920×1080(271E1S/271E1 SD/272E1SA), 2560×1440(275E1/275E1S) , 3840×2160(278E1/278E1A)for best results.
-
Page 15: Remove The Base Assembly For Vesa Mounting
2. Setting up the monitor 2.3 Remove the Base Assembly 4. Use a screwdriver to remove the screws on the arm,and then detach for VESA Mounting the arm/stand from the monitor. Before you start disassembling the monitor base, please follow the instructions below to avoid any possible damage or injury. - Page 16 2. Setting up the monitor 27xE1 Note This monitor accepts a 100mm x 100mm 1. Place the display face down on a VESA-Compliant mounting interface. smooth surface. Pay attention not to VESA Mounting Screw M4. Always scratch or damage the screen. contact manufacturer for wall-mount installation.
-
Page 17: Image Optimization
How d oes it work? SmartImage is an exclusive, leading edge Philips technology that analyzes 1. Toggle to the left to launch the the content displayed on your screen. SmartImage on screen display. - Page 18 Developed for wellbeing, rays from LED displays can cause Philips LowBlue Mode setting uses a eye damage and affect vision over smart software technology to reduce time. Developed for wellbeing, harmful shortwave blue light.
-
Page 19: Smartcontrast
LCD monitors. automatically optimizes a LCD monitor's Typical uniformity is measured contrast ratio for maximum visual clarity around 75-80%. By enabling Philips and viewing enjoyment, stepping up SmartUniformity feature, display backlighting for clearer, crisper and uniformity is increased to above brighter images or dimming backlighting 95%. -
Page 20: Adaptive Sync
4. Adaptive Sync • AMD Radeon R9 290 4. Adaptive Sync • AMD Radeon R9 285 • AMD Radeon R7 260X 271E1S/271E1SD/272E1SA/275E1/275E1S • AMD Radeon R7 260 ■ ■ Processor A-Series Desktop and Mobility APUs Adaptive Sync • AMD A10-7890K •... -
Page 21: Technical Specifications
5. Technical Specifications 5. Technical Specifications Picture/Display Monitor Panel Type IPS Technology Backlight W-LED system Panel Size 27” W (68.6cm) Aspect Ratio 16:9 271E1S/271E1SD/272E1SA: 0.311 x 0.311 mm Pixel Pitch 275E1/275E1S: 0.233 x 0.233 mm 278E1/278E1A: 0.155 x 0.155 mm Contrast Ratio 1000:1 (typ.) - Page 22 5. Technical Specifications 271E1S: VGA(Analog), HDMI(Digital,HDCP) 271E1SD: VGA(Analog), HDMI(Digital,HDCP), DVI Signal Input 272E1SA/275E1/275E1S: VGA(Analog), HDMI, DP(Digital,HDCP) 278E1/278E1A: HDMI, DP(Digital,HDCP) 271E1S: HDMI audio out 271E1SD/275E1/275E1S/278E1: Audio out Audio In/Out 272E1SA: Audio-in, Audio out 278E1A: Audio-in, Earphone output Input Signal Separate Sync, Sync on Green Convenience English, German, Spanish, Greek, French, Italian, Hungarian, Dutch, Portuguese, Brazil Portuguese, Polish, Russian,...
- Page 23 5. Technical Specifications AC Input AC Input AC Input Heat Dissipation* Voltage at Voltage at Voltage at 100VAC , 50Hz 115VAC , 60Hz 230VAC , 50Hz 81.23 BTU/hr 81.57 BTU/hr 81.91 BTU/hr Normal Operation (typ.) (typ.) (typ.) <1.71 BTU/hr <1.71 BTU/hr <1.71 BTU/hr Sleep (Standby) (typ.)
- Page 24 5. Technical Specifications <1.02 BTU/hr <1.02 BTU/hr <1.02 BTU/hr (typ.) (typ.) (typ.) On mode: White, Standby/Sleep mode: White Power LED indicator (blinking) Power Supply External, 100-240VAC, 50-60Hz Power(278E1/278E1A) AC Input AC Input AC Input Consumption Voltage at Voltage at Voltage at 100VAC , 50Hz 115VAC , 60Hz 230VAC , 50Hz...
- Page 25 100% PVC BFR free housing Cabinet Color Black Finish Texture Note This data is subject to change without notice. Go to www.philips.com/support to download the latest version of leaflet. 2. SmartUniformity and Delta E information sheets are included in the box.
-
Page 26: Resolution & Preset Modes
5. Technical Specifications 5.1 Resolution & Preset Modes H. freq Resolution V. freq (kHz) (Hz) Maximum Resolution 79.98 1280x1024 75.03 1920x1080@60Hz (analog input)(271 55.94 1440x900 59.89 E1S/271E1SD/272E1SA/275E1/275E1S) 70.64 1440x900 74.98 1920x1080@75Hz (HDMI input) (271E1S) 65.29 1680x1050 59.95 1920x1080@75Hz (HDMI input) 67.50 1920x1080 60.00... -
Page 27: Power Management
6. Power Management 275E1/275E1S 6. Power Management Power Management Definition If you have VESA DPM compliance VESA Video H-sync V-sync Power Used LED Color display card or software installed in Mode your PC, the monitor can automatically 29.90 W (typ.) Active White 37.70 W(Max.) -
Page 28: Customer Care And Warranty
Other combinations Pixel Defect Policy of lit and dark sub pixels appear as single pixels of other colors. Philips strives to deliver the highest quality products. We use some of the Types of Pixel Defects industry's most advanced manufacturing... - Page 29 A red or blue bright dot must be the warranty period, a TFT Monitor more than 50 percent brighter than panel in a Philips flat panel monitor must have pixel or sub pixel defects neighboring dots while a green exceeding the tolerances listed in the bright dot is 30 percent brighter than following tables.
- Page 30 7. Customer care and warranty BRIGHT DOT DEFECTS ACCEPTABLE LEVEL 1 lit subpixel 2 adjacent lit subpixels 3 adjacent lit subpixels (one white pixel) Distance between two bright dot defects* >15mm Total bright dot defects of all types BLACK DOT DEFECTS ACCEPTABLE LEVEL 1 dark subpixel 5 or fewer...
-
Page 31: Customer Care & Warranty
Please contact our Philips Customer Service Representative or local contact center (by Consumer care number) for more details. Philips Customer Care Center number listed below. -
Page 32: Troubleshooting & Faqs
• Disconnect the monitor from mains • First, ensure that the power button power source immediately for safety on the front of the monitor is in the • Contact with Philips customer OFF position, then press it to the service representative immediately. ON position. - Page 33 Service contact information listed in may cause "burn in", also known as Important information manual and "after-imaging " or "ghost imaging", contact Philips customer service on your screen. "Burn-in", "after- representative. imaging", or "ghost imaging" is a * Functionality different according to well-known phenomenon in LCD display.
-
Page 34: General Faqs
• Shut down your computer, that the panel surface is not disconnect your old monitor and subjected to excessive shocks reconnect your Philips LCD monitor. and is protected from sharp or • Turn on your monitor and then turn blunt objects. When handling the on your PC. - Page 35 Q9: Can I connect my LCD monitor to sharp text, and is displaying jagged any PC, workstation or Mac? characters? Ans.: Yes. All Philips LCD monitors are Ans.: Your LCD monitor works best at fully compatible with standard its native resolution of 1920x108 PCs, Macs and workstations.
- Page 36 Q14: Where can I find Important Information manual mentioned in EDFU? Ans.: Important Information manual can be download on the Philips website support page.
- Page 37 This product has been manufactured by and is sold under the responsibility of Top Victory Investments Ltd., and Top Victory Investments Ltd. is the warrantor in relation to this product. Philips and the Philips Shield Emblem are regis- tered trademarks of Koninklijke Philips N.V. and are used under license.