
Related Manuals for VTech AM18047


Summary of Contents for VTech AM18047
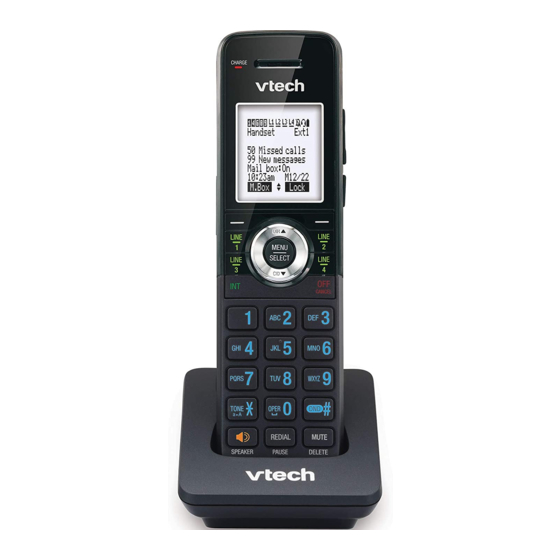
- Page 1 CM18045/ Go to www.vtechphones.com to AM18047 register your product for enhanced warranty support and the latest VTech product 4-Line news. Small Business System Cordless Handset User’s manual...
- Page 2 Serial number: Purchase date: Place of purchase: Both the model and serial numbers of your VTech product can be found on the bottom of the charger. Save your sales receipt and original packaging in case it is necessary to return your telephone for warranty service.
- Page 3 Important safety information This symbol is to alert you to important operating or servicing instructions that may appear in this user’s manual. Always follow basic safety precautions when using this product to reduce the risk of injury, fire, or electric shock. Safety information •...
- Page 4 Important safety information • For PLUGGABLE EQUIPMENT, the socket-outlet shall be installed near the equipment and shall be easily accessible. Caution: • Use only the power adapter provided with this product. To obtain a replacement, visit our website at www.vtechphones.com, or call 1 (800) 595-9511.
- Page 5 Important safety information Precautions for users of implanted cardiac pacemakers Cardiac pacemakers (applies only to digital cordless telephones): Wireless Technology Research, LLC (WTR), an independent research entity, led a multidisciplinary evaluation of the interference between portable wireless telephones and implanted cardiac pacemakers. Supported by the U.S. Food and Drug Administration, WTR recommends to physicians that: Pacemaker patients •...
- Page 6 Go to www.vtechphones.com to www.vtechphones.com AM18047 register your product for to register your product for enhanced warranty support enhanced warranty support and and the latest VTech product the latest VTech product news. 4-Line news. Small Business System CM18045/ Cordless Handset AM18047...
-
Page 7: Table Of Contents
Table of contents Getting started Telephone operation Installation ........1 Telephone operation ....27 Charger installation ...... 3 Line indicators ......27 Battery installation and Making and ending a call ..27 charging ........4 On hook dialing (predialing) ... 27 Wall mount installation Using the speakerphone .. - Page 8 Table of contents Call history Handle an intercom call by the private mailbox ....41 About the caller ID ..... 53 Call transfer ....... 42 Information about caller ID with call waiting ...... 53 Blind transfer ......42 Caller ID information ....54 Transfer a call and speak to the receiving party ....
- Page 9 Table of contents Answering system operation ..67 New message indication ..67 Call screening ......67 Call intercept ......67 Message playback ....68 Options during playback ..69 Transfer messages ....69 Delete all mailbox messages .. 70 Record memo ......
-
Page 10: Getting Started Installation
Getting started Installation This CM18045/AM18047 handset is an accessary of CM18445/ AM18447 concole. You must purchase the CM18445/AM18447 console and register this handset to the console before use. Install and set up CM18445/AM18447 console first before expanding your system with this CM18045/AM18047 handset. - Page 11 Getting started Installation Avoid placing the handset too close to: • Communication devices such as television sets, VCRs, or other cordless telephones. • Excessive heat sources. • Noise sources such as a window with traffic outside, motors, microwave ovens, refrigerators, or fluorescent lighting. •...
-
Page 12: Charger Installation
Getting started Charger installation The power adapter is intended to be correctly oriented in a vertical or floor mount position. The prongs are not designed to hold the plug in place if it is plugged into a ceiling, under-the-table or cabinet outlet. Install the charger as shown below. -
Page 13: Battery Installation And Charging
Getting started Battery installation and charging Install the battery as shown on the next page. Once you have installed the battery, the screen indicates the battery status (see the table below). If necessary, place the handset in the charger to charge the battery. For best performance, keep the handset in the charger when not in use. - Page 14 Getting started Battery installation and charging Install the battery as shown below. 1. Plug the battery connector securely into the socket inside the handset battery compartment. Insert the supplied battery with the label THIS SIDE UP facing up as indicated. 2.
-
Page 15: Wall Mount Installation (Optional)
Getting started Wall mount installation (Optional) The charger is ready for tabletop use. If you want to mount the charger on a wall, use two 10mm screws and wall anchors (not provided) to hold the charger in place. The screws and wall anchors are available for purchase in many hardware or consumer electronics retailers. - Page 16 Getting started Wall mount installation (Optional) 3. Insert the screws (not provided) into the holes and tighten them until only 1/4 inch of the screws are exposed. 4. Align the holes at the back of the charger with the screws on the wall and slide the charger down until it locks into place.
-
Page 17: Add And Register A Handset
Getting started Add and register a handset You can add CM18045/AM18047 handsets to the CM18445/ AM18447 console at any time, each new handset must be registered with the console before use. The handsets are assigned with available extension numbers starting from 1 in ascending 1) Press MENU order (1 to 9). -
Page 18: Use A Belt Clip (Optional)
Getting started Use a belt clip (Optional) Install the belt clip, if desired. Snap the belt clip into notches on both sides of the handset. To release the belt clip, pull and unlock one flap from its notch first before detaching the whole belt clip from the handset. -
Page 19: Add A Corded Headset (Optional)
Getting started Add a corded headset (Optional) You can use this handset handsfree when you install any industry-standard 2.5mm corded telephone headset (purchased separately). Side view of the handset Plug a 2.5 mm headset into the HEADSET jack on the side of the handset. -
Page 20: Handset Overview
Getting started Handset overview Charge light • On when the handset is charging in the charger. Softkeys (2) • Press to select a menu item displayed above the key. LINE 1/LINE 2/LINE 3/LINE 4 • Press to make a call on the desired line. •... - Page 21 Getting started Handset overview • Press to scroll up while in menus. • Press to show directory entries when the telephone is not in use. -/VOLUME/+ • During a call, press to adjust the listening volume. • Press to adjust the ringer volume when in idle mode. PAGE •...
- Page 22 Getting started Handset overview Menus Answering system menu • Play messages • Mailbox On/Off • Record memo • Gen MB • Settings • Remaining time • Delete all old Main menu • Directory • Call history • Ringer setting • Handset setup •...
- Page 23 Getting started Handset overview The following tables provides you with more details on the main menu and the answering system menu of the handset. Table 1 - Main menu (Press MENU/ in idle screen) SELECT Menu Description Reference Directory Review, add or delete directory Pages 48-52 entries.
- Page 24 Getting started Handset overview Table 2 - Answering system menu (Press left softkey in idle screen) Menu Description Reference Play Play messages in the private Pages 68-69 messages mailbox. Mailbox Turn on or off the private mailbox, Page 60 On/Off or set to play an announcement only to caller when no one is available to pick up the call.
- Page 25 Getting started Handset overview Table 2 - Answering system menu (Press left softkey in idle screen) (Continued) Menu Description Reference Call screening - Set whether Settings Pages 61-66 the handset user hear the caller (Continued) whenever a voice recording is taking place.
-
Page 26: Handset Screen Icons
Getting started Handset screen icons On when any corresponding extensions are in use. 1 2 3 4 5 On when the telephone line is in use by another extension. L1 L2 L3 L4 Flashes slowly when the telephone line is on hold by another extension. -
Page 27: Alert Tones And Lights
Getting started Alert tones and lights Handset alert tones One beep The handset is recording an announcement or memo. Two beeps You have set the hold reminder on; a call has been on hold for more than three minutes. -OR- You have set the message alert tone on. -
Page 28: Telephone Settings Telephone Setup
Telephone settings Telephone setup Menu settings Use this menu to change the handset settings. 1. Press MENU when in idle mode (when the handset is /SELECT not in use) to enter the main menu. 2. Press to scroll to the feature to be changed. The >... -
Page 29: Ringer Volume
Telephone settings Telephone setup Ringer volume Use this feature to set the ringer volume to one of six levels or turn the ringer off. When the ringer is off, the icon appears on the handset screen. The handset stores the volume setting for all lines. 1. -
Page 30: Ringer Tone
Telephone settings Telephone setup Ringer tone Use this feature to choose one of the ten ringer tones. You can choose different ringer tones for different lines so you can easily identify which line is calling. 1. When the handset is idle, press MENU /SELECT to scroll to Ringer setting, then press 2. -
Page 31: Lcd Contrast
Telephone settings Telephone setup LCD contrast Use this feature to adjust the screen contrast to one of five levels to optimize readability in different lighting conditions. 1. When the handset is idle, press MENU /SELECT to scroll to Handset setup, then press 2. -
Page 32: Auto Key Lock
Telephone settings Telephone setup Auto key lock Use this feature to prevent accidental dialing while carrying the handset around. When auto key lock is on, the handset will lock the keypad automatically after 30 seconds in idle mode. 1. When the handset is idle, press MENU /SELECT to scroll to Handset setup, then press 2. -
Page 33: Primary Line
Telephone settings Telephone setup Primary line Use this feature, also known as automatic line selection, to choose which line is automatically selected each time you make an outside call. If you select Auto, the handset picks up any available line starting from Line 1. 1. -
Page 34: Hold Reminder
Telephone settings Telephone setup Hold reminder When the handset holds an outside call or an intercom call for more than three minutes, it gives you a double beep every 30 seconds. You can set its volume to one of six levels or turn the reminder off. -
Page 35: Factory Reset
MENU/ /CANCEL or 3. Press to return to the previous menu. User support Use this feature to display the VTech website. 1. When the handset is idle, press MENU /SELECT 2. Press to scroll to User support, then press SELECT or Select. -
Page 36: Telephone Operation Telephone Operation
Telephone operation Telephone operation Line indicators Each of the four indicators on LINE 1-LINE 4 indicate the state of the corresponding telephone line. • On when the corresponding line is in use on this handset. • Flashes when there is an incoming call on the corresponding line. -
Page 37: Using The Speakerphone
Telephone operation Telephone operation Using the speakerphone /SPEAKER to switch between handsfree During a call, press speakerphone and normal handset use. Press OFF/ CANCEL hang up. Answering a call Press any line key (LINE 1-LINE 4). -OR- Press /SPEAKER on the handset to answer using the speakerphone. -
Page 38: Options While On Calls
Telephone operation Options while on calls Call waiting If you subscribe to call waiting service with your telephone service provider, you hear two beeps if someone calls while you are on a call. Flash • Press to put your current call on hold and take the new call. -
Page 39: Hold
Telephone operation Options while on calls Hold Use this feature to hold one line while accessing another, or as part of the conference. While on a call, press Hold. The corresponding line key (LINE 1- LINE 4) indicator for the line on hold flashes slowly. After the call has been put on hold for more than three minutes, you hear a double beeps every 30 seconds. -
Page 40: Call Privacy
Telephone operation Options while on calls Call privacy During a call, you can temporarily change the call privacy setting to allow or disallow other extensions to join the call. The original setting is automatically restored after you hang up or resume the call you put on hold. -
Page 41: Recording A Call
Telephone operation Options while on calls Recording a call Use this feature to record a phone conversation during a call. The recording is treated the same as memos and is marked as a new message in the private mailbox. Listen to recorded conversation the same way as incoming messages or memos (see Message playback on page 68). -
Page 42: Chain Dialing
Telephone operation Options while on calls Chain dialing While you are on a call, you can initiate a dialing sequence from the numbers in the directory, caller ID history or redial list. Chain dialing can be useful if you wish to access other numbers (such as bank account numbers or access codes) from the directory, caller ID history or redial list To access the directory while on a call:... -
Page 43: Redial
Telephone operation Redial The last 10 telephone numbers dialed (up to 32 digits) are stored in your handset. To view and dial the 10 most recently dialed numbers: 1. Press REDIAL/ to enter the redial list and display the PAUSE most recently called number. - Page 44 Telephone operation Redial To delete a redial number: While the screen displays the desired number, press /DELETE to delete the number from the redial memory. MUTE You hear a confirmation tone.
-
Page 45: Conference Call
Telephone operation Conference call The system can support 6-party conference with a maximum of four outside calls and two system extensions (including the initiating party). Establish a conference call There are two ways to establish a conference call. A. Hold an intercom call After establishing an intercom call with another system extension, the initiating party holds the intercom call and invites an external party to join the conference by making an outside call. - Page 46 Telephone operation Conference call B. Hold an outside call or join a call in progress After establishing the first outside call, the party can invite another system extension to join the conference by using intercom. Any system extension can also join a call in progress by pressing the line key which is currently in use to set up a conference.
-
Page 47: Options During A Conference Call
Telephone operation Conference call Options during a conference call To talk privately with one external party: 1. Press LINE 1-LINE 4 to talk privately with the person on that line. The intercom call is automatically placed on hold. SELECT, then press 2. - Page 48 Telephone operation Conference call To end a conference call: • Press OFF/ or return the handset to the charger to hang CANCEL up. The call will be ended when all parties hang up.
-
Page 49: Intercom
Telephone operation Intercom You can use the intercom feature for conversations between the handset and other system devices. Make an intercom call to an extension 1. Press INT on the handset when it is idle. 2. Press to scroll to a desired extension, then press SELECT or Select. -
Page 50: Answer An Incoming Call During An Intercom Call
Telephone operation Intercom Answer an incoming call during an intercom call If you receive an incoming outside call during an intercom call, there is an alert tone. To answer the call, press the corresponding line key (LINE 1- LINE 4). The intercom call is put on hold automatically. Hold an intercom call During an intercom call, press Hold. -
Page 51: Call Transfer
Telephone operation Call transfer You can transfer a call to any other system telephone. Only the recipient extension can answer the transferred call. Blind transfer While on a call, you can transfer a call directly without notifying the desired extension: 1. -
Page 52: Paging
Telephone operation Paging You can directly broadcast your voice to the speakerphone of the console, any deskset and handset. The extension you called can respond by pressing the PAGE key to begin a two-way communication. Make a paging call to an extension 1. -
Page 53: Set And Edit A Group For Paging Call
Telephone operation Paging Set and edit a group for paging call Use the group setting if you want to broadcast your voice to a group of extensions. When you page a group, only the selected extensions hear your voice. You can create up to three paging groups. -
Page 54: Make A Paging Call To Multiple Extensions
Telephone operation Paging Make a paging call to multiple extensions 1. Press PAGE on the handset when it is idle. 2. Press to scroll to Group or All, press /SELECT or Select. MENU If you choose Group, press or to scroll to a desired group of •... -
Page 55: Speed Dial
Telephone operation Speed dial This handset has 10 speed dial locations where you can store and dial phone numbers or system extension numbers. You can store up to 32 digits in each location. NOTE: By default, pressing speed dial keys 0 to 9 will make an intercom call to the corresponding registered extension. -
Page 56: Dial A Speed Dial Entry
Telephone operation Speed dial sequence. An F appears on the screen. SELECT or Save. 6. Press MENU/ The display shows Number already saved if the number is • already in the directory. Go to the previous step and choose Add from DIR to assign the speed dial entry. 7. -
Page 57: Directory About The Directory
Directory About the directory Use the directory to store names and phone numbers. Directory entries are not shared with other extensions. The console and each deskset have their own directories. Capacity The directory of this handset can store up to 100 entries, with a maximum of 24 alphanumeric characters (including spaces) for names and 32 digits for telephone numbers. -
Page 58: Create Directory Entries
Directory Create directory entries Create a new directory entry Use the following steps to store a name and number in the directory. 1. When the handset is idle, enter the telephone number (up to 32 digits). SELECT or Add. Use the dialing keys to edit the 2. -
Page 59: Review Directory Entries
Directory Create directory entries Review directory entries DIR. The screen displays the 1. When the handset is idle, press first entry in the directory. 2. Press to browse through the directory. Entries appear alphabetical order. /CANCEL to return to idle mode. 3. -
Page 60: Search Directory
Directory Search directory Search by name Follow the steps below to search for directory entries on the handset. 1. When the handset is idle, press 2. Use the dial pad keys (2-9) to start a name search. • If there is an entry matching the letter you press, the directory shows the first name beginning with that letter. -
Page 61: Dial, Delete Or Edit Entries
Directory Dial, delete or edit entries You can dial, delete or edit a directory entry (name and number) when it is shown on the handset. You can use the directory review (page 50) or name search (page 51) to show an entry. Display dial When a number is displayed on the screen, you can dial the number by pressing the desired line key (LINE 1-LINE 4) or... -
Page 62: Call History About The Caller Id
Call history About the caller ID This telephone supports caller ID services that most telephone service providers offer. Caller ID allows you to see the name, number, date and time of calls. Depending on your service subscription, you might see the caller’s number, or the caller’s name and number from the telephone service provider after the first or second ring. -
Page 63: Caller Id Information
Call history Caller ID information How the caller ID information (call log) works The telephone stores caller ID information for the last 50 incoming calls in the handset. Entries are stored in reverse chronological order. The telephone deletes the oldest entry when the log is full to make room for new calls. -
Page 64: Caller Id Operation
Call history Caller ID operation Memory match If the incoming telephone number is an exact match with a telephone number in your directory, the name that appears on the screen matches the corresponding name in your directory. For example, if Christine Smith calls, her name appears as Chris if this is how you entered it into your directory. -
Page 65: Review The Caller Id Information
Call history Caller ID operation Review the caller ID information 1. When the handset is idle, press . The handset displays XX Missed Calls. 2. Press to review the caller ID information. The caller ID history entries are stored in reverse chronological order, starting with the most recent entry. -
Page 66: Dial A Call History Entry
Call history Caller ID operation Dial a call history entry 1. When in the caller ID history, press to browse the number you wish to call. 2. Press the desired line key (LINE 1-LINE 4) or /SPEAKER. Save a caller ID entry to the directory 1. -
Page 67: Delete Entries
Call history Caller ID operation Delete entries To delete a call history entry: 1. When in the caller ID history, press to browse the desired number. /DELETE. 2. Press MUTE To delete all call history entries: 1. When the handset is idle, press . -
Page 68: Reasons For Missing Caller Id Information
Call history Reasons for missing caller ID information There are also occasions when other information or no information shows for various reasons: On-screen message Reason The number has been set as private. PRIVATE NUMBER The name has been set as private. PRIVATE NAME Both the name and number have been PRIVATE CALLER... -
Page 69: Answering System Private Mailbox Setup
Answering system Private mailbox setup This handset has a private mailbox that can answer calls and record messages when the auto attendant of the console and the private mailbox of the handset are turned on. When the auto attendant in the console picks up a call, the caller has to enter the extension number of this handset to access the private mailbox. -
Page 70: Number Of Rings
Answering system Private mailbox setup Number of rings You can set the number of times your handset rings before the private mailbox picks up a call. 1. When the handset is idle, press M.Box. to scroll to Settings, then press 2. -
Page 71: Announcement
Answering system Private mailbox setup Announcement An announcement plays when calls are answered by the private mailbox. The system has a default announcement, “Extension X is not available to answer your call right now. Please leave a message after the tone.” (X is the extension number of your handset.) You can use this announcement or record your own. - Page 72 Answering system Private mailbox setup To play the recorded announcement: 1. When the handset is idle, press M.Box. to scroll to Settings, then press 2. Press SELECT or Select. MENU/ 3. Press to scroll to Mailbox On or Announce only, SELECT or Select.
-
Page 73: Remote Access Code
Answering system Private mailbox setup Remote access code Use this code to select a three-digit number to allow remote access of the answering system from another telephone. You can change the code to any number from 000-999. This code is 000 by default. -
Page 74: Call Screening
Answering system Private mailbox setup Call screening Use this feature to choose whether incoming messages can be heard over the speaker when they are being recorded. This feature is set to On by default. You hear the incoming message on your handset when a call comes in. -
Page 75: Message Alert
Answering system Private mailbox setup Message alert Use this feature to turn the audible message alert on or off. If the message alert tone is on, the handset beeps every 10 seconds when there are new messages in the private mailbox. 1. -
Page 76: Answering System Operation
Answering system Answering system operation New message indication The handset displays XX New messages when there are new messages and/or memos in the private mailbox. Call screening When the answering system and call screening are turned on (see Call screening on page 65), and a message is being recorded, Screen press to hear the incoming message. -
Page 77: Message Playback
Answering system Answering system operation Message playback From the handset, you can play the messages in the private mailbox and the general mailbox. You can choose to play the new messages only or play old messages. When playback begins, the total number of messages is announced. -
Page 78: Options During Playback
Answering system Answering system operation Options during playback When a message is playing, you can adjust the playback volume, skip, repeat, delete the message, or switch between speakerphone and handset earpiece. • Press -/VOLUME/+ to adjust the message playback volume. •... -
Page 79: Delete All Mailbox Messages
Answering system Answering system operation Delete all mailbox messages You can use delete all messages stored in the private mailbox or stored in the general mailbox. To delete all messages in the private mailbox: 1. When the handset is idle, press M.Box. to scroll to Delete all old, then press 2. -
Page 80: Record Memo
Answering system Answering system operation Record memo Memos are messages you record into the handset mailbox. You can save, play back, and delete them like incoming messages. You can record a memo as a reminder to yourself, or send a message to other extensions using the answering system. -
Page 81: Remote Access
Answering system Remote access Use this feature to reach your answering system remotely by calling any telephone line connected this handset from any touch-tone telephone. Make sure the auto attendant feature of your CM18445/AM18447 console, and the private mailbox of the extension are turned on for this feature to work. - Page 82 Answering system Remote access 5. Hang up to end the call. NOTES: • If you do not enter the valid remote access code after you enter the answering system successfully, the answering system starts to record the message after the tone. •...
-
Page 83: Appendix
Appendix Deregister a handset You may need to deregister the handset from the console if you already have nine registered devices and need to replace a handset, or if you wish to change the assigned number of your registered devices. You must first deregister the desired device(s), and then register the device(s) individually. -
Page 84: Handset Display Screen Messages
Appendix Handset display screen messages All Caller ID histories are deleted. All calls deleted. All group settings for paging call are All group cleared. settings clear. All old messages in the private All old msgs mailbox are deleted. deleted. There are no entries in the caller ID Call history history. - Page 85 Appendix Handset display screen messages You cannot barge-in a conference Line in conf. call. The extension on the desired line Line user’s is holding an intercom. You cannot intercom in use barge-in it at the moment. The telephone line X is in use. Line X There is an incoming call from line ---Line X---...
- Page 86 Appendix Handset display screen messages The private mailbox is in use or System busy. an extension is holding a call. You Try again later cannot reset the handset settings to default. There are new calls in the caller ID XX Missed calls history.
-
Page 87: Troubleshooting
Appendix Troubleshooting If you have difficulty with your telephone, please try the suggestions below. For customer service, visit our website at www.vtechphones.com or call 1 (800) 595-9511. In Canada, dial 1 (800) 267-7377 The handset registration is unsuccessful. • Follow the handset registration instructions to register the handset again (see Add and register a handset on page My telephone doesn’t work at all. - Page 88 Appendix Troubleshooting There is no dial tone. • Try all the suggestions above. • Move the cordless handset closer to the console. You may have moved out of range. • If the previous suggestions do not work, disconnect the telephone line from the console and connect it to a different phone.
- Page 89 Appendix Troubleshooting My cordless handset isn’t performing normally. • Move the cordless handset closer to the console. You may have moved out of range. • Reset the console. Unplug the electrical power. Wait for 15 seconds, then plug it back in. Allow at least one minute for the console to reset.
- Page 90 Appendix Troubleshooting The batteries do not hold a charge. • If the cordless handset is in the charger and the charge light is not on, refer to The charge light is off (page 85). • Charge the battery in the cordless handset for at least 11 hours. For optimum daily performance, return the cordless handset to the charger when not in use.
- Page 91 Appendix Troubleshooting • If you plug your telephone in with a modem or a surge protector, plug the phone (or modem/surge protector) into a different location. If this does not solve the problem, relocate your console or modem farther apart from one another, or use a different surge protector.
- Page 92 Appendix Troubleshooting My cordless handset does not ring when I receive a call. • Make sure that the ringer is not off (page 20). • Make sure you plug the telephone line cords securely and firmly into the console and the telephone wall jacks. •...
- Page 93 Appendix Troubleshooting My calls cut in and out while I’m using my cordless handset. • Other electronic products such as HAM radios and other DECT phones can cause interference to your cordless telephone. Try installing your telephone as far away as possible from these types of electronic devices.
- Page 94 Appendix Troubleshooting My caller ID isn’t working. • Caller ID is a subscription service. You must subscribe to this service from your telephone service provider for this feature to work on your cordless handset. • The caller must be calling from an area that supports caller ID. •...
- Page 95 Appendix Troubleshooting Common cure for electronic equipment. • If the telephone does not seem to be responding normally, try putting the cordless handset in the charger. If it does not fix the problem, do the following (in the order listed): 1.
-
Page 96: Maintenance
Appendix Maintenance Taking care of your telephone • Your cordless telephone contains sophisticated electronic parts, so you must treat it with care. • Avoid rough treatment. • Place the corded handset down gently. • Save the original packing materials to protect your cordless telephone if you ever need to ship it. -
Page 97: Fcc Part 68 And Acta
Appendix FCC Part 68 and ACTA This equipment complies with Part 68 of the FCC rules and with technical requirements adopted by the Administrative Council for Terminal Attachments (ACTA). The label on the back or bottom of this equipment contains, among other things, a product identifier in the format US:AAAEQ##TXXXX. - Page 98 Appendix FCC Part 68 and ACTA If this product is equipped with a corded or cordless handset, it is hearing aid compatible. If this product has memory dialing locations, you may choose to store emergency telephone numbers (e.g., police, fire, medical) in these locations. If you do store or test emergency numbers, please: Remain on the line and briefly explain the reason for the call before hanging up.
-
Page 99: Fcc Part 15
20 cm (8 inches) or more. If you choose to use a clipping device, please make sure to only use the supplied VTech belt clip. For body worn operation, this handset has been tested and meets the FCC RF exposure guidelines when used with the belt clip supplied or designated for this product. -
Page 100: California Energy Commission Battery Charging Testing Instructions
Appendix California Energy Commission battery charging testing instructions This cordless handset is set up to comply with the energy-conserving standards right out of box. These instructions are intended for California Energy Commission (CEC) compliance testing only. When the CEC battery charging testing mode is activated, all telephone functions, except battery charging, will be disabled. -
Page 101: For C-Ul Compliance Only
Appendix For C-UL compliance only Mesures de sécurité importantes Ce symbole vous alertera d’informations importantes ou d’instructions d’entretien pouvant apparaître dans ce guide d’utilisation. Respectez toujours les mesures de sécurité et de sécurité de base lorsque vous utilisez ce produit, afin de réduire les risques de blessures, d’incendie, ou d’électrocution. - Page 102 Appendix For C-UL compliance only • Remplacez les piles uniquement tel que décrit dans votre guide d’utilisation. N’incinérez pas et ne percez pas les piles — elles contiennent des produits chimiques caustiques. • Les adaptateurs secteurs sont conçus pour être orientés verticalement ou installés sur le plancher.
- Page 103 Appendix For C-UL compliance only • Piles rechargeables : Vous devez recycler ou jeter les piles de manière écologique. Ne pas jeter dans les rebuts domestiques. Ne pas brûler ni percer les piles. Comme pour les autres piles du même type, si elles sont brûlées ou percées, des matières corrosives peuvent s’en échapper, ce qui risque de causer des brûlures ou autres blessures corporelles.
- Page 104 Appendix For C-UL compliance only Spécifiquement en rapport avec les répondeurs téléphoniques Enregistrement deux voies : Cet appareil n’émet pas de bips d’avertissement qui permettent de prévenir l’autre partie que vous enregistrez la conversation. Pour assurer votre conformité aux règlements fédéraux ou provinciaux en rapport avec les enregistrements des conversations téléphoniques, vous devriez informer l’autre partie lorsque vous activez l’enregistrement.
-
Page 105: Limited Warranty
Limited warranty 1. What does this limited warranty cover? The manufacturer of this VTech product warrants to the holder of a valid proof of purchase (“CONSUMER” or “you”) that the product and all accessories provided in the sales package (“PRODUCT”) are free from defects in material and workmanship, pursuant to the following terms and conditions, when installed and used normally and in accordance with the PRODUCT operating instructions. - Page 106 VTech will notify you and will request that you authorize the cost of repair prior to any further repair activity. You must pay for the cost of repair and return...
- Page 107 In no event shall VTech be liable for any indirect, special, incidental, consequential, or similar damages (including, but not limited to lost...
-
Page 108: Technical Specifications
Appendix Technical specifications RF frequency band 1921.536MHz - 1928.448MHz Channels Charger voltage 100Vrms - 120Vrms (AC voltage, 50/60Hz) Charger voltage 6VDC @ 100mA (Adapter output voltage) Battery pack 2.4V 400mAh Ni-MH battery Headset jack 2.5mm, 32ohm - 150ohm Operation Operating time* Talk time (cordless handset) Up to 7.1 hours Talk time (cordless handset speakerphone) -
Page 109: Index
Index Display dial 52 Do not disturb 21 Add a headset 10 Add a speed dial entry 46–47 Alert tones 18 Edit directory 52 Announcement 62–63 End a call 27 Answer a call 28 End an intercom call 40 Answer an intercom call 40 FCC, ACTA and IC regulations Battery charging 4–5 88–90... - Page 110 Index Make a call 27 Remote access 64, 72–73 Make an intercom call 40 Rename handset 25 Memo 71 Review call history 56 Memory match 55 Review directory 50 Menu settings 19 Ringer tone 21 Message indication 67 Ringer volume 20 Message playback 68–69 Missed (new) calls indicator 55 Screen contrast 22...
- Page 111 And your life. VTech Communications, Inc. A member of THE VTECH GROUP OF COMPANIES. VTech is a registered trademark of VTech Holdings Limited. Specifications are subject to change without notice. © 2017 VTech Communications, Inc. All rights reserved. 06/17. CM18045_AM18047_CIB_V4.0...