Table of Contents
Advertisement
Available languages
Available languages
Quick Links
READ AND SAVE
THESE INSTRUCTIONS
Installer: leave this guide with homeowner.
Register your product online at www.nutone.com/register.
Easy installation in both
new construction and retrofit
© 2014 Broan-NuTone LLC
RN80
RN110
n
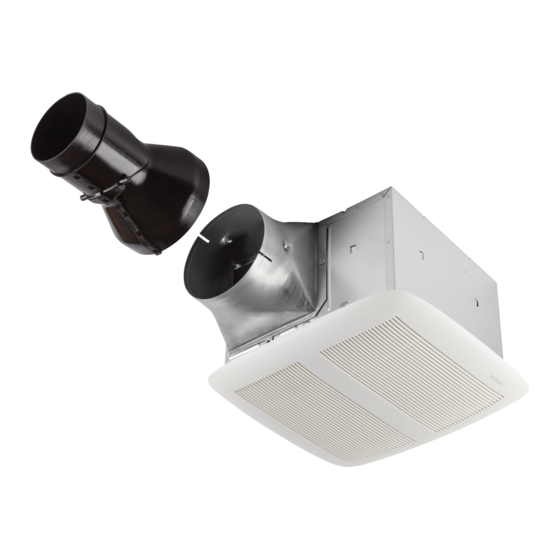
ULTRA Pro
| Ventilation Fan
TM
with ULTRAQuick
TM
INSTALLATION GUIDE
Table of Contents
Warnings and Cautions
Typical Installation
New Construction Installation
Retrofit Installation
Operation
Cleaning and Maintenance
Troubleshooting
Service Parts
Warranty
Installation Technology
2
2
3
7
12
12
12
13
13
Advertisement
Table of Contents

Related Manuals for NuTone Ultra Pro RN80


Summary of Contents for NuTone Ultra Pro RN80
- Page 1 | Ventilation Fan THESE INSTRUCTIONS with ULTRAQuick Installation Technology Installer: leave this guide with homeowner. INSTALLATION GUIDE Register your product online at www.nutone.com/register. Table of Contents Warnings and Cautions Typical Installation New Construction Installation Easy installation in both Retrofit Installation...
- Page 2 Page 2 RN80 RN110 Installation Guide WARNING CAUTION TO REDUCE THE RISK OF FIRE, ELECTRIC SHOCK, OR . For general ventilating use only. Do not use to exhaust INJURY TO PERSONS, OBSERVE THE FOLLOWING: hazardous or explosive materials and vapors. 1.
- Page 3 Page 3 RN80 RN110 Installation Guide New Construction Installation Tools needed Materials needed • Power screwdriver with a Phillips bit • 4" round metal ducting recommended for best performance. Use of other ducting is acceptable but may impact performance. • Phillips screwdriver •...
- Page 4 Page 4 RN80 RN110 Installation Guide New Construction Installation Snap-in and Secure Housing and Muffler Position Housing between joists and crimp channel on both sides of Mounting Frame to lock Housing in place. Do not crimp Housing. Screws from Parts Bag Attach Muffler.
- Page 5 Page 5 RN80 RN110 Installation Guide New Construction Installation Connect Wires and Install Knockout Plate • Run 120VAC electrical wiring to the installation location. • Use proper UL-approved connectors to secure wiring to the Knockout Plate provided in Parts Bag. •...
- Page 6 Page 6 RN80 RN110 Installation Guide New Construction Installation Insert Mask and Finish Ceiling • Tape Mask into Housing. • Install ceiling material. • Cut out around Housing. Mask protects unit during construction. Remove before installing Grille. Install Grille See Page 12 for Operation, Cleaning and Maintenance, and Troubleshooting.
- Page 7 Page 7 RN80 RN110 Installation Guide Retrofit Installation Tools needed Materials needed • Power screwdriver with a Phillips bit • Ruler • Tape to seal duct connections • Phillips screwdriver • Pencil • Existing rigid duct will require the addition of a short length of flexible duct •...
- Page 8 Page 8 RN80 RN110 Installation Guide Retrofit Installation Remove Blower Assembly Set aside Blower Assembly Both sides Remove Wiring Panel Set aside Wiring Panel Set aside screw Insert Mounting Frame Remove screws from Mounting Frame Bend up and set aside four tabs...
- Page 9 Page 9 RN80 RN110 Installation Guide Retrofit Installation Secure Mounting Frame Screws set aside in Step 7 Snap-in Housing Pull existing wiring into Housing as it is inserted into Mounting Frame Attach Flange, Transition and Ducting Screw from Parts Bag Pull existing 4"...
- Page 10 Page 10 RN80 RN110 Installation Guide Retrofit Installation Install Knockout Plate, Connect Wires and Install Wiring Panel • Use proper UL-approved connectors to secure wiring to the Knockout Plate provided in Parts Bag. • Connect wires as shown in wiring diagram. Attach cable clamp to Knockout Plate.
- Page 11 Page 11 RN80 RN110 Installation Guide Retrofit Installation Insert and Secure Blower Assembly and Muffler Screws from Parts Bag If ceiling repairs are needed, tape Mask into Housing. Attach Muffler. See New Construction Installation, Step 6. Remove Mask before installing Grille. Install Grille...
- Page 12 Page 12 RN80 RN110 Installation Guide Troubleshooting WARNING Before servicing or cleaning unit, Symptom: The fan does not run. switch power off at service panel and lock the service • Check for an open fuse or circuit breaker in the disconnecting means to prevent power from being building’s service panel.
- Page 13 Fan or part thereof, to the extent NuTone finds it to be covered by and in breach of this limited warranty. NuTone will ship the repaired or replaced Fan or replacement parts to you at no charge.
- Page 14 Page 14 RN80 RN110 Installation Guide 99045219C...
-
Page 15: Table Of Contents
ULTRAQuick Instalador: entregue esta guía al dueño de casa. GUÍA PARA LA INSTALACIÓN Registre su producto en línea en el sitio www.nutone.com/register. Tabla de contenido Advertencias y precauciones Instalación típica Instalación en una construcción nueva Instalación en modernizaciones... -
Page 16: Advertencias Y Precauciones
Página 2 RN80 RN110 Guía para la instalación ADVERTENCIA PRECAUCIÓN PARA REDUCIR RIESGO INCENDIO, SHOCK . Sólo debe utilizarse para ventilación general. No utilizar para ELÉCTRICO O DAÑOS A LAS PERSONAS, RESPETE LAS ventilar materiales y vapores peligrosos o explosivos. SIGUIENTES INSTRUCCIONES: 2. -
Page 17: Instalación En Una Construcción Nueva
Página 3 RN80 RN110 Guía para la instalación Instalación en una construcción nueva Herramientas necesarias Materiales necesarios • Destornillador eléctrico con punta Phillips • Conducto circular de metal de 4 pulg. recomendado para un mejor • Destornillador Phillips rendimiento. Se acepta el uso de otro tipo de conducto pero esto puede afectar el rendimiento. •... - Page 18 Página 4 RN80 RN110 Guía para la instalación Instalación en una construcción nueva Coloque el compartimiento y el mofle a presión y asegúrelo Ubique el compartimiento entre las vigas y ajuste el canal a ambos lados del bastidor de montaje para que el compartimiento quede asegurado ¡Presione...
- Page 19 Página 5 RN80 RN110 Guía para la instalación Instalación en una construcción nueva Conecte los cables e instale la placa metálica • Extienda un cableado eléctrico de 120 VCA hasta el sitio de la instalación. • Utilice conectores aprobados por UL para asegurar el cableado hasta la placa metálica que se incluye en la bolsa de piezas. •...
- Page 20 Página 6 RN80 RN110 Guía para la instalación Instalación en una construcción nueva Introduzca la máscara y acondicione el techo • Cinta de la máscara en el compartimiento. • Instale el material del techo. La máscara protege • Corte alrededor del la unidad durante la compartimiento.
-
Page 21: Instalación En Modernizaciones
Página 7 RN80 RN110 Guía para la instalación Instalación en modernizaciones Herramientas necesarias Materiales necesarios • Destornillador eléctrico con punta Phillips • Regla • Cinta para sellar las conexiones de los conductos • Destornillador Phillips • Lápiz • Los conductos rígidos existentes requerirán el •... - Page 22 Página 8 RN80 RN110 Guía para la instalación Instalación en modernizaciones Retire el conjunto del ventilador Aparte el conjunto del ventilador Ambos lados Retire el panel con los cables Aparte el panel con los cables Aparte el perno Introduzca el bastidor de montaje Retire los pernos del bastidor de montaje...
- Page 23 Página 9 RN80 RN110 Guía para la instalación Instalación en modernizaciones Asegure el bastidor de montaje Pernos apartados en el Paso 7 Coloque el compartimiento a presión ¡Presione hasta que trabe! Tire del cableado existente en el compartimiento mientras lo introduce en el bastidor de montaje Fije el reborde, la transición y los conductos Perno de la...
- Page 24 Página 10 RN80 RN110 Guía para la instalación Instalación en modernizaciones Instale la placa metálica, conecte los cables e instale el panel de cableado • Utilice conectores aprobados por UL para asegurar el cableado hasta la placa metálica que se incluye en la bolsa de piezas. •...
- Page 25 Página 11 RN80 RN110 Guía para la instalación Instalación en modernizaciones Introduzca y asegure el conjunto del ventilador y el mofle Pernos de la bolsa de piezas Si se necesitan reparaciones de techo, cinta del mofle en el compartimiento. Fije el mofle. Consulte Instalación en modernizaciones, Paso 6.
-
Page 26: Funcionamiento
Página 12 RN80 RN110 Guía para la instalación Identificación y solución de fallas ADVERTENCIA Antes de realizar el Síntoma: El ventilador no funciona. servicio o de limpiar la unidad, corte el suministro • Verifique la presencia de un fusible o interruptor abierto eléctrico en el panel de servicio y bloquee el servicio en el panel de servicios del edificio. -
Page 27: Repuestos
97018349 Bastidor de montaje Esta garantía cubre sólo el reemplazo o la reparación de los Ventiladores o piezas con defectos del mismo en la plana principal de NuTone y no incluye los costos del 97018721 Placa metálica y pernos transporte del servicio en campo ni los gastos de estadía. - Page 28 Página 14 RN80 RN110 Guía para la instalación 99045219C...