Table of Contents
Advertisement
Quick Links
Advertisement
Table of Contents

Related Manuals for AEG L8FEN96CAD


Summary of Contents for AEG L8FEN96CAD
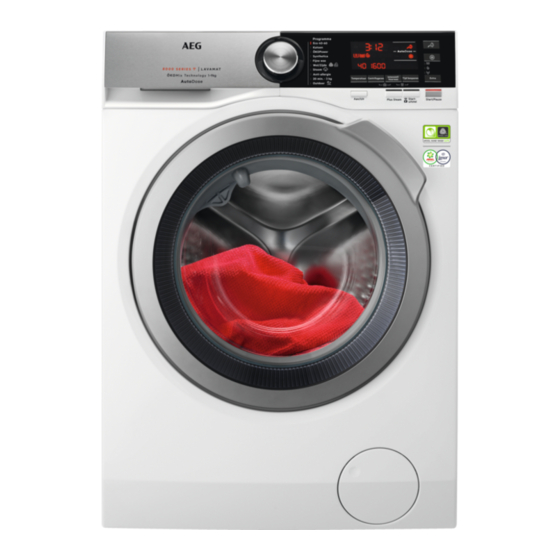
- Page 1 L8FEN96CAD User Manual Washing Machine USER MANUAL...
- Page 2 8. THE AUTODOSE TECHNOLOGY (AUTODOSING).......... 21 9. PROGRAMMES....................28 WI-FI - CONNECTIVITY SETUP..............33 11. DAILY USE....................... 35 12. HINTS AND TIPS....................39 13. CARE AND CLEANING..................41 14. TROUBLESHOOTING..................48 15. CONSUMPTION VALUES................53 16. ACCESSORIES....................55 My AEG Care app...
- Page 3 ENGLISH FOR PERFECT RESULTS Thank you for choosing this AEG product. We have created it to give you impeccable performance for many years, with innovative technologies that help make life simpler – features you might not find on ordinary appliances. Please spend a few minutes reading to get the very best from it.
- Page 4 Children between 3 and 8 years of age and persons • with very extensive and complex disabilities shall be kept away from the appliance unless continuously supervised. Children of less than 3 years of age should be kept •...
- Page 5 ENGLISH The appliance must be connected to the water mains • using the new supplied hose sets, or other new hose sets supplied by the Authorised Service Centre. Old hose sets must not be reused. • If the mains power supply cable is damaged, it must •...
- Page 6 2.4 Use • Always use a correctly installed shockproof socket. • Make sure that the parameters on the WARNING! rating plate are compatible with the Risk of injury, electric shock, electrical ratings of the mains power fire, burns or damage to the supply.
- Page 7 ENGLISH • Concerning the lamp(s) inside this • Disconnect the appliance from the product and spare part lamps sold mains electrical and water supplies. separately: These lamps are intended • Cut off the mains electrical cable to withstand extreme physical close to the appliance and dispose of conditions in household appliances, such as temperature, vibration,...
- Page 8 3.2 Appliance overview 11 12 Worktop Feet for levelling the appliance Detergent dispenser with AutoDose Drain hose tanks and manual compartments Inlet hose connection Control panel Mains cable Door handle Transit bolts Rating plate Hose support Drain pump filter...
- Page 9 ENGLISH Water supply pressure Minimum 0.5 bar (0.05 MPa) Maximum 8 bar (0.8 MPa) Cold water Water supply Maximum Load Cotton 9 kg Spin Speed Maximum spin speed 1351 rpm 1) Connect the water inlet hose to a water tap with a 3/4'' thread. 5.
- Page 10 7. Remove the polystyrene protection 10. Remove the three bolts by using the from the bottom. spanner supplied with the appliance. 8. Pull up the appliance in vertical 11. Pull out the plastic spacers. position. 12. Put the plastic caps, that you find in the user manual bag, in the holes.
- Page 11 ENGLISH 2. Position it toward left or right WARNING! depending on the position of the Do not put cardboard, wood water tap. or equivalent materials below the appliance feet to adjust the level. 45º 45º 20º 20º Make sure that the inlet hose is not in vertical position.
- Page 12 The red sector in the window «A» shows this fault. If this occurs, close the water tap and Make sure that the drain contact the authorized service centre to hose end is not immersed in replace the hose. the water. There may be a 5.5 Water drainage...
- Page 13 ENGLISH 5. Without the plastic hose guide, to The rating plate and the 'Technical Data' a sink spigot - Put the drain hose in chapter indicate the necessary electrical the spigot and tighten it with a clamp. ratings. Make sure that they are Refer to the illustration.
- Page 14 6. CONTROL PANEL 6.1 Control panel description 11 10 The options are not selectable with all washing programmes. Check the compatibility between options and washing programmes in the "AutoDose and options compatibility with programmes" paragraph in the "Programmes" chapter. An option can exclude another one, in this case the appliance doesn't allow you to set the incompatible options together.
- Page 15 ENGLISH By touching this button you can set: • Alleen spoelen at first touch. The washing programme starts from the rinsing phase by skipping the washing phase. All set options (except permanent extra rinse) are deselected automatically. Extra - Skip‐ •...
- Page 16 Press this button repeatedly to activate one of the two options or both. The relevant indicator comes on in the display. • Remote Select this option to connect appliance with App. Touch this button, the display shows the indicator blink‐...
- Page 17 ENGLISH Press this button repeatedly to activate one of the two options or both. The relevant indicator comes on in the display. • Intensief By setting this option, the indicator appears close to deter‐ gent symbol, and the machine will automatically dose an extra amount of detergent when automatic detergent tank is ena‐...
- Page 18 When you set a programme, the appliance automatically selects the maximum spin speed. Touch this button repeatedly to: • Decrease the spin speed. The display shows only the spin speeds avail‐ able for the set programme. • Activate the Rinse Hold option .
- Page 19 ENGLISH With this option you can permanently have an extra rinse. To activate/deactivate this option touch the Centrifugeren button and the Intensief/Voorwas button simultaneously, the relevant in‐ Permanent Extra Rinse dicator comes on/goes off over rinse phase symbol. This option adds two rinses. With this option you can prevent that the children play with the control panel.
- Page 20 Wi-Fi connection indicator. Remote connection indicator. Delay start indicator. Door locked indicator. The digital indicator can show: • Maximum load indicator: e.g. Cottons . The icon flashes dur‐ ing laundry load estimation. Refer to "ProSense load detection" para‐ graph.
- Page 21 ENGLISH Extra Silent indicator. Voorwas indicator. Intensief indicator. AutoDose liquid detergent tank indicator. When it lights, appliance auto‐ matically doses the detergent. This indicator appears beside when Intensief option is set. AutoDose softener tank indicator. When it lights, appliance automatically doses the softener.
- Page 22 Too much detergent damages your Further explanations on clothes and too little doesn’t ensure good AutoDose and activation of wash performances. advanced settings are This appliance is equipped with an auto available downloading the dosing system able to automatically APP.
- Page 23 ENGLISH However, under extreme conditions (very soft or very hard water) and particular type of detergent (such as super compact), we recommend to adjust the pre-set dosage by following the indication given on detergent and fabric softener container: e.g when using super compact detergent you may need to reduce the pre-set dosage considerably.
- Page 24 8.4 AutoDose configuration Centrifugeren button to adjusts it downwards. Minimum step is 1 ml. mode Enter the AutoDose configuration mode before proceeding with any programme setting. The configuration mode may cancel temporary settings . 1. Press the Aan/Uit button for a few 6.
- Page 25 ENGLISH 3. Gently pour only liquid detergent in the AutoDose detergent tank . Fill up to the maximum indicated level 8.6 AutoDose low level indication Do not refill the AutoDose 4. Gently pour only liquid softener in the tanks unless appliances AutoDose fabric softener tank .
- Page 26 8.7 Switching from AutoDose to manual dosing It is possible to disable AutoDose function for one or both tanks by pressing related button symbol. Example: • To switch Fabric Softener tank off, 2. After about 10 seconds the display...
- Page 27 ENGLISH 2. Pour the liquid detergent in the 3. If desired, pour the fabric softener in compartment the compartment Manual 3. Gently close the detergent dispenser, 4. Gently close the detergent dispenser, till click engagement. till click engagement. If the machine has not been used for more than 4 weeks with filled tanks, detergent/ softener can become...
- Page 28 This will happen even if the user turned To restart the programme, ensure the AutoDose off. drawer is properly closed and press Start/Pauze button. 9. PROGRAMMES 9.1 Programme Chart Washing programmes Programme Programme description Washing programmes White cotton and fast-coloured cotton. Normally soiled items.
- Page 29 ENGLISH Programme Programme description White cotton items. This programme removes micro-organ‐ isms thanks to a washing phase with the temperature main‐ Anti-allergie tained above 60°C for several minutes. This helps remove germs, bacteria, micro-organism and particles. An additional rinsing phase ensures a proper removal of detergent residues and pollens/allergenic items.
- Page 30 Programme Default tempera‐ Reference spin Maximum load ture speed Temperature Spin speed range range 40 °C 1400 rpm 9 kg 95 °C - Cold 1400 rpm - 400 rpm Katoen ÖKOPower 30 °C 1400 rpm 5 kg 60 °C - 30 °C 1400 rpm - 400 rpm 40 °C...
- Page 31 ENGLISH AutoDose ■ ■ ■ ■ ■ ■ ■ ■ AutoDose Detergent ■ ■ ■ ■ ■ ■ ■ ■ AutoDose Fabric Softener Others ■ ■ ■ ■ ■ ■ ■ ■ ■ Centrifugeren ■ ■ ■ ■ ■ ■ ■...
- Page 32 ■ ■ ■ ■ Plus Steam 1) This option is not available with temperature lower than 40 °C. 2) If you set the shortest duration, we recommend that you decrease the load size. It is possible to fully load the appliance, however the washing results can be less satisfactory.
- Page 33 1. Press and hold the Aan/Uit button for a few seconds to activate the configuring "My AEG" appliance. Wait about 10 seconds before proceeding with wireless "My AEG" allows you to configuration. control your laundry through a mobile device. 2. Press and hold the...
- Page 34 This 4. Configure the "My AEG" app on your function is deactivates when smart device and follow the door is open. instructions to connect the appliance to your Wi-Fi network.
- Page 35 ENGLISH 10.4 Over-the-air update Do not switch off or unplug the appliance during update. The App may propose an update for your The appliance will usable again at the appliance. end of the update, without any The update is accepted via App only. notification about successful update.
- Page 36 11.4 Setting a programme In the display, the indicator of the operating phase starts flashing. If you wish to change the The programme starts, the door is automatic detergent or fabric locked. The display shows the indicator softener dosage, enter the...
- Page 37 ENGLISH 11.7 The ProSense load About 20 minutes after the detection programme start, the programme duration could The programme duration in be adjusted again depending the display is referred to a on the capacity of water medium/high load. absorption of the fabrics. After touching the Start/Pauze button, The ProSense detection is the maximum declared load indicator...
- Page 38 2. Change the options. The given also set a spinning or draining information in the display changes programme/option and than press accordingly. Start/Pauze button. If the spin and 3. Touch the Start/Pauze button again. drain programmes are not available The washing programme continues.
- Page 39 ENGLISH 11.14 Stand-by option • The drum still turns at regular intervals to prevent the creases in the The Stand-by function automatically laundry. deactivates the appliance to decrease • The door stays locked. the energy consumption when: • You must drain the water to open the door: •...
- Page 40 First, follow these generic rules: – powder detergents for all types of fabric, excluding delicate. Prefer powder detergents containing bleach for whites and laundry sanitization, – liquid detergents, preferably for low temperature wash programmes (60 °C max) for all •...
- Page 41 ENGLISH 12.5 Water hardness each programmes helps to reduce energy and water consumption. If the water hardness in your area is high • With adequate pre-treatment, stains or moderate, we recommend that you and limited soiling can be removed; use a water softener for washing the laundry can then be washed at a machines.
- Page 42 CAUTION! drained out with the water. Regularly Do not use alcohol, solvents examine the seal. Coins, buttons, other or chemical products. small items can be recovered at the end of the cycle.
- Page 43 ENGLISH Occasionally, at the end of a cycle the display may show the icon : this is a recommendation to perform the “drum cleaning”. Once the drum cleaning has been performed, the icon disappears. 13.8 Cleaning the detergent dispenser and the AutoDose tanks CAUTION! Do not change brand or...
- Page 44 5. Wash the drawer and all inserts under running water. CAUTION! Press the bottom cover as indicated in the picture. Make sure that it is closed properly. CAUTION! Do not use sharp or metal brushes and sponges. 6. Turn the dispenser up side down and open the bottom cover as indicated in the picture.
- Page 45 ENGLISH b. Place the bottom cover and press till "click" sound. c. Place the top cover on the tanks compartment and press till "click" sound. d. Replace components on manual compartment. 11. Insert the detergent dispenser into the guide rails and gently close it till "click"...
- Page 46 13.9 Cleaning the drain pump WARNING! Disconnect the mains plug from the mains socket. Regularly check the drain pump filter and make sure that it is clean. Clean the drain pump if: • The appliance does not drain the water.
- Page 47 ENGLISH contact the Authorised Service Centre. When you drain the water with the emergency drain procedure, you must 10. Clean the filter under the water tap. activate the drain system again: a. Put 2 litres of water in the main wash compartment of the detergent dispenser.
- Page 48 13.11 Emergency drain If the appliance cannot drain the water, carry out the same procedure, described in 'Cleaning the drain pump' paragraph. If necessary, clean the pump. When you drain the water with the emergency drain procedure, you must activate the drain system again: 1.
- Page 49 ENGLISH 14.1 Alarm Codes and Possible failures The appliance does not start or it stops during operation. First try to find a solution to the problem (refer to the tables). WARNING! Deactivate the appliance before carrying out any check. With some problems, the display shows an alarm code and the Start/Pauze button may flash continuously: If the appliance is overloaded, remove some items from the drum and/or keep pressed the door while...
- Page 50 • Make sure that the door is properly closed. The appliance door is open or not closed correctly. • The programme was not finished properly or the appliance stopped too early. Switch the appliance off and on again. Internal fail. No com‐...
- Page 51 ENGLISH Problem Possible solution • Make sure that the couplings of the water hoses are tight and there is not water leakages. There is water on the • Make sure that the water inlet hose and the drain hose have floor.
- Page 52 Problem Possible solution The display shows • The appliance is downloading any available updates. Wait un‐ til the update process is complete. If you deactivate the appli‐ . All buttons are ance during update, it resumes when you activate the appli‐...
- Page 53 ENGLISH 14.2 Emergency door To open the door, proceed as follows: opening 1. Press the Aan/Uit button to switch the appliance off. In case of power failure or functioning 2. Disconnect the mains plug from the failure the appliance door remains mains socket.
- Page 54 The QR code on the energy label supplied with the appliance provides a web link to the information related to the performance of the appliance in the EU EPREL database. Keep the energy label for reference together with the user manual and all other documents provided with this appliance.
- Page 55 16. ACCESSORIES 16.1 Available in Only appropriate www.aeg.com/shop or from accessories approved by authorised dealer AEG ensure the safety standards of the appliance. If Read carefully the instructions supplied unapproved parts are used, with the accessory. any claims will be...
- Page 56 If you install the appliance on a plinth under the washing machine. that is not an accessory supplied by Verify the compatible AEG, secure the appliance in the fixing stacking kit by checking the plates. depth of your appliances. Read carefully the instructions supplied with the accessory.
- Page 60 My AEG Care app The software in this product contains components that are based on free and open source software. AEG gratefully acknowledges the contributions of the open software and robotics communities to the development project. To access the source code of these free and open source software components whose license conditions require publishing, and to see their full copyright information and applicable license terms, please visit: http://aeg.opensoftwarerepository.com (folder NIUX)