
Related Manuals for Daikin FTXZ25NVM


Summary of Contents for Daikin FTXZ25NVM
- Page 1 DAIKIN ROOM AIR CONDITIONER OPERATION MANUAL MODELS FTXZ25NVM FTXZ35NVM FTXZ50NVM FTXZ25NVMM FTXZ35NVMM FTXZ50NVMM...
-
Page 2: Table Of Contents
CONTENTS Before Operation Safety precautions ...................... 3 Names and functions of parts ..................5 Preparation before operation ..................9 To set the batteries To set the clock To set the position where the indoor unit is installed Basic Operation To set operation modes ..................... 11 AUTO COOLING “SARARA”... -
Page 3: Before Operation
Before Operation To purify the air in the room ..................24 Basic Operation FLASH STREAMER AIR PURIFYING To consider the environment of use ................25 Useful Functions ECONO OUTDOOR UNIT QUIET To prevent mishandling by children ................26 Cleaning CHILD LOCK To keep the air conditioner clean ................ -
Page 4: Safety Precautions
Safety precautions Read the precautions in this manual carefully This appliance is filled with R32. before operating the unit. • Keep this manual where the user can easily find it. • The precautions described herein are classified as WARNING and CAUTION. They both contain important information regarding safety. Be sure to observe all precautions without fail. - Page 5 • Do not place appliances that produce naked flames in places exposed to the airflow from the unit as this may impair combustion of the burner. • Do not block air inlets nor outlets. Impaired airflow may result in insufficient performance or trouble. •...
-
Page 6: Names And Functions Of Parts
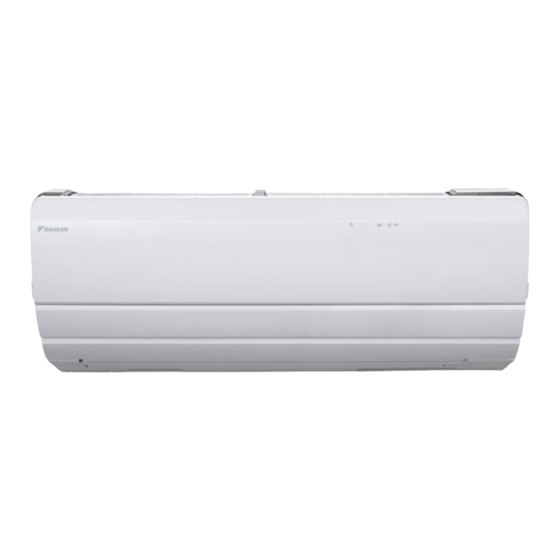
Names and functions of parts Indoor unit Air inlet INTELLIGENT EYE sensor (top surface) Front panel Auxiliary fl ap (horizontal blade) Page 13 Shutter Model name plate Flap (horizontal blade) (bottom air inlet) Page 13 Louvres (vertical blades) (Inside of the air outlet located on the Air outlet right and left sides.) - Page 7 When the front panel is open Page 35 „ Display unit Indoor unit ON/OFF switch • Press to start the operation with the mode set to INTELLIGENT EYE sensor “AUTO” and airfl ow rate to “AUTO”. Press the button again to stop the operation. Detects human motion to confi rm that a person is in •...
- Page 8 Names and functions of parts Remote controller Transmitter/Receiver Transmitter/Receiver Display (LCD), with backlight • Displays the operating conditions. (All displayed here for your reference.) (All displayed here for your reference.) • Press any of the operation buttons to light Press any of the operation buttons to light the backlight for about 5 seconds.
- Page 9 Open the cover A menu item is shown above. A menu item is shown below. Airfl ow direction buttons Adjust the vertical and horizontal FLASH STREAMER AIR PURIFYING Page 24 airfl ow directions. Page 13 AUTO MOLD PROOF ...
-
Page 10: Preparation Before Operation
Preparation before operation To set the batteries Pull down the upper tab to open the cover. Insert 2 dry batteries AA.LR6 (alkaline). • Using batteries other than AA.LR6 (alkaline) may lead to Upper tab improper operation. Do not confuse Insert the 2 lower tabs on the cover to put sides. -
Page 11: To Set The Position Where The Indoor Unit Is Installed
To set the clock Press Press to set the clock to the current time. • Each time you press , the time changes by 1 minute. If you press and hold the button, the time changes by 10 minutes. Press •... -
Page 12: To Set Operation Modes
To set operation modes AUTO operation To operate in appropriate operation mode (COOLING or HEATING) based on the set temperature and the indoor temperature. Press COOLING operation To lower the temperature. Press “SARARA” DRY operation To lower the humidity. Press DRY COOLING operation To lower the temperature and humidity. - Page 13 To adjust the temperature Press To adjust the humidity Press Notes on humidity settings Setting Description : CONTINUOUS Continues dehumidifying. : HIGH Dehumidifies with high power. : STANDARD Dehumidifies with moderate power. : LOW Dehumidifies with low power. : OFF Does not perform humidity control.
-
Page 14: To Adjust The Airflow
To adjust the airflow To adjust the airflow rate Press • Each time you press the button, the airflow rate indicator changes. (Some indicators may not appear depending on the operation mode. Page 14 ..AUTO Indoor unit quiet Airflow rate 1-5 •... -
Page 15: Airfl Ow Directions
Notes on airflow rate • When the airflow rate setting is “AUTO”, starting COOLING, “SARARA” DRY, or DRY COOLING operation (including the operation selected with “AUTO”) triggers the deodorising function which reduces odour coming from the indoor unit and the unit does not blow air immediately. - Page 16 To adjust the airfl ow Note on 3-D airfl ow • Using 3-D airfl ow circulates cold air, which tends to collect at the bottom of the room, and hot air, which tends to collect near the ceiling, throughout the room, preventing areas of cold and hot developing. Note on horizontal airfl ow direction •...
-
Page 17: To Operate Wisely Using The Sensor
To operate wisely using the sensor 3 Area INTELLIGENT EYE operation Whether to blow air away from a person or not can be set according to your preference. The INTELLIGENT EYE sensor detects the movement of a person and automatically changes the airflow direction. -
Page 18: To Use The Timer
To use the timer ON/OFF TIMER operation This function controls the operation start and stop time. When you set the timer, you can select the operation frequency either once or daily. < To use the operation > Press Press to select the item and press 24 HOUR ON TIMER 24 HOUR OFF TIMER C-SLEEP TIMER... - Page 19 COUNTDOWN OFF TIMER operation You can set the timer for the remaining time until the scheduled stop. The timer should be set each time. < To use the operation > Press • The time can be set in increments of 30 minutes each time the button is pressed (from 30 minutes to 9 hours 30 minutes).
-
Page 20: To Ensure A Comfortable Sleep
To ensure a comfortable sleep COMFORT SLEEP TIMER operation COMFORT SLEEP TIMER operation keeps the indoor temperature and humidity at suitable levels for a comfortable sleep and refreshing morning. < To use the operation > Press during COOLING or HEATING operation. Press to select the item and press 24 HOUR ON TIMER... - Page 21 Notes on COMFORT SLEEP TIMER operation • After the COMFORT SLEEP TIMER operation is fi nished, the operation displayed on the remote controller will continue. • If you set the COMFORT SLEEP TIMER while the ON TIMER is set, the ON TIMER will be cancelled. <...
-
Page 22: To Guarantee High Heating Capacity When You Wake Up
To guarantee high heating capacity when you wake up QUICK HEATING TIMER operation This operation quickly blows warm air when the HEATING operation starts in the morning and makes a warm space (warmth zone) around the indoor unit. How to set the QUICK HEATING TIMER Press Press to select the item and press... - Page 23 < To change or cancel the setting > Follow steps 1 and 2 on page 21 and then select the timer setting you want to change. Press to select the item and press Setting change TIMER cancel • Settings can be cancelled with •...
-
Page 24: To Increase The Cooling Or Heating Power
To increase the cooling or heating power POWERFUL operation POWERFUL operation quickly maximises the cooling/heating effect. You can get the maximum capacity. < To use the operation > Press during COOLING or HEATING operation. • When POWERFUL operation is set, the operation mode will be changed as follows. -
Page 25: To Purify The Air In The Room
To purify the air in the room FLASH STREAMER AIR PURIFYING operation Flash streamer discharge decomposes mold and allergic substances to clean the air in the room. < To use the operation > Press • Each time you press the button, the setting changes. CLEAN On CLEAN Off •... -
Page 26: To Consider The Environment Of Use
To consider the environment of use ECONO operation ECONO operation enables efficient operation by limiting the maximum power consumption value. This function is useful for ensuring a circuit breaker does not trip when the unit runs alongside other appliances. OUTDOOR UNIT QUIET operation OUTDOOR UNIT QUIET operation lowers the noise level of the outdoor unit by changing the frequency and fan speed on the outdoor unit. -
Page 27: To Prevent Mishandling By Children
Notes on ECONO operation < Image of running current and power consumption in ECONO operation > Maximum during normal operation Normal operation Maximum during ECONO operation The maximum running current and power consumption of the air conditioner in ECONO operation vary with the ECONO connecting outdoor unit. -
Page 28: To Keep The Air Conditioner Clean
To keep the air conditioner clean MOLD PROOF operation The inside of the air conditioner is dried to reduce the occurrence of mold and odour. When COOLING, “SARARA” DRY, or DRY COOLING operation is performed, condensation may occur inside the air conditioner and may cause mold or odour. It is recommended to dry the inside of the air conditioner by MOLD PROOF operation. -
Page 29: Auto Cleaning Filter
CLEANING FILTER operation The air fi lter will automatically be cleaned. < To automatically operate: Default “On” > Press during operation. • “ ” is displayed on the LCD. • The air fi lter will automatically be cleaned according to the operating hours (about once per day). - Page 30 To keep the air conditioner clean Notes on MOLD PROOF operation • This operation dries the inside of the air conditioner with the FAN ONLY and HEATING operation. • This operation dries the inside of the air conditioner while streamer discharge is performed to reduce the development of mold and odour inside the air conditioner.
-
Page 31: To Know The Status Of Your Room And Air Conditioner
To know the status of your room and air conditioner INFORMATION The indicator displayed on the LCD gives information about temperature, power consumption, and so on. The indicated indoor and outdoor temperatures are measured near the indoor and outdoor units. The indicator should be used as a guide only. -
Page 32: To Change The Default Settings
To change the default settings Menu settings You can change the default settings according to your room’s environment and your taste. < To change the setting > Press Press to select the item and press Menu items Page INTELLIG.EYE AIRFLOW AUTO OFF time BREEZE AIRFLOW CONTINUE DRY... - Page 33 Menu Setting Description The INTELLIGENT EYE sensor detects an area where there is a person and adjusts the Focus horizontal airfl ow direction to blow air directly on the person. INTELLIG.EYE AIRFLOW The INTELLIGENT EYE sensor detects an area where there is a person and adjusts the Comfort * horizontal airfl ow direction to avoid blowing air directly on the person.
- Page 34 To change the default settings Menu Setting Description Oblong centre The horizontal airfl ow direction blows air evenly to the right and left. Oblong right corner The horizontal airfl ow direction blows air to the left. Oblong left corner The horizontal airfl ow direction blows air to the right. INSTALLED POSITION Horizontal centre...
-
Page 35: Menu Settings
Menu Setting Description The default setting is “1” for both the indoor unit and remote controller. < To set the address to “2” > 1. Open the front panel, and turn on the circuit breaker. Push APPLY 2. Press 2 sec. 3. -
Page 36: Cleaning (For Service Personnel)
Cleaning (for service personnel) CAUTION • Be sure to stop the operation and turn off the circuit breaker before cleaning. • For care and cleaning, call service personnel. Streamer unit INTELLIGENT EYE sensor Page 36 Front panel Dust box / Dust brush ... -
Page 37: When The Timer Lamp (Orange) Blinks
CAUTION • Do not touch the aluminium fi ns of the indoor unit. (It may cause an injury.) • Do not use the following to clean the air conditioner. (It may cause deformation, discolouration or scratches.) – Water hotter than 40°C –... -
Page 38: When The Mold Proof / Cleaning Filter Lamp (Green) Blinks
Cleaning (for service personnel) Dust box / Dust brush When? < Removing or attaching the dust brush > 1) Pull the centre of the dust brush. When the MOLD PROOF / CLEANING FILTER lamp (green) 2) Take out the dust brush from the right-side and left-side shaft blinks. - Page 39 When you clean the fi lters, open the front panel and remove the dust box. Air fi lter (white) If the AUTO CLEANING FILTER operation is set to “On”, basically Attaching the air fi lter no care is required. Page 28 When you are aware of dirt, such as when oil or nicotine is Hold the grips (blue) and insert the attached to the air fi lter or when the AUTO CLEANING FILTER...
- Page 40 Cleaning (for service personnel) When you clean the fi lters, open the front panel and remove the dust box. Photocatalytic air-purifying and deodorising fi lter (black) When? Attaching the photocatalytic air-purifying and When you fi nd dust. deodorising fi lter How? Return the photocatalytic air-purifying •...
-
Page 41: When The Operation Lamp (Green) Blinks
When the OPERATION lamp (green) blinks When the OPERATION lamp (green) blinks, turn off the circuit breaker. After about 1 minute, turn it on again and start operation. If the OPERATION lamp still blinks, check the error code according to the steps below and OPERATION lamp (green) take appropriate action. -
Page 42: Faq
Indoor unit Commonly occurring sounds „ Hissing or cracking sound • This is a sound of streamer discharge. „ Rustling sound • This is a sound of the dust brush rubbing the air filter to remove dust from the air filter in CLEANING FILTER operation. -
Page 43: Troubleshooting (For Service Personnel)
Troubleshooting (for service personnel) Before making an inquiry or a request for repair, check the following. If the problem persists, consult the service shop. Not trouble Check These cases are not troubles. Please check again before calling a repair person. The air conditioner does not operate Case Description / where to check... - Page 44 Troubleshooting (for service personnel) The room does not cool down/warm up Case Description / where to check Air does not come out. „ In HEATING operation • The air conditioner is warming up. Wait for about 1 to 4 minutes. „...
- Page 45 Display Case Description / where to check The air conditioner is operating • Is the brightness of the indoor unit lamps set to “Off”? Page 10 even with the OPERATION lamp off. The indoor unit lamps are dark. • Is the brightness of the indoor unit lamps set to “Low”? ...
- Page 46 Troubleshooting (for service personnel) INTELLIGENT EYE sensor Case Description / where to check The sensor does not respond. • The sensor is warming up for about 2 minutes after operation is started. Wait for a while. • The sensor may not recognise small movements such as those made by sleeping persons or small children.
- Page 47 Call the service shop immediately WARNING „ When an abnormality (such as a burning smell) occurs, stop operation and turn the circuit breaker off. • Continued operation in an abnormal condition may result in troubles, electric shocks or fire. • Consult the service shop where you bought the air conditioner. „...
- Page 48 The two-dimensional bar code is a manufacturing code. 3P362304-1C M13B238B (1906) HT...