Enterasys D2G124-12 Quick Reference Manual
D2 series
Hide thumbs
Also See for D2G124-12:
- Cli reference manual (496 pages) ,
- Hardware installation manual (76 pages) ,
- Datasheet (6 pages)
Advertisement
Quick Links
Download this manual
See also:
Cli Reference Manual
Related Documents
• Enterasys D2 Hardware Installation Guide
• Enterasys D2 CLI Reference
Documentation URL: http://www.enterasys.com/support/manuals
Warranty Information
For information on the D2 Limited Lifetime Warranty, go to:
http://www.enterasys.com/products/security‐enabled‐infrastructure/
warranties/warranty.aspx
Switch Setup
Electrical Hazard: Only qualified personnel should perform
installation procedures.
Use this Quick Reference to set up the Enterasys D2 switch as a
freestanding unit. Refer to the Enterasys D2 Hardware Installation
Guide for procedures on mounting the switch into a rack, on a
wall, or under a table.
Handling the Switch
To prevent electrostatic damage, attach an ESD wrist strap to your
wrist before handling the D2 switch.
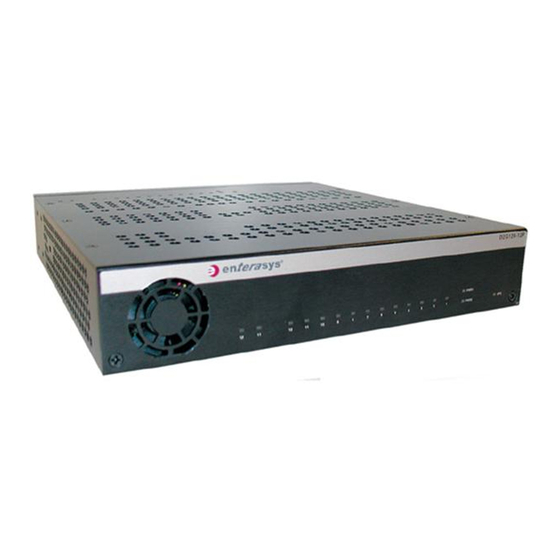
Switch Components
Note: Unless otherwise noted, the procedures in this document apply to all
D2 switches.
As shown in Figure 1 and Figure
2, ports and power supply
receptacles are located on the rear panel of the D2 switch. Port,
CPU, and power LEDs are visible from the front, top, and rear
panels of the switch.
Figure 1
D2 Switch (rear view) shown without optional enclosure
1
Fan
2
Power Supply 1 non-PoE receptacle (PWR1-A)
3
Power Supply 2 non-PoE receptacle (PWR2-A)
4
Console port (RJ45)
5
Reset button
6
Power Supply 2 (PWR2) LED
7
RJ45 ports (1-12)
8
SFP combo ports (11 and 12)
9
RJ45 Port LEDs
10
Power Supply 1 (PWR1) LED
11
CPU (system) LED
12
Power Supply 2 PoE receptacle (PWR2-B)
13
Power Supply 1 PoE receptacle (PWR1-B)
Figure 2
D2 (top and front views) shown without optional enclosure
1 CPU (system) LED
2 Power supply (PWR1 and PWR2) LEDs
3 RJ45 port LEDs (ports 1-12)
4 SFP combo port LEDs (ports 11 and 12)
Connecting Power to the Switch
You can connect to a single, primary source of power, or to two
sources of power for redundancy. The example used here
describes connecting to two power sources.
The following redundant power supplies are available to be
purchased from Enterasys for connection to the D2 switch:
• D2‐PWR, a DC power supply capable of providing power to a
fully‐loaded non‐PoE switch
• D2‐PWR‐POE, a DC power supply recommended for PoE
power redundancy
Notes: The D2-PWR supply will power either the D2G124-12 or the
D2G124-12P without PoE support. The D2-PWR-POE is the only supply
needed to power the D2G124-12P with PoE support.
Both power supplies must be of the same type to support redundancy.
1. Plug the DC power cord from each power supply into each of
the switch DC power receptacles that are appropriate for your
type of power supplies.
• For the D2‐PWR supply, plug into the PWR1‐A and
PWR2‐A receptacles
• For the D2‐PWR‐POE supply, plug into the PWR1‐B and
PWR2‐B receptacles
2. Plug each AC cord into its power supply's AC receptacle.
3. Plug each AC cord into a dedicated, grounded AC outlet.
Note: To take advantage of redundancy capabilities, each power cord must
be plugged into a separate, dedicated AC outlet.
4. Verify that the appropriate power LEDs (PWR1 and PWR2)
turn green, and the CPU (system) LED turns amber until the
D2 finishes its initialization. These LEDs are visible from the
back of the switch as shown in Figure
1, as well as from the top
and front of the switch, as shown in Figure
2.
If the initialization process is successful, the CPU LED turns green.
If the CPU LED does not turn green, refer to the Enterasys D2
Hardware Installation Guide for troubleshooting information.
Fan Operation
The D2 fan will turn on when power is first supplied to the switch
and will shut off automatically when the temperature falls below
the following switch thresholds:
• D2G124‐12 ‐ 40 degrees C (104 degrees F)
• D2G124‐12P ‐ 35 degrees C (95 degrees F)
Completing the Setup and Downloading the Latest
Firmware
Once you have connected power to the D2 switch and verified
LED activity, you can complete the setup process as follows. Refer
to the Enterasys D2 Hardware Installation Guide for more
information.
Note: Once you are logged in to the D2 switch, it is recommended that
you check the version of firmware running on the switch and, if necessary,
download the latest version.
1. Determine the latest D2 firmware version by visiting the
Enterasys download site at:
http://secure.enterasys.com/services/support/downloads/software
2. Connect the switch to the network.
3. Connect a mangement station to the console port.
4. Verify that the network devices connected to the switch ports
are powered on, and that each link/activity LED is on (solid
green or blinking green).
5. At the device connected to the console port, perform the
following:
a. Enter admin for Username.
b. At the Password prompt, press ENTER (RETURN).
c. At the command prompt, determine if the latest firmware
image is loaded on the switch by entering this command:
show version
d. If the output (under FW Version) displays an older version
number than that determined in Step 1, download and
activate the new version as directed on the download website.
(Alternatively, you can use the CLI command listed in
Table
1.)
e.
Refer to Table 1 and Table
2 for a list of basic CLI setup
commands.
Basic Setup Commands
Table
1 lists CLI commands that are required for setting up the D2
switch with the latest firmware. Table
2 lists optional CLI
commands that will help you perform additional basic
configuration on the D2 switch. Refer to the Enterasys D2 CLI
Reference for more information.
Table 1 Required CLI Setup Commands
Step Task
CLI commands
1
Set a new password
set password [username]
2
Set the switch IP address
set ip address ip-address [mask
ip-mask] [gateway ip-gateway]
3
Download, activate, and
copy
tftp://tftp_server_ip_address/
verify new firmware on the
filename system:image
switch using TFTP copy.
set boot system filename
show version
Table 2 Optional CLI Setup Commands
Task
CLI commands
Save the active configuration
save config
Enable or disable SSH
set ssh enable | disable
Enable or disable Telnet
set telnet {enable | disable}
[inbound | outbound | all]
Enable or disable HTTP
set webview {enable | disable}
management (WebView)
Enable or disable SNMP port link
set port trap port-string
{enable | disable}
traps
Set the per port broadcast limit
set port broadcast port-string
threshold-value
Configure a VLAN
set vlan create vlan-id
set port vlan port-string
vlan-id modify-egress
Set a Syslog server IP and severity
set logging server index ip-addr
ip-addr severity severity state
enable
Table 2 Optional CLI Setup Commands (Continued)
Task
CLI commands
Configure and enable a RADIUS
set radius server index ip-addr
port [secret-value]{realm
server.
{management-access | any |
network-access}
set radius enable
Configure and enable first arrival
set maclock firstarrival
port-string value
MAC locking on user ports.
set maclock enable port-string
Downloading Policy QuickStart
Policy QuickStart provides an easy method to get started applying
port‐level security and performance settings to Enterasysʹ
policy‐enabled switches for a set of pre‐defined business roles.
For example, you can easily designate specific ports for guest
users where they will only be able to obtain an IP address and
access the web and at a lower quality of service than you provide
to your enterprise users. To download Policy QuickStart go to:
http://secure.enterasys.com/services/support/downloads/software
For more advanced control, including creation of custom business
roles, Enterasys provides NetSight Policy Manager.
Switch Specifications
Interfaces
12 RJ45 1000BASE‐TX ports
Two combo 1000Base‐SX, 1000Base‐LX, or 100Base‐FX SFP ports
Notes: Each combo SFP port on the D2 switch supports the installation of
Mini-GBICs for 1000Base-SX, 1000Base-LX, or 100Base-FX SFP
transceivers.
Each combo SFP port in use on the switch eliminates the availability of one
RJ45 port. In other words, only 12 ports can be active at any given time.
When an SFP transceiver (Mini-GBIC) SFP port 11 establishes a link, RJ45
port 11 is disabled. When an SFP transceiver (Mini-GBIC) in SFP port 12
establishes a link, RJ45 port 12 is disabled.
Dimensions
D2G124-12
Size: 4.1 H x 21 W x 21 D (cm) / 1.6 H x 8.25 W x 8.5 D (in.)
Weight (without power supply): 3.65 lb/1.66 kg
D2G124-12P
Size: 4.1 H x 21 W x 21 D (cm) / 1.6 H x 8.25 W x 8.5 D (in.)
Weight (without power supply): 4.02 lb/1.82 kg
Power Consumption and Mean Time Between Failure (MTBF)
D2G124-12
Power: 30W / 102.39 (BTUs/hr)
MTBF: 196,559 hrs
D2G124-12P
Power: 130W / 443.69 (BTUs/hr)
MTBF: 144,035 hrs
Temperature and Humidity
Operating: D2G124‐12 ‐ 0°C to 60°C (32°F to 140°F)
D2G124‐12P ‐ 0°C to 50°C (32°F to 122°F)
Storage:
‐40° to 70°C (‐40° to 158°F)
Operating relative humidity: 5% to 95% (non‐condensing)
Getting Help
World Wide Web
www.enterasys.com/support/
Phone
1-800-872-8440 (toll-free in U.S. and Canada)
or 1-978-684-1000
Internet mail
support@enterasys.com
To expedite your message, type [Switching] in the
subject field of your message.
Latest image and
www.enterasys.com/support/downloads/
release notes
Documentation
www.enterasys.com/support/manuals/
Advertisement

Related Manuals for Enterasys D2G124-12


Summary of Contents for Enterasys D2G124-12
- Page 1 Refer to Table 1 and Table commands. Basic Setup Commands Table 1 lists CLI commands that are required for setting up the D2 Notes: The D2-PWR supply will power either the D2G124-12 or the switch with the latest firmware. Table D2G124-12P without PoE support. The D2-PWR-POE is the only supply needed to power the D2G124-12P with PoE support. commands that will help you perform additional basic Both power supplies must be of the same type to support redundancy.
-
Page 2: Ethernet Switch
Federal Communications Commission (FCC) Notice This device complies with Part 15 of the FCC rules. Operation is subject to the following two conditions: (1) this device may not cause harmful interference, and (2) This table shows where these substances may be found in the supply chain of Enterasys’ electronic this device must accept any interference received, including interference that may information products, as of the date of sale of the enclosed product. Note that some of the component types cause undesired operation.