
Related Manuals for Beko DRY937SI


Summary of Contents for Beko DRY937SI
- Page 1 Asciugatrice Manuale utente Dryer User Manual DRY937SI IT / EN 2960313041_I T /060721.1017...
-
Page 2: Spiegazione Dei Simboli
Gentile cliente, grazie per aver scelto di acquistare un prodotto AVVERTENZA! Beko.Speriamo che il suo prodotto, realizzato con un alto livello qualitativo tecnologico, le posso offrire risultati ottimali. Le consigliamo • Avvertenza superfici calde. -
Page 3: Istruzioni Importanti Per La Sicurezza E L'ambiente
1 Istruzioni importanti per la sicurezza e l’ambiente AVVERTENZA ! NOTA • I piedini regolabili non dovrebbero • Questa sezione contiene istruzioni essere rimossi. Lo spazio fra di sicurezza che vi aiuteranno a l’asciugatrice e il pavimento non va proteggere dal rischio di lesioni ridotto servendosi di materiali quali personali o danni alla proprietà. - Page 4 AVVERTENZA ! PERICOLO ! • Non aprire l’oblò quando sono in • Collegare l’asciugatrice a una presa funzione i programmi a vapore. dotata di messa a terra protetta L’acqua calda potrebbe essere da uno fusibile del valore indicato espulsa. dall’etichetta. Fare in modo che la •...
-
Page 5: Norme Di Sicurezza Generali
PERICOLO ! PERICOLO ! • Punti da prendere in considerazione • Non usare prolunghe, ciabatte per limitare il rischio di incendio: o adattatori per collegare I capi di seguito indicati non vanno l’asciugatrice alla presa di corrente al fine di ridurre il rischio di incendio messi in asciugatrice dato che sussiste un rischio di incendio. - Page 6 PERICOLO ! NOTA Oggetti quali ad esempio accendini, • Usare ammorbidenti e altri prodotti fiammiferi, monete, parti metalliche, in conformità con le istruzioni dei ago, ecc. possono danneggiare rispettivi produttori. il cestello o portare a problemi Pulire sempre il filtro lanugine prima sul piano funzionale.
-
Page 7: Impiego Conforme Allo Scopo Previsto
1.3. Impiego conforme allo scopo previsto AVVERTENZA ! • L’asciugatrice è stata pensata per un • Verificare che gli animali uso domestico. Non è adatta per usi domestici non entrino all’interno commerciali e non va usata al di fuori del suo ambito di utilizzo previsto. - Page 8 1.5 Conformità alla direttiva WEEE e 1.8 Specifiche tecniche allo smaltimento dei rifiuti: Questo apparecchio è conforme alla Direttiva UE WEEE (2012/19/EU). Questo apparecchio Altezza (regolabile) 84,6 cm / 86,6 cm* riporta il simbolo di classificazione per i rifiuti Larghezza 59,7 cm delle apparecchiature elettriche ed elettroniche (WEEE).
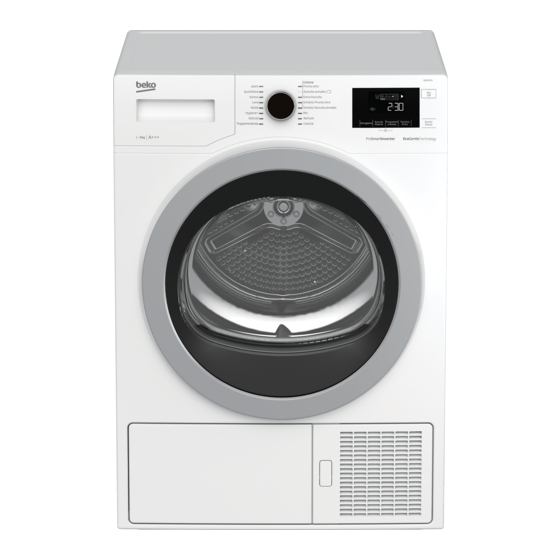
- Page 9 2 La tua asciugatrice 2.2 Informazioni sull’imballaggio 2.1 Panoramica 1. Tubo Contenitore di scarico acqua * riempimento dell’acqua* 2. Spugna di ricambio 7. Acqua cassetto pura* filtro* 8. Gruppo 3. Manuale capsule dell’Utente fragranza* 1. Pannello superiore 2. Pannello di controllo 4.
-
Page 10: Installazione
3 Installazione • Dopo aver installato l’asciugatrice, dovrebbe restare nello stesso luogo in cui sono stati eseguiti i collegamenti. In fase Prima di contattare il Centro Assistenza di installazione dell’asciugatrice, accertarsi Autorizzato più vicino per l’installazione che la parete posteriore non abbia punti dell’asciugatrice, verificare che l’impianto di contatto con altri oggetti (rubinetto, elettrico e lo scarico dell’acqua siano adeguati... - Page 11 3.2 Rimozione del gruppo di 3 Collegare un’estremità del tubo di scarico sicurezza trasporto fornito in dotazione con l’asciugatrice al punto di collegamento da cui è stato rimosso il tubo del prodotto nel passaggio AVVERTENZA ! precedente. 4 Collegare l’altra estremità del tubo di scarico direttamente al allo scarico Rimuovere il gruppo dell’acqua di scarto o al lavandino.
- Page 12 AVVERTENZA ! • Consigliamo di trasportare l‘asciugatrice in posizione verticale. Non è possibile trasportare l‘apparecchiatura in verticale, consigliamo di trasportarla inclinando il lato destro, se osservata da davanti. 3.6 Avvertenze sui suoni NOTA • Sarà normale sentire un suono metallico dal compressore in fase di funzionamento.
- Page 13 4 Procedimento • Non aggiungere bucato bagnato mentre l’asciugatrice è in funzione • Per modellPer i mPer i modelli dotati di 4.1 Bucato adatto per essere unità condensatore: pulire il condensatore messo in asciugatrice una volta al mese o dopo 30 operazioni. Rispettare sempre le istruzioni fornite sull’etichetta del capo.
-
Page 14: Funzionamento Del Prodotto
5 Funzionamento del prodotto 5.1 Pannello di controllo 1. Pulsante di selezione programma 2. Display 3. Pulsante On-Off 4. Pulsante Start/Stand-by 5. Pulsante tempo fine 6. Pulsante di regolazione programmi a tempo 7. Pulsante livello avvertenze audio 8. Pulsante di selezione impostazioni secchezza 5.2 Simboli schermo Simbolo livello cicalino Pronto per armadio... -
Page 15: Selezione Programma
5.3 Preparazione dell’asciugatrice Collegare l’asciugatrice alla presa di corrente NOTA ! Aprire l’oblò del dispositivo Collocare il bucato nella vasca. • Il programma non si avvia immediatamente Chiudere l’oblò spingendo. premendo solo il pulsante On/Off/Annulla. Avviare il programma col pulsante On/Off/ Annulla dopo la selezione del programma. - Page 16 5.5 Selezione programma e tabella di consumo Programmi Descrizione del programma Con questo programma si può asciugare il bucato in cotone da stirare in modo che Cotone Pronto Stiro 1000 sia leggermente umido al fine di facilitare la stiratura. (camicie, magliette, tovaglie, ecc.) Con questo programma si può...
- Page 17 Con questo programma si può asciugare biancheria delicata o biancheria con il Delicati simbolo del lavaggio a mano (camicette in seta, biancheria intima leggera, ecc.) a basse temperature. Questo programma viene usato per gli indumenti per bambini che recano Hygiene+ 1000 l’approvazione “asciugabili in lavatrice”...
- Page 18 Allergy UK è il marchio della NOTA ! British Allergy Foundation. Il Sigillo di Approvazione è stato • Sarà possibile modificare il livello dell’audio creato per guidare le persone prima che il programma si avvii o mentre il che chiedono un consiglio in programma continua.
- Page 19 Svuotamento del serbatoio dell’acqua Al termine del programma il simbolo la spia che indica la necessità di svuotare il serbatoio dell’acqua si accende. Livello asciugatura umido NOTA ! • Per informazioni dettagliate, cfr. 6 Manutenzione e pulizia. Se il serbatoio dell’acqua si riempie mentre Livello asciugatura normale il programma continua, il simbolo inizia a lampeggiare e l’apparecchiatura passa in...
-
Page 20: Avvio Del Programma
Modifica del tempo di fine Per modificare la durata durante il conto alla rovescia: • Premere per 3 secondi il pulsante On/ Off/Cancel per annullare il programma. Accendere nuovamente la macchina e ripetere il processo di Impostazione ritardo per la durata desiderata. •... - Page 21 5.11 Modifica del programma dopo che è stato avviato Sarà possibile modificare il programma selezionato per l’asciugatura del bucato con un programma diverso dopo che la macchina inizia a funzionare • Ad esempio per selezionare Extra Dry anziché Iron Dry, mettere in pausa il programma premendo il pulsante Start / Stand-by.
-
Page 22: Fine Del Programma
NOTA ! AVVERTENZA! • La funzione antipiega attiva il programma • Non toccare la superficie interna del anti-pieghe della durata di due ore se il tamburo in fase di aggiunta o estrazione bucato non viene estratto dalla macchina degli indumenti mentre un programma è dopo il completamento del programma. -
Page 23: Manutenzione E Pulizia
6 Manutenzione e pulizia • Aprire entrambi i filtri (superiore e inferiore) e rimuovere la lanugine con la mano, oppure utilizzare la spazzola per la pulizia La durata di vita del servizio aumenta e i problemi saranno ridotti se l’apparecchiatura del coperchio del percorso dell’aria. -
Page 24: Pulizia Del Sensore
AVVERTENZA ! • L‘acqua condensata non è potabile!. • Non togliere mai il serbatoio dell‘acqua quando il programma è in funzione! Qualora si dimentichi di scaricare il serbatoio dell’acqua, la macchina si bloccherà durante i cicli di asciugatura successivi quando il serbatoio è... -
Page 25: Pulizia Del Condensatore
6.4 Pulizia del condensatore • La lanugine Piccole quantità di lanugine possono passare raccolta sulla attraverso il filtro ed essere raccolte sulla superficie del superficie metallica del condensatore. condensatore La superficie metallica del condensatore deve deve essere essere pulita regolarmente. rimossa con un Se l’icona dell’evaporatore lampeggia sul panno umido o... - Page 26 AVVERTENZA ! • Si può pulire a mano, purché si indossino guanti protettivi. Non cercare di pulire a mani nude. Le alette del condensatore possono danneggiare le mani. La pulizia con movimenti da sinistra a destra può danneggiare le alette del condensatore. Questo può...
-
Page 27: Guida Alla Risoluzione Dei Problemi
7 Guida alla risoluzione dei problemi Il processo di asciugamento dura troppo tempo. Il programma si é interrotto senza alcuna ragione Lo sportello di carico puo’ non essere completamente Possono essersi otturati i fori del filtro anti-lanugine (filtro chiuso. >>> Assicurarsi che lo sportello di carico sio chiuso interno ed esterno). - Page 28 La macchina emette un segnale sonoro I filtri anti-lanugine possono non essere stati montati. >>> Montare il filtro interno ed esterno. Il simbolo di avvertimento dell’evaporatore lampeggia La parte anteriore dell’evaporatore potrebbe essere otturata dalle fibre. >>> Pulire la parte anteriore dell’evaporatore. I filtri anti-lanugine possono non essere stati montati.
- Page 29 SCHEDA PRODOTTO Conforme al Regolamento delegato della commissione (UE) N. 392/2012 BEKO Nome fornitore o marchio commerciale DRY937SI Nome modello 7188287290 Capacità nominale (kg) Ventilato ad aria Tipo di asciugatrice a tamburo Condensatore A+++ Classe di efficienza energetica Consumo energetico annuale (kWh)
-
Page 30: Please Read This User Manual First
Please read this user manual first! Dear Customer, WARNING! Thank you for prefering a Beko product. We hope that your product which has been • Warning against hot surfaces. manufactured with high quality and technology will give you the best results. We advise you... -
Page 31: Important Instructions For Safety And Environment
1 Important instructions for safety and environment WARNING! NOTE Always have the installation and • This section contains safety repairing procedures carried instructions that will help protect out by the Authorized Service. from risk of personal injury or Manufacturer shall not be held property damage. -
Page 32: Electrical Safety
1.1.1 Electrical safety DANGER! DANGER! • Do not use extension cords, multi- • Electrical safety instructions plugs or adaptors to connect the should be followed while electrical dryer to power supply in order to connection is made during the decrease the risk of fire and electric installation. - Page 33 WARNING! DANGER! Never stop your dryer before the Points to be taken into programme completes. If you must consideration for fire hazard: do this, remove all laundry quickly Below specified laundry or items and lay them out to dissipate the must not be dried in the dryer heat.
-
Page 34: Mounting Over A Washing Machine
1.2 Mounting over a washing machine WARNING! • A fixing device should be used between the two machines when installing the • Never attempt to repair the dryer dryer above a washing machine. The by yourself. Do not perform any fitting device must be installed by the repair or replacement procedures authorized service agent. -
Page 35: Compliance With The Weee Directive And Disposing Of The Waste Product
1.6 Compliance with RoHS Directive • Electrical products are dangerous for the children. Keep children away from the The product you have purchased complies product when it is operating. Do not let with EU RoHS Directive (2011/65/EU). It does them tamper with the dryer. Use the child- not contain harmful and prohibited materials proof lock in order to prevent the children specified in the Directive. -
Page 36: Your Dryer
2 Your Dryer 2.2 Package Contents 2.1 Overview 1. Water 6. Water drain Filling hose * Container* 2. Filter drawer 7. Pure spare Water* sponge* 3. User Fragrance Manual Capsules Group* 1. Top panel 2. Control panel 4. Drying 9. Brush* 3. -
Page 37: Appropriate Installation Location
3 Installation • The rear surface of the tumble dryer shall be placed against a wall. Before installation, ensure that electrical installation and water drain is appropriate DANGER! referring to the user’s manual. If they are not suitable, contact a qualified electrician and Do not place the dryer on the power cable. - Page 38 3.3 Connecting to the drain WARNING! You can directly drain accumulated water through the water drain hose supplied with • We recommend carrying the dryer in the product instead of periodically draining the upright position. If it is not possible to water collected in the water tank.
-
Page 39: Laundry Not Suitable For Drying In The Dryer
4 Preparation • For models with a condenser unit: clean the condenser once in a month or after every 30 operations regularly. . 4.1 Laundry suitable for drying in the • Clean the filter periodically.Read the dryer Maintenance and cleaning of filters for Always obey the instructions given on the detalied information. -
Page 40: Operating The Product
5 Operating the product 5.1 Control Panel 1. Program Selection button 2. Display 3. On-Off button 4. Start/Stand-by button 5. End Time button 6. Time Programs Adjusting button 7. Audio Warning Level button 8. Dryness Settings Selection button 5.2 Screen symbols Buzzer level sym bol Closet - dry Clean filter drawer warning symbol... -
Page 41: Preparing The Dryer
5.3 Preparing the dryer 5.4 Program selection Your dryer has 16 different programs. Plug in the tumble dryer Open device door. Place the laundry into the tub in a slight loosely. Close the door by pushing. Verluchten Rafraîchir Hemden 30’ Chemises 30’... -
Page 42: Program Selection And Consumption Chart
5.5 Program selection and consumption chart Programmes Programme Description You may dry your cotton laundry to be ironed in this program to have them slightly Cottons Iron Dry 1000 damp for ease of ironing. (Shirt, T-shirt, tablecloth, etc.) You may dry all your cotton laundry in this Cottons Cupboard program. - Page 43 Use this programme to dry woolen garments such as jumpers that are washed according Wool protect to the instructions.It is recomended that garments would be removed at the end of the programme. You can use this program to dry your cotton Express laundry that you have spun at high speeds in 1200...
- Page 44 Allergy UK is the brand of the British Allergy Association. Seal of Approval is created to guide people that require recommendation about a product that the related product restricts / reduces / eliminates the allergens or reduces the allergen content significantly in Volume level low the ambient where allergy patients exist.
-
Page 45: Warning Symbols
• For detailed information, See 6 Maintenance and cleaning. If the water tank fills up while the program continues, the warning symbol starts flashing and the machine goes into stand-by. In this case, empty the water tank and start the program by pressing the Start / Stand-by Drying level damp button. -
Page 46: Starting The Program
5.8 Starting the program Press the Start/Stand-by button to start the program. Indicating start of the program, Start symbol turns on, “:” separator in the middle of remaining time keeps flashing. Program Progress Symbol turns on. • Open the loading door and place the 5.9 Program progress status laundry. -
Page 47: Cancelling The Program
NOTE • Adding laundry after the drying operation starts may cause the dried laundry inside the machine to mix with wet laundry and leave the laundry damp at the end of operation. • Adding or removing laundry during drying • The child lock has to be deactivated to may be repeated as many times as you be able to start a new program after the... - Page 48 NOTE • Wrinkle Prevention function activates the 2 hour-Wrinkle Prevention program if laundry isn’t taken out of machine after completion of the program. • Clean the fibre filter after each drying. See 6.1 Cleaning Lint Filter / Loading Door Inner Surface •...
-
Page 49: Maintenance And Cleaning
6 Maintenance and cleaning 6.1 Loading Door Inner Surface The hair and fibres that are separated from the laundry during drying process is collected by the Fibre Filter. NOTE • Fibres are formed during wearing and washing clothes. • You can clean the filter slot with a •... -
Page 50: Cleaning The Sensor
• Clean the front door interior surface and its WARNING! gaskets with a soft damp cloth or with the brush on air routing cover. • Condensed water is not drinkable! • Never remove the water tank when the program is running! If you forget to drain the water tank, the machine will stop during the subsequent drying cycles when the water tank is full and the Water... - Page 51 • Insert the brush • Open the toe into its slot pushing board by pressing to the right, after on it. cleaning condenser, front cover and lint filter. • To open the air • After the cleaning routing door, move process is the release latch.
-
Page 52: Troubleshooting
7 Troubleshooting Clothes have shrunk, hardened or spoiled. A program not suitable with the laundry type might Drying operation takes too long. have been used. >>> Check the maintenance labels on the clothes and select a program Fibre filter (interior and exterior filter) pores may suitable for the clothes. - Page 53 Evaporator warning icon is flashing. WARNING! Evaporator front side may be clogged with fibres. >>> Clean the front side of the evaporator. • If the problem persists after following the Fibre filters may not be inserted. >>> Insert the instructions in this section, contact your interior and exterior filters to their places.
- Page 54 PRODUCT FICHE Complying Commission Delegated Regulation (EU) No 392/2012 BEKO Supplier name or trademark DRY937SI Model name 7188287290 Rated capacity (kg) Air Vented Type of Tumble Dryer Condenser A+++ Energy efficiency class 194,3 Annual Energy Consumption (kWh) Automatic Type of Control...