Table of Contents
Advertisement
Quick Links
PIAGGIO WOULD LIKE TO THANK YOU
for choosing one of its products. We have prepared this manual to help you to get the very best from your vehicle. Please read it carefully before riding
the vehicle for the first time. It contains information, tips and precautions for using your vehicle. It also describes features, details and devices to assure
you that you have made the right choice. We believe that if you follow our suggestions, you will soon get to know your new scooter and it will serve you
well for a long time to come. This booklet forms an integral part of the vehicle; should the vehicle be sold, it must be transferred to the new owner.
Liberty 125 4T Delivery
Ed. 02_02/2013
Advertisement
Table of Contents

Related Manuals for PIAGGIO Liberty 125 4T Delivery


Summary of Contents for PIAGGIO Liberty 125 4T Delivery
- Page 1 PIAGGIO WOULD LIKE TO THANK YOU for choosing one of its products. We have prepared this manual to help you to get the very best from your vehicle. Please read it carefully before riding the vehicle for the first time. It contains information, tips and precautions for using your vehicle. It also describes features, details and devices to assure you that you have made the right choice.
- Page 2 The instructions given in this manual are intended to provide a clear, simple guide to using your vehicle; this booklet also details routine maintenance procedures and regular checks that should be carried out on the vehicle at an authorised Dealer or Service Centre. The booklet also contains instructions for simple repairs.
- Page 3 Personal safety Failure to completely observe these instructions will result in serious risk of personal injury. Safeguarding the environment Sections marked with this symbol indicate the correct use of the vehicle to prevent dam- aging the environment. Vehicle intactness The incomplete or non-observance of these regulations leads to the risk of serious damage to the vehicle and sometimes even the invalidity of the guarantee.
-
Page 5: Table Of Contents
INDEX VEHICLE..................Tyres..................35 Dashboard................Spark plug dismantlement............36 Clock..................Removing the air filter............... 37 Keyswitch.................. 10 Air filter cleaning............... 37 Locking the steering wheel............ 10 Secondary air system............... 38 Releasing the steering wheel..........10 Checking the brake oil level............39 Switch direction indicators............ -
Page 7: Vehicle
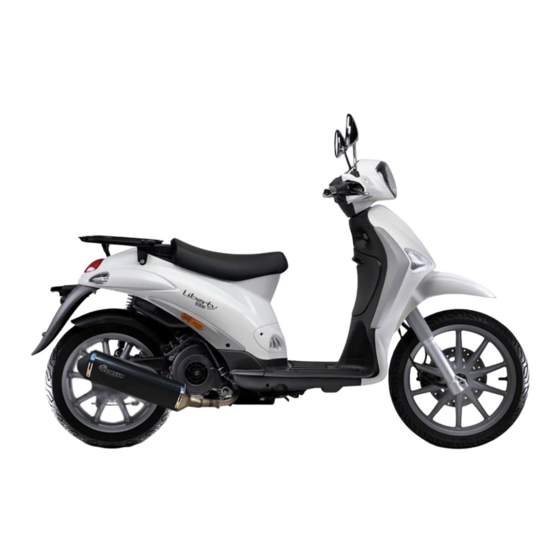
Liberty 125 4T Delivery Chap. 01 Vehicle... -
Page 8: Dashboard
01_01 Dashboard (01_01) A = Speedometer B = Odometer C = Fuel gauge D = Front brake lever E = Turn indicator warning light F = Pre-set warning light G = High-beam warning light H = Low fuel warning light I = Low-beam/side lights warning light L = High/low beam switch... -
Page 9: Clock
M = Turn indicator switch N = Horn button P = Starter button Q = Throttle grip R = Rear brake lever S = Digital clock Clock (01_02) Hours and minutes are displayed in a 1 to 12, AM or PM, format on the instrument panel. -
Page 10: Keyswitch
Keyswitch (01_03) LOCK = Ignition disabled, extractable key, steering lock engaged front glove-box locked. OFF = Ignition disabled, extractable key, steering lock disengaged, front glove-box unlocked. ON = Ready to start position, steering lock disabled, non-extractable key, glove-box unlocked. 01_03 Locking the steering wheel Turn the handlebar to the left (as far as it will go), turn the key to «LOCK»... -
Page 11: Switch Direction Indicators
Switch direction indicators (01_04) To set the left turn indicators flashing, move lever «B» to the left; to set the right turn indicators flashing, move it to the right. The lever automatically returns to the central position and the indicators remain on. To turn the indicators off, press the lever towards the switch. -
Page 12: Light Switch
Light switch (01_06) 0 = Low-beam and tail light 1 = High-beam and tail light 01_06 Start-up button (01_07) To start the engine, press the starter button, «P», after pulling either one of the two brake levers. 01_07... -
Page 13: Opening The Saddle
Opening the saddle (01_08) Insert the key into the seat lock «A», turn the key clockwise and lift the saddle forward. 01_08 Keys (01_09) The vehicle is supplied with two keys (one spare) which serve to start the engine and unlock the saddle compartment. -
Page 14: Identification
Identification (01_10, 01_11) The identification numbers consist of a prefix stamped on the chassis and on the en- gine, followed by a number. They must be quoted when ordering spare parts. We recommend that you check that the prefix and chassis number stamped on the vehicle correspond with those in the vehicle documents. -
Page 17: Use
Liberty 125 4T Delivery Chap. 02... -
Page 18: Checks
Checks Before using the vehicle, check: 1. that the fuel tank is full. 2. The oil level in the rear hub. 3. engine oil level (see section «Engine oil level»). 4. That tyres are properly inflated. 5. correct functioning of headlights, rear taillight and turn indicators. 6. -
Page 19: Tyre Pressure
CAUTION DO NOT BRING NAKED FLAMES OR CIGARETTES NEAR THE MOUTH OF THE FUEL TANK: FIRE HAZARD. ALSO AVOID INHALING HARMFUL VAPOURS. Characteristic Fuel tank capacity 9 ± 0.5 litres (1 l of which is reserve) Tyre pressure (02_02, 02_03) CAUTION TYRE PRESSURE SHOULD BE CHECKED WHEN TYRES ARE COLD.INCOR- RECT TYRE PRESSURE CAUSES ABNORMAL TYRE WEAR AND MAKES RID-... -
Page 20: Running In
THE CONTENTS OF THE SPRAY BOTTLE ARE SUFFICIENT FOR ONE REPAIR ONLY. WARNING IN THE EVENT OF TYRE LACERATION OR LARGE HOLES, REPLACE THE TYRE AT AN AUTHORISED PIAGGIO SERVICE CENTRE. 02_03 Running in (02_04) WARNING DURING THE FIRST 1000 KM DO NOT RIDE THE VEHICLE OVER 80% OF ITS MAXIMUM SPEED. -
Page 21: Starting Up The Engine
FIRST 1000 KM, GRADUALLY INCREASE SPEED UNTIL REACHING THE MAX- IMUM PERFORMANCE. Starting up the engine (02_05) The vehicle is fitted with direct drive automatic transmission. Therefore, always start the engine with the throttle grip slightly twisted; to start-off from stationary position, progressively twist the throttle grip. -
Page 22: Difficult Start Up
«A» with the throttle at a minimum to provide maximum aspiration for the tap. If the scooter fails to start even after taking the steps described above, contact an Authorised Piaggio Service Centre. CAUTION ALWAYS PLACE THE VEHICLE ON ITS STAND BEFORE KICK STARTING. -
Page 23: Stopping The Engine
WARNING TAMPERING MAY CAUSE SERIOUS ENGINE MALFUNCTION. AS THE CARBURETTOR IS FITTED WITH AN ACCELERATOR PUMP DO NOT ENGAGE THE ACCELERATOR WITH THE ENGINE OFF IN ORDER TO AVOID FLOODING SPECIALLY IN HOT WEATHER. Stopping the engine (02_07) Stop acceleration, then turn the key switch «D» to «OFF » to stop the engine (ex- tractable key). -
Page 24: Stand
Stand (02_08) Push with your foot on the end of the stand until it opens completely, and at the same time lean the vehicle on you. WHEN LIFTING THE VEHICLE, THE STAND RETURNS AUTOMATICALLY TO THE REST POSITION. DO NOT USE THE SIDE STAND TO CARRY BAGS AND DO NOT USE IT FOR 02_08 REAR COMPARTMENT ASSEMBLY AND DISASSEMBLY OPERATIONS. -
Page 25: Safe Driving
Safe driving (02_09, 02_10) WARNING SOME SIMPLE TIPS ARE PROVIDED BELOW WHICH WILL ENABLE YOU TO USE YOUR VEHICLE ON A DAILY BASIS MORE EASILY AND SAFELY. < Your ability and your knowledge of the vehicle form the basis of safe riding. We rec- ommend trying out the vehicle in traffic-free zones to get to know your vehicle completely. - Page 26 8. Any elaboration that modifies the vehicle's performances, such as tampering with original structural parts is strictly forbidden by law, and renders the vehicle not con- forming to the approved type and therefor dangerous to ride. CAUTION RIDING UNDER THE INFLUENCE OF ALCOHOL, DRUGS OR CERTAIN MEDI- CINES CAN BE EXTREMELY DANGEROUS FOR ONESELF AND FOR OTHERS.
-
Page 27: Accessories
02_10 Accessories (02_11) The vehicle is fitted with a windshield with protective flap. (if available) 02_11 The vehicle is fitted with an antitheft chain with key. (if available) -
Page 28: Rear Rack
Rear rack (02_12, 02_13, 02_14, 02_15, 02_16, 02_17) Maximum permissible load depends on Country version. 02_12 Type of luggage rack and maximum permissible load depend on Country versions. 02_13 Trailer stop lights and running lights connector. (if available) 02_14... - Page 29 For use only for connecting trailer. (if available) 02_15 To remove the bag support «A» undo the 4 screws locking the luggage carrier. (if available) 02_16 To remove the lower front cowl «B» undo the 5 screws locking the bag support.
- Page 30 TOTAL LOAD CAPACITY: (only Italy) The maximum load technically allowed is: - front luggage carrier: 20 kg; - intermediate bag: 5 kg; - rear luggage carrier: 40 kg (including the rear top box weight, approximately 6 kg). In these conditions, the rider must pay particular attention to the vehicle use, in order to ensure safety in riding and departure.
-
Page 31: Maintenance
Liberty 125 4T Delivery Chap. 03 Maintenance... -
Page 32: Engine Oil Level
Engine oil level In four stroke engines, the engine oil is used to lubricate the distribution elements, the bench bearings and the thermal group. An insufficient quantity of oil can seriously damage the engine. In all 4T engines the decay of oil characteristics as well as some consumption is normal. -
Page 33: Engine Oil Top-Up
Always check oil level before carrying out top-ups and add oil without exceeding the MAX level. An engine oil check-up and top-up should be carried out every 3,000 km at an Authorised Piaggio Service Centre. Engine oil change (03_03) Change oil and clean the filter after every 6,000 km at an Authorised Service Cen- tre. -
Page 34: Hub Oil Level
Hub oil level (03_04, 03_05, 03_06) To check the hub oil level, proceed as follows: 1. Park the scooter on level ground and rest it on its stand. 2. Unscrew the oil dipstick «A», dry it with a clean cloth and then reinsert it, screwing it fully into place;... -
Page 35: Tyres
API GL-4 Characteristic Rear hub oil Quantity: approx. 85 cc Tyres (03_07) Periodically check the inflation pressure of each tyre. Tyres are equipped with wear indicators. Tyres should be replaced as soon as these indicators become visible on the tyre tread. Also check that tyres do not show signs of splitting at the sides or irregular tread wear;... -
Page 36: Spark Plug Dismantlement
Spark plug dismantlement (03_08, 03_09, 03_10) In order to inspect the spark plug, follow the operation described when the engine is cold: 1. Remove the access door «A» after undoing the corresponding screw; 2. Remove the helmet compartment; 3. Detach the spark plug cap; 4. -
Page 37: Removing The Air Filter
CHAMPION RG6YC - NGK CR7EB Removing the air filter (03_11) Remove cleaner cover «D» after unscrewing the 7 retaining screws «B», then remove the filter. Clean with water and car shampoo, afterwards dry with compressed air and submerge in a recommended oil and petrol mixture in ratio of 50%. Afterwards squeeze it, leave it to dry and mount it again. -
Page 38: Secondary Air System
Before closing the cover of the SAS housing, check the good condition of the sealing O-ring; replace it if damaged or deformed. N.B. 03_12 The reed valve can be inserted in only one direction on the SAS housing CAUTION CONTACT AN AUTHORISED PIAGGIO SERVICE CENTRE TO CARRY OUT THESE OPERATIONS. -
Page 39: Checking The Brake Oil Level
03_13 03_14 Checking the brake oil level (03_15, 03_16) The brake fluid reservoir is equipped with a sight glass «A» made of transparent ma- terial; the quantity of liquid contained in the sight glass indicates the level of liquid in the reservoir. - Page 40 system thoroughly checked. If you need to top up the level, follow the steps listed below. Unscrew the 2 screws «B», remove the reservoir cap «C » and pour in the required quantity of fluid (the brake fluid level must be above minimum). Place the handlebar in the riding position and pay attention not to tilt the vehicle in order to keep the brake fluid reservoir in horizontal position when checking the fluid level.
-
Page 41: Battery
Battery (03_17) To access the battery, tip the saddle forwards («Keys» section), then remove the bat- tery compartment cover by unscrewing the screw shown in the figure. CAUTION IN ORDER TO AVOID DAMAGING THE ELECTRICAL SYSTEM, NEVER DISCON- NECT THE WIRING WHILE THE ENGINE IS RUNNING. DO NOT TIP THE VEHICLE 03_17 TOO MUCH IN ORDER TO AVOID DANGEROUS LEAKAGE OF THE BATTERY ELECTROLYTE. - Page 42 performance may also be due to environmental conditions and the cleanliness of the poles. In order to avoid difficult starts and/or irreversible damage to the battery, follow any of these steps: - At least once a month start the engine and run it slightly above idle speed for 10-15 minutes.
-
Page 43: Fuses
Fuses (03_18) The electrical system is protected by a 10A fuse valve «B» located next to the battery. Before replacing a blown fuse, find and solve the problem that caused it to blow. Do not replace the fuse with any alternative form of conductor CAUTION IN ORDER TO AVOID DAMAGING THE ELECTRICAL SYSTEM, NEVER DISCON- 03_18... - Page 44 03_20 To access the headlight bulbs, remove the front of the handlebar cover, as follows: 1) Remove the rear-view mirrors; for this operation follow the instructions described and illustrated in the «Rear-view mirrors» section. 2) Unscrew the 3 screws holding the handlebar cover. The front central one «B» and the rear 2 «C».
-
Page 45: Front Direction Indicators
Front direction indicators (03_23, 03_24, 03_25) Type of front turn indicators depends on the Country version Use a flat screwdriver as a lever on the slots placed on the sides. Operate carefully in order to prevent the screwdriver from damaging the plastic parts. Remove the glass and the flashing bulb. -
Page 46: Rear Optical Unit
Rear optical unit (03_26, 03_27, 03_28, 03_29) In order to reach the rear light bulb proceed as follows: - Remove screw "B" in order to remove cover "C". Repeat this operation also on the left side. - Remove screw "D" on both sides of the headlight assembly. - Remove screw "E"... -
Page 47: Rear-View Mirrors
03_29 Rear-view mirrors (03_30) To adjust mirrors, loosen lock nut «A», place the mirror stem adequately and tighten the lock nut. The rear-view mirror is assembled on a stem with a ball 'joint'. The mirror can be adjusted manually to the desired position. 03_30... -
Page 48: Idle Adjustment
For idle speed adjustment, it is necessary to operate on the idle speed set screw A placed on the front part of the air filter, as shown in the figure. Contact an Authorised Piaggio Service Centre to restore the level of minimum CO (carbon monoxide emissions). -
Page 49: Rear Drum Brake
BOTH PADS IS IN THE REGION OF 1.5 MM, BOTH PADS MUST BE CHANGED. IT IS RECOMMENDED TO CARRY OUT THIS OPERATION AT AN AUTHORISED SERVICE CENTRE AS SOON AS POSSIBLE. AFTER FITTING NEW BRAKE PADS DO NOT USE THE VEHICLE UNTIL YOU HAVE ACTIVATED THE BRAKE LEVER REPEATEDLY TO POSITION THE PADS AND RESTORE THE LEVER STROKE TO ITS CORRECT POSITION. -
Page 50: Puncture
To use this device, just keep pulled the left brake lever, then push it downward to engage it in the stud bolt on the rear brake lever. To unlock the brake, pull the lever again: the release will come out from the stud bolt and will return to its initial position. -
Page 51: Inactivity Of The Vehicle
Inactivity of the vehicle (03_36) The following operations are recommended: 1. Clean the scooter thoroughly and then cover it with a canvas; 2. With the engine off, remove the spark plug, and pour 10÷15 cm³ of oil through its hole. Operate the starter button 1-2 times for roughly 1 second to turn the engine over slowly, then insert the spark plug again;... - Page 52 · Air pollution: city and/or industrial areas. · Salinity and humidity of the atmosphere: marine areas, hot and wet weather. WARNING . Prevent deposits from remaining on the bodywork, industrial and pollutant residual dust, tar spots, dead insects, bird droppings, etc. ·...
- Page 53 WARNING WHEN WASHING THE ENGINE WITH A HIGH-PRESSURE WATER JET: • ONLY USE FAN SPRAY JETS. • DO NOT PLACE THE NOZZLE CLOSER THAN 60 CM. • DO NOT USE WATER AT TEMPERATURES OVER 40° C. • DO NOT DIRECT THE JETS DIRECTLY TO CARBURETTOR, WIRINGS, SLOT DIFFUSERS ON THE TRANSMISSION COVER AND SCROLL COVER.
- Page 54 Replace the spark plug if the insulator is cracked or broken. If the spark plug is in good condition, contact an Authorised Piaggio Service Centre. ACK OF COMPRESSION Spark plug adapter "worn", valve Contact an Authorised Service clearance not adequate; worn Centre.
- Page 55 INEFFICIENT SUSPENSION Oil leak; worn limit switch bumpers; Contact an Authorised Service worn shock absorber attachment Centre points AUTOMATIC TRANSMISSION PROBLEMS Deteriorated roller housing or belt. Contact an Authorised Service Centre. INCREASED EXHAUST NOISE Deterioration of the SAS system Contact an Authorised Service and/or of the tab Centre.
- Page 56 STARTER LEVER DOES NOT RETURN TO CORRECT POSITION Presence of dirt Clean and grease...
-
Page 57: Technical Data
Liberty 125 4T Delivery Chap. 04 Technical data... - Page 58 04_01...
- Page 59 SPECIFICATIONS - 125 ENGINES Type Single-cylinder, 4-stroke Cubic capacity 124 cm³ Bore x stroke 57.0 x 48.6 mm Compression ratio 10.6 ± 0.5: 1 Engine idle speed 1650 ± 100 rpm Timing system 2 valves, single overhead camshaft, chain-driven. Valve clearance (cold engine) Intake: 0.10 mm Exhaust: 0.15 mm Max.
- Page 60 Ignition advance Three-dimensional map managed by control unit Spark plug CHAMPION RG 6 YC Alternative spark plug NGK CR7EB Fuel system KEIHIN CVK 27 carburettor and vacuum-operated fuel pump. Fuel Unleaded petrol (95 RON) Exhaust silencer Absorption-type exhaust muffler with catalytic converter. Emissions compliance EURO 3 VEHICLE TECHNICAL DATA...
-
Page 61: Tool Kit
Rear drum Ø 140 mm drum brake Front wheel rim Die-cast aluminium alloy, 2.15 x16" Rear wheel rim Die-cast aluminium alloy, 2.75 x14" Front tyre Tubeless 90/80-16" Rear tyre Tubeless 110/80-14" Front tyre pressure 2.2 bar Rear tyre pressure 2.5 bar Kerb weight 120 kg CAPACITY... -
Page 63: Spare Parts And Accessories
Liberty 125 4T Delivery Chap. 05 Spare parts and accessories... -
Page 64: Warnings
Warnings (05_01, 05_02) WARNING IT IS RECOMMENDED THAT "ORIGINAL PIAGGIO SPARE PARTS" BE USED, AS THESE ARE THE ONLY ONES OFFERING YOU THE SAME QUALITY AS- SURANCE AS THOSE INITIALLY FITTED ON THE VEHICLE. IT SHOULD BE REMEMBERED THAT USING NON-ORIGINAL SPARE PARTS 05_01 CAUSES YOUR WARRANTY RIGHTS TO EXPIRE. -
Page 65: Scheduled Maintenance
Liberty 125 4T Delivery Chap. 06 Scheduled maintenance... - Page 66 MAINTENANCE TABLE Km x 1,000 Safety fasteners Spark plug Centre stand bracket Drive belt Throttle control Air filter SAS filter Oil filter Mesh oil filter Valve clearance Electrical system and battery Cylinder ventilation system Brake levers Brake fluid ** Engine oil * Hub oil Headlight direction adjustment Brake pads...
- Page 67 Km x 1,000 Vehicle road test Idle speed Odometer gear Suspension Steering Transmission I: INSPECT AND CLEAN, ADJUST, LUBRICATE OR REPLACE IF NECESSARY C: CLEAN, R: REPLACE, A: ADJUST, L: LUBRICATE Clean the SAS air filter every 2 years * Check level every 3,000 km ** Replace every 2 years RECOMMENDED PRODUCTS TABLE Product...
- Page 68 Product Description Specifications eni i-Ride PG 5W-40 Synthetic based lubricant for high-performance JASO MA, MA2 - API SL - ACEA A3 four-stroke engines. AGIP GREASE SM 2 Gray black smooth-textured lithium grease, containing molybdenum disulphide. AGIP BRAKE 4 Brake fluid. Synthetic fluid SAE J 1703 -FMVSS 116 - DOT 3/4 - ISO 4925 - CUNA NC 956 DOT 4...
- Page 69 TABLE OF CONTENTS Mirrors: 47 Tyre pressure: 19 Tyres: 35 Air filter: 37 Fuses: 43 Puncture: 50 Vehicle: 7, 51 Battery: 41 Horn: 11 Brake: 39, 48, 49 Hub oil: 34 Refuelling: 18 Checks: 18 Identification: 14 Clock: 9 Saddle: 13 Scheduled maintenance: 65 Spark plug: 36 Keys: 13...
- Page 70 Not all versions/models shown in this publication are available in all countries. The availability of single versions should be checked at the official Piaggio sales network. "© Copyright 2008 - PIAGGIO & C. S.p.A. Pontedera. All rights reserved. Reproduction of this publication in whole or in part is prohibited."...