
Related Manuals for Janome DC4030


Summary of Contents for Janome DC4030
- Page 1 Janome DC4030 Instruction manual Janome Sewing Machine Janome DC4030 Instruction Manual www.toews.com DC4030 Owners Manual/ User Guide...
-
Page 2: Table Of Contents
Blind Hemming ............. 62 Bartacking ..............64 Applique ............... 66 Patchwork ..............66 Satin Stitch ..............68 Elongation ..............68 Decorative Stitch Pattern with Auto Lock Stitch ..70 Adjusting Pattern Balance ........... 72 www.toews.com DC4030 Owners Manual/ User Guide... - Page 3 Puntada de dobladillo invisible ........63 Hilván de barra ............. 65 Aplicación ..............67 Patchwork costura estilo parche ........67 Costura de puntada de satín ........69 Alargamiento ..............69 Patron de costura decorativa ........71 www.toews.com DC4030 Owners Manual/ User Guide...
- Page 4 Boutonnière pour tissus extensibles ......55 Boutonnière cordonnet ..........57 Couture des fermetures éclair ........ 59-61 L’ourlet invisible ............63 Les points de fixation ........... 65 Appliqué ............... 67 Patch ................67 Point lancé ..............69 Allongement ..............69 www.toews.com DC4030 Owners Manual/ User Guide...
-
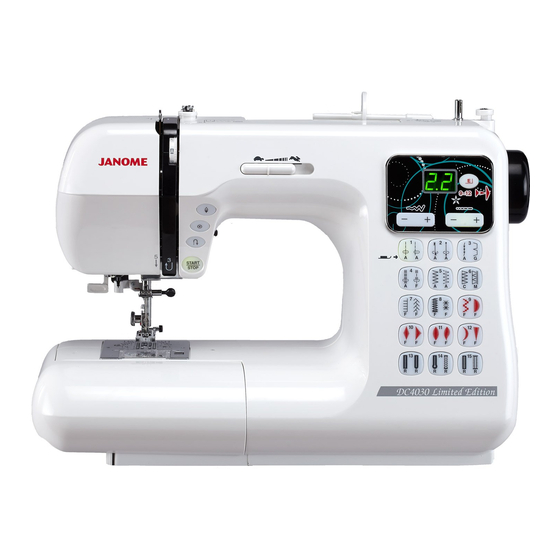
Page 5: Names Of Parts
Bobbin winder stopper Bobbin winder spindle Carrying handle Presser foot lifter Buttonhole lever Free-arm Drop feed dog lever Foot control Power supply cord *The design and specifications are subject to change without a prior notice. www.toews.com DC4030 Owners Manual/ User Guide... -
Page 6: Sección I. Componentes Principales Nombre De Las Piezas
#9 Pédale $0 Enchefe de la máquina $0 Fiche de la machine * El diseño y las especificaciones pueden ser modificados sin * La conception et les spécifications peuvent être modifiées previo aviso. sans préavis. www.toews.com DC4030 Owners Manual/ User Guide... -
Page 7: Standard Accessories
Zipper foot: E y Automatic buttonhole foot: R u Overedge foot: C i Blind hem foot: G o Screwdriver !0 Quilter !1 Seam ripper/Buttonhole opener !2 Lint brush !3 Large spool holder !4 Small spool holder www.toews.com DC4030 Owners Manual/ User Guide... -
Page 8: Accessorios Estandares
!0 Guide à matelasser !0 Acolchador !1 Découd-vite/Ouvre boutonnière !1 Cortador/Abreojales !2 Brosse a peluches !2 Cepillo de limpieza !3 Disque fixe-bobine (grand modèle) !3 Tapa-carretes grande !4 Disque fixe-bobine (petit modèle) !4 Tapa-carretes pequeñol www.toews.com DC4030 Owners Manual/ User Guide... -
Page 9: Section Ii. Getting Ready To Sew
* Always turn off the power switch and unplug from the power supply: - When leaving the machine unattended. - When attaching or removing any parts. - When cleaning the machine. * Do not place anything on the foot control, when not sewing. www.toews.com DC4030 Owners Manual/ User Guide... -
Page 10: Sección Ii. Preparativos Antes De Coser
- Cuando vaya a limpiar la máquina Ne placez rien sur la pédale, sinon la machine risque de No coloque ningún objeto sobre el pedal; si lo hace, la máquina funcionará intermitentemente. tourner par intermittence. www.toews.com DC4030 Owners Manual/ User Guide... -
Page 11: Controlling Sewing Speed
• The button is lit red until locking stitch is automatically stopped. www.toews.com DC4030 Owners Manual/ User Guide... -
Page 12: Pedal
• El botón es rojo encendido hasta la fijación de la puntada se • Le bouton est rouge allumée jusqu’à fermer à clef le point est para automáticamente. automatiquement arrêté. www.toews.com DC4030 Owners Manual/ User Guide... - Page 13 * The alphabet under the stitch pattern indicates the suitable presser foot type for the selected stitch pattern. Note: Raise the needle above the fabric when selecting the stitch pattern. www.toews.com DC4030 Owners Manual/ User Guide...
- Page 14 Para evitar daño en llla aguja o la tela, asegúrese que la s’assurer que l’aiguille est en position levée et ne touche pas aguja está hacia arribaa y fuera de la tela mientras selecciona le tissu, lors de votre choix de point. la puntada. www.toews.com DC4030 Owners Manual/ User Guide...
-
Page 15: Presser Foot Lifter
Push the extension table q, inserting the pin w into the hole e, until the extension table q snaps into the machine. q Extension table w Pin e Hole r Free-arm • Accessory case Many sewing accessories are stored in the accessory case. www.toews.com DC4030 Owners Manual/ User Guide... -
Page 16: Alzador Del Pie Prensatelas
Bras libre r Brazolibre • Compartimento de accesorios • Rangement des accessoires Un certain nombre d’accessoires de couture sont rangés Muchos accesorios de costura se colocan en rangement des dans laompartimento de accesorios. accessoires. www.toews.com DC4030 Owners Manual/ User Guide... -
Page 17: To Drop Or Raise The Feed Dog
To use the carrying handle, pull it up as far as it will go. Press down the carrying handle to store it. Note: Press down and store the carrying handle when it is not in use. www.toews.com DC4030 Owners Manual/ User Guide... -
Page 18: Subida Y Bajada De Los Dientes De Arrastre
Abaissez poignée de transport pour la stocker. NOTA : REMARQUE : Empuje y almacene la manija que lleva cuando es parado. Abaissez et stockez la poignée de transport quand il est non utilisable. www.toews.com DC4030 Owners Manual/ User Guide... -
Page 19: Changing Needle
Polyester Cotton, Silk #50 #11/75–14/90 Polyester Cotton #60-80 Medium Fine jersey Synthetic #50-80 Wool Cotton #50 #14/90 Denim Silk #50 #14/90–16/ Jersey Cotton #40-50 Heavy Coating Synthetic #40-50 Quilting Silk #30 Cotton #50 #16/100 www.toews.com DC4030 Owners Manual/ User Guide... -
Page 20: Cambio De Aguja
Soie #50 #14/95–16/100 Tejido liso (jersey) Algodón #40–50 Jersey Coton #40–50 Gruesa Lourd Tela para abrigos Sintética #40–50 Tissus de recouvrement Synthétique #40–50 Acolchado Seda #30 #16/100 Matelassage Soie #30 #16/100 Algodón #30 Coton #30 www.toews.com DC4030 Owners Manual/ User Guide... -
Page 21: Removing And Attaching The Foot Holder
Attach the large spool holder w, and press it firmly against the spool of thread. The small spool holder e is used with narrow or small spools of thread. www.toews.com DC4030 Owners Manual/ User Guide... -
Page 22: Cómo Quitar/Poner El Enmangue Del Prensatelas
Coloque el tapa-carretes grande w, y empújelo firmemente contre la bobine. On utilise la petite rondelle e pour les bobines contra el carrete. plus minces. El tapa-carretes pequeño e se usa con los carretes de hilo estrechos o pequeños. www.toews.com DC4030 Owners Manual/ User Guide... - Page 23 NOTE: Make sure that the carrying handle is not being raised when winding the bobbin. NOTE: The machine motor automatically stops after 2 minutes if you do not stop the machine. www.toews.com DC4030 Owners Manual/ User Guide...
- Page 24 Pour des questions ddde sécurité, la maccccchine s’arrête Por motiiiiivos de seguridad, la máquina se detendrá automatiquement 2 minutes après a voir commencé à enrouler autooomáticamente minutos después de empezar el bobinado. la canette. www.toews.com DC4030 Owners Manual/ User Guide...
- Page 25 Pull out about 6˝ (15 cm) of thread. v Attach the hook cover plate. Check the threading by referring to the diagram r shown on the hook cover plate. www.toews.com DC4030 Owners Manual/ User Guide...
- Page 26 Vous trouverez un guide d’enfilage r canilla y compruebe si ha enhebrado correctamente. de la canette sur le couvercle de navette. www.toews.com DC4030 Owners Manual/ User Guide...
-
Page 27: Threading The Machine
Pull the thread through the needle eye. NOTE: The needle threader can be used with a #11 to #16 needle or a blue tipped needle. Thread size 50 to 90 should also work well. www.toews.com DC4030 Owners Manual/ User Guide... -
Page 28: Enhebrado Del Hilo De La Aguja
El enhebrador de agujas se puede utilizar con las agujas #11 a No 16, ou une aiguille bleue No11. #16, o con una aguja #11 azul. Un fil de taille 50 à 100 est recommandé. Se recomienda un hilo de tamaño 50 a 100. www.toews.com DC4030 Owners Manual/ User Guide... -
Page 29: Drawing Up Bobbin Thread
If the needle thread tension is too tight, the bobbin thread is pulled up and will appear on the right side of the fabric. Turn the dial to a lower tension setting number to loosen the needle thread tension. www.toews.com DC4030 Owners Manual/ User Guide... -
Page 30: Extracción Del Hilo De La Canilla
Afloje la tensión del hilo de la aguja girando produit des bosses. Tournez la molette vers le haut pour hacia arriba el ajuste de tensión del hilo. relâcher la tension du fil de l’aiguille. www.toews.com DC4030 Owners Manual/ User Guide... -
Page 31: Adjust The Needle Thread Tension For A Zigzag Stitch
• Tension is too loose q Right side (Top side) of fabric w Wrong side (Bottom side) of fabric The corner of each zigzag point pulls together on the wrong side of the fabric. www.toews.com DC4030 Owners Manual/ User Guide... -
Page 32: Ajuste De La Tensión Del Hilo De La Aguja Para Puntada Zigzag
El hilo de la aguja pasará por la parte de abajo de la tela y se Le fil de l’aiguille à tendance à faire des boucles sur l’envers du jalará quedando casí junto. tissu et les points sont déformés. www.toews.com DC4030 Owners Manual/ User Guide... -
Page 33: Section Iii. Basic Sewing
When you reach the end edge of the fabric, press the reverse stitch button q once. The machine will sew four reverse stitches, four forward stitches then stop sewing. www.toews.com DC4030 Owners Manual/ User Guide... -
Page 34: Sección Iii. Puntadas Básicas Puntada Recta
La máquina coserá alors quatre points en arrière, quatre point en avant et cuatro putadas hacia atrás, cuatro hacia adelante y se s’arrête automatiquement. parará automáticamente. www.toews.com DC4030 Owners Manual/ User Guide... -
Page 35: Using The Seam Guides On The Needle Plate
Slide the quilter in the hole to the desired width and tighten the screw. x Sew, guiding the quilter over the previous row of stitching. q Quilter holding screw w Quilter e Hole r Distance www.toews.com DC4030 Owners Manual/ User Guide... -
Page 36: Uso De Las Guías De Costura
Cosa llevando la guía sobre la anterior línea de puntada. la couture précédente. q Tornillos sujetador del acolchador q Vis de blocage du guide à matelasser w Acolchador w Guide à matelasser e Alojamiento e Trou r Distancia r Distance entre deux coutures www.toews.com DC4030 Owners Manual/ User Guide... -
Page 37: Sewing On Heavy Fabrics
When you press “–”, the needle position will move to the left. When you press “+”, the needle position will move to the right. q Left (0.0) w Middle (3.5) e Right (7.0) www.toews.com DC4030 Owners Manual/ User Guide... -
Page 38: Manera De Coser Telas Pesadas
Al pulsar la tecla “+”, la aguja se moverá a la posición derecha. q Izquierda (0.0) Lorsque vous appuyez sur la touche “+”, l’aiguille se déplace w Centro (3.5) vers la droite. e Derecha (7.0) q Gauche (0.0) w Milieu (3.5) e Droite (7.0) www.toews.com DC4030 Owners Manual/ User Guide... -
Page 39: Pintucking
Use it to reinforce areas such as crotch and armhole seams. Also use for extra reinforcement when constructing items such as backpacks. www.toews.com DC4030 Owners Manual/ User Guide... -
Page 40: Remate
Utilisez-le pour renforcer les coutures d’entre-jambe ou entrepierna y axila. Usela también para hacer artículos tales d’emmanchure. Également utile pour la fabrication como mochilas para obtener un refuerzo adicional. d’accessoires résistantas comme les sacs-à-dos. www.toews.com DC4030 Owners Manual/ User Guide... -
Page 41: Straight Stretch
Saddle Stitch q Stitch pattern: w Needle thread tension: e Presser foot: Satin stitch foot: F You can achieve a lovely hand-worked look when topstitching suits, blazers, jumpers, and denim outfits with the saddle stitch. www.toews.com DC4030 Owners Manual/ User Guide... -
Page 42: Puntada Recta Triple
Vous obtiendrez un superbe aspect “cousu main” lorsque vous surpiquerez avec le point sellier les costumes, les vestes, les usar sobrepuntads en trajes, chaquetas, jumpers y prendas de tela de jeans. chasubles et les tenues en jean. www.toews.com DC4030 Owners Manual/ User Guide... -
Page 43: Zigzag Stitch
As you sew, be sure your fabric edge pushes up against the black ridge. NOTE: When using an Overedge foot, make sure to set the stitch width between 5 and 7, otherwise the needle may hit the overedge foot. www.toews.com DC4030 Owners Manual/ User Guide... -
Page 44: Puntadas De Zig-Zag
La anchura de puntada debe estar ajustada entre 5.0 y 7.0, La largeur du point devrait être réglée entre 5.0 et 7.0, sinon pues de lo contrario la aguja puede golpear el prensatelas de l’aiguille pourrait heurter le pied à surjeter. sobrehilado. www.toews.com DC4030 Owners Manual/ User Guide... -
Page 45: Tricot Stitch
This stitch finishes the edge of fabric similar to a commercial overlocking machine for professional look. Place the fabric edge next to the guide of the foot and then sew. q Pin w Guide e Edge of the fabric www.toews.com DC4030 Owners Manual/ User Guide... -
Page 46: Puntada De Múltiple Zig-Zag
Cologue el borde de la tela al lado de la guía del prensatelas y commencez à coudre. comience a coser. q Broche q Pasador w Guíde w Guía e Bord du tissu e Borde de la tela www.toews.com DC4030 Owners Manual/ User Guide... -
Page 47: Button Sewing
Left hole of the button w Right hole of the button * After the button sewing is completed, raise the feed dogs for normal sewing. www.toews.com DC4030 Owners Manual/ User Guide... -
Page 48: Costura De Botones
Trou de gauche w Agujero derecho del botón w Trou de droite * Suba los dientes de arrastere cuando hay aterminado de * Lorsque la couture est terminée, relever la griffe coser. d’entraînement. www.toews.com DC4030 Owners Manual/ User Guide... -
Page 49: Automatic Buttonhole
Pull the button holder e to the back, and place the button in it. Push it forward tightly against the button. x Pull the buttonhole lever r down as far as it will go. www.toews.com DC4030 Owners Manual/ User Guide... -
Page 50: Ojales Automáticos
Empuje firmemente el alojamiento con x Tirez le levier des boutonnières r aussi bas que possible. el botón dentro. x Baje la palanca de ojales r tan bajo como se pueda. www.toews.com DC4030 Owners Manual/ User Guide... - Page 51 When finished, push the buttonhole lever up as far as it will go. If you select the other pattern without raising the foot, the indicator window shows “UP” to warn you. www.toews.com DC4030 Owners Manual/ User Guide...
- Page 52 Dans le cas où vous sélectionneriez l’autre point sans relever le pantalla aparecerá el mensaje “UP” para advertirle que debe pied, le mot « UP » (levé) apparaît sur l’écran pour vous en levantar el prensatelas. avertir. www.toews.com DC4030 Owners Manual/ User Guide...
-
Page 53: Adjusting The Stitch Width And Density In Buttonholes
The Keyhole Buttonhole is widely used on medium to heavy weight fabrics. It is also suitable for larger and thicker buttons. * Sewing procedure is the same as automatic buttonhole. r Starting point t Bartacking www.toews.com DC4030 Owners Manual/ User Guide... -
Page 54: Ajustes De La Densidad Y La Anchura De Los Ojaes
* El procedimiendo de costura es el misomo que el ojals boutons plus grands et plus épais. automáticos. * Le procédé de coutre est le même que pour boutonnière automatique. r Punto de incio de costura r Point de départ t Arrêt t Remate www.toews.com DC4030 Owners Manual/ User Guide... -
Page 55: Knit Buttonhole
Designed for non-woven fabrics such as knit and jersey. It provides a decorative touch. a Sew the left row and the front bartack. s Sew the rear bartack and right row. d Locking stitch at end. www.toews.com DC4030 Owners Manual/ User Guide... -
Page 56: Ojal De Punto
(2) Cosa el remate delantero. (1) Coudre le côte gauche et la bride d’arrêt avant. (3) Fijación de la puntada el extermo. (2) Coudre la bride d’arrêt arrière et le côté droit. (3) Verrouillage du point à l’extrémité. www.toews.com DC4030 Owners Manual/ User Guide... -
Page 57: Corded Buttonhole
Pull the loose ends of the filler cord to tighten it. Thread the end of the cord through a hand-sewing needle. Then draw them to the wrong side of the fabric and knot. www.toews.com DC4030 Owners Manual/ User Guide... -
Page 58: Ojal Acordonado
Enfiler l'extrémité du cordonnet dans une aiguille à repriser para apretarlo. et le passer sur l'envers du tissu avant de le couper. Pase el extremo por una aguja de zurcir, llévelo al reverso de la tela y córtelo. www.toews.com DC4030 Owners Manual/ User Guide... -
Page 59: Zipper Sewing
Place the zipper teeth next to the fold and pin it in place. q Bottom fabric w End of the zipper opening e Zipper teeth r 0.3 cm (1/8˝) t Wrong side of the upper fabric y Opening size u Fold www.toews.com DC4030 Owners Manual/ User Guide... -
Page 60: Aplicación De Cremalleras
0,2 a 0,3 cm r 0,2 à 0,3 cm t Reverso de la tela superior t Envers du tissu de dessus y Tamaño de la abertura y Taille de l’ouverture u Pliegue u Pli www.toews.com DC4030 Owners Manual/ User Guide... - Page 61 Remove the basting stitches. !2 Basting stitches m Open the zipper, then lower the foot and stitch the remainder of the seam. After finish sewing, remove the basting stitches on the upper fabric. www.toews.com DC4030 Owners Manual/ User Guide...
- Page 62 Mueva el deslizador detrás del pie prensatelas. Abaissez le pied presseur et poursuivez le reste de la Baje el prensatelas y acabe la costura. couture. Al terminar, retire el hilván. Une fois terminée, retirez les points de bâti. www.toews.com DC4030 Owners Manual/ User Guide...
-
Page 63: Blind Hemming
The indicator window will show the distance between the guide and left needle drop position in millimeter. Guide Left needle drop position NOTE: The needle drop position will move to the left or right, but the stitch width is remained the same. www.toews.com DC4030 Owners Manual/ User Guide... -
Page 64: Puntada De Dobladillo Invisible
La posición de la gota de la aguja se moverá el al izquierdo ou droit, mais la largeur de point est restée la même. o derecho, pero se sigue siendo igual la anchura de la puntada. www.toews.com DC4030 Owners Manual/ User Guide... -
Page 65: Bartacking
“+” for even stitch. • Stitch does not meet return position !0 . Turn dial toward “–” for even stitch. o Start position !0 Return position !1 Feed balancing dial !2 Standard setting mark !3 Indication line www.toews.com DC4030 Owners Manual/ User Guide... -
Page 66: Hilván De Barra
Position de départ !0 Posición a volver !0 Position à retourner !1 Eje equilibrador de puntada !1 Molette d’équilibrage de l’entraînement !2 Marca de posición estándar !2 Réglage normal !3 Línea de indicación !3 Ligne indicative www.toews.com DC4030 Owners Manual/ User Guide... -
Page 67: Applique
Wrong side of fabric w Right side of fabric Sew seam with straight stitch pattern 1 and press seam allowance to open. Sew pattern stitch pattern 7 on right side of garment centering over the seam line. www.toews.com DC4030 Owners Manual/ User Guide... -
Page 68: Aplicación
Cousez le en el anverso de la tela, centrando las puntadas sobre la motif n° 7 à l’endroit du vêtement en le centrant sur la ligne línea de la costura. de couture. www.toews.com DC4030 Owners Manual/ User Guide... -
Page 69: Satin Stitch
Satin stitches can be elongated up to five times their normal length by pressing the elongation button q. When the width or length of stitch is changed, a greater variety of patterns are available. q Elongation button www.toews.com DC4030 Owners Manual/ User Guide... -
Page 70: Costura De Puntada De Satín
Cambie el ancho o la longitud de la puntada para opciones Changer la largeur ou la longueur de point pour avoir le máximas combinadas con alargamiento. maximum d’options en association avec l’allongement. q Botón de alargamiento q Bouton de allongement www.toews.com DC4030 Owners Manual/ User Guide... -
Page 71: Decorative Stitch Pattern With Auto Lock Stitch
Start sewing and the machine will sew one unit of the pattern and stop automatically. Repeat the above steps to sew a line of the pattern combination. www.toews.com DC4030 Owners Manual/ User Guide... -
Page 72: Patron De Costura Decorativa
Appuyer sur la commande à pédale et la machine coudra un Repiiita los pasos anteriores para coser una línea de la seul point du motif et s’arrêtera automatiquement. combinación de patrones. Répéter cette procédure pour coudre une ligne de points combinés. www.toews.com DC4030 Owners Manual/ User Guide... -
Page 73: Adjusting Pattern Balance
“+”. (2) When patterns are too drawn out, correct by turning the dial in the direction of “–”. NOTE: Turn the feed balancing dial slightly as it is very sensitive. www.toews.com DC4030 Owners Manual/ User Guide... -
Page 74: Ajuste De Balance Del Patrón
“–”. NOTA: REMARQUE: Dé vuelta al eje equlibrador de puntada pues es muy sen- Tournez le molette d’équilibrade de l’entraînement légèrement sible. car il est très sensible. www.toews.com DC4030 Owners Manual/ User Guide... -
Page 75: Clean The Hook Race And Feed Dog
Insert the bobbin holder so that the knob fits next to the stopper in the hook race. x Insert the bobbin. c Attach the needle plate with screw. After cleaning the machine, make sure the needle and presser foot are attached. www.toews.com DC4030 Owners Manual/ User Guide... -
Page 76: Limpieza Del Garfio Y De Los Dientes De Transporte
Insérez la canette. c Après avoir nettoyé la machine, assurez-vous que l’aiguille c Después de limpiar la máquina, asegúrese de que la aguja y el prensatelas estén instalados. et le pied presseur sont bien fixés. www.toews.com DC4030 Owners Manual/ User Guide... -
Page 77: Replacing The Light Bulb
Light bulb r Base Attaching the Light Bulb z To insert the light bulb in the lamp socket, match the base on the light bulb with the lamp socket holes. x Close face plate cover. www.toews.com DC4030 Owners Manual/ User Guide... -
Page 78: Cómo Quitar La Bombilla
Pour insérer l’ampoule dans la douille, alignez la base de que la base de la lámpara correspondan con los agujeros l’ampoule sur les trous dans la douille. del receptáculo. x Fermez le couvercle de façade. x Cierre la tapa frontal. www.toews.com DC4030 Owners Manual/ User Guide... -
Page 79: Problems And Warning Signals
3 minutes. Audible signal The buzzer sounds when: Normal operation Pip-pip-pip Invalid operation Pip-pip-peep Buttonhole sewing completed Peep Malfunciton It is not abnormal that a faint humming sound is coming from the internal motors. www.toews.com DC4030 Owners Manual/ User Guide... -
Page 80: Problemas Y Señales De Advertencia
Dos pitidos cortos y uno largo al final se ha terminado de coser un ojal Pitido largo hay un fallo Es normal oír un zumbido proveniente de los motores internos. www.toews.com DC4030 Owners Manual/ User Guide... - Page 81 L’avertisseur sonore se déclenche dans les cas suivants: Fonctionnement normal bip-bip-bip Opération invalide bip-bip-biiip Couture de boutonnière terminée Biiip Mauvais fonctionnement Il est tout à fait normal que les moteurs internes émettent un faible bourdonnement. www.toews.com DC4030 Owners Manual/ User Guide...
-
Page 82: Troubleshooting
The machine does not 1. Thread has been caught in the hook race. Page 74 run smoothly and is 2. Lint has built up in the hook race or bobbin holder. Page 74 noisy. www.toews.com DC4030 Owners Manual/ User Guide... -
Page 83: Identificación Y Resolución De Problemas
La máquina no funciona 1. Hay hilos atrados en el mecanismo del gancho. Paguina 75 correctamente y es muy 2. Se han acumulado las pelusas en el portacanillas o en el garfio. Paguina 75 ruidosa www.toews.com DC4030 Owners Manual/ User Guide... - Page 84 Le fronctionnement est 1. Du fil est bloqué dans la piste coursière. Page 75 bruyant. 2. Des peluches se sont accumulées dans la coursière ou dans le porte-canettes. Page 75 www.toews.com DC4030 Owners Manual/ User Guide...
- Page 85 Janome DC4030 Instruction manual Janome Sewing Machine INSTRUCTION BOOK MANUAL DE INSTRUCCIONES MANUEL D’INSTRUCTIONS www.toews.com DC4030 Owners Manual/ User Guide...
- Page 86 SAVE THESE INSTRUCTIONS Please note that on disposal, this product must be safely recycled in accordance with relevant National legislation relating to electrical/electronic products. If in doubt please contact your retailer for guidance. (European Union only) www.toews.com DC4030 Owners Manual/ User Guide...
- Page 87 Tenga presente que, cuando desee deshacerse de este producto, deberá reciclar el producto de forma segura, en cumplimiento de la legislación nacional relacionada con los productos eléctricos y electrónicos. Si tiene alguna duda, póngase en contacto con el distribuidor (sólo válido en la Unión Europea). www.toews.com DC4030 Owners Manual/ User Guide...
- Page 88 Remarque : à la mise au rebut, ce produit devra être recyclé en toute sécurité d’après la législation en vigueur concernant les appareils électriques et électroniques. En cas de doute, demandez conseil à votre revendeur. (Union européenne uniquement) www.toews.com DC4030 Owners Manual/ User Guide...
- Page 89 Janome DC4030 Instruction manual Janome Sewing Machine 807-800-036 Printed in Taiwan www.toews.com DC4030 Owners Manual/ User Guide Impreso en Taiwan Impremé en Taiwan...