
Subscribe to Our Youtube Channel
Related Manuals for Beko DRZ1025B


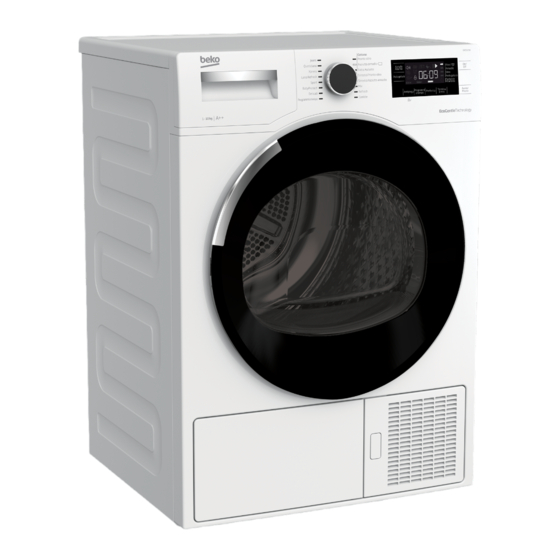
Summary of Contents for Beko DRZ1025B
- Page 1 Asciugatrice Manuale utente Dryer User Manual DRZ1025B 2960311620_IT/241117.1557...
-
Page 2: Spiegazione Dei Simboli
Leggere come prima cosa questo manuale dell'utente! Gentile cliente, grazie per aver scelto di acquistare un prodotto Beko. Speriamo che il suo prodotto, realizzato con un alto livello qualitativo tecnologico, le posso offrire risultati ottimali. Le consigliamo di leggere questo manuale nella sua interezza oltre ai documenti allegati, prima di iniziare a uti- lizzare il prodotto. -
Page 3: Istruzioni Importanti Per La Sicurezza E L'ambiente
Istruzioni importanti per la sicurezza e l’ambiente Questa sezione contiene istruzioni di sicurezza che vi aiuteranno a proteggere dalla rischio di lesioni personali ho da mia proprietà. Il mancato rispetto di queste istruzioni invaliderà qualsiasi garanzia. 1.1 Norme di sicurezza generali •... - Page 4 Istruzioni importanti per la sicurezza e l’ambiente 1.1.1 Norme di sicurezza generali In fase di realizzazione di un collegamento elettrico, durante la procedura di installazione, è opportuno attenersi alle istruzioni per la sicurezza elettrica. L’apparecchiatura non deve essere alimentata mediante un dispositivo di switching esterno, ad esempio un timer, o essere collegata a un circuito regolarmente acceso o spento separatamente.
- Page 5 Istruzioni importanti per la sicurezza e l’ambiente I cavi di alimentazione danneggiati vanno sostituite previa notifica alla Servizio Assistenza Autorizzato. Qualora il prodotto abbia un difetto, non dovrebbe essere usato a meno che non venga riparato da un Agente di Servizio Autorizzato. C'è rischio di scossa elettrica! 1.1.2 Norme di sicurezza generali Punti da prendere in considerazione per...
- Page 6 Istruzioni importanti per la sicurezza e l’ambiente I seguenti capi/indumenti non vanno messi in asciugatrice dato che sussiste il rischio di incendio: • indumenti o cuscini imbottiti con schiuma di gomma (schiuma di lattice), cuffie per la doccia, tessuti resistenti all'acqua, materiali con rinforzo in gomma e cuscinetti in schiuma di gomma.
- Page 7 Istruzioni importanti per la sicurezza e l’ambiente Pulire sempre il filtro lanugine prima o dopo ogni carico. Non usare mai l'asciugatrice senza il filtro lanugine installato. • Non cercare mai di riparare da soli l’asciugatrice. Non eseguire procedure di riparazione o sostituzione sul prodotto nemmeno se si è...
- Page 8 Istruzioni importanti per la sicurezza e l’ambiente 1.2 Installazione sopra a una lavatrice • Sarà necessario usare un dispositivo di fissaggio fra le due macchine, in fase di installazione dell’asciugatrice sopra alla lavatrice. Il dispositivo di fissaggio deve essere installato da un agente di servizio autorizzato. •...
-
Page 9: Impiego Conforme Allo Scopo Previsto
Istruzioni importanti per la sicurezza e l’ambiente 1.3. Impiego conforme allo scopo previsto • L’asciugatrice è stata pensata per un uso domestico. Non è adatta per usi commerciali e non va usata al di fuori del suo ambito di utilizzo previsto. •... - Page 10 Istruzioni importanti per la sicurezza e l’ambiente 1.5 Conformità con le normative WEEE e smaltimento dei prodotti di scarico Questo prodotto è conforme alla direttiva WEEE dell’UE (2012/19/EU). Questo prodotto porta un simbolo di classificazione per la strumentazione elettrica ed elettronica di scarto (WEEE). Questo prodotto è...
-
Page 11: Specifiche Tecniche
Istruzioni importanti per la sicurezza e l’ambiente 1.8 Specifiche tecniche Altezza (minima / massima ) 84,6 cm / 86,6 cm* Larghezza 59,5 cm Profondità 60,9 cm Capacità (max.) 10 kg** Peso netto (uso sportello 49,5 kg anteriore in plastica) Peso netto (uso sportello 52 kg anteriore in vetro) Tensione... - Page 12 La vostra asciugatrice 2.1 Informazioni sull’imballaggio 1. Tubo di scarico acqua * 2. Spugna di ricambio cassetto filtro* 3. Manuale dell’Utente 4. Cestello di asciugatura* 5. Manuale dell’utente del cestello di asciugatura* *Può essere fornito in dotazione con la macchina, a seconda del modello. Asciugatrice/ Manuale utente 12 / IT...
-
Page 13: Installazione
Installazione Prima di contattare il Centro Assistenza • Posizionare l’asciugatrice ad almeno 1 cm Autorizzato più vicino per l’installazione dai bordi di altri mobili. dell’asciugatrice, verificare che l’impianto • L’asciugatrice può essere usata a elettrico e lo scarico dell’acqua siano adeguati temperature comprese fra +5°C e +35°C. -
Page 14: Regolazione Dei Piedini
Installazione Controllare che nessuna Il tubo di scarico dell'acqua va componente del gruppo di fissato a un'altezza massima di sicurezza trasporto resti 80 cm. all'interno del cestello. Accertarsi che il tubo di scarico 3.3 Collegamento allo scarico dell'acqua non venga calpestato e non venga piegato fra lo scarico e Nei prodotti dotati di unità... - Page 15 Installazione Consigliamo di trasportare l'asciugatrice in posizione verticale. Non è possibile trasportare l'apparecchiatura in verticale, consigliamo di trasportarla inclinando il lato destro, se osservata da davanti. 3.7 Avvertenze sui suoni Sarà normale sentire un suono metallico dal compressore in fase di funzionamento.
- Page 16 Procedimento 4.1 Bucato adatto per essere messo in asciugatrice Rispettare sempre le istruzioni fornite nelle etichette degli indumenti. Asciugare unicamente il bucato con l'etichetta che indica che può essere messo in asciugatrice. Verificare inoltre di aver selezionato il programma adeguato. SIMBOLI LAVAGGIO BUCATO Simboli Adatto...
- Page 17 Procedimento • Pulire il filtro lanugine prima o dopo ogni I seguenti pesi sono forniti come esempi. ciclo di asciugatura. (Cfr 6.1 Pulizia del Pesi approssimativi filtro lanugine / superficie interna Bucato (g)* porta di carico) Coperte-trapunte in • Pulire il filtro periodicamente quando c’è 1500 cotone (doppie) una raccolta di aria visibile o quando si...
-
Page 18: Pannello Di Controllo
Funzionamento del prodotto 5.1 Pannello di controllo 1. Manopola di selezione programma 2. Pulsante di regolazione del livello di asciugatura 3. Pulsante livello avvertenze audio 4. Visualizzazione 5. Pulsante ON/OFF 6. Pulsante Avvio/Pausa 7. Pulsante tempo fine 8. Pulsante preferiti 9. - Page 19 Funzionamento del prodotto 5.3 Preparazione della 5.5 Programmi principali macchina A seconda del tipo di tessuto, sono disponibili i seguenti programmi. Collegare la macchina. • Cotone Collocare il bucato all'interno della Asciugare il bucato resistente con questo macchina. programma. Si asciuga a una temperatura Premere il pulsante On/Off/Annulla per normale.
- Page 20 Funzionamento del prodotto • Xpress • Programmi a Tempo Sarà possibile usare questo programma per Sarà possibile selezionare un o dei program- asciugare il bucato in cotone centrifugato mi timer 10 min., 20 min., 30 min., 40 min., ad alta velocità nella lavatrice. Questo pro- 50 min., 60 min., 80 min., 100 min.,120 min., gramma asciuga 1 kg di bucato in cotone (3 140 min.
- Page 21 Funzionamento del prodotto 5.7 Selezione programma e tabella di consumo Quantità Tempo di Velocità centrifuga di approssimativa Programmi Capacità (kg) asciugatura lavatrice (rpm) di umidità (minuti) rimanente Cotone/Colorati A Extra Asciutto 1000 % 60 A Asciutto armadio 10 / 5 1000 % 60 215 / 120...
- Page 22 Funzionamento del prodotto 5.8 Funzioni Ausiliarie Selezione della regolazione livello di asciugatura Segnale sonoro Il pulsante di Regolazione livello as- L'apparecchiatura emette un segnale ciugatura viene usato per regolare il livello sonoro quando il programma viene comple- di asciugatura necessario. La durata del pro- tato.
- Page 23 Funzionamento del prodotto Anti-pieghe Premere il pulsante Anti-pieghe Sarà possibile modificare la durata del per attivare questa funzione. programma Anti-pieghe servendosi del pul- Il simbolo Anti-pieghe si illumina sante di selezione Anti-pieghe. Sarà possi- al termine del programma se la bile usare la funzione Anti-pieghe per evitare funzione Anti-pieghe è...
- Page 24 Funzionamento del prodotto Premere il pulsante Tempo di fine per im- • Premere il pulsante Start/Pause per postare il ritardo di tempo desiderato. avviare il programma precedentemente • Pulsante Avvio/Pausa Il Ritardo Tempo selezionato. avvia il conto alla rovescia e il simbolo di 5.9 Pulsanti di avvertenza ritardo tempo si illumina sul display.
-
Page 25: Blocco Bambini
Funzionamento del prodotto Per attivare il Blocco Bambini: Per informazioni dettagliate, cfr. • Premere e tenere premuto il pulsante 6 Manutenzione e pulizia. Blocco bambini per 3 secondi. • Il simbolo Blocco bambini compare sul display quando viene attivato il Blocco Bambini. - Page 26 Funzionamento del prodotto 5.14 Annullamento del Aggiungere / rimuovere il bucato mentre l'asciugatrice è in funzione programma • Per aggiungere o rimuovere il bucato Per annullare il programma dopo l'avvio dopo l'avvio del programma di dell'asciugatrice: asciugatura: • Premere e tenere premuto il pulsante •...
-
Page 27: Manutenzione E Pulizia
Manutenzione e pulizia La durata di vita del servizio aumenta e i Fare attenzione a non far cadere i problemi saranno ridotti se l’apparecchiatura pelucchi, le fibre viene pulita a intervalli regolari. e i grumi di cotone nella sede del 6.1 Pulizia dei Filtri Anti- filtro rimasta aperta. - Page 28 Manutenzione e pulizia 6.3 Scarico del serbatoio dell’acqua L’umidità del bucato viene rimossa e con- densata in fase di asciugatura, e l’acqua che sale si accumula nel serbatoio dell’acqua. Scaricare il serbatoio dell’acqua dopo ogni ciclo di asciugatura. 6.2 Pulizia del sensore Nell’asciugatrice ci sono dei sensori di umidità...
- Page 29 Manutenzione e pulizia • Scaricare l’acqua nel serbatoio. • Pulire i pelucchi sulla superficie dell’evaporatore con un panno umido/con la spazzola di un aspirapolvere dall’alto verso il basso e viceversa. • Qualora vi sia un accumulo di lanugine nell’imbuto del serbatoio dell’acqua, •...
-
Page 30: Guida Alla Risoluzione Dei Problemi
Guida alla risoluzione dei problemi Il processo di asciugamento dura troppo tempo. Possono essersi otturati i fori del filtro anti-lanugine (filtro interno ed esterno). >>> Lavare i filtri con acqua tiepida e asciugarli. Puo’ essersi otturata la parte anteriore dell’evaporatore.>>> Pulire la parte anteriore dell’evaporatore. - Page 31 Guida alla risoluzione dei problemi La biancheria si è ristretta, infeltrita o danneggiata. Puo’ essere stato utilizzato un programma non adatto al tipo di biancheria. >>> Controllare l’etichetta di manutenzione del capo e selezionare un programma adatto al tipo di biancheria.
- Page 32 Guida alla risoluzione dei problemi Se non è possibile risolvere il problema anche se avete seguito le istruzioni fornite in questa sezione, contattare il rivenditore da cui è stato acquistato il prodotto o il Centro di Assistenza Autorizzato. Non tentare mai di riparare da soli un prodotto non funzionante.
- Page 33 SCHEDA PRODOTTO Conforme al Regolamento delegato della commissione (UE) N. 392/2012 Beko Nome fornitore o marchio commerciale DRZ1025B Nome modello Capacità nominale (kg) Ventilato ad aria Tipo di asciugatrice a tamburo Condensatore Classe di efficienza energetica Consumo energetico annuale (kWh)
-
Page 35: Please Read This User Manual First
Please read this user manual first! Dear Customer, Thank you for prefering a Beko product. We hope that your product which has been manufactured with high quality and technology will give you the best results. We advise you to read through this manual and the other accompanying documentation carefully before using your product and keep it for future reference. -
Page 36: Important Instructions For Safety And Environment
Important instructions for safety and environment This section contains safety instructions that will help protect from risk of personal injury or property damage. Failure to follow these instructions shall void any warranty. 1.1 General safety • The dryer can be used by children at and above 8 years old and by persons whose physical, sensory or mental capabilities were not fully developed or who lack experience and knowledge provided that they are... -
Page 37: Product Safety
Important instructions for safety and environment • Connect the dryer to a grounded outlet protected by a fuse at the value specified on the type label. Have the grounding installation performed by a qualified electrician. Our company shall not be liable for any damages that will arise when the dryer is used without grounding in accordance with the local regulations. - Page 38 Important instructions for safety and environment Points to be taken into consideration for fire hazard: Below specified laundry or items must not be dried in the dryer considering fire hazard. • Unwashed laundry items • Items soiled with oil, acetone, alcohol, fuel oil, kerosene, stain removers, turpentine, paraffin or paraffin removers must be washed in hot water with plenty of detergent before being dried in the...
- Page 39 Important instructions for safety and environment Clothes that are washed inadequately may ignite on their own and even may ignite after drying ends. • You must provide enough ventilation in order to prevent gases exiting from devices operating with other types of fuels including the naked flame from accumulating in the room due to the back fire effect.
-
Page 40: Mounting Over A Washing Machine
Important instructions for safety and environment 1.2 Mounting over a washing machine • A fixing device should be used between the two machines when installing the dryer above a washing machine. The fitting device must be installed by the authorized service agent. -
Page 41: Intended Use
Important instructions for safety and environment 1.3 Intended use • Dryer has been designed for domestic use. It is not suitable for commercial use and it must not be used out of its intended use. • Use the dryer only for drying laundry that are marked accordingly. -
Page 42: Compliance With The Weee Regulation And Disposing Of The Waste Product
Important instructions for safety and environment 1.5 Compliance with the WEEE regulation and disposing of the waste product This product complies with EU WEEE Directive (2012/19/EU). This product bears a classification symbol for waste electrical and electronic equipment (WEEE). This product has been manufactured with high quality parts and materials which can be reused and are suitable for recycling. -
Page 43: Technical Specifications
Important instructions for safety and environment 1.8 Technical Specifications Height (min. / max.) 84,6 cm / 86,6 cm* Width 59,5 cm Depth 60,9 cm Capacity (max.) 10 kg** Net weight (plastic front door 49,5 kg usage) Net weight (glass front door 52 kg usage) Voltage... -
Page 44: Your Dryer
Your Dryer 2.1 Package Contents 1. Water drain hose * 2. Filter drawer spare sponge* 3. User Manual 4. Drying basket* 5. Drying basket user manual* *It can be supplied with your machine depending on its model. Dryer / User Manual 44 / EN... -
Page 45: Appropriate Installation Location
Installation Before the calling the nearest Authorized • The rear surface of the tumble dryer Service for the installation of the dryer, shall be placed against a wall. ensure that electrical installation and water on the Do not place the dryer drain is appropriate referring to the user’s power cable. -
Page 46: Adjusting The Feet
Installation Connecting the water drain hose 3.4 Adjusting the feet Pull hose at the behind of the dryer • In order to ensure that the dryer by hand in order to disconnect it from operates more silently and vibration- where it is connected. Do not use any free, it must stand level and balanced tools to remove the hose. -
Page 47: Warnings About Sounds
Installation 3.7 Warnings about sounds It is normal to hear a metallic noise from the compressor sometimes during operation. Water collected during operation is pumped to water tank. It is normal to hear pumping noise during this process. 3.8 Changing the illumination lamp In case an illumination lamp is used in your laundry dryer.To change the Bulb/LED used... -
Page 48: Laundry Not Suitable For Drying In The Dryer
Preparation 4.1 Laundry suitable for drying in the dryer Always obey the instructions given on the garment tags. Dry only the laundry having a label stating that they are suitable for drying in a dryer and make sure that you select the appropriate programme. -
Page 49: Correct Load Capacity
Preparation • Clean the lint filter before or after each Following weights are given as examples. drying cycle. (See 6.1 Cleaning Lint Approximate Filter / Loading Door Inner Surface) Laundry weights (g)* • Clean the filter drawer periodically when Cotton quit covers there is visible air collection on it or 1500 (double) -
Page 50: Operating The Product
Operating the product 5.1 Control panel 1. Programme Selection knob 2. Dryness Level Adjustment button 3. Audio Warning Level button 4. Display 5. On /Off/Cancel button 6. Start/Pause button 7. End Time button 8. Favourite button 9. Timer Programmes Selection button 10. -
Page 51: Programme Selection
Operating the product 5.3 Preparing the machine 5.5 Main programmes Plug in your machine. Depending on the fabric type, the following Place the laundry in the machine. main programmes are available. Press the On/Off/Cancel button for 1 • Cottons second (long). Dry durable laundry with this programme. - Page 52 Operating the product • Ekspres • Timer programmes You can use this programme to dry your You can select one of the 10 min., 20 min., 30 cotton laundry that you have spun at high min., 40 min., 50 min., 60 min., 80 min., 100 speeds in your washing machine.
- Page 53 Operating the product 5.7 Programme selection and consumption table Approximate Spin speed in washing amount of Drying time Programs Capacity (kg) machine (rpm) remaining (minutes) humidity Cottons / Coloreds Extra dry 1000 % 60 Cupboard dry 10 / 5 1000 % 60 215 / 120 Iron dry...
- Page 54 Operating the product 5.8 Auxiliary functions Audio Warning The machine will give an audio warning when the programme comes to an end. Use the Audio Warning Level button to adjust the sound level. You can change the sound level Drying level damp either before the programme starts or while the programme is in progress.
- Page 55 Operating the product Favourite selection button A programme with the set auxiliary function is saved with Favourite selection button. When the product is switched on and off, features of the saved programme is displayed by means of Favourite selection button. Select the programme with the programme button;...
-
Page 56: Warning Symbols
Operating the product Lint filter cleaning process starts and the programme duration is displayed. When the programme is completed, a warning symbol will appear continously If loading door is opened and indicating that the filter needs to be cleaned. closed during the End Time duration, the programme will For detailed information, see 6 switch to pause mode. - Page 57 Operating the product Loading door open • All buttons except the On/Off/Cancel and Child Lock button on the control This warning symbol Pause appears and programme progress symbol flashes when panel are deactivated when the Child the loading door of the dryer is open. Lock is active.
-
Page 58: End Of Programme
Operating the product 5.15 End of programme Any laundry added after the When the programme comes to an end drying process has started Lint filter cleaning and Water tank warning may cause the clothes that are symbols light up in the programme follow-up already dried in the machine indicator. -
Page 59: Maintenance And Cleaning
Maintenance and cleaning Loading Door Inner Surface 6.1 Ensure that hair, fibre and cotton The hair and fibres that are separated from balls do not fall into the slot the laundry during drying process is collected .where the filters are installed by the Fibre Filter. -
Page 60: Cleaning The Sensor
Maintenance and cleaning • Clean the loading door interior and its Clean metal surfaces of the washer with a soft damp cloth. sensors 4 times a year. Do not use metal tools when cleaning metal surfaces of the sensors. Never use solvents, cleaning agents or similar substances for cleaning due to the risk of fire and explosion! -
Page 61: Cleaning The Evaporator
Maintenance and cleaning • To open the air routing door, move the release latch. • Drain the water in the tank. • Clean the fibres on the evaporator with a damp cloth / vacuum cleaner with a brush by moving upwards and downwards. •... - Page 62 Maintenance and cleaning Cleaning by left to right movements may damage the evaporator fins. This may lead .to drying issues Dryer / User Manual 62 / EN...
-
Page 63: Troubleshooting
Troubleshooting Drying operation takes too long. Fibre filter (interior and exterior filter) pores may be clogged. >>> Wash the fibre filters with warm water and dry. Evaporator front side may be clogged. >>> Clean the front side of the evaporator. The ventilation grills in front of the machine may be closed. - Page 64 Troubleshooting Loading door opens by itself. Loading door might be closed completely. >>> Push the loading door until the closing sound is heard. Water tank warning symbol is on/flashing. Water tank may be full. >>> Empty the water tank. Water discharge hose might have collapsed. >>> If the product is connected directly to the water drain check the water discharge hose.
- Page 65 PRODUCT FICHE Complying Commission Delegated Regulation (EU) No 392/2012 Beko Supplier name or trademark DRZ1025B Model name Rated capacity (kg) Air Vented Type of Tumble Dryer Condenser Energy efficiency class Annual Energy Consumption (kWh) Automatic Type of Control Non-automatic Energy consumption of the standard cotton programme at full load (kWh)
Need help?
Do you have a question about the DRZ1025B and is the answer not in the manual?
Questions and answers