Garmin FUSION Apollo MS-RA770 Owner's Manual
Marine stereo
Hide thumbs
Also See for FUSION Apollo MS-RA770:
- Manual (16 pages) ,
- Installation instructions manual (21 pages)
Table of Contents
Advertisement
Quick Links
Advertisement
Table of Contents
Troubleshooting

Related Manuals for Garmin FUSION Apollo MS-RA770


Summary of Contents for Garmin FUSION Apollo MS-RA770
- Page 1 FUSION ® Apollo MS-RA770 ™ O W N E R ’ S M A N U A L ENGLISH...
- Page 2 © 2019 Garmin Ltd. or its subsidiaries All rights reserved. Under the copyright laws, this manual may not be copied, in whole or in part, without the written consent of Garmin. Garmin reserves the right to change or improve its products and to make changes in the content of this manual without obligation to notify any person or organization of such changes or improvements. Go to www.fusionentertainment.com...
-
Page 3: Table Of Contents
Table of Contents Controlling Music Playback on a USB Flash Drive or Media Player Controlling Music Playback on a Getting Started Connected Android Device Stereo Controls Controlling Music Playback on a Playback Controls Connected Apple Device Gesture Screen USB Source Settings Entering Text Using the Dial to Select Items Radio... - Page 4 Enabling the TuneStart™ Feature Parental Controls Unlocking the Parental Controls Locking Channels Clearing All Locked Channels Changing the Parental Control Passcode SiriusXM Troubleshooting Clearing SiriusXM Data DAB Playback Setting the Tuner Region Scanning for DAB Stations Changing DAB Stations Selecting a DAB Station from a List Selecting a DAB Station from a Category Presets Saving a Station or Channel as a Preset...
- Page 5 Setting the Fusion PartyBus Device as a Wireless Access Point Wireless Access Point Settings Advanced Network Configuration Setting the Fusion PartyBus Device as the DHCP Server Configuring the Stereo for use with a Garmin Marine Network Setting a Static IP Address Resetting Network Settings Update Options...
-
Page 7: Getting Started
Getting Started WARNING See the Important Safety and Product Information guide in the product box for product warnings and other important information. Stereo Controls • Turn to adjust the volume. • When adjusting the volume, press to switch between zones. •... -
Page 8: Playback Controls
Playback Controls The on-screen playback controls may change depending on the source selected. NOTE: After about fifteen seconds, the playback controls are hidden by the gesture screen feature. You can swipe down on the screen to view the playback controls (Gesture Screen, page Press to pause media playback. -
Page 9: Gesture Screen
Press to decrease the gain. (Aux and Optical sources) Gesture Screen After about fifteen seconds, a screen appears showing media information and album art only. You can use the touchscreen to interact with this screen. • You can swipe left or right to change the track or preset. •... -
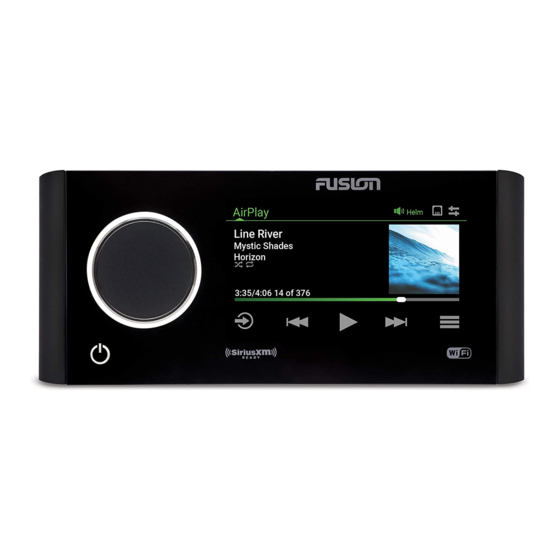
Page 10: Stereo Screen
Stereo Screen The information displayed on the screen varies depending on the source selected. The on-screen playback controls may change depending on the source selected (Playback Controls, page 2). This example shows a track playing on a device connected using Bluetooth ®... -
Page 11: Setting The Home Zone
Setting the Home Zone The home zone is the speaker zone that you adjust by default when you turn the dial. 1 Select > SETTINGS. 2 Select ZONE > ASSIGN HOME ZONE. 3 Select a zone. Selecting a Source 1 Select 2 Turn the dial to highlight a source. -
Page 12: Adjusting The Subwoofer Level
Adjusting the Subwoofer Level You can adjust the subwoofer level for each zone. 1 Press the dial, and select a zone with a connected subwoofer. 2 Press and hold the dial. The SUB LEVEL adjustment for the zone appears. 3 Adjust the subwoofer level and press the dial to set it. Adjusting the Tone 1 Select >... -
Page 13: Configuring The Dsp Settings
Configuring the DSP Settings You must download and install the Fusion-Link remote control app on your compatible Apple ® or Android ™ device before you can configure the DSP settings (Fusion-Link Wireless Remote Control App, page 31). You can configure the DSP settings to optimize the sound on each zone with the installed speakers, amplifiers, and environment. -
Page 14: Bluetooth Device Playback
Bluetooth Device Playback You can pair the stereo to up to eight Bluetooth media devices. You can control the playback using the stereo controls on all Bluetooth devices, and on some devices you can browse the music collection from the menu on the stereo. On Bluetooth devices that do not support media browsing, you should select the song or playlist on the media device. -
Page 15: Bluetooth Source Menu And Settings
Bluetooth Source Menu and Settings With the BT source selected, select > BT. NOTE: The options in this menu vary based on the connected device. CONNECTIONS > DISCOVERABLE: Allows the stereo to be visible to Bluetooth devices. You can turn off this setting to prevent possible interruption to audio after pairing a Bluetooth device to the stereo. -
Page 16: Usb Device Compatibility
USB Device Compatibility You can use a USB flash drive or the USB cable included with your media player to connect a media player or mobile device to the USB port. The stereo is compatible with iAP2 Apple devices such as the iPhone ®... -
Page 17: Controlling Music Playback On A Connected Apple Device
Controlling Music Playback on a Connected Apple Device 1 Connect a compatible iAP2 Apple device to the stereo using USB. 2 Select the iPod source on the stereo. 3 Launch a music application on the connected Apple device, and begin playback. You can use the music application on the Apple device or you can use the stereo controls to browse the music library and to select, play, pause, and skip tracks. -
Page 18: Changing The Radio Station
Changing the Radio Station 1 Select an applicable source, such as FM. 2 Select repeatedly to move through the tuning modes, and select an option: • Select AUTO to scan and stop on the next available station. • Select MANUAL to select a station manually. •... -
Page 19: Connecting A Upnp Device
Connecting a UPnP Device You must connect your stereo to a network to play media from a UPnP device, such as a NAS device. 1 Connect your UPnP device to the same network as the stereo, referring to the instructions provided with your UPnP device and router if necessary. -
Page 20: Activating A Siriusxm Subscription
Activating a SiriusXM Subscription 1 With the SiriusXM source selected, tune to channel 1. You should be able to hear the preview channel. If not, check the SiriusXM Connect Tuner and antenna installation and connections, and try again. 2 Tune to channel 0 to locate the Radio ID. 3 Contact SiriusXM listener care by phone at (866) 635-2349 or go to www.siriusxm.com/activatenow subscribe in the United States. -
Page 21: Adding Teams For Game Alerts
Adding Teams for Game Alerts You can set alerts for sports teams so that when a game featuring a saved team begins to play on any sports channel, you can quickly tune to that channel. NOTE: A Game Alert is different than a SportsFlash ™... -
Page 22: Starting And Stopping A Tunemix Collection
Starting and Stopping a TuneMix Collection Before you can start playing a TuneMix collection, you must create one (Creating and Customizing a TuneMix Collection, page 16). The TuneMix feature enables you to mix your favorite music channels to create a custom listening experience. 1 Select >... -
Page 23: Enabling The Tunestart™ Feature
Enabling the TuneStart ™ Feature When you enable the TuneStart feature and tune to a preset channel, the stereo starts the current song from the beginning of the song instead of starting it from the point it is at in the live broadcast. NOTE: The TuneStart feature is available when tuning to preset channels only. -
Page 24: Siriusxm Troubleshooting
SiriusXM Troubleshooting Advisory Description Resolutions • Verify the antenna cable is connected to the SiriusXM Connect Vehicle Tuner. The radio has detected a fault with the Check • Inspect the antenna cable for damage and kinks. SiriusXM antenna. The antenna cable Antenna Replace the antenna if the cable is damaged. -
Page 25: Dab Playback
DAB Playback When you connect a compatible Digital Audio Broadcasting (DAB) module and antenna, such as the MS- DAB100A to the Apollo RA770 stereo, you can tune in to and play DAB stations. DAB broadcasts are not available in all regions. When the stereo is not set to a compatible region, the DAB source is not available. -
Page 26: Presets
Presets You can save your favorite AM stations and FM stations as presets for easy access. You can save your favorite SiriusXM channels if the stereo is connected to an optional SiriusXM tuner and antenna. You can save your favorite DAB stations if the stereo is connected to an optional DAB module and antenna. Saving a Station or Channel as a Preset 1 With an applicable source selected, tune the stereo to a station or a channel. -
Page 27: Creating A Group
Creating a Group Before you can create a group, you must connect multiple compatible stereos to the Fusion PartyBus network. See the installation instructions provided with your stereo for information about installing and configuring the network. NOTE: There are some limitations and other considerations when using stereos in groups. See Grouped Stereo Source Considerations, page 22for more information. -
Page 28: Grouped Stereo Source Considerations
Grouped Stereo Source Considerations When selecting sources to play over the network, you should observe these considerations. • A zone stereo, such as the Apollo SRX400, can create or join a group to control and play sources from other stereos, but it cannot share its sources with the group. •... -
Page 29: Speaker Zone Settings
Speaker Zone Settings Disabling the Internal Amplifier If you do not connect speakers directly to zones 1 and 2, you can disable the internal amplifier to reduce power consumption. 1 Select > SETTINGS. 2 Select ZONE. 3 Select INTERNAL AMP ON to clear the check box. Setting the Home Zone The home zone is the speaker zone that you adjust by default when you turn the dial. -
Page 30: Automatic Volume Control Settings
Automatic Volume Control Settings Select > SETTINGS > ZONE > SPEED VS VOLUME. ENABLED: Enables the automatic volume control feature. SPEED SOURCE: Sets the source that the stereo uses to determine the speed (Speed Source Information, page 24). MAX/MIN SPEED: Sets the expected maximum and minimum speed range for the selected SPEED SOURCE. The MIN setting indicates the speed at which the volume plays at the level you set by turning the dial. -
Page 31: Linking Zones
Linking Zones You can link zones 1 and 2 to keep the volume levels synchronized. Adjusting the volume of either of the linked zones affects both zones. 1 Select > SETTINGS. 2 Select ZONE > ZONE 2 > LINK TO ZONE 1. NOTE: After zones 1 and 2 are linked, you cannot adjust the volume of each zone individually. -
Page 32: Power Options
Power Options Select > SETTINGS > POWER OPTIONS. POWER SAVE: Disables the LCD backlight after one minute of inactivity to save battery power. GESTURE SCREEN: Enables the screen that hides the playback controls to show track info and album art only when playing media (Gesture Screen, page NRX POWER: Turns on or off the power the stereo provides to optional NRX series wired remote controls not... -
Page 33: Connecting The Device To A Wireless Access Point Using Wi-Fi Protected Setup
Connecting the Device to a Wireless Access Point Using Wi‑Fi Protected Setup If it is supported by your wireless access point, you can connect this device using Wi‑Fi Protected Setup (WPS) instead of manually selecting the SSID and entering the password. NOTE: You may need to see the owner's manual for your wireless access point for information about enabling WPS. -
Page 34: Wireless Access Point Settings
STATIC IP: Allows you to set a static IP address for the device (Setting a Static IP Address, page 30). GARMIN MARINE NETWORK: Allows the device to be used on a Garmin ® Marine Network so it can be viewed... -
Page 35: Setting The Fusion Partybus Device As The Dhcp Server
END IP: Sets the final IP address in the IP-address range of the DHCP server. Configuring the Stereo for use with a Garmin Marine Network You can connect this stereo to a Garmin Marine Network in order to view and control the stereo using a compatible Garmin chartplotter. -
Page 36: Setting A Static Ip Address
Setting a Static IP Address If the stereo is configured as a DHCP server, it is automatically assigned the IP address of 192.168.0.1. You can change this IP address. If the stereo is a client on the network and you do not want the DHCP server to automatically assign an IP address to the stereo, you can set a static IP address. -
Page 37: Additional Stereo Control Options
Additional Stereo Control Options Connecting to a Garmin Watch For more information about the watch, see the watch manual at garmin.com/manuals. 1 Following the instructions in the watch manual, install the Fusion-Link Lite ™ app from the Connect IQ ™... -
Page 38: Fusion-Link™ Network Technology
FUSION-Link Network Technology ™ FUSION-Link network technology allows you to fully control compatible Fusion entertainment systems on compatible multi-function displays installed at the helm, flybridge, or navigation station of the vessel. This provides integrated entertainment control and a less cluttered console. The partnered multi-function display becomes the portal on which you can control all audio on the vessel, no matter where on the vessel the connected stereo is installed. -
Page 39: Nmea 2000 Information
• You can program only newer versions of software on the device. 1 Go to the page for your device on support.garmin.com, and download the update file. 2 Extract the contents of the .zip file to the root of your USB storage device. -
Page 40: Updating The Software Using The Fusion Link App
Updating the Software Using the Fusion Link App You must connect the Fusion-Link app to the network using a wireless router or wireless access point to update the software. You cannot update the software using a Bluetooth connection. NOTE: If the stereo you want to update is in a group, you must remove it from the group (Leaving a Group, page 21). -
Page 41: Network Troubleshooting
• Make sure you have the latest version of iTunes and the latest operating software on your Apple device. • Make sure you have the latest version of the Fusion-Link application on your Apple device. • Reset the Apple device. Go to apple.com for more information. • Contact your Fusion dealer or go to support.garmin.com. Appendix... -
Page 42: My Apple Airplay Audio Is Interrupted By Short Breaks
My Apple AirPlay audio is interrupted by short breaks • Make sure the Apple device is not covered or obstructed. • Make sure the Apple device has a good connection to the same Wi‑Fi network as the stereo. • Make sure the Apple device is not connected to the stereo using Bluetooth technology and Wi‑Fi. Using both a Bluetooth and a Wi‑Fi connection may cause playback interruptions. -
Page 43: Specifications
Specifications General Weight 750 g (26.5 oz.) Water resistance IEC 60529 IPX7 (front of stereo only, when properly installed) Operating temperature range From 0 to 50°C (from 32 to 122°F) Storage temperature range From -20 to 70°C (from -4 to 158°F) Input voltage From 10.8 to 16 Vdc Current (max.) -
Page 44: Stereo Dimension Drawings
Stereo Dimension Drawings Side Dimensions 20.4 mm (0.8 in.) 99 mm (3.9 in.) 50 mm (1.97 in.) Top Dimensions 164 mm (6.5 in.) 20.4 mm (0.8 in.) 10 mm (0.39 in.) 192 mm (7.56 in.) Appendix... -
Page 45: Index
7, 23 Fusion PartyBus 30 settings 24 Fusion PartyBus network 26, 27, 29 FUSION-Link 32 watch 31 Wi‑Fi technology 26, 27, 29 gain 6 wireless devices, network configuration 28 Garmin Marine Network 29 groups 21, 22 creating 21 editing 21 home zone 5, 23 icons 4, 35 keys 1, 3 language 22 media player 2, 3, 10 music player 2, 3... - Page 46 FUSION SUPPORT New Zealand 09 369 2900 Australia 1300 736 012 Europe +44 (0) 370 850 1244 623 580 9000 Pacific +64 9 369 2900 S U P P O R T . G A R M I N . C O M July 2021 Printed in Taiwan GUID-AA746CCF-6D74-481B-AE87-1EA928679A4A v6...