Table of Contents
Advertisement
Advertisement
Table of Contents

Related Manuals for Edimax BR-6424n


Summary of Contents for Edimax BR-6424n
- Page 2 Č Č ý : Českého průvodce rychlou instalací naleznete na přiloženém CD s ý ovladači : Auf der beiliegend Treiber CD finden Sie deutsche Anleitung zur Schnellinstallation. ñ l : Incluido en el CD el G.R.I. en Español. ñ ç : Veuillez trouver l’français G.I.R ci-joint dans le CD ç...
-
Page 3: Table Of Contents
1 Product Introduction ...4 1-1 Package Contents...5 1-2 Front Panel ...5 1-3 Back Panel...6 2 Network Setup...8 Step 1:Getting Started ...8 Step2 : PC LAN IP Configuration ...9 2.1 Router Configuration – PPPoE ...12 2.2 Router Configuration - Cable Modem...15 3 Advanced Setup ...17 3-1 Change management password ...17 3-2 Firmware Upgrade ...18... - Page 4 Copyright© by Edimax Technology Co, LTD. all rights reserved. No part of this publication may be reproduced, transmitted, transcribed, stored in a retrieval system, or translated into any language or computer language, in any form or by any means, electronic, mechanical, magnetic, optical, chemical, manual or otherwise, without the prior written permission of this Company .
-
Page 5: Product Introduction
1 Product Introduction Thank you for purchasing Edimax broadband router! This high cost-efficiency router is the best choice for Small office / Home office users, all computers and network devices can share a single xDSL / cable modem internet connection at high speed. -
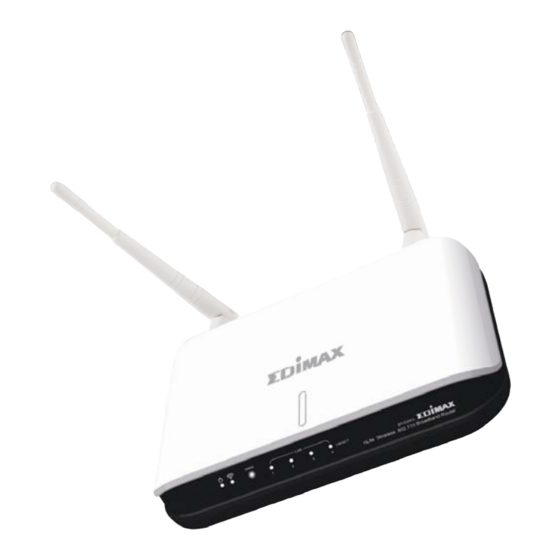
Page 6: Package Contents
□ One CD-ROM (Including the Setup Wizard, Multi-languages Quick Installation Guide and User Manual) □ 12V power adapter (1 pcs) □ Ethernet Cable □ 3dBi Antenna (2 pcs for BR-6424n/BR-6324nL or 3 pcs for BR-6574n ) □ Accessary and Holding Base 1-2 Front Panel Light... -
Page 7: Back Panel
1-3 Back Panel Item Name Description Power Power connector, connects to 12V power adapter Enable / Disable wireless signal (For BR-6424n / ON/OFF BR-6324nL only) You can not connect the router via wireless adapter, when you disable the wireless signal. - Page 8 Reset the router to factory default settings (clear all Reset / WPS settings) or start WPS function. (a) Press this button and hold for 20 seconds to clear (b) Press this button for 2 ~ 5 seconds to start WPS The router’s 4 LAN ports are where you connect your 1 - 4 LAN’s PCs, printer servers, hubs and switches etc.
-
Page 9: Network Setup
Instructions for using the router to share the Internet with multiple PCs. (Power on the Modem and the Router.) Connect the Ethernet cable from the router’s WAN port to the LAN port of the modem. Connect another Ethernet cable from the any LAN ports (1~4) on router to the Ethernet socket on the PC. -
Page 10: Step2 : Pc Lan Ip Configuration
Configure the PC LAN setting to automatically obtain an IP address from the router by following the below steps. Click “Start” in the task bar then select the “Control Panel” . Click “Switch to Classic View” on the left top to see more setting icons. - Page 11 Find an icon “Network Connection” then Double-Click to open the network connection setting. You will see an icon “Local Area Connection”, select the icon then Right-Click the mouse to open the sub-menu and select the “Properties”.
- Page 12 Select the “Internet Protocol (TCP/IP)” then click the “Properties” Ensure the parameter marked in blue are checked in “Obtain an IP address automatically” and “Obtain DNS server address automatically” then press “OK” to close.
-
Page 13: Router Configuration - Pppoe
1. Enter the router’s default IP address: “192.168.2.1” into your PC’s web browser and press “enter”. 2. The login screen below will appear. Enter the “User Name” and “Password” and click “OK” to login. The default User name is “admin” and the Password is “1234”, –... - Page 14 3. The main page will appear, click “Quick Setup” to setup the Internet connection. Following example is for “PPPoE” WAN setting. 4. Select ‘(GMT) Greenwich Mean Time: (your country or city) then Click “Apply” button. 5. Select “PPPoE xDSL”, the system will move into next step...
- Page 15 6. Enter the “User Name” and “Password” that ISP provided and leave the others. (The “Service Name” can be blank) and click “OK” to save the setting then reboot the router 7. After reboot, your router is now ready for Internet connection.
-
Page 16: Router Configuration - Cable Modem
1. The following example is for U.K. Click on “Quick Setup”. 2. Select ‘(GMT) Greenwich Mean Time : “London”. Click “Next” button. - Page 17 3. Select “Cable Modem”, the system will move into next step 4. Enter ”Host Name” and “MAC Address”. (The “Host Name” can be blank) The MAC Address is provided by ISP (e.g. NTL) or click “Clone Mac Address” button if you’re using the computer’s MAC Address. Confirm with your ISP about MAC Address used, Click “OK”...
-
Page 18: Advanced Setup
3 Advanced Setup 3-1 Change management password Default password of this router is 1234, and it’s displayed on the login prompt when accessed from web browser. There’s a security risk if you don’t change the default password, since everyone can see it. To change password, please follow the following instructions: Please click ‘General Setup’... -
Page 19: Firmware Upgrade
Here are descriptions of every setup items: Current Password New Password Confirm Password When you finish, click ‘Apply’; If you want to keep original password unchanged, click ‘Cancel’. 3-2 Firmware Upgrade The system software used by this router is called as ‘firmware’, just like any applications on your computer, when you replace the old application with a new one, your computer will be equipped with new function. - Page 20 Click ‘Browse’ button first, you’ll be prompted to provide the filename of firmware upgrade file. Please download the latest firmware file from our website, and use it to upgrade your router. After a firmware upgrade file is selected, click ‘Apply’ button, and the router will start firmware upgrade procedure automatically.
-
Page 21: System Restart And Reset To Default
3-3 Restart and Reset to Default Setting If you found the router behaves strangely, you can perform a reset, sometimes it will solve the problem. You can either reset your router without losing your current settings or restore to factory defaults. If you wish to reset the router to the factory default settings, select “Factory Default Settings”... - Page 22 SSID is the name of the wireless router. You may change your SSID to a meaningful name so that you can identify your wireless router from others. You can use any alphanumeric characters, up to 32 characters. By default the ESSID is ‘default’.
- Page 24 Lithuania, Malta, Poland, Romania, Slovakia, Slovenia, the Netherlands, Portugal, Spain, Sweden, and the United Kingdom. The ETSI version of this device is also authorized for use in EFTA member states: Iceland, Liechtenstein, Norway, and Switzerland. EU Countries not intended for use None A declaration of conformity is available on www.edimax.com N2037...