Table of Contents
Advertisement
Quick Links
Advertisement
Table of Contents

Related Manuals for Baumatic BTM31SS


Summary of Contents for Baumatic BTM31SS
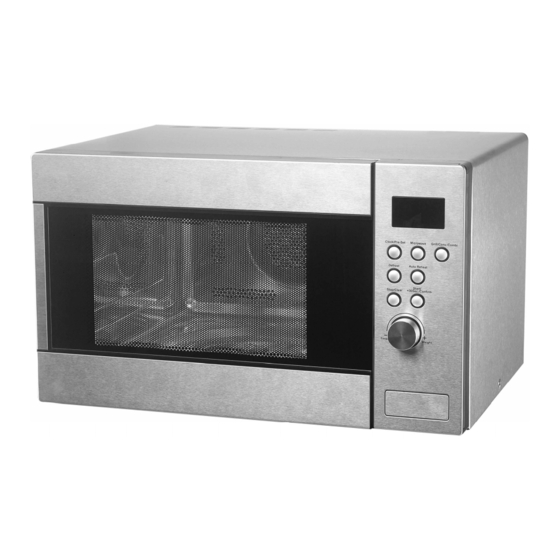
- Page 1 BTM31SS 30 Litre combination microwave oven with grill...
- Page 2 User Manual for your Baumatic BTM31SS 30 Litre combination microwave oven with grill NOTE : This User Instruction Manual contains important information, including safety & installation points, which will enable you to get the most out of your appliance. Please keep it in a safe place so that it is easily available for future reference;...
-
Page 3: Table Of Contents
Contents Environmental note Important safety information 5 – 9 Specifications 10 – 13 Product dimensions Product specifications Electrical details Description of the appliance Control panel The turntable LED display Using your microwave 14 – 29 The adjustment dial Setting the clock Before first use Microwave cooking Microwave power level chart... - Page 4 Environmental note o The packaging materials that Baumatic uses are environmentally friendly and can be recycled. o Please discard all packaging material with due regard for the environment.
-
Page 5: Important Safety Information
IMPORTANT SAFETY INFORMATION Your safety is of the utmost importance to Baumatic. Please make sure that you read this instruction booklet before attempting to install or use the appliance. If you are unsure of any of the information contained in this ooklet, please contact the Baumatic Advice Line. - Page 6 If you notice that the door seal, door surfaces, power cord and plug are damaged. You s hould stop using the appliance, disconnect it from the mains supply and contact the Baumatic Customer Care Department. o Only genuine Baumatic spare parts should be fitted to your appliance.
- Page 7 Child Safety o Baumatic strongly recommend that babies and young children are prevented from being near to the appliance and not allowed to touch the appliance at any time. o If it is nece ssary for younger family members to be in the kitchen, please ensure that they are kept under close supervision at all times.
- Page 8 Baumatic Ltd. declines any respon sibility for injury or damage, to person or property, as a result of improper use or installation of this appliance. o Heat, steam and moisture will be created during use of the...
-
Page 9: Specifications
pecifications Product dimensions Height: 335 mm Width: 518 mm Depth: 520 mm od ct specifications 10 functions: Auto-rehea Vegetables Fish Meat Pasta Potato Pizza Soup Chicken Cake o Quick start o LED minute minder Pushbutton control operation o Safety lock o Stainless steel exterior and cavity o Defrost by weight o Capacity:... -
Page 10: Description Of The Appliance
For future reference please record the following information which can be found on the rating p late and the date of purchase which can be und on your sales invoice. The rating plate for your oven can be located by opening the microwave oven door and looking on the right and side of the chassis. -
Page 11: Control Panel
ALW be placed on the glass tray during cooking. o If the glass tray or turntable ring assembly crack s or breaks, it must be replaced immediately. Genuine Baumatic parts can be obtained from the Baumatic Spares Department. -
Page 12: Led Display
ED display The LED display will show the time of day, or if the microwave is in use, it will show the cooking time. Indicates that microwave cooking is taking place. Indicates that grilling is taking place Indicates that defrosting is taking place. Indicates that the safety lock is engaged. -
Page 13: Using Your Microwave
Using your microw The adjustment dial o The adjustment dial (I) should only be turned clockwise (towards the plus symbol) if you want to use the auto menu function. o For all other purposes and se ttings, the adjustment dial (I) should be turn ed anti-clockwise (towards the minus symbol). -
Page 14: Microwave Cooking
Microwave cooking o Once the clock has been set, your microwave is then ready to use. o Use the door button (J) to open the door of the microwave. o Check that the turntable shaft, turntable ring assembly and glass tray are correctly assembled in the cavity. -
Page 15: Microwave Power Level Chart
+ 30 second button (Quick start) o If you want to cook on the highest power level setting for a period of time, then you can use the +30 second button (H). o Press the +30 second button (H) once and your microwave will operate on full power for 30 seconds. -
Page 16: Grill Cooking
Grill cooking o Press the grill button (D) once and the LED display (A) will show “G-1”. o Once “G-1” appears on the LED display (A), press the confirm button (H). o Turn the adjustment dial (I) to set the cooking time that you require. -
Page 17: Combination Cooking
Combination cooking Press the combination button (D) once and the LED display (A) will show “G-1”. o Turn the adjustment dial (I) until “C-1”, “C-2”, “C-3” or “C-4” appears on the LED display (see the table below to see the various combination cooking modes that can be selected). -
Page 18: Convection Cooking
Convection cooking o Convection cooking allows you to operate your microwave like a traditional oven. Th e appliance does not use microwaves to cook the food and the cavity should be preheated before food is placed inside of it. o Use the door button (J) to open the door of the microwave. o Place whatever you are cooking in the centre of the microwave cavity and then close the microwave door. -
Page 19: Interrupting A Cooking Cycle
o Once the required temperature inside the oven cavity has been reached, an audible signal will sound twice and the LED display will flash. o You cannot set the cooking time until pre-heating has finished. o Use the door button (J) to open the door of the microwave. o Place whatever you are cooking in the centre of the microwave cavity and then close the microwave door. -
Page 20: Cancelling A Cooking Cycle
Cancelling a cooking cycle o If you wish to cancel a cooking cycle when it is in progress, you should press the stop/clear button (G). o The microwave will stop heating immediately, give an audible signal and the LED display (A) will return to showing the time of day. -
Page 21: Defrost By Weight
Defrost by weight o Press the defrost button (E) until “d-2”, “d-3” or “d-4” appears on the LED display (A). o Turn the adjustment dial (I) to select the weight of the food that you want to defrost. The letter “g” will appear on the LED display (A) to indicate grams. -
Page 22: Setting A Cooking Time In Advance
o At the end of the cooking time, your microwave will give an audible signal and the LED display (A) will return to showing the time of day. Setting a cooking time in advance o This function will allow you to set a time in the future that the microwave will switch on at. -
Page 23: Auto Menu Function
IMPORTANT: Although your microwave has a set in advance time feature, we do not recommend that the microwave is EVER programmed to switch on when it is unatte nded. Auto menu function o Your microwave has menus pre-programmed into it, where it will cook particular types of food on pre-set power levels and for pre- set periods of time. -
Page 24: Auto Menu Chart
Auto menu chart Menu Weight (g) Display Vegetable Fish Meat 50 (with cold water 450ml) Pasta 100 (with cold water 800ml) 150 (with cold water 1200ml) 200ml Soup 400ml 600ml Roast Chicken 1000 1000 1200 1200 Bread Cake Pizza 1 (about 230g) Potato 2 (about 460g) 3 (about 690g) -
Page 25: Auto Reheat Function
Auto Reheat Function o Your microwave can automatically reheat certain food types based on a pre-set weight or portion. o Press the auto reheat button (F) and the LED display (A) will show “h-1”. o Turn the adjustment dial (I) to select the weight or portion of your food type. -
Page 26: Microwave Cooking Guidelines
Microwave cooking guidelines o If you are heating liquid in the microwave, then you must also place a teaspoon in the container. This will ensure that the liquid does not boil suddenly after being removed from the microwave cavity. o This phenomenon is called “delayed boiling”, this means that a liquid can be close to boiling point, even if there is no steam coming off the liquid or the liquid is not bubbling. -
Page 27: Materials You Can Use In A Microwave Oven
Materials you can use for microwave cooking Material Remarks Aluminium foil To be used for shielding only. Small smooth pieces can be used to cover thin parts of meat or poultry to prevent overcooking. Arcing can occur if foil is too close to the cavity walls. -
Page 28: Materials Not To Be Placed In A Microwave Oven
Materials you cannot use for microwave cooking Material Remarks Aluminium tray May cause arcing. Transfer food into a microwave-safe dish. Food carton with May cause arcing. Transfer food into a metal handle microwave-safe dish. Metal or metal- Metal shields the food from microwave energy. trimmed utensils The metal trim may cause arcing. -
Page 29: The Appliance Exterior
The appliance exterior o You should wipe over the front of the appliance with a soft cloth and warm water mixed with a little washing up liquid. o DO NOT use abrasive cleaners or sharp objects to clean the front surface of the microwave. The appliance interior o You should wipe over the inside of the appliance with a soft cloth and warm water mixed with a little washing up liquid. -
Page 30: Installation
Any damage that is caused to the appliance by a cleaning product will not be fixed by Baumatic free of charge, even if the appliance is within the guarantee period. o WARNING: Children should not be allowed near to the appliance unsupervised. -
Page 31: Electrical Connection
Electrical connection o Before connecting the appliance, make sure that the supply voltage marked rating plate corresponds with your mains supply voltage. o We recommend that the appliance is connected by a qualified electrician, who is a member of the N.I.C.E.I.C. and who will comply with the I.E.E. -
Page 32: My Appliance Isn't Working Correctly
Baumatic Customer Care Department. o The interior light bulb is not working. * Call the Baumatic Customer Care Department. The interior light bulb can only be replaced by a trained service technician. o My food is not cooking properly. - Page 33 Or any installation other than the one specified by Baumatic Ltd. has been completed. Please refer to the conditions of guarantee that appear on the...
-
Page 34: Contact Details
United Kingdom Czech Republic Baumatic Ltd., Baumatic CR spol s.r.o. Baumatic Buildings, Průmyslová zóna Sever 696 6 Bennet Road, 460 11 Liberec 11 Reading, Berkshire Czech Republic RG2 0QX United Kingdom +420 483 577 200 Sales Telephone www.baumatic.cz (0118) 933 6900...