
Related Manuals for Teac SL-D96


Summary of Contents for Teac SL-D96
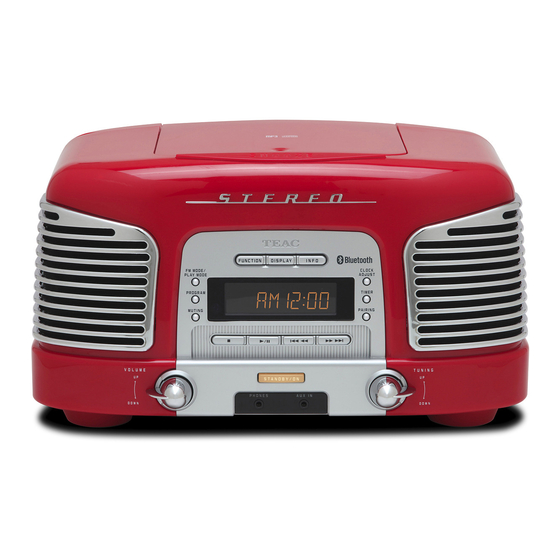
- Page 1 9A10228900 SL-D96 AM/FM Stereo Radio CD-Player with Digital Clock OWNER’S MANUAL MANUEL DU PROPRIÉTAIRE MANUAL DEL USUARIO...
- Page 2 openings must not be blocked or covered. The openings should never be blocked by placing the product on a bed, sofa, rug, or other similar surface. This product should not be placed in a built-in installation such as a bookcase or rack unless proper ventilation is provided or the manufacturer’s instructions have been adhered to.
- Page 3 _ this indicates a need for service. Changes or modifications to this equipments not expressly 21) Replacement Parts — When replacement parts are approved by TEAC CORPORATION for compliance will void required, be sure the service technician has used replacement the user’s warranty.
-
Page 4: Table Of Contents
Contents Thank you for choosing TEAC. Read this manual carefully to get the best performance from this unit. Contents........4 Before Using the Unit . -
Page 5: Sommaire
Sommaire Indice Nous vous remercions pour l’achat d’un appareil Enhorabuena por la adquisición de un TEAC. Lea TEAC. Lire ce manuel avec attention pour obtenir detenidamente este manual a fin de obtener el les meilleures performances possibles de cet mejor rendimiento de esta unidad. -
Page 6: Before Using The Unit
Before Using the Unit Read this before attempting any operations < As the unit may become warm during operation, always leave sufficient space around the unit for ventilation. < The voltage supplied to the unit should match the voltage as printed on the rear panel. If you are in any doubt regarding this matter, consult an electrician. -
Page 7: Avant Utilisation
Evite colocarla expuesta excessive, à la chaleur, au froid ou à l’humidité. directamente a la luz del sol o cerca de una fuente < Ne pas placer SL-D96 sur le dessus de de calor. Así mismo, evite ubicaciones sujetas a l’amplificateur/récepteur. -
Page 8: Discs 1
CD standard may not play back correctly in this player. If you use such discs in this unit, TEAC Corporation and its subsidiaries cannot be responsible for any consequences or guarantee the quality of reproduction. If you experience problems with such non-standard discs, you should contact the producers of the disc. -
Page 9: Disques 1
Disques 1 Discos 1 Disques pouvant être lus avec ce lecteur : Discos que se pueden reproducir en esta unidad: • CD audio classiques, portant le logo CD-DA sur • CD-Audio convencionales con el logotipo CD-DA l’étiquette: en la etiqueta: •... - Page 10 Discs 2 < Never use such chemicals as record sprays, antistatic sprays or fluid, benzine or thinner to clean the discs. Such chemicals will do irreparable damage to the disc’s plastic surface. < Discs should be returned to their cases after use to avoid dust and scratches that could cause the laser pickup to “skip.”...
- Page 11 Disques 2 Discos 2 < Ne jamais utiliser de produits chimiques, tels que < No utilice nunca productos químicos como los des sprays, des liquides antistatiques, de l’essence aerosoles para discos de vinilo o antiestáticos, ou des diluants pour nettoyer les disques. Ces bencina o aguarrás para limpiar los discos.
-
Page 12: Remote Control Unit
Remote Control Unit The provided Remote Control Unit allows the unit to be operated from a distance. When operating the remote control unit, point it towards the REMOTE SENSOR on the front panel of the unit. < Even if the remote control unit is operated within the effective range, remote control operation may be impossible if there are any obstacles between the unit and the remote control. -
Page 13: Boîtier De Télécommande
Boîtier de télécommande Unidad de control remoto Le boîtier de télécommande fourni permet la La unidad de control remoto suministrada le commande à distance defourni permet la permite controlar el aparato a distancia. commande à distance de l’appareil. Pour Cuando opere con el control remoto, diríjalo hacia l’utilisation du boîtier de télécommande, le diriger el sensor remoto en el panel frontal del aparato. -
Page 14: Connections
LINE VCR, DVD, etc. Connections CAUTION: AUX IN jacks < Switch off the power to all equipment before You can connect a DVD player, VCR etc. to this making connections. unit. < Read the instructions of each component you Connect the component with an RCA pin cord. intend to use with this unit. -
Page 15: Connexions
Connexions Conexión PRÉCAUTION: PRECAUCIÓN: < Coupez l’alimentation de tous les appareils avant < Apague todos los equipos antes de realizar las d’effectuer les raccordements. conexiones. < Lisez les instructions qui accompagnent chaque < Lea las instrucciones de cada equipo que intenta appareil que vous avez l’intention d’utiliser en utilizar con esta unidad. - Page 16 FRONT REMOTE CONTROL SIDE...
-
Page 17: Names Of Each Control
Names of Each Control Disc cover PLAY/PAUSE button (y/J) Press the L mark on the disc cover to open it. Use this button to start or pause playback. SNOOZE button SKIP buttons (. m / , /) After the on time is reached, use this button to turn Press these buttons to skip tracks. - Page 18 DESSUS DEVANT TÉLÉCOMMANDE CÔTÉ...
-
Page 19: Nomenclature
Nomenclature Couvercle du disque Touches d’opération du CD Appuyez sur la marque L située sur le couvercle du Si le TUNER ou le AUX est choisi, ces touches ne disque pour l’ouvrir.. fonctionnent pas. Touche SNOOZE Touche STOP (H) Après que l’appareil s’est allumé, utilisez cette Utiliser cette touche pour arrêter la lecture. - Page 20 VISTA SPERIOR VISTA FRONTAL MANDO A DISTANCIA VISTA LATERAL...
-
Page 21: Nombres De Cada Control
Nombres de cada control Cubierta del disco Botones de operación de CD Oprima la marca L en la cubierta del disco para Cuando se selecciona TUNER o AUX, estos botones abrirlo. no trabajarán. Botón SNOOZE Botón STOP (H) Después de que se llega a la hora, utilice este botón Utilice este botón para detener la reproducción. -
Page 22: Playing A Cd
Playing a CD 1 Press the POWER switch to turn the unit ON. Press the CD button to select “CD”. Press the FUNCTION button repeatedly to select “CD”, when using the remote control unit. < When no disc is in the unit, “no dISC” will be displayed. -
Page 23: Lecture Du Cd 1
Lecture du CD 1 Reproducción de CD 1 Appuyer sur le commutateur d’alimentation Oprima el interruptor POWER para encender la pour allumer l’appareil. unidad. Appuyer sur la touche CD pour choisir “CD” Oprima el botón CD para seleccionar “CD” Appuyez sur la touche FUNCTION répététivement Oprima el botón FUNCTION de manera repetida pour choisir “CD”, quand vous utilisez la para seleccionar ”CD”, cuando utilice la unidad de... - Page 24 Playing a CD 2 To stop playback Press the STOP button (H) to stop playback. To suspend playback temporarily (pause mode) Press the PLAY/PAUSE button (y/J). Playback stops at the current position. To resume playback, press the PLAY/PAUSE button (y/J) again. DISPLAY button During playback, press this button repeatedly to change the display mode as follows:...
- Page 25 Lecture du CD 2 Reproducción de CD 2 Pour l’arrêt de la lecture Para detener la reproducción Appuyer sur la touche STOP (H) pour arrêter la Oprima el botón STOP (H ) para detener la lecture. reproducción. Pour un arrêt momentanné de la Para suspender temporalmente la lecture (mode pause) reproducción (modo de pausa)
-
Page 26: Playback From A Specific Part
Playback from a Specific Part To skip to the next or a previous track During playback, press the SKIP button (. m or , /) repeatedly until the desired track is found. The selected track will be played from the beginning. -
Page 27: Lecture À Partir D'un Point Spécifique
Lecture à partir d’un point spécifique Reproducción desde una parte específica Pour sauter vers la piste suivante ou Para saltar a la siguiente o a una précédente pista Previa. Durant la lecture, appuyer sur la touche SKIP Durante la reproducción, oprima el botón SKIP (. -
Page 28: Programmed Playback 1
Programmed Playback 1 Up to 20 tracks can be programmed in the desired order. < Shuffle playback does not work during program playback. < Insert a disc and select “CD” before beginning programming. Press the MEMORY/CLOCK ADJ button in the stop mode. -
Page 29: Lecture Programmée 1
Lecture programmée 1 Reproducción programada 1 Jusqu’à 20 pistes peuvent être programmer dans Se pueden programar hasta 20 pistas en el orden l’ordre désiré. deseado. < La lecture aléatoire ne fonctionne pas durant la < La reproducción aleatoria, no funciona durante la lecture programmée. - Page 30 Programmed Playback 2 To check the programmed order In the stop mode, press the MEMORY/CLOCK ADJ button repeatedly to show the track numbers that have been stored in memory. To add a track to the end of the program In the stop mode, press the MEMORY/CLOCK ADJ button repeatedly until a track number “00”...
- Page 31 Lecture programmée 2 Reproducción programada 2 Pour vérifier l’ordre de Para verificar el orden programado programmation En el modo de paro, oprima el botón MEMORY/CLOCK ADJ de manera repetida para En mode d’arrêt, appuyez sur la touche mostrar los números de pista que se almacenaron MEMORY/CLOCK ADJ répététivement, pour voir en memoria.
-
Page 32: Repeat Playback
Repeat Playback Every time the REPEAT/PRESET button is pressed, the REPEAT indicator lights or blinks, and the mode is changed as follows: repeat one track repeat all the tracks (off) < If one of the following buttons is pressed or the disc cover is opened, repeat mode will be canceled: STOP (H), POWER, AUX, TUNER, FUNCTION Repeat one track... -
Page 33: Lecture Répétitive
Lecture répétitive Reproducción repetida Chaque fois que la touche REPEAT/PRESET est Cada vez que se oprime el botón REPEAT/PRESET, el appuyée, l’indicateur REPEAT s’allume ou clignote et le indicador REPEAT se enciende o parpadea y el modo mode est changé tel qu’il suit: se cambia de la manera siguiente: répétition d’une piste Repetir una pista... -
Page 34: Shuffle Playback
Shuffle Playback Tracks can be played randomly. Press the SHUFFLE button in the stop or play mode to start shuffle playback. < If you press the SKIP button ( , /) during shuffle playback, next track will be randomly selected and played. If you press the SKIP button (. -
Page 35: Lecture Aléatoire
Lecture aléatoire Reproducción aleatoria Les pistes peuvent être jouer aléatoirement Las pistas pueden reproducirse aleatoriamente. Appuyez sur la touche SHUFFLE mode arrêt (stop) Oprima el botón SHUFFLE en el modo de paro o ou en mode lecture (play). de reproducción. Les pistes seront sélectionnées et lues de façon Las pistas se van a reproducir al azar. -
Page 36: Listening To The Radio
Listening to the Radio Press the POWER switch to turn the unit ON. Press the TUNER button to select “TUNER”. Or, press the FUNCTION button repeatedly to select “TUNER”, when using the remote control unit. Press the FM/AM button to select FM or AM. Use the BAND button, when using the remote control unit. -
Page 37: Tuner
Ecoute radio Cómo escuchar la radio Appuyer sur le commutateur POWER pour Oprima el interruptor POWER para ENCENDER allumer l’appareil. la unidad. Appuyer touche TUNER pour Oprima el botón TUNER para seleccionar sélectionner le “TUNER”. “TUNER” (SINTONIZADOR). appuyez touche FUNCTION U oprima el botón FUNCTION de manera repetida répététivement pour choisir “TUNER”, quand vous para seleccionar “TUNER”, cuando se utilice la... -
Page 38: How To Preset Stations
How to Preset Stations In each band, up to 10 stations can be stored in preset memories. Press the FM/AM button to select FM or AM. Use BAND button, when using the remote control unit. Turn the TUNING knob and tune in a station to be stored as a preset station. -
Page 39: Comment Préréglé Une Station
Comment préréglé une station Cómo Preestablecer estaciones Pour chaque bande, jusqu’à 10 stations peuvent En cada banda, se pueden almacenar hasta 10 être entreposer en mémoire. estaciones en memorias preestablecidas. Oprima el botón FM/AM para seleccionar FM o Appuyer sur la touche BAND pour sélectionner FM ou AM. -
Page 40: Listening To The External Sources
Listening to the External Sources You can connect external sources such as VCR deck or TV to the AUX input jacks. Press the POWER switch to turn the unit ON. Press the AUX button to select “AUX”. Press the FUNCTION button repeatedly to select “AUX”, when using the remote control unit. -
Page 41: Ecoute À Partir D'une Source Externe
Cómo escuchar Fuentes externas Ecoute à partir d’une source externe Il est possible de connecter des appareils externes tels Usted puede conectar fuentes externas tales como el qu’une VCR ou un téléviseur aux prises d’entrée AUX. deck de una videocasetera o la televisión a los conectores de entrada AUX. -
Page 42: Clock Adjustment
Clock Adjustment In the CD mode or the TUNER mode, press the DISPLAY button to select clock display. “:” blinks in the clock display. < If the AUX button is selected or the unit is off, press and hold the MEMORY/CLOCK ADJUST button for 2 or more seconds, and continue the procedure from step <... -
Page 43: Réglage De L'horloge
Réglage de l’horloge Ajuste de reloj En mode de CD ou de TUNER, appuyer sur la En el modo CD o en el modo TUNER, oprima el touche DISPLAY pour choisir l’affichage de botón DISPLAY para seleccionar el desplegado l’horloge. de reloj. -
Page 44: Timer 1
MEMORY/ Timer 1 TIMER/SLEEP CLOCK ADJUST Adjust the clock before setting the timer. Setting the timer Press the DISPLAY button to change the timer mode. (In the CD mode or the TUNER mode, press the button twice) The “TIMER” indicator blinks on the display. Press the TIMER button to change the timer mode, when using the remote control unit. -
Page 45: Minuterie 1
Minuterie 1 Despertador 1 Régler l’horloge avant de régler la minuterie Ajuste el reloj antes de ajustar el despertador. Réglage de la minuterie Ajuste del despertador Appuyer sur la touche DISPLAY pour changer Oprima el botón DISPLAY para cambiar el le mode de minuterie. - Page 46 Timer 2 Activating the timer Press and hold the TIMER/SLEEP button for 2 or more seconds, and press the POWER button to turn the unit off. The unit will turn on at the specified time every day. For the timer to start playback of a CD, press the CD button to select CD, insert a disc and adjust the volume before turning the unit off.
- Page 47 Minuterie 2 Despertador 2 Activation de la minuterie Activación del despertador Appuyer et retenir la touche TIMER/SLEEP pour 2 Oprima y mantenga así el botón TIMER/SLEEP secondes ou plus, et appuyez sur la touche durante 2 ó más segundos y oprima el botón POWER pour éteindre l’appareil.
-
Page 48: Troubleshooting
Remote control doesn’t work. you can solve the problem yourself before you call e If the batteries are exhausted, change the your dealer or a TEAC service center. batteries. e Use remote control unit within the range General (5m/15ft) and point at the front panel. -
Page 49: Guide De Dépannage
La télécommande ne fonctionne pas. avant de contacter le revendeur ou le centre de service e Si les batteries sont usées, remplacez-les. client TEAC. e Sans dépasser la portée (5 m) de la télécommande, l’orientez vers la face avant de l’appareil. -
Page 50: Corrección De Fallas
El mando a distancia no funciona. de llamar a su distribuidor o al Centro de servicio e Si las pilas están agotadas, cámbielas. TEAC. e Emplee el mando a distancia sin sobrepasar la distancia indicada (5 m) y apunte al panel frontal. -
Page 51: Specifications
Specifications Spécifications Especificaciones TUNER Section Section SYNTONISATEUR Sección del SINTONIZADOR Frequency Range(FM) Gamme de fréquence(FM) Rango de frecuencia (FM): 87.50 MHz to 108.00 MHz 87,50 MHz à 108,00 MHz 87.50 MHz a 108.00 MHz Frequency Range(AM) Gamme de fréquence(AM) Rango de frecuencia (AM): 520 kHz to 1710 kHz 520 kHz à... - Page 52 TEAC ITALIANA S.p.A. Via C. Cantù 11, 20092 Cinisello Balsamo, Milano, Italy Phone: 02-66010500 TEAC AUSTRALIA PTY., LTD. 280 William Street, Melbourne VIC 3000, Australia Phone: (03) 9672-2400 A.B.N. 80 005 408 462 This appliance has a serial number located on the rear panel. Please record the model number and serial number and retain them for your records.