
Related Manuals for Daikin VRV III REMQ8P8Y1B


Summary of Contents for Daikin VRV III REMQ8P8Y1B
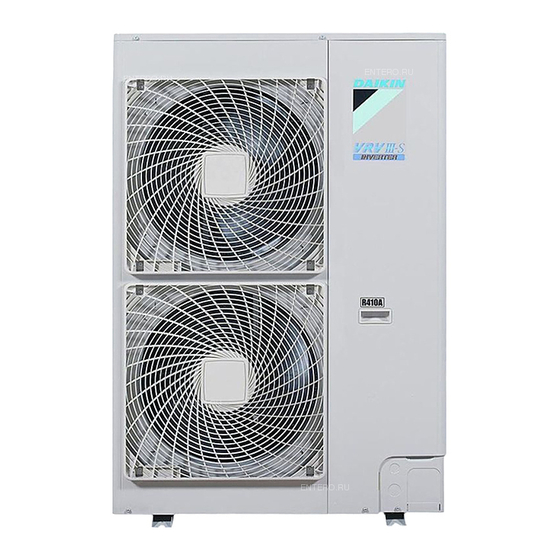
- Page 1 INSTALLATION MANUAL System air conditioner REMQ8P8Y1B REMQ10P8Y1B REMQ12P8Y1B REMQ14P8Y1B REMQ16P8Y1B...
- Page 2 A+B+C+D a ≥10 mm a ≥50 mm a ≥200 mm b ≥300 mm b ≥100 mm b ≥300 mm (mm) c ≥10 mm c ≥50 mm d ≥500 mm d ≥500 mm a ≥10 mm a ≥50 mm a ≥200 mm b ≥300 mm b ≥100 mm b ≥300 mm...
- Page 3 15° TO IN/D UNIT TO OUT/D UNIT TO MULTI UNIT F2 Q1Q2 F1 F2 F1 F2 F1 F2 F1 F2 TO IN/D TO OUT/D TO IN/D TO OUT/D UNIT UNIT UNIT UNIT F1 F2 F1 F2 F1 F2 F1 F2 F1 F2 F1 F2 REMQ8~12...
- Page 4 2PW40200-2A...
- Page 5 2PW40200-2A...
-
Page 6: Table Of Contents
READ THIS MANUAL ATTENTIVELY BEFORE STARTING UP THE UNIT. DO NOT THROW IT AWAY. KEEP IT IN The REMQ-P units can be combined with Daikin VRV indoor units for YOUR FILES FOR FUTURE REFERENCE. air conditioning purposes suitable for R410A. -
Page 7: Combination
1.1. Combination 1.3. Optional accessories The indoor units can be installed in the following range. To install the above outdoor units, the following optional parts are also required. Always use appropriate indoor units compatible with R410A. To learn which models of indoor units are compatible with Refrigerant branching kit (for R410A only: Always use an R410A, refer to the product catalogs. -
Page 8: Selection Of Location
11 To prevent dripping water to form a puddle underneath the unit, ELECTION OF LOCATION install a drain pan (available as option kit). This unit, both indoor and outdoor, is suitable for installation in a The equipment described in this manual may cause commercial and light industrial environment. -
Page 9: Inspecting And Handling The Unit
NSPECTING AND HANDLING THE UNIT NPACKING AND PLACING THE UNIT At delivery, the packing should be checked and any damage should Remove the four screws fixing the unit to the pallet. be reported immediately to the carrier claims agent. Make sure the unit is installed level on a sufficiently strong base to prevent vibration and noise. -
Page 10: Refrigerant Piping
6.2. Selection of piping material EFRIGERANT PIPING Foreign materials inside pipes (including oils for fabrication) must be 30 mg/10 m or less. Do not insert fingers, rods or other objects into the air Use the following material specification for refrigerant piping: inlet or outlet. -
Page 11: Connecting The Refrigerant Piping
6.4. Connecting the refrigerant piping Precautions when connecting field piping. Front connection or side connection Add brazing material as shown in the figure. Installation of refrigerant piping is possible as front connection or side connection (when taken out from the bottom) as shown in the figure. - Page 12 3.1 Precautions when connecting piping between outdoor Prohibited patterns: change to pattern 1 or 2. units (multiple outdoor unit system) To connect the piping between outdoor units, an optional multi connection piping kit BHFQ23P907/1357 is always required. When installing the piping, follow the instructions in the installation manual that comes with the kit.
-
Page 13: Protection Against Contamination When Installing Pipes
Branching the refrigerant piping For installation of the refrigerant branching kit, refer to the installation manual delivered with the kit. (See figure 12) Horizontal surface Follow the conditions listed below: - Mount the refnet joint so that it branches either horizontally or vertically. -
Page 14: Example Of Connection
6.6. Example of connection REMQ8~16P8Y1B Installation manual VRVIII System air conditioner 4PW40598-1A... - Page 15 REMQ8~16P8Y1B Installation manual VRVIII System air conditioner 4PW40598-1A...
-
Page 16: Leak Test And Vacuum Drying
Vacuum drying: Use a vacuum pump which can evacuate to EAK TEST AND VACUUM DRYING –100.7 kPa (5 Torr, –755 mm Hg) The units were checked for leaks by the manufacturer. Evacuate the system from the liquid pipe, the suction gas pipe, the high pressure/low pressure gas pipe and the equalizer pipe After connecting the field piping, perform the following inspections. -
Page 17: Internal Wiring - Parts Table
8.1. Internal wiring – Parts table Y1S~Y7S .... Solenoid valve (RMTG, 4 way valve–PPE, 4 way valve–H/E gas, RMTL, hot gas, EV bypass, Refer to the wiring diagram sticker on the unit. The abbreviations RMTO) used are listed below: Z1C~Z10C ..Noise filter (ferrite core) A1P~A8P .....Printed circuit board (main, noise filter, inverter, Z1F...... -
Page 18: Power Circuit And Cable Requirements
8.3. Power circuit and cable requirements NOTE Select the power supply cable in accordance with A power circuit (see table below) must be provided for connection of relevant local and national regulations. the unit. This circuit must be protected with the required safety Wire size must comply with the applicable local devices, i.e. -
Page 19: System Examples
This unit has a reverse phase detection circuit. (If it is activated, Use a power wire pipe for the power wiring. only operate the unit after correcting the wiring.) Power supply wires must be attached securely. Outside the unit, make sure the low voltage electric wiring (i.e. -
Page 20: Field Line Connection: Power Wiring
8.8. Field line connection: power wiring Outside unit The power cord must be clamped to the plastic bracket using field Be sure to follow the limits below. If the unit-to-unit supplied clamp material. cables are beyond these limits, it may result in malfunction of transmission. -
Page 21: Wiring Example For Wiring Inside Unit
8.9. Wiring example for wiring inside unit IPE INSULATION figure After finishing the leak test and vacuum drying, the piping must be insulated. Take into account the following points: Power wiring Make sure to insulate the connection piping and refrigerant Wiring between units branch kits entirely. -
Page 22: Charging Refrigerant
11. C Be sure to use tools exclusively for R410A to ensure required HARGING REFRIGERANT pressure resistance and to prevent foreign materials from mixing into the system. The outdoor unit is factory charged, but depending on the length of the piping when installed, the outdoor unit may require additional Charging with an unsuitable substance may cause charging. -
Page 23: How To Check How Many Units Are Connected
11.4. How to check how many units are connected 11.5. Additional refrigerant charge It is possible to find out how many indoor units are active and Adding refrigerant using the automatic refrigerant charging connected by operating the push-button switch on the printed circuit function is recommended. - Page 24 After pre-charging, perform the refrigerant charge operation as Procedure for additional refrigerant charge shown below and charge the remaining refrigerant of the The automatic refrigerant charging has limits as described additional charging amount through valve A. (See figure 24) below. At out of limit, the system can not operate the automatic NOTE For a multi outdoor unit system, it is not required...
- Page 25 Charging in heating mode 10. In case leak detection function is required Press the button once for post-processing with BS4 TEST Start up regard to the leak detection function and press the BS1 MODE Wait while the unit is preparing for charging in heating mode. button to confirm that charging is completed.
-
Page 26: Procedure For Inputting The Additional Refrigerant Charge Weight Into The Pcb
Complete Remote controller malfunction code display H1P H2P H3P H4P H5P H6P H7P Remote controller heating mode malfunction codes c c c w w w w Error code The display on the remote controller shows a flashing PE code Close valve A immediately and press the TEST OPERATION for signalling that automatic charging will be finished in about 10 recharge button once. -
Page 27: Checks After Adding Refrigerant
11.7. Checks after adding refrigerant Press the button 14 times. BS2 SET The LED display must be as follows: Are the stop valves for both liquid and gas open? H1P H2P H3P H4P H5P H6P H7P Is the amount of refrigerant, that has been added, recorded? w x x w w w x Make sure to open the stop valves after charging the refrigerant. -
Page 28: Checks Before Initial Start-Up
12.2. Checks before initial start-up Location of the dip switches, LEDs and buttons LED H1~8P NOTE Remark that during the first running period of the unit, required power input may be higher than stated on the Push button switches BS1~BS5 nameplate of the unit. - Page 29 3.2 Possible settings for function C Setting the mode The noise of level 3 < level 2 < level 1 ( The set mode can be changed with the button according BS1 MODE H1P H2P H3P H4P H5P H6P H7P to the following procedure: w x x x x x x For setting mode 1: Press the...
-
Page 30: Test Operation
12.4. Test operation Press the button once to confirm. BS3 RETURN H1P H2P H3P H4P H5P H6P H7P Do not insert fingers, rods or other objects into the air w x x x x x c inlet or outlet. When the fan is rotating at high speed, it Press the button in order to change the LED BS2 SET... -
Page 31: Final Check After Installation
Vacuuming method Installation error Error code Remedial action The added amount of Availability of the leak detection At the first installation, this vacuuming is not required. It is required refrigerant was not function feature requires input of only for repair purposes. inputted after the additional refrigerant charge automatic charging. -
Page 32: Caution For Refrigerant Leaks
15. C Calculate the smallest room volume (m AUTION FOR REFRIGERANT LEAKS In a case such as the following, calculate the volume of (A), (B) Introduction as a single room or as the smallest room. Where there are no smaller room divisions The installer and system specialist shall secure safety against leakage according to local regulations or standards. - Page 33 1 10 6 6 6 6 6 6...
- Page 34 4PW40598-1A...