Kenmore 625.383500 Use & Care Manual
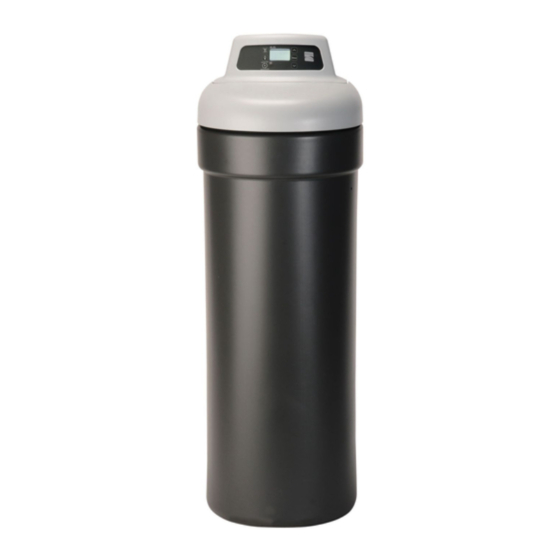
Water softener with high flow valve
Hide thumbs
Also See for 625.383500:
- Use & care manual (56 pages) ,
- Use and care manual (28 pages) ,
- Use & care manual (56 pages)
Table of Contents
Advertisement
Quick Links
Use & Care Guide
Manual de Uso y Cuidado
Kenmore
Water Softener
with High Flow Valve
Ablandador de Agua
con válvula de alto flujo
Model / Modelo: 625.383500
Kenmore and the Kenmore logo are registered trademarks
of KCD IP LLC and/or Transform SR Brands LLC, and are used
under license by Water Channel Partners, Woodbury, Minnesota.
Customer Assistance / Asistencia al Cliente
www.kenmorewatersolutions.com
Water Channel Partners
1890 Woodlane Drive,
Woodbury, MN 55125
®
System tested and certified by NSF International
against NSF/ANSI Standard 44 for
hardness reduction and efficiency,
and certified to NSF/ANSI Standard 372.
Este sistema ha sido probado y certificado por
NSF International según la norma NSF/ANSI 44
para la reducción de la dureza y eficiencia,
y certificado según la norma NSF/ANSI 372.
System tested and certified by the Water Quality
Association against CSA B483.1.
Este sistema ha sido probado y certificado por la
Water Quality Association según la norma CSA B483.1.
7388946 (Rev. B 4/7/21)
Advertisement
Table of Contents

Related Manuals for Kenmore 625.383500


Summary of Contents for Kenmore 625.383500
- Page 1 Ablandador de Agua con válvula de alto flujo Model / Modelo: 625.383500 Kenmore and the Kenmore logo are registered trademarks of KCD IP LLC and/or Transform SR Brands LLC, and are used under license by Water Channel Partners, Woodbury, Minnesota.
-
Page 2: Warranty
Warranty WARRANTY ON KENMORE WATER SOFTENER ® Warrantor: Water Channel Partners, 1890 Woodlane Drive, Woodbury, MN 55125 Warrantor guarantees, to the original owner, that: One Year Full Warranty: For a period of one (1) year from the date of purchase, all parts will be free from defects in materials and workmanship and will perform their normal functions. -
Page 3: Table Of Contents
Reading this manual will also help you to get all the turn upside down or drop. benefits from your water softener. Avoid installing in direct sunlight. Excessive heat may Your Kenmore water softener will remove hardness cause distortion or other damage to non-metallic parts. ®... -
Page 4: Specifications & Performance Claims
Operational efficiency is the actual efficiency after the system has been installed. It is typically less than the rated efficiency, due to individual application factors including water hardness, water usage, and other contaminants that reduce a softener's capacity. Model No. 625.383500 Model Code 12,600 @ 2.5 lbs. -
Page 5: Dimensions
Dimensions 16-1/2” 16-1/2" 3-3/8” 19-3/4” 3-3/8" 19-3/4" IN - OUT IN - OUT 47-3/4” 47-3/4" 41-1/2” 40-1/4” 41-1/2" 40-1/4" Figure 1 FRONT VIEW SIDE VIEW FRONT VIEW SIDE VIEW Questions? Visit www.kenmorewatersolutions.com or call 1-800-695-2761. -
Page 6: Packing List
Packing List The parts required to assemble and install the water Remove and discard (or recycle) all packing materials. softener are included with the unit. Thoroughly check To avoid loss of small parts, we suggest you keep the the water softener for possible shipping damage and small parts in the parts bag until you are ready to use parts loss. - Page 7 (well water) or water meter 6. Put the softener in a place where water damage is least likely to occur if it develops a leak. Kenmore (city water). or the manufacturer will not repair or pay for water 2.
-
Page 8: Installation
Plan Your Installation CHECK YOUR WATER PRESSURE BEFORE INSTALLING For your water softener to work properly, incoming psi, buy and install a pressure reducing valve in the water pressure in your house pipes must be no lower pipe supplying water to the softener’s inlet. than 20 pounds per square inch (psi). - Page 9 Installation INSTALL SINGLE BYPASS VALVE (cont.) ASSEMBLE INLET AND OUTLET PLUMBING Before installing the bypass valve and/or installation Measure, cut (thread if needed) and put together all adaptors, make sure that the turbine and support are pipe and fittings up to the main water pipe. Make sure firmly in place inside the softener valve’s outlet port.
- Page 10 Installation CONNECT THE VALVE DRAIN HOSE COPPER DRAIN TUBE: Local plumbing codes may require the use a copper valve drain tube. A copper Take a length of 3/8” inside diameter drain tubing tube is also best to use if running a drain line overhead. (supplied) and attach one end to the drain fitting (see To adapt a copper drain tube to the softener, purchase Fig.
- Page 11 Installation LEAK TEST SINGLE BYPASS VALVE To check for leaks, complete the following steps: CAUTION: To avoid water or air pressure damage to soft ener inner parts, and to flush pipe chips Pull stem outward or other residue from the water pipes, be for Service sure to do the following steps exactly as instructed.
- Page 12 Installation METAL WATER PIPE GROUNDING METAL PIPE GROUNDING (parts not included) IMPORTANT: This water softener has a non-metallic valve system. Installing it on metal Ground Wire plumbing will break electrical continuity, which may interrupt grounding for the home. You must restore electrical conti- nuity in your metal plumbing system.
-
Page 13: Programming The Softener
Programming the Softener SET SALT LEVEL button Display UP button SELECT button TANK LIGHT SALT SALT LEVEL ALARM button Salt Level Select press for tonight Salt hold for immediate Figure 15 REGENERATION button LOW SALT indicator DOWN button PROGRAM THE SOFTENER SET WATER HARDNESS NUMBER When the power supply is plugged into the electrical out- If you completed the previous step, the word “HARD -... - Page 14 Programming the Softener SET RECHARGE (REGENERATION) START TIME If you completed the previous step, the words “RE - CHARGE TIME" should show in the display. Otherwise, press the SELECT button several times until they do. Figure 19 1. The softener’s default recharge start time is 2:00 AM. This is normally a time of day when water is not being used in the household.
-
Page 15: Sanitizing The Water Softener
50 gallons of water to pass through the system. This should take at least 20 minutes. Close the faucet. 1. Open salt lid, remove the brinewell cover and pour Your new Kenmore softener is now softening the water about 3 oz. (6 tablespoons) of household bleach into ®... -
Page 16: Controller Features
Controller Features EXTRA RECHARGE SALT MONITOR SYSTEM Sometimes, a manually initiated recharge (regeneration) The water softener has a salt monitor indicator light to may be desired, or needed. Two examples are: remind you to add salt to the storage tank. You have used more water than usual (guests visiting) NOTE: You must set salt level each time salt is added to the water softener. - Page 17 DOWN button to short- California Efficiency Requirement en the time. If no change is desired, continue to next Your Kenmore Water Softener has a “High step. ® Efficiency” feature that can be set ON or OFF.
- Page 18 Controller Features 4. Press SELECT again to display the “Recharge Days” 6. Press SELECT again to display the “12 or 24 hr” screen. screen. Figure 30 Default Display Example: Set to 4 days maxi mum between regenerations 12 OR 24 HOUR CLOCK: All time displays are shown in standard clock time (1 to 12 AM;...
- Page 19 WATER FLOW THROUGH THE SOFTENER KENMORE’S ULTRA CLEANSING FEATURE If soft water is in use, the water flow bars continually scroll across the display. The bars scroll slowly when...
-
Page 20: Care Of Your Water Softener
Care of Your Water Softener SALT BRIDGE Push tool into Sometimes, a hard crust or salt “bridge” forms in the salt bridge brine tank. It is usually caused by high humidity or the to break wrong kind of salt. When the salt “bridges,” an empty space forms between the water and the salt. -
Page 21: Service Information
Service Information TROUBLESHOOTING If your water softener does not work properly, make the following easy checks. Often, you will find what is wrong yourself and you won’t have to call and wait for service. If you do not find anything wrong while making the checks, and your softener still does not work properly, call 1-800-695-2761. - Page 22 Service Information MANUALLY INITIATED ELECTRONIC DIAGNOSTICS 1. To enter diagnostics, press the SELECT button and hold for three seconds. The display will change to Motor show turbine count, valve cycle position, and position Position switch status (open or closed). Switch Turbine Count Valve Position Turbine Count...
- Page 23 Service Information MANUAL ADVANCE REGENERATION CHECK This check verifies proper operation of the valve motor, brine tank fill, brine draw, regeneration flow rates, and Position Markers other controller functions. Always make the initial (valve in service) checks first, and perform the manually initiated elec- tronic diagnostics.
-
Page 24: Exploded View & Parts List
Water Softener Exploded View Water Softener Exploded View Kenmore Model No. 625.383500 Valve Assembly See Pages 26 & 27 for parts Rating Decal Location Questions? Visit www.kenmorewatersolutions.com or call 1-800-695-2761. - Page 25 Softener Parts List Part No. Description Part No. Description 7351054 Power Supply 24V DC 7327584 Repl. Bottom Distributor 7325168 Top Cover 0502272 Resin 7325223 Salt Lid (order decal below) 7113058 Repl. Resin Tank, 8” x 40” 7388865 Instruction Decal Distributor O-Ring Kit –...
- Page 26 Valve Assembly Exploded View Wear Strip Seal Cross-Section View Questions? Visit www.kenmorewatersolutions.com or call 1-800-695-2761.
- Page 27 Valve Parts List Part No. Description Part No. Description Motor, Cam & Gear Kit, 3/4” Bypass Valve Assembly, 3/4”, in - – 7384683 7370286 (includes Key Nos. 50-52) cluding 2 O-Rings (See Key No. 72) Motor O-Ring, 15/16” x 1-3/16”, 7337571 pack of 4 Cam &...