Advertisement
Owner's Manual & Safety Instructions
Save This Manual
operating, inspection, maintenance and cleaning procedures. Write the product's serial number in the
back of the manual near the assembly diagram (or month and year of purchase if product has no number).
Keep this manual and the receipt in a safe and dry place for future reference.
Do not return
pump to the store.
Call 1-844-416-9141
When unpacking, make sure that the product is intact
and undamaged. If any parts are missing or broken,
please call 1-888-866-5797 as soon as possible.
©
Copyright
2020 by Harbor Freight Tools
No portion of this manual or any artwork contained herein may be reproduced in
any shape or form without the express written consent of Harbor Freight Tools.
Diagrams within this manual may not be drawn proportionally. Due to continuing
improvements, actual product may differ slightly from the product described herein.
Tools required for assembly and service may not be included.
Keep this manual for the safety warnings and precautions, assembly,
Visit our website at: http://www.harborfreight.com
Email our technical support at: productsupport@harborfreight.com
®
. All rights reserved.
Read this material before using this product.
Failure to do so can result in serious injury.
SAVE THIS MANUAL.
21c
Advertisement
Table of Contents

Related Manuals for Harbor Freight Tools DRUMMOND 63320


Summary of Contents for Harbor Freight Tools DRUMMOND 63320
- Page 1 No portion of this manual or any artwork contained herein may be reproduced in Failure to do so can result in serious injury. any shape or form without the express written consent of Harbor Freight Tools. Diagrams within this manual may not be drawn proportionally. Due to continuing SAVE THIS MANUAL.
-
Page 2: Fluid Type
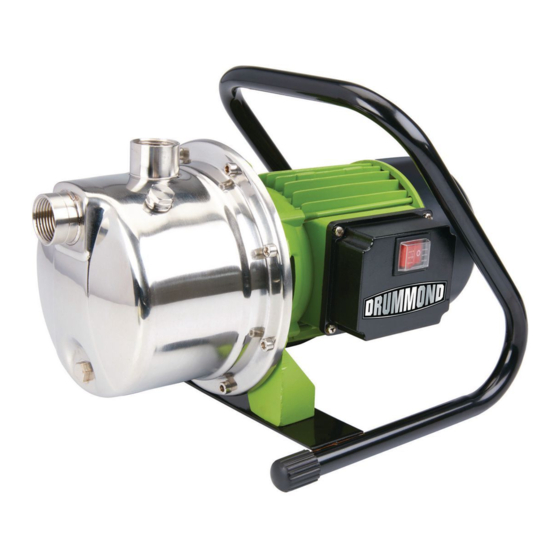
Before start-up, note the following: The Pump must be connected to a GFCI-protected plug which has been installed according CAUTION This Pump has been evaluated for use with water only. WARNING IMPORTANT! For your own safety – 7. The Pump must be protected from running dry. before starting to run the Pump, please have 8. - Page 3 Specifications Electrical Rating Power Cord Length Maximum Flow @ 0' 1075 GPH Maximum Head Lift @ 0 Flow 160' Inlet Port 1" NPT Thread Discharge Port 1" NPT Thread Item 63320 For technical questions, please call 1-888-866-5797. Page 3...
-
Page 4: Power Supply
Installation The Pump must be installed in a stationary position with either: a. A fixed pipeline or b. A flexible hose pipe. Please note! 1. Do not install the Pump by suspending it 2. If the source water level sinks too low, unit will unsupported from its delivery pipe or power cord. -
Page 5: Installation Instructions
Installation Instructions 1. Position Pump on solid surface. WARNING! TO PREVENT SERIOUS INJURY: This is NOT a submersible pump. Do not immerse in water. Bucket 2. The Pump uses 1" NPT piping (sold separately). full of Purchase the necessary length of pipe, including clean any needed fittings and bends. - Page 6 Operation After reading these instructions, consider the following points before starting the Pump: 1. Verify that the discharge pipe is properly connected. NOTICE: Do not run the Pump Dry! Turn off the Pump IMMEDIATELY if water 2. Verify that the electrical connection stops coming out of the Outlet.
-
Page 7: Quarterly Maintenance
Maintenance TO PREVENT SERIOUS INJURY FROM ACCIDENTAL OPERATION: Unplug the Pump from its electrical outlet before performing any inspection, maintenance, or cleaning procedures. 1. BEFORE EACH USE, inspect the 2. AFTER USE, wipe the Pump clean with a soft, general condition of the Pump. Check for: damp cloth with soapy water. -
Page 8: Troubleshooting
Troubleshooting Problem Possible Causes Possible Solutions Pump runs, but 1. Inlet pipe not submerged. 1. Make sure bottom of inlet pipe is will not deliver underneath surface of water source. any water. 2. Low line voltage. 2. Consult an electrician. 3. - Page 9 PLEASE READ THE FOLLOWING CAREFULLY IN THIS MANUAL AS A REFERENCE TOOL ONLY. NEITHER THE MANUFACTURER OR DISTRIBUTOR MAKES ANY REPRESENTATION OR WARRANTY OF ANY KIND TO THE BUYER THAT HE OR SHE IS QUALIFIED TO MAKE ANY REPAIRS TO THE PRODUCT, OR THAT HE OR SHE IS QUALIFIED TO REPLACE STATES THAT ALL REPAIRS AND PARTS REPLACEMENTS SHOULD BE UNDERTAKEN BY CERTIFIED AND LICENSED TECHNICIANS, AND NOT BY THE BUYER.
-
Page 10: Parts List
Parts List and Diagram Parts List Part Description Qty. Part Description Qty. Bolt Bolt Drain Plug Pump Body O-Ring Guide Disk O-Ring Impeller Venturi Tube Mechanical Seal End Cap O-Ring Screw Pump Support Cover Seal Water Proof Ring Terminal Box Pump Support Capacitor Handle... -
Page 11: Assembly Diagram
Assembly Diagram Item 63320 For technical questions, please call 1-888-866-5797. Page 11... - Page 12 Limited 90 Day Warranty Harbor Freight Tools Co. makes every effort to assure that its products meet high quality and durability standards, and warrants to the original purchaser that this product is free from defects in materials and workmanship for the period of 90 days from the date of purchase.