Table of Contents
Advertisement
Quick Links
Advertisement
Table of Contents

Related Manuals for Plustek MobileOffice S410 Plus


Summary of Contents for Plustek MobileOffice S410 Plus
- Page 1 Scanner User’s Guide MobileOffice S410 Plus...
- Page 2 Trademarks © 2021 Plustek Inc. All rights are reserved. No portion of this document may be reproduced without permission. Plustek is a registered trademark of Plustek Inc. OCR processing by ABBYY® FineReader®, © 2021 ABBYY. ABBYY and FineReader are trademarks of ABBYY Software, Ltd.
-
Page 3: Table Of Contents
Table of Contents ....................1 NTRODUCTION How to Use This Guide....................1 Conventions of This Guide ..................1 A Note about Icons ....................... 2 Safety Precautions...................... 2 System Requirements ....................3 Box Contents ......................3 Scanner Overview ...................... 4 I. I ..............5 HAPTER NSTALLING THE... -
Page 4: Introduction
Introduction Thank you for choosing us as your scanner supplier. Your new scanner will improve the professionalism of your day-to-day computing tasks by allowing you to input images and electronic text into your computer system. You can easily scan single-sided documents with your scanner. Like all of our products, your new scanner is thoroughly tested and backed by our reputation for unsurpassed dependability and customer satisfaction. -
Page 5: A Note About Icons
This guide uses the following icons to point out information that deserves special attention. A procedure that must be followed carefully to prevent injury, or accidents. Warning Instructions that are important to remember and may prevent mistakes. Attention Optional tips for your reference. Information Safety Precautions Before using this device, please read the following important information to... -
Page 6: System Requirements
System Requirements 2.0 GHz CPU with dual-core processor minimum (Recommended: 2.8 GHz Intel® Core™ i5 Processor with 4 CPU Cores or better) 4 GB RAM minimum (Recommended: 8 GB or more) 2 GB of hard-disk space for program installation Display dimensions of 1024x768 or greater Operating System: Windows 7 / 8 / 10 Box Contents 1. -
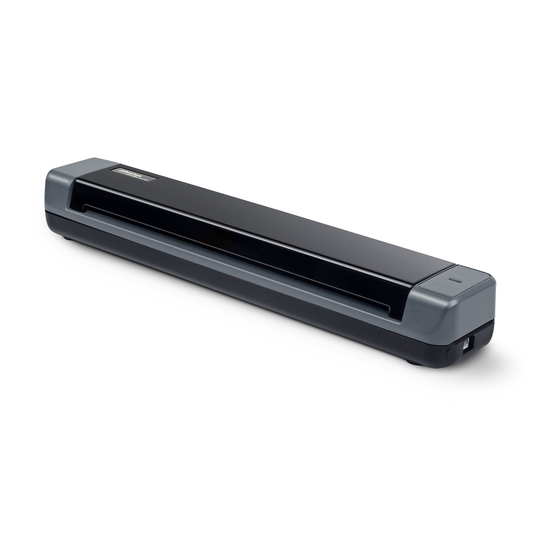
Page 7: Scanner Overview
Scanner Overview 1. Page feed slot: Feed the document into the scanner from this direction. You can feel the document being grabbed by the scanner. 2. LED indicator: It indicates the scanner’s current status. Light Status The scanner is connected with the computer, ready to scan images. -
Page 8: Chapter I. Installing The Scanner
Chapter I. Installing the Scanner Before installing your scanner, please verify that you have all of the proper components. A list of the package contents is provided in the Box Contents section of this guide. Software Installation Requirements Your scanner comes with OCR software (ABBYY FineReader Sprint), the scanner’s driver and DocAction. -
Page 9: Installing And Setting Up The Scanner
Installing and Setting up the Scanner Please follow the step-by-step procedures described below to install the Plustek scanner. 1. Plug the square end of the included USB cable to the USB port of the scanner. 2. Plug the rectangular end of the USB cable to the USB port on the back of your computer. - Page 10 Hardware Wizard” message will be displayed when you turn the computer on and when Windows starts. 2. For Windows 7: When the Setup/Application DVD is for several scanner models a. Insert the Setup/Application DVD-ROM, included with your scanner, into your DVD-ROM drive.
- Page 11 5. After the software is installed, you will be prompted to perform the scanner calibration. 6. Insert the special calibration sheet, included with the scanner, face up into the page feed of the scanner. 7. Follow the on-screen instructions to complete the scanner calibration. 8.
-
Page 12: Step 3. Testing The Scanner
The following test procedure checks to see if the scanner is properly functioning with your computer and the scanning software. Before testing your scanner, double check to make sure that all connections are securely fastened. To properly test your scanner, please perform the following steps: 1. -
Page 13: Installing Additional Software
4. You’ll see a scanned image of the document in the default saving folder; your scanner is working properly. Installing Additional Software Your scanner is TWAIN compliant and functions with virtually all available TWAIN compatible software. If you purchase additional software to be used with your scanner, please make sure that it conforms to the TWAIN standard. -
Page 14: Chapter Ii. Scanning
Chapter II. Scanning Your scanner needs to be driven by certain type of software program. Since all documents or images (whether text or pictures) that are acquired from the scanner are treated by your computer as images, most scanning will probably be done from an image-editing program where you can view, edit, save and output the scanned images. -
Page 15: Document Scanning
2. The scanning starts immediately. Business card scanning Make sure the business card you wish to scan is horizontally loaded into the scanner. Attention To scan the business card, please follow the steps: 1. Insert one business card face up into the scanner. 2. -
Page 16: Scanning Methods
Scanning Methods The TWAIN interface and DocAction software are automatically installed to your system along with the scanner driver. Before you start scanning, check the following: The power of both your computer and scanner is turned on. 2. The icon appears on the Windows Attention system tray. -
Page 17: Scanning From Docaction
3. In the TWAIN window that opens, select Sheet Feeder as the Scan Type. 4. Adjust the scanning settings. 5. Insert the document face up into the scanner. Please allow the sensor to detect the edges of your document. The scanning starts immediately. 6. - Page 18 to configure or view the settings of DocAction: Double-click the icon in the Windows system tray. Right-click the DocAction icon in the Windows system tray, and then choose Button Configuration… in the pop-up menu that opens. 2. Select the desired function from the drop-down list of Button Template and adjust settings.
- Page 19 4. The scanner starts to scan immediately and carry out the corresponding action according to the settings you have set up in the Button Configuration window. Click the Help button within the Button Configuration window for more information about the settings.
-
Page 20: Chapter Iii. Clean And Maintenance
Chapter III. Clean and Maintenance Your scanner is designed to be maintenance-free. However, constant care and maintenance can keep your scanner working smoothly. Clean the Scanner Paper powder, dust, ink and toner from paper being scanned may make the inner scanner dirty, which leads to poor image quality or document-feeding errors. -
Page 21: Clean Feed Roller And Glass
1. Open the scanner cover gently. 2. Wipe the Feed Roller from side to side and then roll it. 3. Clean the glass side to side. Repeat this until its entire surface is cleaned. Do not spray cleaner directly onto the scanner glass. -
Page 22: Power Save
the screen to scroll right until you find Your scanner model name, and then click on Calibration Wizard.) 2. Insert the special calibration sheet face up into the page feed slot of the scanner. Please insert the special calibration sheet included with the scanner. - Page 23 These documents can cause paper jams and possibly damage the unit.
-
Page 24: Chapter Iv. Troubleshooting
Chapter IV. Troubleshooting If you encounter problems with your scanner, please review the installation and scanning instructions contained in this guide. Before you ask for customer service or repair, please refer to the information in this chapter and consult our FAQ (Frequently Asked Questions) in which you can find useful self troubleshooting information. -
Page 25: Appendix A: Specifications
Appendix A: Specifications Plustek MobileOffice S410 Plus Image Sensor Light Source Optical Resolution 600 dpi Hardware Resolution 600 x 600 dpi Color: 48-bit Input; 24-bit Output Scan Modes Grayscale: 16-bit Input; 8-bit Output B/W: 1-bit Scanning Speed 9 sec (Color Mode, 300 dpi, A4) Maximum: 210 x 356 mm (8.5"... -
Page 26: Appendix B: Customer Service And Warranty
Appendix B: Customer Service and Warranty Please visit our website www.plustek.com for more customer service information. To avoid delays, please have the following information available: Scanner name and model number Scanner serial number (Located at the bottom of the scanner) -
Page 27: Statement Of Limited Warranty
Statement of Limited Warranty This Statement of Limited Warranty applies only to the options you originally purchase for your use, and not for resale, from an authorized reseller. The manufacturer warranty includes all parts and labor, and is not valid without the receipt of original purchase. -
Page 28: Fcc Radio Frequency Statement
consequential damages, so the above limitation or exclusion may not apply to you. This Limited Warranty gives you specific legal rights, and you may also have other rights that vary from jurisdiction to jurisdiction. FCC Radio Frequency Statement This equipment has been tested and found to comply with the limits for a Class B digital device, pursuant to part 15 of the FCC rules.