
Related Manuals for Stanley AC6359


Summary of Contents for Stanley AC6359
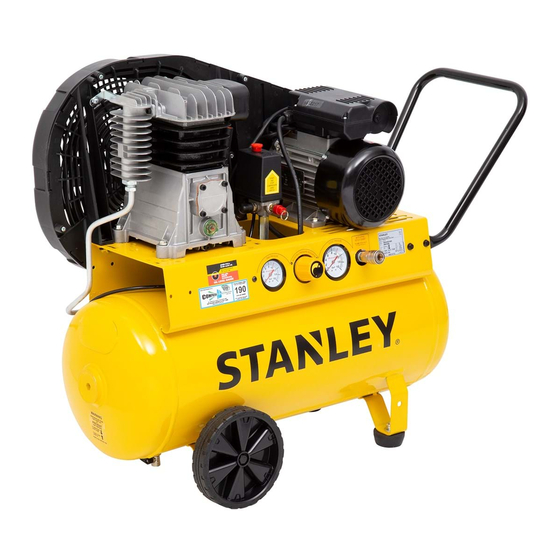
- Page 1 MODEL NO. AC6359 2.5HP 50LT Belt Drive Compressor For service, spare parts or product information, please contact Smart Marketing Group Pty. Ltd. AUST. 1300 660 457 N.Z. 0800 474 876 02701 01/11...
- Page 2 CONTENTS SUGGESTED APPLICATIONS You may use most light duty air tools with this compressor. Some Section Page examples of light duty tools are: CLEANING Contents TOOLS Warranty FASTENING Components and Controls PAINTING Maintenance Parts Diagram...
- Page 3 INTRODUCTION What is not covered. Dear Customer, Thank you for purchasing this compressor which has passed through incorrect voltage and wattage. to ensure that it reaches you in perfect condition. However, in the any assistance please do not hesitate to contact us; If you have a problem, call customer service do not return this compressor to the place of purchase.
- Page 4 COMPLETE WARRANTY STATEMENT – COMPRESSOR GROUP Damage caused to attached equipment or third party accessories that you check to make sure it is intact and that you read the operating compressor is not covered under the warranty. Loss of income is not covered under the warranty.
- Page 5 LUBRICATION OF COMPRESSOR WORK AREA the oil level to ensure the level is to the top of the red dot on the sight glass; refer to page 10 for complete details and diagram. Failure to the user. when using tools designed for sanding or spraying liquids. ASSEMBLY WORK ENVIRONMENT Do not expose your air compressor to rain or use in damp or wet...
- Page 6 DO NOT ABUSE THE POWER CORD REMOVE ADJUSTING KEYS AND WRENCHES cord. Keep the power cord away from heat, oil, solvents and sharp AVOID UNINTENTIONAL STARTING EXTENSION CORDS AND REELS air compressor into the mains supply. socket. PROTECT FURNISHINGS The use of extension cords may cause power voltage loss and will warranty.
- Page 7 CHECK DAMAGED PARTS PERSONAL SAFETY Clothing determine that it will operate properly and perform its intended function. in moving machinery. Check for the correct alignment of moving parts ensuring that they do Hair or repaired at an authorised service facility. Check any other condition Eye Protection indicated in this instruction manual.
- Page 8 ELECTRICAL DATA IMPORTANT SPECIFIC SAFETY INSTRUCTIONS Warning! Do not use the air compressor in areas where there is a risk changes and when changing attachments such as air hoses / tools. and its use. out. • Do not attempt to modify the air compressor, guards or the supplied accessories in any way.
- Page 9 PIC. 1 COMPONENTS AND CONTROLS Pic. 1 Handle Belt guard Pump Sight glass 10. Motor/Pump Deck 11. Tank 12. Wheel 18. Motor cover 19. Motor 20. Safety valve...
- Page 10 OPERATING INSTRUCTIONS PIC. 2 Unpacking Assembly initial use. Oil breather pressure switch, this is also the oil fill. Lubrication Warning: To check the oil level: PIC. 3 level ground. To add oil, if required, additional oil not included: and settle. to the top of the red dot on the sight glass...
- Page 11 RUBBER STOPPER PIC. 5 the tank; 1. Undo and remove the nut and star washer. 3. Tighten the nut, Pic. 5. WHEELS PIC. 6 1. Undo and remove the nut and star washer. 3. Tighten the nut, Pic. 6. HANDLE PIC.
- Page 12 AIR FILTER PIC. 8 To replace filter: 1. Carefully unscrew the screws inside the air filter. air filter . Do not over tighten the screws. NOTE: STARTING AND STOPPING PIC. 9 YOUR AIR COMPRESSOR Pic. 9 down for off down for on can lead to a voltage drop which may cause power loss and over heating.
- Page 13 RUNNING IN YOUR NEW USING THE AIR COMPRESSOR AIR COMPRESSOR Before starting, run through this simple list: Before running in ensure that the following has been completed: 1. Oil level is correct, see page 10. Your new air compressor requires running in: an authorised service centre.
- Page 14 PIC. 10 Pic.10 When you have finished using your air compressor follow these simple steps: 1. Turn your air compressor OFF, using the 2. Turn the power point OFF and disconnect the power lead. 3. Disconnect your air tools and air hose. 5.
- Page 15 ADJUSTING THE PRESSURE PIC. 11 Pressure switch Use the gauge to ensure you set the correct working pressure. regulate the air pressure to match your air tool. Different air tools manufacturer if unsure. Tank Outlet pressure pressure gauge outlet socket gauge SAFETY VALVE PIC.
- Page 16 DRAIN TAP PIC. 14 Pic. 14 Drain Tap Sealed excess air will also help purge the moisture. Leave the drain tap open when air compressor is not in use, so any moisture can continue to drain To open the drain tap pull the lever down to vertical. To seal the drain tap push the lever up to horizontal.
- Page 17 BELT STRAIGHTNESS PIC. 16 Pic. 16 2. Slide the pump to the appropriate position. PUMP BOLTS BELT REPLACEMENT PIC. 17 Loosen and remove these Pic. 17 screws. reached 250 hours of use. if required, see page 16. unclasp these 8 clips into place.
- Page 18 MAINTENANCE PIC. 18 Daily Before use oil into funnel. After use tighten oil drain 2. Wipe down the air compressor. 3. Store safely and securely. Every 50 Hours 2. Drain oil completely and replace with fresh oil To drain: c. Wipe up any oil spills. d.
- Page 19 PARTS DIAGRAM Image may not match exactly. For reference only. Part Description Part Description Cylinder Head Drain Tap Tank Handle Tank Pressure Gauge Oil Breather Wheel Oil Level Sight Glass 68,70 Belt Belt Guard Output Pressure Gauge Tank Bung Cast outlet tree Pressure Switch...
- Page 20 TECHNICAL INFORMATION Specifications Motor Wattage 2200W 190 L per minute* Tank Size 50 L For any queries or assistance call Customer Service AUST. 1300 660 457 NZ 0800 474 876 Hours of operation: Do not return to place of purchase.