
Related Manuals for Nedap ANPR LUMO


Summary of Contents for Nedap ANPR LUMO
- Page 1 ANPR LUMO installation guide 2021-01-05 | v1.12 | Doc. no. 5286778 www.nedapidentification.com...
- Page 2 Copyright © Nedap N.V. All rights reserved. The information in this document is subject to change without notice, it is not to be reproduced in any way, in whole or in part, without the written consent of Nedap N.V. All trademarks...
-
Page 3: Table Of Contents
Contents Introduction ..................................5 Typical applications ..............................5 Key features ................................5 Getting started ..................................6 Mounting the ANPR LUMO ............................6 Connecting the ANPR ............................... 6 Assigning an IP-address ............................6 Testing the ANPR ..............................6 Installation ..................................7 Safety precautions .............................. - Page 4 ANPR LUMO | installation guide 6.3.1 Wiegand matchlist ............................. 19 Configuration menus ................................ 20 CAMERA .................................. 20 ANPR ..................................22 ACTIONS ................................. 29 7.3.1 DIGITAL OUT ..............................29 7.3.2 FTP UPLOAD ..............................30 7.3.3 FTP DATABASE ..............................30 7.3.4 STORE ................................30 7.3.5...
-
Page 5: Introduction
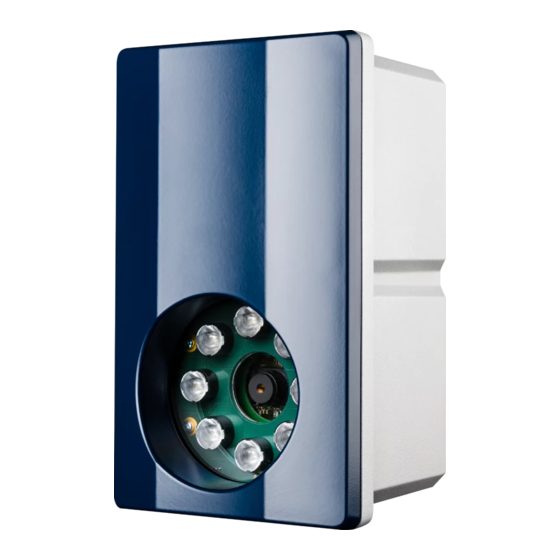
ANPR LUMO | installation guide Introduction The NEDAP ANPR LUMO License Plate Reader offers automatic number plate reading. The NEDAP ANPR LUMO is an all in one camera including camera, analyzer and IR illuminator. The ANPR has embedded processing software onboard. -
Page 6: Getting Started
2 Getting started 2.1 Mounting the ANPR LUMO Determine how to mount the ANPR. The ANPR LUMO can be installed onto a pole or behind the barrier. Mount behind the barrier to ensure recognition right in front of the barrier. -
Page 7: Installation
• The ANPR shall only be installed and serviced by qualified and trained personnel. • To be sure of safety, do not modify or add anything other than mentioned in this manual or indicated by NEDAP • N.V. CAUTION: for continued protection against risk of fire, replace fuses only with the same type and rating. -
Page 8: Behind Barrier Mounting
If there is space behind the barrier and the sight is not blocked, then the best place for the ANPR is at bumper height (0.5m height) about 2 to 3 meters behind the barrier. A vehicle just in front of the barrier is still recognized in that case. Figure 2: Behind the barrier mounting (ANPR LUMO) 3.3 Dimensions 76.5... - Page 9 ANPR LUMO | installation guide 60° max 60° max Figure 4: Mounting bracket dimensions 9/39...
-
Page 10: Connections
The Ethernet cable is already fitted to the ANPR provided an RJ-45 connector. This Cat5e cable will be adequate for connection of the unit to a local area network. The ANPR LUMO can also be powered through Power Over Ethernet (POE). -
Page 11: Osdp
5.4 Plate reading messages Ensure that you enable a SERIAL-OSDP action upon a READ-event. See page 32. The ANPR LUMO will send an OSDP_RAW message including the message data. The data report will be sent in response to a poll command (OSDP_POLL). -
Page 12: Digital Inputs
The ANPR LUMO supports the OSDP v2 including the secure channel protocol. The OSDP control panel (CP) can request the device capabilities using the OSDP_CAP command. The ANPR LUMO will respond with the OSDP_PDCAP device capabilities report. Below an overview of the ANPR device capabilities. -
Page 13: Configuration
Factory default username and password are: Username: admin secret Password: If the login was successful, the user is now able to access the main menu screen. Note: This document will describe all function available in ANPR LUMO version 4.3.2 13/39... -
Page 14: Menu Items
ANPR LUMO | installation guide 6.2 Menu Items 6.2.1 Home The Home screen has 3 items, the live view, the Live text results and the camera information. At the camera info box, you can check which version of the software is currently installed in the camera. -
Page 15: Text Results
ANPR LUMO | installation guide 6.2.2 Text results There are three different events that the results are listed for: Accepted Results, Wrong Direction Results and NoRead Log. At the ACCEPTED RESULTS tab you can see all past results, the text results can be exported to a CSV file or excel file. -
Page 16: Access List
6.3 Access list The ANPR LUMO has three “Access” lists, and one Wiegand Matchlist. The “access” lists can be used to trigger an action like activating a relay. These actions can be defined in the menu “configuration” -> “Actions” see chapter 7.3. - Page 17 ANPR LUMO | installation guide When you want to upload a file through the “IMPORT” button, follow these directives: Open any text editor to create a file and save it any_name.txt. Only textual documents can be imported. Enter the information according to the formatting rules and save the file. On the ACCESS configuration page click on ,Import’...
- Page 18 Regular Expressions Regular expressions are used to conveniently define patterns for license plates or groups of license plate strings. The ANPR LUMO uses a powerful set of regular expressions, of which the most important details are described in the following paragraphs.
-
Page 19: Wiegand Matchlist
Match all license plates that start with a letter and end with a digit: [A-Z]+.*[0-9]+ Match all license plates from the Nedap company, assuming that their license plates consist of a NEDAP string and a following 3 number digit (like NEDAP001): NEDAP[0-9]{3} When making a list using regular expressions, the string should always start with "!"... -
Page 20: Configuration Menus
ANPR LUMO | installation guide 7 Configuration menus 7.1 CAMERA After installation camera configuration should take place. The essential segment of ANPR is image acquisition. Quality of images depends on the camera and illumination preferences. The area within the green polygon is the brightness control region of interest (ROI). It defines the image area within which the camera measures and corrects the image brightness. - Page 21 ANPR LUMO | installation guide Shutter speed should be changed according to vehicle speed. If the vehicle is approaching in high speed, the exposure time should be reduced. When minimum shutter is set too high (in relation to the vehicle speed) it may cause lower reading performance because images can turn out blurry.
-
Page 22: Anpr
ANPR LUMO | installation guide DRAW STATE: If display state is enabled state name with the percentage of reading confidence will be overlaid onto processed images DRAW CHARACTER CONFIDENCE: Enabling Visualize character confidence, confidence of recognition for each character will be overlaid above the vehicles number plates JPEG COMPRESSION LEVEL:* JPEG compression reduces the size of images. - Page 23 ANPR LUMO | installation guide to a new image location. • Remove a polygon point by right clicking on it. Additionally, more than one region of interest can be defined by writing the number of desired regions in the Area Count field ANPR settings window.
- Page 24 ANPR LUMO | installation guide After choosing the mode from the drop-down menu, press the Apply button to activate the trigger mode and set the parameters as needed. Overview of trigger modes: Single_Line read as long as the trigger line is active...
- Page 25 ANPR LUMO | installation guide Setup: Define Start trigger line, Start trigger polarity. If Start trigger polarity high is enabled, the session will start when the input signal is transitioning from low to high. If Start trigger polarity high is disabled, the session will start when the input signal is transitioning from high to low.
- Page 26 ANPR LUMO | installation guide HTTP trigger type: Setup: no need for setups Start: when an HTTP GET Request gets to the endpoint: http://camera_ip/trigger/start Stop: when an HTTP GET Request gets to the endpoint: http://camera_ip/trigger/stop Setup: Trigger Timeout (ms) Trigger timeout (ms) - maximal waiting time in milliseconds for an ALPR reading after a trigger signal.
- Page 27 ANPR LUMO | installation guide Start_Stop ANPR detects plates when start input is received, and stops after receiving the stop input (used when the start and stop trigger is depending on 2 different inputs) Start_Time ANPR detects plates when start trigger is received, and will stop after the Trigger timeout value...
- Page 28 ANPR LUMO | installation guide than the Min Plate Confidence. The typical use of this parameter in conjunction with the Low Confidence Read action is to detect and store low quality (= low confidence) readings for further analysis or retraining.
-
Page 29: Actions
ANPR LUMO | installation guide 7.3 ACTIONS In the actions menu, you can define what actions the camera should perform on certain events. There are three types of events based on the OCR system: READ When ANPR recognizes a plate NOREAD When there are no plates recognized between given limitations set under ALPR Configuration-Trigger (i.e. -
Page 30: Ftp Upload
ANPR LUMO | installation guide 7.3.2 FTP UPLOAD FTP upload can save image files of detected plates to a remote FTP server. Set to “ON” for the action to be executed (as shown on the image). HOST Enter the Host ftp servers IP address or name, as ftp://... -
Page 31: Http Action
ANPR LUMO | installation guide 7.3.5 HTTP ACTION With the HTTP action you can send an HTTP message with a specific Request type like Post, Put etc . REQUEST TYPE The request type, PUT, POST, PATCH, DELETE The URL of the server where the message should be send to... -
Page 32: Serial
The composed message for the action using the message placeholders, see appendix A. The ANPR LUMO will send the message data in raw bit array format (OSDP_RAW). The data report will be sent in response to a poll command (OSDP_POLL). -
Page 33: Wiegand Matchlist
ANPR LUMO | installation guide 010101 011111 101001 110011 010110 100000 101010 010111 100001 101011 011000 100010 101100 « empty » 000000 011001 100011 101101 « other » 111111 Examples: License plate 'HK55EVB': 0 1 1 0 0 0 0 0 0 0 0 0 0 0 0 0 0 0 0 0 0 0 1 0 0 0 0 1 1 0 0 1 0 0 0 1 0 1 0 1 0 1 0 1 0 1 0 1 1 1 1 0 1 0 1 1 1 1 0 1 1 0 1 1 «empty»... -
Page 34: Installation Parameters
ANPR LUMO | installation guide 7.4 Installation parameters The camera has tilt, roll and voltage sensor. These sensors can be used to trigger an alarm. First you set up the working limits, these are the limitations in which the camera may work. -
Page 35: System Settings
ANPR LUMO | installation guide 8 SYSTEM SETTINGS In the SYSTEM SETTINGS menu you can change all system related settings like Network, Users, Classifiers and do system related actions like making backups. 8.1 NETWORK The NETWORK menu has two settings screens, one for the Network interface and one for the time synchronization 8.1.1... -
Page 36: Users
This option shuts the entire system down. The system remains shut down until a manual cold start of the camera is performed. DOWNLOAD LOGS All log files will be downloaded, this van later be used for analytics by the Nedap support team. SAVE CONFIGURATION Save a backup of all configuration settings. -
Page 37: Library Version
OSDP secure channel base key (OSDP-SCBK). The OSDP key must be exactly 16 bytes, e.g. 303132333435363738393a3b3c3d3e3f. * requires at least ANPR LUMO hardware revision A.05 and software v4.5.1. FACTORY RESET This option is used to reset the camera configuration back to factory settings. -
Page 38: A Message Placeholders
ANPR LUMO | installation guide A Message placeholders Placeholder Description "%LP%" License plate value (ABC123) "%LP_WS%" License plate value including white spaces. (ABC 123) "%LP_UL%" License plate value including underscores. (ABC_123) "%STATE%" License plate state. "%CONF%" Confidence value. "%CONF_STATE%" State confidence value. -
Page 39: B Disposal Of Equipment
ANPR LUMO | installation guide B Disposal of equipment The products will be disposed of by the end-user and discharge Nedap for any liability or responsibility thereof. The WEEE symbol in Europe indicates that the relevant electrical product or battery should not be disposed of as general household waste in Europe.