Sony HT-SS380 Operating Instructions Manual
Home theater systems: home theatre system
Hide thumbs
Also See for HT-SS380:
- Operating instructions manual (52 pages) ,
- Specifications (2 pages) ,
- Quick setup manual (2 pages)

Related Manuals for Sony HT-SS380


Summary of Contents for Sony HT-SS380
- Page 1 Home Theatre System HT-SS380 ©2011 Sony Corporation 4-264-479-11(1) Operating Instructions Manual de instrucciones...
-
Page 2: Important Safety Instructions
The model and serial numbers are located on the rear of the unit. Record these numbers in the space provided below. Refer to them whenever you call upon your Sony dealer regarding this product. Model No. Important Safety Instructions 1) Read these instructions. - Page 3 12)Use only with the cart, stand, tripod, bracket, or table specified by the manufacturer, or sold with the apparatus. When a cart is used, use caution when moving the cart/apparatus combination to avoid injury from tip-over. 13)Unplug this apparatus during lightning storms or when unused for long periods of time.
-
Page 4: About This Manual
HDMI Licensing LLC in the United States and other countries. “x.v.Color (x.v.Colour)” and “x.v.Color (x.v.Colour)” logo are trademarks of Sony Corporation. “BRAVIA” is a trademark of Sony Corporation. “PlayStation” is a registered trademark of Sony Computer Entertainment Inc. ® iPhone , iPod ®... -
Page 5: Table Of Contents
Table of Contents Supplied accessories ... 6 Supplied speakers... 6 Description and location of parts ... 7 Getting started ... 14 Connections 1: Installing the speakers... 15 2: Connecting the speakers ... 17 3: Connecting the TV... 18 4: Connecting the video equipment ... 19 5: Connecting the audio equipment ... -
Page 6: Supplied Accessories
Supplied accessories • Operating Instructions (this manual) • Quick Setup Guide • FM wire antenna (aerial) (1) • Remote control (RM-AAU120) (1) • R6 (size-AA) batteries (2) • Optimizer microphone (ECM-AC2) (1) • DOCK FOR iPod/iPhone (TDM-iP380) (1) Supplied speakers •... -
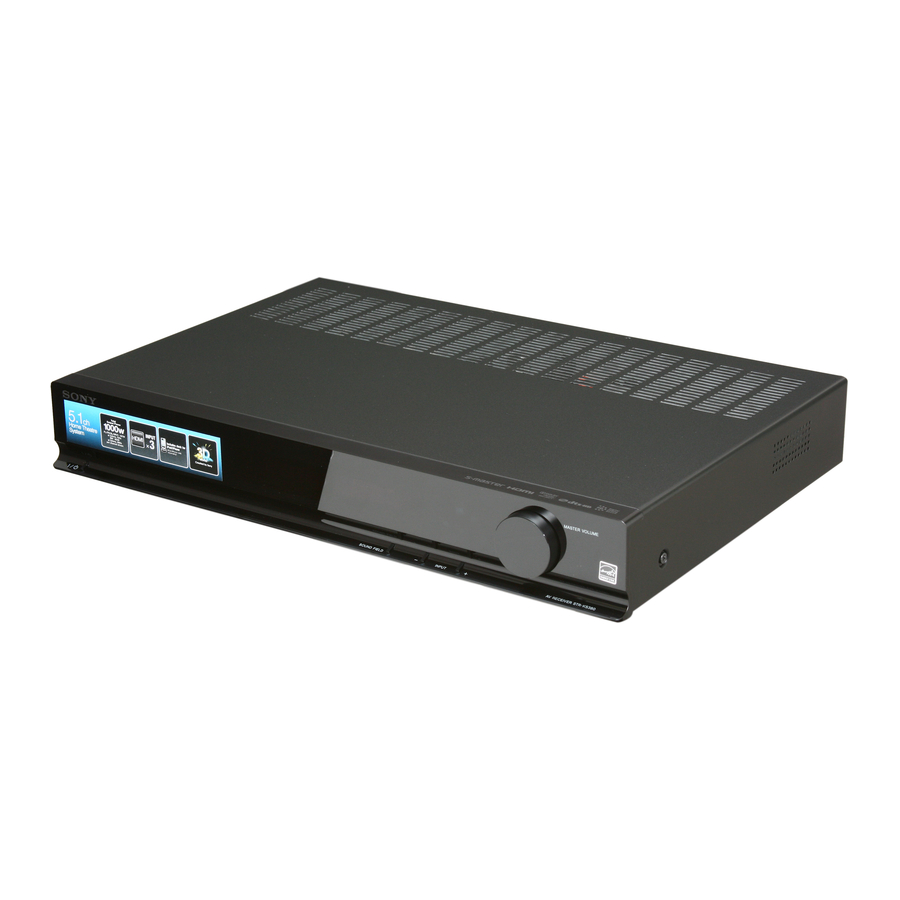
Page 7: Description And Location Of Parts
Description and location of parts Front panel A ?/1 (on/standby) (page 24, 28, 39) B Display panel (page 7) C White indicator Lights up when the receiver is turned on. Lights off when the DIMMER is set to DIM MAX (page 43) or the receiver is turned off. Indicators on the display panel LPCM NIGHT SLEEP HDMI COAX... - Page 8 Lights up to indicate the current input. HDMI – The INPUT MODE is set to “AUTO”, and when the receiver recognizes the equipment connected via an HDMI IN jack (page 19). – The TV INPUT detected Audio Return Channel (ARC) signals (page 37). COAX The VIDEO input is selected.
-
Page 9: Rear Panel
Rear panel SPEAKERS FRONT R FRONT L SUR R SUR L SUBWOOFER CENTER A SPEAKERS section (page 17) B Audio signal section DIGITAL INPUT/OUTPUT jacks (page 18, 21) OPT IN COAX IN HDMI IN/OUT ANALOG INPUT jack (page 22) AUDIO IN C AUTO CALIBRATION section (page 25) AUTO CAL MIC jack D ANTENNA section (page 23) -
Page 10: Remote Control
Remote control Use the supplied remote control to operate this receiver and other equipment. The remote control is assigned to operate Sony audio/ video equipment. You can reassign the input button to match the equipment connected to your receiver (page 38). -
Page 11: Amp Menu
The 5/TV, AUDIO, N and TV CH +/SOUND FIELD+ buttons have tactile dots. Use the tactile dots as references when operating the receiver. To control a Sony TV Hold down TV (P), then press the button printed in yellow to select the function you want. - Page 12 Displays the TV menus. N TV CH + /– Scans for the preset TV channels. Q TV VOL +/– Adjust the TV volume. R MUTING Activates the TV’s muting function. S RETURN/EXIT O Returns to the previous TV menu. T GUIDE Display the on-screen program guide.
- Page 13 To control other Sony equipment Be sure to hold down SHIFT (O) to activate the buttons printed in pink (page 10). Name A AV ?/1 C Numeric buttons ENTER CLEAR F DISPLAY G ANGLE H Color buttons V/v/B/b K TOOLS/OPTIONS...
-
Page 14: Getting Started
Getting started You can enjoy your audio/video equipment connected to the receiver by following the simple steps below. Installing and connecting the speakers (page 15, 17) Connecting the TV (page 18) Connecting the video equipment (page 19) Connecting the audio equipment (page 22) Setting the audio output settings on the connected equipment To output multi channel digital audio, check the digital audio output setting on the connected equipment. -
Page 15: Connections
Connections 1: Installing the speakers This receiver allows you to use a 5.1 channel speaker system. To fully enjoy theater-like multi channel surround sound, be sure to connect all the supplied speakers (two front speakers, a center speaker, and two surround speakers) and a subwoofer (5.1 channel). - Page 16 • Contact a screw shop or installer regarding the 210 mm wall material or screws to be used. (8 3/8 in) • Sony is not responsible for accident or damage caused by improper installation, insufficient wall strength or improper screw installation, natural calamity, etc.
-
Page 17: 2: Connecting The Speakers
2: Connecting the speakers Before connecting cords, be sure to disconnect the AC power cord (mains lead). The connector of the speaker cords is color- coded depending on the type of speaker. Connect the speaker cords to match the color of the SPEAKERS jacks of the receiver. -
Page 18: 3: Connecting The Tv
CAL MIC A Optical digital cord (not supplied) B HDMI cable (not supplied) Sony recommends that you use an HDMI- authorized cable or Sony HDMI cable. * To enjoy the TV broadcast in multi channel surround sound from the speakers connected to... -
Page 19: 4: Connecting The Video Equipment
Using HDMI connection High-Definition Multimedia Interface (HDMI) is an interface which transmits video and audio signals in digital format. By connecting Sony “BRAVIA” Sync- compatible equipment using HDMI cables, operations can be simplified. See ““BRAVIA” Sync Features” (page 34). HDMI features •... - Page 20 When connecting cords • Before connecting cords, be sure to disconnect the AC power cord (mains lead). • It is not necessary to connect all the cords. Connect according to the availability of jacks on the connected equipment. • Use a High Speed HDMI cable. If you use a Standard HDMI cable, 1080p, Deep Color (Deep Colour) or 3D images may not be displayed properly.
- Page 21 AUTO DIGITAL LINE IN CAL MIC A Coaxial digital cord (not supplied) B HDMI cable (not supplied) Sony recommends that you use an HDMI authorized cable or Sony HDMI cable. C Optical digital cord (not supplied) PlayStation 3 Audio/video Audio/video...
-
Page 22: 5: Connecting The Audio Equipment
5: Connecting the audio equipment Before connecting cords, be sure to disconnect the AC power cord (mains lead). Super Audio CD player, CD player Audio signals AUDIO IN OPT IN OPT IN COAX IN SAT/CATV VIDEO AUTO DIGITAL LINE IN CAL MIC DOCK FOR iPod/iPhone (supplied) -
Page 23: 6: Connecting The Antennas
6: Connecting the antennas Before connecting the antennas, be sure to disconnect the AC power cord (mains lead). FM wire antenna (aerial) (supplied) AUDIO IN OPT IN OPT IN COAX IN SAT/CATV VIDEO AUTO DIGITAL LINE IN ANTENNA CAL MIC Notes •... -
Page 24: Preparing The Receiver
Preparing the receiver Initializing the receiver Before using the receiver for the first time, initialize the receiver by performing the following procedure. This procedure can also be used to revert back to the factory default settings. Be sure to use the buttons on the receiver to perform this operation. - Page 25 1: Setting up the Auto Calibration AUDIO IN OPT IN OPT IN COAX IN SAT/CATV VIDEO SPEAKERS DC5V 1 A MAX HDMI FRONT R FRONT L SUR R SUR L SUBWOOFER CENTER AUTO DIGITAL LINE IN ANTENNA DMPORT GAME IN BD/DVD IN SAT/CATV IN TV OUT...
- Page 26 The table below provides measurement status shown on the display panel. Measurement for Speaker existance Speaker gain, distance, frequency response Subwoofer gain and distance To cancel Auto Calibration The Auto Calibration function will be canceled when you perform the following during the measurement process: –...
- Page 27 When error codes appear Check the problem of the error. Display and explanation * 32 None of the speakers were detected. Make sure that the optimizer microphone is connected properly and perform the Auto Calibration again. If the optimizer microphone is connected properly but the error code still appears, the optimizer microphone cable may be damaged.
-
Page 28: Basic Operations
Basic Operations Playback SAT/ BD/DVD GAME CATV VIDEO LINE IN TUNER DMPORT V/v/B/b MENU MASTER VOL +/– MUTING Turn on the connected equipment. Turn on the receiver. Press the input button which corresponds to the equipment you want. You can also use INPUT +/– on the receiver. -
Page 29: Viewing Information On The Display Panel
Viewing information on the display panel The display panel provides various information of the receiver status such as sound field. SAT/ BD/DVD GAME CATV VIDEO LINE IN TUNER DMPORT Select the input for which you want to check the information. Press AMP MENU, then press DISPLAY repeatedly. -
Page 30: Direct Tuning
Tuning to a station automatically (Automatic Tuning) Press TUNER. Press TUNING + or TUNING –. TUNING + scans from lower to higher frequency stations and TUNING – for scanning higher to lower. The receiver stops scanning whenever a frequency is received. In case of poor FM stereo reception If the FM stereo reception is poor and “ST”... -
Page 31: Presetting Radio Stations
Presetting radio stations You can store up to 30 FM stations as your favorite stations. SAT/ BD/DVD GAME CATV VIDEO LINE IN TUNER TUNER DMPORT V/v/B/b MENU > Press TUNER. Tune to the station that you want to preset using Automatic Tuning (page 30) or Direct Tuning (page 30). -
Page 32: Enjoying Surround Sound
Naming preset station Press TUNER. Tune to the preset station you want to create an index name for (page 31). Press AMP MENU. Press V/v repeatedly until “TUNER” appears, then press or b. Press V/v repeatedly until “NAME IN” appears, then press or b. -
Page 33: Music Mode
HD-D.C.S. (HD Digital Cinema Sound) This mode is Sony’s new innovative home theater technology using the latest acoustic and digital signal processing technologies. It is based on precise response measurement data of a mastering studio. -
Page 34: Bravia" Sync Features
Sony products such as TV, Blu-ray Disc/DVD Player, AV amplifier, etc. that supports the Control for HDMI function. By connecting Sony equipment that are compatible with the “BRAVIA” Sync via an HDMI cable (not supplied), operation is simplified as follows: •... -
Page 35: Preparing For The "Bravia" Sync
Preparing for the “BRAVIA” Sync The receiver is compatible with the “Control for HDMI-Easy Setting” function. • If your TV is compatible with the “Control for HDMI-Easy Setting” function, you can set the Control for HDMI function of the receiver and playback equipment automatically by setting the Control for HDMI function on your TV (page 35). -
Page 36: Playing Back Equipment With One-Touch Operation (One-Touch Play)
Playing back equipment with one-touch operation (One-Touch Play) By a simple operation (one-touch), equipment connected to the receiver with BRAVIA Sync function start automatically. You can enjoy the sound/images from the connected equipment. When you start playback a connected equipment, the receiver and TV operation are simplified as follow: Receiver and TV Turns on (if in standby mode) -
Page 37: Turning Off The Receiver With The Tv (System Power-Off)
Turning off the receiver with the TV (System Power-Off) When you turn the TV off, using the POWER button on the TV’s remote control, the receiver and the connected equipment turn off automatically. You can also use the receiver’s remote control to turn off the TV. -
Page 38: Enjoying Movies With The Optimum Sound Field (Theatre/Theater Mode Sync)
Enjoying movies with the optimum sound field (Theatre/Theater Mode Sync) Press THEATER or THEATRE on the remote control of the TV or the Blu-ray Disc player, while pointing the remote control toward the TV. The sound field switches to “HD-D.C.S.”. To return to the previous sound field, press THEATER or THEATRE again. -
Page 39: Using The Setting Menu
For details on the BD1 or BD3 setting, refer to the operating instructions supplied with the Blu-ray Disc player or Blu-ray Disc recorder. Sony DVD recorders are operated with a DVD1 or DVD3 setting. For details, refer to the operating instructions supplied with the DVD recorders. -
Page 40: Overview Of The Menus
Overview of the menus You can set the following items using the AMP MENU. The default settings are underlined. AMP MENU AUTO CAL A.CAL START LEVEL TEST TONE FL LEVEL FR LEVEL CNT LEVEL SL LEVEL SR LEVEL SW LEVEL D. - Page 41 LEVEL menu You can adjust the level of each speaker to suit your preference. To output a test tone from each speaker You can output a test tone from the speakers in sequence. • AUTO FL, AUTO CNT, AUTO FR, AUTO SR, AUTO SL, AUTO SW •...
-
Page 42: Dual Mono
TUNER menu You can set the FM station receiving mode and name the preset stations. x FM MODE • STEREO: This receiver will decode the signal as stereo signal when the radio station is broadcast in stereo. • MONO: This receiver will decode the signal as mono signal regardless of the broadcast signal. -
Page 43: System Menu
• AUTO: When the TV is turned on while the receiver is in the standby mode, the receiver outputs HDMI signals from the receiver’s HDMI TV OUT jack. Sony recommends this setting if you use a “BRAVIA” Sync compatible Sony TV. This setting saves power in the standby mode when compared with the “ON”... -
Page 44: Additional Information
Additional Information Precautions On safety Should any solid object or liquid fall into the cabinet, unplug the receiver and have it checked by qualified personnel before operating it any further. On power sources • Before operating the receiver, check that the operating voltage is identical with your local power supply. -
Page 45: Troubleshooting
Should any problem persist, consult your nearest Sony dealer. Note that if service personnel changes some parts during repair, these parts may be retained. Power The receiver is turned off automatically. - Page 46 There is no sound from a specific equipment. • Check that the equipment is connected correctly to the audio input jacks for that equipment. • Check that the cord(s) used for the connection is (are) fully inserted into the jacks on both the receiver and the equipment.
- Page 47 No sound is output from the receiver and TV speaker. • Check that the equipment is connected correctly to the HDMI jack for that equipment. • Make sure “CTRL HDMI” is set to “CTRL ON” in HDMI menu. • You cannot listen to the Super Audio CD by connecting HDMI.
- Page 48 Tuner The FM reception is poor. • Use a 75-ohm coaxial cable (not supplied) to connect the receiver to an outdoor FM antenna (aerial) as shown below. Outdoor FM antenna (aerial) Receiver ANTENNA Radio stations cannot be tuned in. • Check that the antennas are connected securely.
-
Page 49: Specifications
If there is a malfunction, a message appears on the display panel. You can check the condition of the system by the message. If any problem persists, consult your nearest Sony dealer. If an error message appears while you perform Auto Calibration, see “When error codes appear”... - Page 50 Dimensions (w/h/d) (Approx.) 430 mm × 65 mm × 306 mm (17 in × 2 5/8 in × 12 1/8 in) including projecting parts and controls Mass (Approx.) 3.0 kg (6 lb 10 oz) Speaker section • Front/Surround speaker (SS-TSB105) •...
-
Page 51: Index
Index Numerics 2 channel sound mode 32 5.1 channel 15 A.F.D. MODE 32 A/V SYNC 42 Audio Return Channel (ARC) 37 Auto Calibration 24 AUTO STBY 43 Blu-ray Disc player connecting 21 “BRAVIA” Sync preparing 35 Cable TV tuner connecting 21 CD player connecting 22 Clear... - Page 52 Anote estos números en el espacio proporcionado a continuación. Indíquelos cuando se ponga en contacto con el distribuidor Sony con relación a este producto. N.º de modelo N.º de serie Este símbolo tiene por objeto advertir al usuario de la presencia de “tensión peligrosa”...
- Page 53 9) No fuerce el dispositivo de seguridad de los enchufes polarizados o con conexión a tierra. Un enchufe polarizado presenta dos patas, una más ancha que la otra. Un enchufe con conexión a tierra presenta dos patas y un tercer contacto de conexión a tierra.
- Page 54 LLC en los Estados Unidos y en otros países. “x.v.Color (x.v.Colour)” y el logotipo de “x.v.Color (x.v.Colour)” son marcas comerciales de Sony Corporation. “BRAVIA” es una marca comercial de Sony Corporation. STR-KS380 “PlayStation” es una marca comercial registrada de Sony Computer Entertainment Inc.
- Page 55 Índice Accesorios suministrados... 6 Altavoces suministrados... 6 Descripción y localización de las piezas... 7 Procedimientos iniciales ... 15 Conexiones 1: Instalación de los altavoces... 16 2: Conexión de los altavoces... 18 3: Conexión del televisor ... 19 4: Conexión de un equipo de vídeo... 20 5: Conexión de un equipo de audio...
-
Page 56: Accesorios Suministrados
Accesorios suministrados • Manual de instrucciones (este manual) • Guía de instalación rápida • Antena monofilar de FM (1) • Mando a distancia (RM-AAU120) (1) • Pilas R6 (tamaño AA) (2) • Micrófono optimizador (ECM-AC2) (1) • DOCK FOR iPod/iPhone (TDM-iP380) (1) Altavoces suministrados •... -
Page 57: Panel Frontal
Descripción y localización de las piezas Panel frontal A ?/1 (encendido/en espera) (página 25, 29 y 41) B Visor (página 7) C Indicador blanco Se ilumina cuando el receptor está encendido. Se apaga cuando el DIMMER está ajustado en DIM MAX (página 46) o el receptor está apagado. - Page 58 Se ilumina para indicar la entrada activada. HDMI – El INPUT MODE está ajustado en “AUTO” y el receptor reconoce el equipo conectado a través de una toma HDMI IN (página 20). – La entrada TV INPUT detecta las señales de Canal de Retorno de Audio (ARC) (página 39).
-
Page 59: Panel Posterior
Panel posterior SPEAKERS FRONT R FRONT L SUR R SUR L SUBWOOFER CENTER A Sección SPEAKERS (altavoces) (página 18) B Sección de señal de audio Tomas DIGITAL INPUT/OUTPUT (entrada/salida digital) (páginas 19 y 22) OPT IN (entrada OPT) COAX IN (entrada COAX) HDMI IN/OUT (entrada/salida HDMI) Toma ANALOG INPUT (página 23) AUDIO IN (entrada audio) -
Page 60: Mando A Distancia
Con el mando a distancia suministrado podrá utilizar este receptor y otros equipos. El mando a distancia está asignado a la utilización de equipos de audio o vídeo de Sony. Con el botón de entrada puede modificar la asignación en función de los equipos que tenga conectados al receptor (página 40). - Page 61 D D.TUNING (sintonización D.) Accede al modo de sintonización directa (página 31). E MEMORY (memoria) Guarda una emisora cuando funciona el sintonizador. F DISPLAY (visor) Pulse AMP MENU (menú amplificación) y, a continuación, pulse DISPLAY (visor) para ver la información en el visor (página 30). I AMP MENU (menú...
- Page 62 Para controlar un televisor Sony Mantenga pulsado TV (P) y, a continuación, pulse el botón con la impresión amarilla para seleccionar la función que desee. Ejemplo: mantenga pulsado el botón TV (P), y, a continuación, pulse TV CH + (canal TV +) (N).
- Page 63 Para controlar otros equipos Sony Mantenga pulsado el botón SHIFT (mayúsculas) (O) para activar los botones con la impresión rosa (página 10). Nombre Lector de discos Blu-ray, DVD A AV ?/1 Alimentación C Botones numéricos Pista ENTER (introducir) Introducción CLEAR...
- Page 64 Si pulsa AV ?/1 (A) y ?/1 (B) al mismo tiempo, el receptor y el equipo conectado se apagarán (SYSTEM STANDBY). La función de AV ?/1 (A) cambia automáticamente cada vez que pulsa los botones de entrada (C). Los botones 5/TV, AUDIO, N y TV CH +/ SOUND FIELD+ (canal TV/campo de sonido +) cuentan con puntos táctiles.
-
Page 65: Procedimientos Iniciales
Procedimientos iniciales Siguiendo el procedimiento descrito a continuación podrá disfrutar de su equipo de audio o vídeo conectado al receptor. Instalación y conexión de los altavoces (página 16, 18) Conexión del televisor (página 19) Conexión de un equipo de vídeo (página 20) Conexión de un equipo de audio (página 23) Configuración de los ajustes de salida de audio en el equipo conectado Para emitir audio digital multicanal, verifique la configuración de salida de audio digital del... -
Page 66: 1: Instalación De Los Altavoces
Conexiones 1: Instalación de los altavoces Este receptor le permite utilizar un sistema de altavoces de 5.1 canales. Para disfrutar al máximo de un sonido envolvente multicanal similar al de las salas de cine, asegúrese de conectar todos los altavoces suministrados (dos altavoces frontales, un altavoz central y dos altavoces de sonido envolvente) y un altavoz de graves (5.1 canales). - Page 67 (8 3/8 pulg.) para informarse del material de la pared o los tornillos que debe utilizar. • Sony no se hace responsable de accidentes o daños provocados por instalaciones incorrectas, de la falta de resistencia de la pared, de una instalación inadecuada de los tornillos, desastres naturales, etc.
-
Page 68: 2: Conexión De Los Altavoces
2: Conexión de los altavoces Antes de conectar los cables, asegúrese de desconectar el cable de alimentación de CA. El conector de los cables de los altavoces tiene un código de color que depende del tipo de altavoz. Conecte los cables de altavoz procurando que coincidan con los colores de las tomas SPEAKERS (altavoces) del receptor. -
Page 69: 3: Conexión Del Televisor
A Cable digital óptico (no suministrado) B Cable HDMI (no suministrado) Sony recomienda utilizar un cable HDMI certificado o un cable HDMI de Sony. * Para disfrutar de un programa de televisión con sonido envolvente multicanal procedente de los altavoces conectados al receptor, puede realizar una de las siguientes conexiones: –... -
Page 70: 4: Conexión De Un Equipo De Vídeo
(HDMI) es una interfaz que transmite señales de audio y vídeo en formato digital. Mediante la conexión de equipos compatibles con la tecnología Sony “BRAVIA” Sync utilizando cables HDMI, pueden simplificarse las operaciones. Consulte “Funciones de “BRAVIA” Sync” (página 36). - Page 71 • Antes de poder disfrutar de PCM lineal multicanal, es posible que tenga que realizar algunos ajustes en la resolución de la imagen del equipo de reproducción. Consulte el manual de instrucciones del equipo de reproducción. • Puede disfrutar de contenidos de vídeo en 3D con televisores y equipos de vídeo compatibles con 3D (por ejemplo, reproductor de discos Blu-ray, grabadora de...
- Page 72 DIGITAL LINE IN A Cable digital coaxial (no suministrado) B Cable HDMI (no suministrado) Sony recomienda utilizar un cable HDMI certificado o un cable HDMI de Sony. C Cable digital óptico (no suministrado) PlayStation 3 Señales de audio/vídeo HDMI DC5V...
-
Page 73: 5: Conexión De Un Equipo De Audio
5: Conexión de un equipo de audio Antes de conectar los cables, asegúrese de desconectar el cable de alimentación de ca. Reproductor de Super Audio CD, lector de CD Señales de audio AUDIO IN OPT IN OPT IN COAX IN SAT/CATV VIDEO AUTO... -
Page 74: 6: Conexión De Las Antenas
6: Conexión de las antenas Antes de conectar las antenas, asegúrese de desconectar el cable de alimentación de ca. Antena monofilar de FM (suministrada) AUDIO IN OPT IN OPT IN COAX IN SAT/CATV VIDEO AUTO DIGITAL LINE IN CAL MIC Notas •... -
Page 75: Preparación Del Receptor
Preparación del receptor Inicialización del receptor Antes de utilizar el receptor por primera vez, inicialícelo siguiendo los pasos que se indican a continuación. Este procedimiento también puede utilizarse para restaurar los ajustes predeterminados de fábrica. Utilice los botones del receptor para realizar esta operación. - Page 76 Notas • Los altavoces emiten un sonido muy alto durante la calibración y el volumen no puede ajustarse. Piense en los vecinos y en los niños que estén en la sala. • Si ha activado la función de silenciamiento antes de realizar la Calibración automática, se apagará...
- Page 77 Pulse V/v varias veces hasta que aparezca “A.CAL START” y, a continuación, pulse La medición empezará al cabo de 5 segundos. El proceso de medición dura 30 segundos aproximadamente. Esta tabla presenta los distintos estados de medición que aparecen en el visor. Objeto de la medición Existencia del altavoz Ganancia del altavoz,...
- Page 78 Desconecte el micrófono optimizador del receptor. Nota Si cambia de sitio el altavoz, le recomendamos que vuelva a realizar la Calibración automática para disfrutar del mejor sonido envolvente. Cuando aparecen códigos de error Consulte el problema asociado al error. Mensaje y explicación * 32 No se ha detectado ningún altavoz.
-
Page 79: Operaciones Básicas
Operaciones básicas Reproducción SAT/ BD/DVD GAME CATV VIDEO LINE IN TUNER DMPORT V/v/B/b MENU MASTER > VOL +/– MUTING Encienda el equipo conectado. Encienda el receptor. Pulse el botón de introducción del equipo que desea utilizar. También puede pulsar INPUT +/– (entrada +/-) en el receptor. -
Page 80: Visualización De Información En El Visor
Visualización de información en el visor El visor ofrece distintos datos sobre el estado del receptor, como el campo de sonido. SAT/ BD/DVD GAME CATV VIDEO LINE IN TUNER DMPORT Seleccione la entrada de la que desea obtener información. Pulse AMP MENU (menú amplificación) y, después, pulse DISPLAY (visor) varias veces. - Page 81 Sintonización de una emisora automáticamente (Sintonización automática) Pulse TUNER (sintonizador). Pulse TUNING + (sintonización +) o TUNING – (sintonización –). TUNING + (sintonización +) busca las emisoras empezando por la frecuencia más baja, mientras que TUNING – (sintonización –) empieza por la frecuencia más alta.
-
Page 82: Presintonización De Emisoras De Radio
Presintonización de emisoras de radio Puede guardar un máximo de 30 emisoras de FM como emisoras favoritas. BD/DVD GAME VIDEO TUNER TUNER DMPORT V/v/B/b MENU Pulse TUNER (sintonizador). Sintonice la emisora que desee presintonizar con Sintonización automática (página 31) o Sintonización directa (página 31). - Page 83 Sintonización de emisoras presintonizadas Pulse TUNER (sintonizador). Pulse PRESET + (presintonizar +) o PRESET – (presintonizar –) para seleccionar la emisora. Cada vez que pulsa el botón, puede seleccionar una emisora presintonizada en este orden: Otra opción es mantener pulsado SHIFT (mayúsculas) y, después, pulsar los botones numéricos para introducir la emisora presintonizada.
-
Page 84: Disfrutar De Sonido Envolvente
HD-D.C.S. (HD Digital Cinema Sound) Este modo es la innovadora tecnología que Sony ha diseñado para los sistemas de cine en casa, con los últimos avances en el procesamiento de señales acústicas y digitales. Se basa en los datos de medición de la respuesta de un estudio de masterización... - Page 85 x PLII MV (Pro Logic II Movie) Efectúa la decodificación en el modo Dolby Pro Logic II Movie. Este ajuste es ideal para películas codificadas en Dolby Surround. Además, este modo puede reproducir sonido de 5.1 canales para ver vídeos de películas antiguas o sobregrabadas.
-
Page 86: Funciones De "Bravia" Sync
Blu-ray, lectores de DVD o amplificadores de AV, entre otros, con la función Control por HDMI. Al conectar equipos Sony compatibles con la función “BRAVIA” Sync con un cable HDMI (no suministrado), el funcionamiento se simplifica en los aspectos indicados a continuación:... -
Page 87: Reproducción De Equipos Con Una Pulsación (Reproducción Mediante Una Pulsación)
Si el televisor no es compatible con la función “Control por HDMI (ajuste fácil)” V/v/B/b MENU Pulse AMP MENU (menú amplificación). Pulse V/v varias veces hasta que aparezca “HDMI” y, a continuación, pulse o b. Pulse V/v varias veces hasta que aparezca “CTRL HDMI”... -
Page 88: Escuchar El Sonido Del Televisor Por Los Altavoces Conectados Al Receptor (Control De Audio Del Sistema)
Escuchar el sonido del televisor por los altavoces conectados al receptor (Control de audio del sistema) Es posible escuchar el sonido del televisor a través de los altavoces conectados al receptor mediante una sencilla operación. La función Control de audio del sistema puede controlarse a través del menú... -
Page 89: Apagado Del Receptor Con El Televisor (Apagado Del Sistema)
Apagado del receptor con el televisor (Apagado del sistema) Si apaga el televisor mediante el botón POWER (alimentación) del mando a distancia del televisor, el receptor y el equipo conectado se apagarán automáticamente. También puede utilizar el mando a distancia del receptor para apagar el televisor. -
Page 90: Disfrutar De Películas Con El Campo De Sonido Óptimo (Sincronización Del Modo Theater/Theatre)
Disfrutar de películas con el campo de sonido óptimo (Sincronización del modo Theater/Theatre) Pulse THEATER (cine) o THEATRE (cine) en el mando a distancia del televisor o del reproductor de discos Blu-ray con el mando a distancia orientado hacia el televisor. -
Page 91: Uso Del Menú De Ajustes
BD1 o BD3, consulte el manual de instrucciones suministrado con el reproductor de discos Blu-ray o la grabadora de discos Blu-ray. Las grabadoras DVD de Sony se controlan con un ajuste DVD1 o DVD3. Para obtener más información, consulte el manual de instrucciones suministrado con las grabadoras de DVD. - Page 92 Descripción general de los menús A través de AMP MENU (menú amplificación) podrá ajustar las siguientes opciones. La configuración predeterminada aparece subrayada. AMP MENU AUTO CAL A.CAL START LEVEL TEST TONE FL LEVEL FR LEVEL CNT LEVEL SL LEVEL SR LEVEL SW LEVEL D.
- Page 93 Menú LEVEL Es posible ajustar el nivel de cada altavoz para adaptarlo a sus preferencias. Para emitir un tono de prueba desde cada altavoz Puede emitir un tono de prueba desde los altavoces siguiendo una secuencia. • AUTO FL, AUTO CNT, AUTO FR, AUTO SR, AUTO SL, AUTO SW •...
- Page 94 Menú SPEAKER Es posible ajustar la distancia de los altavoces conectados a este receptor. Para ajustar la conexión de los altavoces • CENTER (SUR) YES: se selecciona cuando conecta el altavoz. • CENTER (SUR) NO: se selecciona cuando no conecta el altavoz. Para ajustar la distancia de los altavoces Puede ajustar la distancia de los distintos...
- Page 95 HDMI desde la toma HDMI TV OUT (salida HDMI TV) del receptor. Sony recomienda este ajuste si utiliza un televisor Sony compatible con “BRAVIA” Sync. Este ajuste ahorra energía en el modo en espera, en comparación con el ajuste “ON”.
-
Page 96: Información Adicional
Menú SYSTEM Puede personalizar los ajustes del receptor. x DIMMER Le permite ajustar el brillo del visor en tres niveles. • DIM MAX • DIM MID • DIM OFF x SLEEP Le permite configurar el receptor para que se apague automáticamente cuando haya transcurrido el tiempo especificado. - Page 97 • Si las manchas son de aceite o de huellas digitales, exhale su aliento sobre la superficie y pase un paño suave seco. Si tiene alguna pregunta o problema relacionado con el receptor, consulte con el distribuidor Sony más cercano.
-
Page 98: Solución De Problemas
Si el problema persiste, consulte con el distribuidor Sony más cercano. Tenga en cuenta que si el personal del servicio técnico cambia algunas piezas durante la reparación, es posible que dichas partes no... - Page 99 No se emite sonido, independientemente del equipo seleccionado, o solo se escucha un sonido muy bajo. • Compruebe que todos los cables de conexión están insertados en las tomas de entrada/salida de las tomas correspondientes del receptor, los altavoces y el equipo. •...
- Page 100 No se emite sonido del receptor ni del altavoz del televisor. • Compruebe que el equipo está conectado correctamente a la toma HDMI correspondiente a dicho equipo. • Asegúrese de que “CTRL HDMI” esté ajustado en “CTRL ON” en el menú HDMI. •...
- Page 101 Sintonizador La recepción de FM no es buena. • Utilice un cable coaxial de 75 ohmios (no suministrado) para conectar el receptor a una antena de FM externa como se muestra a continuación. Antena FM exterior Receptor ANTENNA No se pueden sintonizar emisoras de radio.
-
Page 102: Especificaciones
Si se produce un error, aparece un mensaje en el visor. El mensaje proporciona información sobre el estado del sistema. Si el problema persiste, consulte con el distribuidor Sony más cercano. Si aparece un mensaje de error mientras se realiza el proceso de Calibración automática, consulte “Cuando aparecen códigos de error”... - Page 103 General Requisitos de alimentación ca de 120 V, 60 Hz Salida de potencia (DMPORT) Salida de CC: 5 V, 1 A Max Consumo de energía 110 W Consumo de energía (durante el modo de espera) 0,3 W (si Control por HDMI está...
-
Page 104: Índice
Índice Numerics 5.1 canales 16 A/V SYNC (sinc. A/V) 44 Altavoces conexión 18 instalación 16 Apagado del sistema 39 Asignación de nombre 33 AUTO STBY (espera auto.) Borrar memoria 52 “BRAVIA” Sync preparación 36 Calibración automática 25 Campos de sonido selección 34 Canal de Retorno de Audio (ARC) 39... - Page 108 Sony Corporation Printed in Malaysia...