
Related Manuals for Sony HT-SF370


Summary of Contents for Sony HT-SF370
- Page 1 Home Theatre System Operating Instructions HT-SF370 HT-SS370 ©2010 Sony Corporation 4-168-166-11(1)
-
Page 2: For Customers In The United States
The model and serial numbers are located on the rear of the unit. Record these numbers in the space provided below. Refer to them whenever you call upon your Sony dealer regarding this product. Model No. Important Safety Instructions 1) Read these instructions. - Page 3 12)Use only with the cart, stand, tripod, bracket, or table specified by the manufacturer, or sold with the apparatus. When a cart is used, use caution when moving the cart/apparatus combination to avoid injury from tip-over. 13)Unplug this apparatus during lightning storms or when unused for long periods of time.
-
Page 4: About This Manual
About This Manual • The instructions in this manual are for model HT-SF370 and HT-SS370. In this manual, models of area code CA2 is used for illustration purposes unless stated otherwise. Any difference in operation is clearly indicated in the text, for example, “Models of area code U2 only”. -
Page 5: Table Of Contents
Table of Contents Unpacking ... 6 Description and location of parts ... 8 Getting Started 1: Installing the speakers... 15 2: Connecting the speakers ... 18 3: Connecting the TV... 19 4: Connecting the audio/video components ... 20 5: Connecting the antennas ... 24 6: Preparing the receiver ... -
Page 6: Unpacking
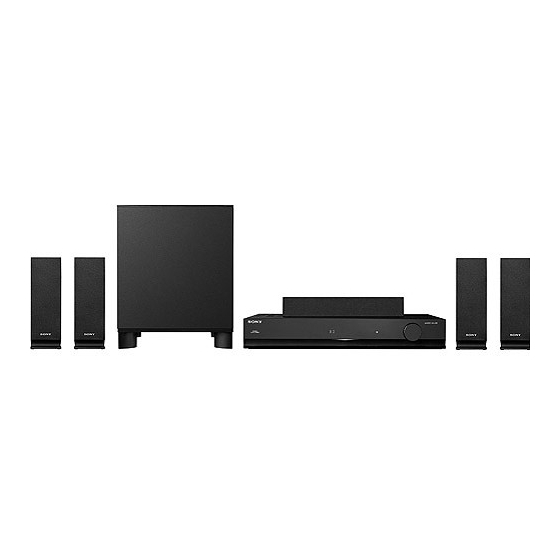
Unpacking Be sure that you have the following items in your package. HT-SF370 only • Receiver (STR-KS370) (1) MASTER VOLUME POWER / ACTIVE STANDBY • Front speakers (SS-MSP37F) (2) • Center speaker (SS-CNP37) (1) • Surround speakers (SS-SRP37F) (2) • Subwoofer (SS-WP37) (1) •... - Page 7 HT-SS370 only • Receiver (STR-KS370) (1) POWER / ACTIVE STANDBY • Front/Surround speakers (SS-TSB101) (4) • Center speaker (SS-CTB101) (1) • Subwoofer (SS-WSB101) (1) • Speaker cords (5, Red/White/Grey/Blue/ Green) • AM loop antenna (1) • FM wire antenna (1) •...
-
Page 8: Description And Location Of Parts
Description and location of parts Receiver Front view POWER / ACTIVE STANDBY Name Function A ?/1 Turns the receiver on or off (on/standby) (page 24, 31, 58). B POWER/ Lights up as follows: ACTIVE Green: The receiver is STANDBY turned on. indicator No light: The receiver is in... - Page 9 About the indicators on the display LPCM NIGHT SLEEP HDMI COAX Name Function A LPCM Lights up when Linear PCM (Pulse Code Modulation) signals are input. B NIGHT Lights up when the Night Mode function is set to on (page 34). C SLEEP Lights up when the sleep timer is activated (page 62).
-
Page 10: Rear Panel
Rear panel SPEAKERS FRONT R FRONT L SUR R SUR L SUBWOOFER A SPEAKERS section Connects to the supplied speakers and subwoofer (page 18). B S-AIR EZW-T100 slot C DMPORT DMPORT jack D AUTO CALIBRATION AUTO CAL MIC jack E AUDIO INPUT section AUDIO IN White (L) jacks... - Page 11 Remote commander You can use the supplied remote RM-AAU071 to operate the receiver and to control the Sony audio/video components that the remote is assigned to operate (page 57). RM-AAU071 SAT/ CATV SA-CD/ VIDEO DMPORT TUNER MENU > Notes on using SHIFT (Q) and...
- Page 12 TV CH + (P). Basic operations Remote button Function B ?/1 Turns the receiver on or off. (on/standby) To turn off all Sony components, press ?/1 (B) and AV ?/1 (A) at the same time (SYSTEM STANDBY). C Input buttons...
- Page 13 Common operations Remote button Function A TV ?/1 Turns on or off the Sony TV AV ?/1 or audio/video components (on/standby) that the remote is assigned to operate (page 57). Press ?/1 (B) and TV ?/1/ AV ?/1 (A) at the same...
- Page 14 To control the DVD player/recorder, Blu-ray Disc player/recorder Remote button Function H ANGLE Switches to other viewing angles when multi-angle are recorded on a Blu-ray Disc or DVD. I DISPLAY – Displays the playback information. – Press AMP MENU (K), then press DISPLAY (I) to display the input stream information for Blu-ray...
-
Page 15: Getting Started
ESurround speaker (right) FSubwoofer HT-SF370 only HT-SS370 only Notes • Be sure to use the supplied speakers. • For HT-SF370, do not lean on the speaker as it may fall down. Tips • The angle A should be the same. 30˚ 30˚... - Page 16 Installing the speakers on a flat surface HT-SF370 only Before you install the center speaker and the subwoofer, be sure to attach the supplied foot pads to prevent vibration or movement as shown in the illustration below. Note Attach the small foot pads to the center speaker and big foot pads to the subwoofer.
- Page 17 8 5/8 in (219 mm) • For HT-SF370, if you install the speakers on the wall, you do not need to attach the supplied speaker stand.
-
Page 18: 2: Connecting The Speakers
HT-SF370 –* –* * This speaker does not have character on the speaker label. For details on the speaker type, see page 6 (for HT-SF370) or page 7 (for HT-SS370). Speaker jack FRONT R FRONT L SUR R SUR L... -
Page 19: 3: Connecting The Tv
A Audio cord (not supplied) B Optical digital cord (not supplied) C HDMI cable (not supplied) Sony recommends that you use an HDMI- authorized cable or Sony HDMI cable. * When you use Audio Return Channel (ARC) function, the audio signal is output from the TV to the receiver. -
Page 20: 4: Connecting The Audio/Video Components
4: Connecting the audio/ video components How to hook up your components This section describes how to hook up your components to this receiver. Before you begin, see “Component to be connected” below for the pages which describe how to connect the audio/video components. -
Page 21: Connecting Components With Hdmi Jacks
• Use a High Speed HDMI cable. If you use a Standard HDMI cable, 1080p or Deep Color images may not be displayed properly. • Sony recommends that you use an HDMI authorized cable or Sony HDMI cable. • We do not recommend using an HDMI-DVI conversion cable. - Page 22 Blu-ray Disc DVD player player A HDMI cable (not supplied) Sony recommends that you use an HDMI- authorized cable or Sony HDMI cable. * When you use Audio Return Channel (ARC) function, the audio signal is output from the TV to the receiver.
-
Page 23: Connecting Video Components
Connecting video components The following illustration shows how to connect video components such as DVD player, DVD recorder, etc. It is not necessary to connect all the cords. Connect audio and video cords according to the jacks of your components. DVD player, Satellite tuner, DVD recorder... -
Page 24: 5: Connecting The Antennas
5: Connecting the antennas Connect the supplied AM loop antenna and FM wire antenna. Before connecting the antennas, be sure to disconnect the AC power cord. FM wire antenna (supplied) AM loop antenna (supplied) DIGITAL EZW-T100 AUDIO IN AUDIO IN COAX IN OPT IN AUTO... -
Page 25: 7: Calibrating The Appropriate Settings Automatically (Auto Calibration)
7: Calibrating the appropriate settings automatically (AUTO CALIBRATION) This receiver is equipped with DCAC (Digital Cinema Auto Calibration) Technology which allows you to perform automatic calibration as follows: • Check the connection between each speaker and the receiver. • Adjust the speaker level. •... - Page 26 Example: HT-SS370 DIGITAL ANTENNA EZW-T100 AUTO AUDIO IN AUDIO IN COAX IN OPT IN OPT IN SPEAKERS CAL MIC SA-CD/CD VIDEO SAT/CATV DC5V 0.7A MAX HDMI FRONT R FRONT L SUR R SUR L SUBWOOFER CENTER DVD IN BD IN SAT/CATV IN TV OUT DMPORT...
- Page 27 The table below shows the display when measurement starts. Measurement for Speaker existance Speaker gain, distance, frequency response Subwoofer gain and distance Notes • If “CHECK MIC” appears, you cannot perform the Auto Calibration. Connect the optimizer microphone, then perform the Auto Calibration again.
-
Page 28: When Error Codes Appear
• The optimizer microphone or subwoofer may be damaged. Contact your Sony dealer or local authorized Sony service facility. ERROR F 33 The front speakers are not connected or either the front left or front right speaker is not connected. -
Page 29: Playback
Clearing the measurement result You can delete the result of Auto Calibration. If there is no saved data, you cannot perform this operation. Press AMP MENU. “LEVEL” appears on the display. Press V/v repeatedly until “A.CAL MENU” appears, then press or b. -
Page 30: Enjoying Sound/Images From The Components Connected To The Receiver
Selected input Components that can [Display] be played back TV, etc., connected to the [TV] TV jack VIDEO DVD player, DVD [VIDEO] recorder, etc., connected to the VIDEO jack SA-CD/CD Super Audio CD player, [SA-CD/CD] CD player, etc., connected to the SA-CD/ CD jack DMPORT DIGITAL MEDIA PORT... - Page 31 Adjust the volume of the receiver. Tips • When you connect a Sony TV, the audio input of the TV is switched and the image from the TV tuner is displayed on the TV screen automatically by pressing the TV button.
- Page 32 Enjoying Blu-ray Disc/DVD Turn on the TV. Turn on the Blu-ray Disc player or DVD player, then place the disc on the tray. Turn on the receiver. Press DVD or BD. You can also press INPUT SELECTOR +/– on the receiver to select “DVD” or “BD”.
-
Page 33: Enjoying Surround Sound
Performs Dolby Pro Logic II Music mode decoding. This setting is ideal for normal stereo sources such as CDs. Reproduces the sound characteristics of the Sony Pictures Entertainment “Cary Grant Theater” cinema production studio. This is a standard mode, great for watching almost any type of movie. -
Page 34: Enjoying The Sound At Low Volume (Night Mode)
Notes • The effects provided by the virtual speakers may cause increased noise in the playback signal. • When listening with sound fields that employ the virtual speakers, you will not be able to hear any sound coming directly from the surround speakers. •... -
Page 35: Tuner Operations
Tuner Operations Listening to FM/AM radio You can listen to FM and AM broadcasts through the built-in tuner. Before operation, be sure you have connected the FM and AM antennas to the receiver (page 24). SAT/ CATV Numeric SA-CD/ VIDEO buttons DMPORT TUNER... -
Page 36: Direct Tuning
Tuning into a station directly (Direct Tuning) Enter the frequency of a station directly by using the numeric buttons. Press TUNER repeatedly to select the FM or AM band. You can also press INPUT SELECTOR +/– on the receiver. Press D.TUNING. Press and hold SHIFT, then press the numeric buttons to enter the frequency. -
Page 37: Presetting Radio Stations
Presetting radio stations You can preset up to 20 FM stations and 10 AM stations. Then you can easily tune in the stations you often listen to. SAT/ CATV Numeric SA-CD/ VIDEO buttons DMPORT TUNER V/v/B/b MENU PRESET > +/– Press TUNER repeatedly to select the FM or AM band. - Page 38 Naming preset station You can enter a name for preset stations. These names (for example, “XYZ”) appear on the display when a station is selected. Note that no more than one name can be entered for each preset station. Press TUNER repeatedly to select the FM or AM band.
-
Page 39: Bravia" Sync Features
When your TV is compatible with the “Control for HDMI-Easy Setting” function When you connect a Sony TV with the “Control for HDMI-Easy Setting” function, the Control for HDMI function of the receiver can be turned on simultaneously by turning the Control for HDMI function of the TV on. - Page 40 When your TV is not compatible with the “Control for HDMI-Easy Setting” function Turn the Control for HDMI function of the receiver and the connected component on individually. SAT/ CATV SA-CD/ VIDEO DMPORT TUNER V/v/B/b MENU Perform the steps given in “When your TV is compatible with the “Control for HDMI-Easy Setting”...
-
Page 41: Playing Back Components With One-Touch Operation (One-Touch Play)
Playing back components with one-touch operation (One-Touch Play) By a simple operation (one touch), components connected to the receiver with HDMI connections start playback automatically. You can enjoy the sound/image using the connected components. Play back a connected component. The receiver and the TV are turned on automatically and switched to the appropriate HDMI input. - Page 42 TV speaker. Tips • Sony recommends that you set the maximum volume level to a little lower than the volume you usually listen to. • Regardless of the maximum volume level you set, the MASTER VOLUME on the receiver and the MASTER VOL +/–...
-
Page 43: Turning Off The Receiver With The Tv (System Power Off)
Turning off the receiver with the TV (System Power Off) When you turn the TV off by using the POWER button on the TV’s remote, the receiver and the connected components turn off automatically. You can also use the receiver’s remote to turn off the TV. -
Page 44: Using The Power Saving Function (Hdmi Pass Through)
HDMI signals from the receiver’s HDMI TV OUT jack. Sony recommends this setting if you use a TV that is compatible with “BRAVIA” Sync. This setting saves power in the standby mode compared with the “THRU ON”... -
Page 45: Enjoying The Tv Sound Via An Hdmi Connection (Audio Return Channel)
Enjoying the TV sound via an HDMI connection (Audio Return Channel) The receiver can receive the audio signal of the TV via an HDMI cable when your TV is compatible with the Audio Return Channel (ARC) function. You can enjoy TV sound via the receiver by using just one HDMI cable. -
Page 46: Enjoying Optimum Sound Field For The Selected Scene (Scene Select)
Enjoying optimum sound field for the selected scene (Scene Select) The Scene Select function allows you to enjoy the optimum picture quality and switches the sound field according to the selected scene on your TV. For details on the operation, refer to the operating instructions of the TV. -
Page 47: S-Air Operations
S-AIR Operations About S-AIR products This receiver is compatible with the S-AIR function (page 64), which allows wireless sound transmission between S-AIR products. When you purchase the S-AIR product, you need to establish the sound transmission. There are two types of S-AIR product. •... -
Page 48: Setting Up An S-Air Product
• Other factors The following may cause poor reception. – Materials or structures, such as walls and floors – The location where an S-AIR product is placed When using S-AIR products, place them as far as possible from the above electronic equipment, or place where S-AIR reception is stable. - Page 49 To insert the wireless transmitter into the S-AIR main unit Remove the screws. Note Remove the screws pointed with not remove other screws. Insert the wireless transmitter. EZW-T100 slot Wireless transmitter Notes • Insert the wireless transmitter with the S-AIR logo facing up.
- Page 50 Establishing sound transmission between the S-AIR main unit and S-AIR sub unit (ID setting) When you match the ID of the S-AIR main unit and the S-AIR sub unit, you can establish sound transmission. V/v/B/b MENU To set the ID of the S-AIR main unit Press AMP MENU.
- Page 51 Pairing the S-AIR main unit with a specific S-AIR sub unit (Pairing operation) To establish sound transmission, you need to set the same ID for your S-AIR main unit and S-AIR sub unit. However, if your neighbors have S-AIR products and their IDs are the same as yours, your neighbors could receive the sound of your S-AIR main unit or vice versa.
-
Page 52: Enjoying The System's Sound In Another Room
Press V/v repeatedly until “PAIRING” appears, then press or b. Press V/v repeatedly until the setting you want appears, then press • START: The S-AIR main unit starts pairing. • CONDITION: You can check the current ID. When the pairing setting is timed out, “NO PAIRING”... - Page 53 Press AMP MENU. “LEVEL” appears on the display. Press V/v repeatedly until “S-AIR SET” appears, then press or b. Press V/v repeatedly until “S-AIR MODE” appears, then press or b. Press V/v repeatedly until the setting you want appears, then press •...
-
Page 54: Stabilizing S-Air Reception
Stabilizing S-AIR reception Read the following when S-AIR reception is poor or unstable. When S-AIR reception is poor Check the following. • Keep cords that are connected to the S-AIR product (AC power cord, speaker cords, or other cords) away from the wireless adapter and slot. -
Page 55: Changing The Channel For Better Sound Transmission
Changing the channel for better sound transmission If you use multiple wireless systems which sharing the 2.4 GHz band, such as wireless LAN or Bluetooth, the transmission of S-AIR products or other wireless systems may be unstable. In this case, the transmission may be improved by changing the following “RF CHANGE”... -
Page 56: Enjoying The S-Air Receiver While The S-Air Main Unit Is In Standby Mode
Enjoying the S-AIR receiver while the S-AIR main unit is in standby mode (For the S-AIR receiver only (not supplied)) You can enjoy the S-AIR receiver while the S-AIR main unit is in standby mode by setting “S-AIR STBY” to “STBY ON”. Note The POWER/ACTIVE STANDBY indicator in the S-AIR main unit (this receiver) lights up in amber. -
Page 57: Advanced Settings
Advanced Settings Changing the input button assignments You can change the initial settings of the input buttons (BD, DVD, SAT/CATV, VIDEO and SA-CD/CD) to suit the components in your system. For example, if you connect a Blu-ray Disc player to the DVD jack on the receiver, you can set the DVD button on this remote to control the Blu-ray Disc player. -
Page 58: Settings And Adjustments Using The Amplifier Menu
Blu-ray Disc player or Blu-ray Disc recorder. The initial setting of the DVD button. Sony DVD recorders are operated with a DVD1 or DVD3 setting. For details, refer to the operating instructions supplied with the DVD recorders. -
Page 59: Overview Of The Menus
Overview of the menus You can set the following items using the AMP MENU. For details of each menu, see the following pages. The default settings are underlined. AMP MENU LEVEL TEST TONE FL LEVEL CNT LEVEL FR LEVEL SR LEVEL SL LEVEL SW LEVEL AUDIO DRC... -
Page 60: Test Tone
For details, see “Enjoying the sound at low volume (NIGHT MODE)” (page 34). This parameter is only available when SAT/CATV input is selected. For details, see “Preparing for the “BRAVIA” Sync” (page 39). This parameter is only available when “CTRL HDMI”... -
Page 61: Tone Menu
Press V/v repeatedly until “T. TONE OFF” appears, then press When a test tone is not output from the speakers • The speaker cords may not be connected securely. • The speaker cords may have the short-circuit problem. Note The test tone signals are not output from the HDMI OUT jack. -
Page 62: System Menu
x INPUT MODE You can select the audio input mode setting when you connect satellite tuner or cable television tuner to both HDMI IN jack and optical digital input jack on the receiver and SAT/CATV input has been selected. • AUTO: Gives priority to HDMI audio signals if there are both digital (HDMI and optical) connections. -
Page 63: Glossary
Digital Cinema Sound (DCS) A unique sound reproduction technology for home theater developed by Sony, in cooperation with Sony Pictures Entertainment, for enjoying the exciting and powerful sound of movie theaters at home. With this “Digital Cinema Sound”... -
Page 64: Dolby Pro Logic Ii
DTS, etc. By adding a deep bass with a frequency between 20 to 120 Hz, audio becomes more powerful. x S-AIR (Sony Audio Interactive Radio frequency) Recent times have seen the rapid spread of DVD media, Digital Broadcasting, and other high quality media. -
Page 65: Precautions
“x.v.Color” is a promotion name given to the products that have the capability to realize a wide color space based on the xvYCC specifications and is a trademark of Sony Corporation. xvYCC is an international standard of the technical specifications of the extended-gamut color space for video signals. - Page 66 On placement • Place the receiver in a location with adequate ventilation to prevent heat buildup and prolong the life of the receiver. • Do not place the receiver near heat sources, or in a place subject to direct sunlight, excessive dust, or mechanical shock.
-
Page 67: Troubleshooting
S-AIR product(s). If you have any questions or problems concerning your receiver, please consult your nearest Sony dealer. Troubleshooting If you experience any of the following difficulties while using the receiver, use this troubleshooting guide to help you remedy the problem. - Page 68 There is no sound from digital sources (from OPTICAL input jack). • Check that the INPUT MODE is set to “OPT” for SAT/CATV input (page 62). • Set “ARC” to “ARC OFF” when no sound is output from TV OPT IN jack during TV input (page 45).
- Page 69 HDMI The source sound input to the HDMI jack on the receiver is not output from the receiver or the TV speaker. • Check the HDMI connection (page 21). • Make sure “CTRL HDMI” is set to “CTRL ON” in SET HDMI menu. •...
- Page 70 S-AIR function S-AIR connection is not established (sound transmission is not established), e.g., the indicator of the S-AIR sub unit turns off, flashes, or turns red. • If you use another S-AIR main unit, place it more than 25 feet (8 meters) away from this S-AIR main unit.
- Page 71 Tuner The FM reception is poor. • Use a 75-ohm coaxial cable (not supplied) to connect the receiver to an outdoor FM antenna as shown below. If you connect the receiver to an outdoor antenna, ground it against lightning. To prevent a gas explosion, do not connect the ground wire to a gas pipe.
-
Page 72: Specifications
If the problem persist Consult your nearest Sony dealer. Note that if service personnel changes some parts during repair, these parts may be retained. In the event of a problem with S-AIR function,... - Page 73 (430 mm × 66.5 mm × 306 mm) including projecting parts and controls Mass (Approx.) 7 lb 8 oz (3.4 kg) Speaker section HT-SF370 only • Front speaker (SS-MSP37F) • Surround speaker (SS-SRP37F) • Center speaker (SS-CNP37) Front/Surround speaker Full range Center speaker...
- Page 74 HT-SS370 only • Front/Surround speaker (SS-TSB101) • Center speaker (SS-CTB101) Front/Surround speaker Full range Center speaker Full range, magnetically shielded Speaker unit Front/Surround speaker 2 1/4 in × 3 1/4 in (55 mm × 80 mm), cone type Center speaker 1 3/16 in ×...
-
Page 75: Index
Index Numerics 5.1 channel 15 AUDIO DRC 61 Audio Return Channel (ARC) 45 AUTO CALIBRATION 25 AUTO STBY 62 Blu-ray Disc player connecting 22 playback 32 “BRAVIA” Sync preparing 39 CD player connecting 20 playback 32 Deep Color 63 Digital Cinema Sound (DCS) 63 DIGITAL MEDIA PORT adapter... - Page 76 Sony Corporation Printed in Malaysia...