Table of Contents
Advertisement
Quick Links
Advertisement
Table of Contents

Related Manuals for AEG DCB331010M


Summary of Contents for AEG DCB331010M
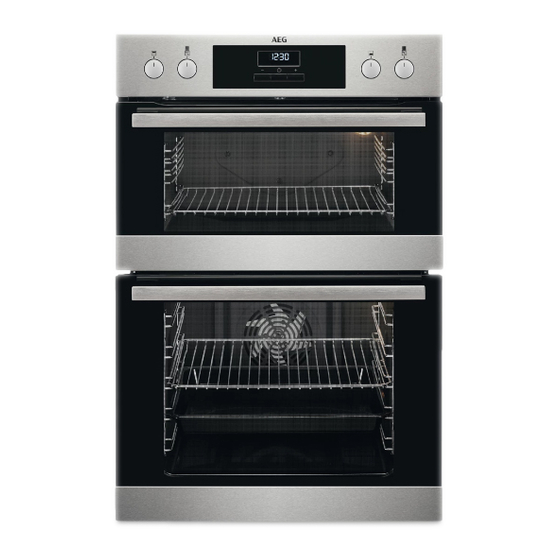
- Page 1 DCB331010M User Manual Built-In Double Oven USER MANUAL...
-
Page 2: Table Of Contents
14. ENVIRONMENTAL CONCERNS..............28 FOR PERFECT RESULTS Thank you for choosing this AEG product. We have created it to give you impeccable performance for many years, with innovative technologies that help make life simpler – features you might not find on ordinary appliances. Please spend a few minutes reading to get the very best from it. - Page 3 ENGLISH responsible for any injuries or damage that are the result of incorrect installation or usage. Always keep the instructions in a safe and accessible location for future reference. 1.1 Children and vulnerable people safety This appliance can be used by children aged from 8 •...
-
Page 4: Safety Instructions
Service Centre or similarly qualified persons to avoid an electrical hazard. The means for disconnection must be incorporated in • the fixed wiring in accordance with the wiring rules. WARNING: Ensure that the appliance is switched off • before replacing the lamp to avoid the possibility of electric shock. - Page 5 ENGLISH installation. Make sure that there is access to the mains plug after the Height of the back of 872 mm installation. the appliance • If the mains socket is loose, do not connect the mains plug. Width of the front of 594 mm •...
- Page 6 • Do not put flammable products or • Make sure the appliance is cold. items that are wet with flammable There is the risk that the glass panels products in, near or on the appliance. can break. • Replace immediately the door glass WARNING! panels when they are damaged.
-
Page 7: Product Description
ENGLISH • Contact your municipal authority for • Remove the door catch to prevent information on how to dispose of the children or pets from becoming appliance. trapped in the appliance. • Disconnect the appliance from the mains supply. • Cut off the mains electrical cable close to the appliance and dispose of 3. -
Page 8: Before First Use
To set the time. 4.3 Display A. Clock functions B. Timer The display works only with the main oven. 5. BEFORE FIRST USE WARNING! Refer to Safety chapters. 5.1 Before first use The oven can emit an odour and smoke during preheating. Make sure that the room is ventilated. -
Page 9: Daily Use
ENGLISH 6. DAILY USE WARNING! Step 2 Turn the control knob to select Refer to Safety chapters. the temperature. 6.1 How to set: Heating Step 3 When the cooking ends, turn function the knobs to the off position to turn off the oven. Step 1 Turn the knob for the heating functions to select a heating... - Page 10 6.3 Main oven functions Heating func‐ Application tion To turn on the lamp. Light To bake on up to two shelf positions at the same time and to dry food. Set the temperature 20 - 40 °C lower than for Conventional Cooking.
-
Page 11: Clock Functions
ENGLISH For the cooking instructions refer to recommendations refer to "Energy "Hints and tips" chapter, Moist Baking. Efficiency" chapter, Energy Saving. For general energy saving 7. CLOCK FUNCTIONS 7.1 Clock functions Clock function Application To set, change or check the time of day. Only the top oven works without the set time. - Page 12 How to set: Duration Step 3 - press to set the duration. The display shows: - flashes when the set time ends. The signal sounds and the oven turns off. Step 4 Press any button to stop the signal.
-
Page 13: Using The Accessories
ENGLISH How to set: Minute Minder Step 2 - press to set the time. The function starts automatically after 5 sec. When the set time ends, the signal sounds. Step 3 Press any button to stop the signal. Step 4 Turn the knobs to the off position. -
Page 14: Additional Functions
Deep pan: Push the tray between the guide bars of the shelf support. Wire shelf, Deep pan: Push the tray between the guide bars of the shelf support and the wire shelf on the guide bars above. 8.2 Trivet and Grill- / Roasting pan Step 1 Put the trivet into a deep pan. -
Page 15: Hints And Tips
ENGLISH 10. HINTS AND TIPS 10.2 Baking Refer to Safety chapters. For the first baking, use the lower temperature. 10.1 Double oven You can extend the baking time by 10 – 15 minutes if you bake cakes on more Top oven than one shelf position. - Page 16 10.4 Baking Top oven Food Temperature (°C) Time (min) Shelf position Biscuits 170 - 190 10 - 20 Bread 200 - 220 30 - 35 Bread rolls / buns 170-180 10 - 15 Cakes: - Small & Queen 160 - 170...
- Page 17 ENGLISH Food Temperature (°C) Time (min) Shelf position Scones 220 - 230 8 - 12 Shepard's Pie 180 - 190 30 - 40 Souffles 190 - 200 20 - 30 Vegetables: - Baked Jacket Potatoes 180 - 190 60 - 90 - Roast Potatoes 180 - 190 60 - 90...
- Page 18 10.5 Moist Baking For the best results follow suggestions listed in the table below. (°C) (min) Sweet rolls, 16 baking tray or dripping 40 - 50 pieces Pizza, frozen, wire shelf 35 - 45 0.35 kg Swiss roll baking tray or dripping...
- Page 19 ENGLISH (°C) (min) Short crust bis‐ baking tray or dripping 35 - 45 cuits, 20 pieces Tartlets, 8 pieces baking tray or dripping 35 - 45 Vegetables, baking tray or dripping 40 - 50 poached, 0.4 kg Vegetarian ome‐ pizza pan on wire shelf 40 - 50 lette Mediterranean...
- Page 20 Food Quantity Temperature Time (min) Shelf position (°C) Roast beef or fillet: per cm of thick‐ 180 - 190 6 - 8 medium, preheat ness the empty oven Roast beef or fillet: per cm of thick‐ 170 - 180...
- Page 21 ENGLISH Poultry Food Quantity Temperature Time (min) Shelf position (°C) Poultry pieces 0.2 - 0.25 each 200 - 220 35 - 50 Half chicken 0.4 - 0.5 each 190 - 210 35 - 50 Poultry 1 - 1.5 190 - 210 45 - 75 Duck 1.5 - 2...
- Page 22 Food Time (min) Sausages 20 - 30 Toasted Sandwiches 3 - 4 Steaks: - Rare 4 - 6 - Medium 6 - 8 - Well Done 12 - 15 Grilling - Main oven Food Temperature Time (min) Shelf position (°C)
-
Page 23: Care And Cleaning
ENGLISH Food Quantity Defrost‐ Further de‐ Comments (kg) ing time frosting time (min) (min) Butter 0.25 30 - 40 10 - 15 Cream 2 x 0.2 80 - 100 10 - 15 Whip the cream when still slightly fro‐ zen in places. Gateau 11. - Page 24 Step 1 Turn off the oven and wait un‐ til it is cold. Step 2 Pull the front of the shelf sup‐ port away from the side wall. Step 3 Pull the rear end of the shelf support away from the side wall and remove it.
- Page 25 ENGLISH Step 1 Fully open the door. Step 2 Lift and press the clamping levers (A) on the two door hinges. Step 3 Close the oven door to the first opening position (ap‐ proximately 45° angle). Hold the door with one hand on each side and pull it away from the oven at an upwards angle.
-
Page 26: Troubleshooting
11.5 How to replace: Lamp WARNING! Risk of electric shock. The lamp can be hot. Before you replace the lamp: Step 1 Step 2 Step 3 Turn off the oven. Wait until Disconnect the oven from Put a cloth on the bottom of the oven is cold. -
Page 27: Energy Efficiency
We recommend that you write the data here: Serial number (S.N.) ......... 13. ENERGY EFFICIENCY 13.1 Product Information Sheet according to UK Ecodesign and Energy Labelling Regulations Supplier's name DCB331010M 944171703, Model identification 944171708 Top oven: 106.8 Energy Efficiency Index Main oven: 95.1 Top oven: A... -
Page 28: Environmental Concerns
The residual heat inside the Moist Baking oven will continue to cook. Function designed to save energy during cooking. Use the residual heat to warm up other dishes. When you use this function the lamp is off. Keep food warm... - Page 32 www.aeg.com/shop...