
Related Manuals for NEFF C17GR00.0B


Summary of Contents for NEFF C17GR00.0B
- Page 1 Microwave Oven [en] User manual and installation instructions C17GR00.0B,C17GR01.0B...
-
Page 2: Table Of Contents
en Safety 1.2 Intended use Table of contents Only a licensed professional may connect ap- pliances without plugs. Damage caused by in- correct connection is not covered under the USER MANUAL warranty. Safety .............. 2 The appliance can only be used safely if it is correctly installed according to the safety in- Preventing material damage ....... -
Page 3: Safety
Safety en The hinges on the appliance door move when 1.4 Safe use the door is opened and closed, which could Always place accessories in the cooking com- trap your fingers. partment the right way round. ▶ Keep your hands away from the hinges. WARNING ‒ Risk of fire! Combustible objects that are left in the cook- WARNING ‒ Risk of electric shock! - Page 4 en Safety WARNING ‒ Risk of suffocation! WARNING ‒ Risk of explosion! Children may put packaging material over Liquids and other food may easily explode their heads or wrap themselves up in it and when in containers that have been tightly suffocate. sealed. ▶ Keep packaging material away from chil- ▶...
-
Page 5: Preventing Material Damage
Preventing material damage en ▶ The appliance must only be used to pre- crowave operation. The appliance is dam- pare food and drink. aged. ▶ Never use metal containers during mi- WARNING ‒ Risk of scalding! crowave-only operation. There is a possibility of delayed boiling when ▶... -
Page 6: Environmental Protection And Saving En- Ergy
en Environmental protection and saving energy Operating the appliance without food in the cooking If you prepare several bags of microwave popcorn in compartment may lead to overloading. immediate succession at a microwave power level that Do not switch on the microwave unless there is food is too high, the cooking compartment may be dam- ▶... -
Page 7: Familiarising Yourself With Your Appliance
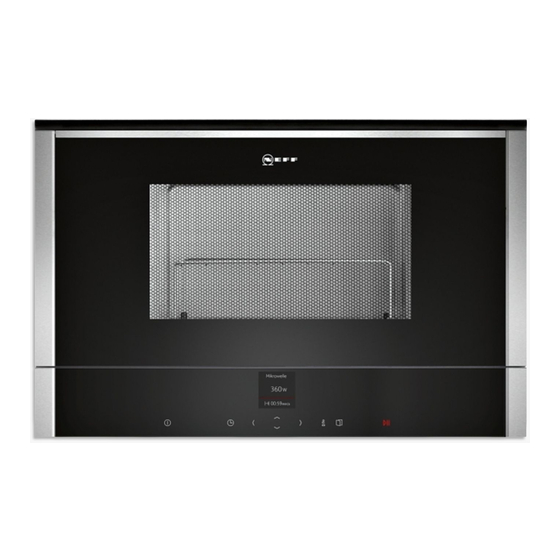
Familiarising yourself with your appliance en 4 Familiarising yourself with your appliance 4.1 Control panel Display You can use the control panel to configure all functions Touch buttons of your appliance and to obtain information about the ShiftControl control element operating status. On certain models, specific details such as colour and shape may differ from those pictured. -
Page 8: Before Using For The First Time
en Before using for the first time ATTENTION! Symbol Description Covering the ventilation slots will cause the appliance Programmes to overheat. Easily prepare selected meals Do not cover the ventilation slots. ▶ Settings To cool the cooking compartment more quickly after Individually adjust the appliance set- operation, the cooling fan continues to run for a certain tings... -
Page 9: Basic Operation
Press to switch the appliance on. ▶ ance interrupts the operation. After an operation is in- a The display shows the Neff logo, followed by the terrupted or cancelled, the cooling fan may continue to maximum microwave output. run. a The appliance is ready to use. - Page 10 en Microwave Not microwave-safe 7.2 Testing cookware for microwave suitability Cookware and accessor- Reason Test cookware to see whether it is suitable for mi- crowave use. Testing cookware is the only time the ap- Metal cookware Metal does not allow mi- pliance should be operated in microwave mode without crowaves to pass any food inside.
-
Page 11: Programmes
Programmes en Note: If the set cooking time exceeds the maximum a The operation continues. cooking time for the 900 W microwave output setting, the appliance automatically reduces the cooking time. The operation stops. Press to start the operation. 8 Programmes The programmes help you to use your appliance to ¡... -
Page 12: Timer
en Timer 8.3 Programme table You can prepare food very easily using the various programmes. You select a programme and enter the weight of your food. The programme then applies the most suitable settings. Defrost Dish Suitable food Weight range Cookware/accessories in kg Defrost bread Bread, whole, round or long;... -
Page 13: Basic Settings
Basic settings en 10 Basic settings You can configure the appliance to meet your needs. Basic settings Selection Audible signal Short cooking time 10.1 Changing basic settings Medium cooking time Long cooking time Press . Button tone Switched off Press . Switched on Use or to select "Settings"... - Page 14 en Cleaning and servicing Clean the front of the appliance using hot soapy wa- 11.2 Cleaning the appliance ter and a dish cloth. Clean the appliance as specified. This will ensure that Note: Slight differences in colour on the front of the the different parts and surfaces of the appliance are appliance are caused by the use of different materi- not damaged by incorrect cleaning or unsuitable clean- als, such as glass, plastic and metal.
-
Page 15: Troubleshooting
Troubleshooting en Set the cooking time to 5 minutes. Wipe out the cooking compartment with a soft cloth. Start the microwave. Leave the cooking compartment to dry with the door Once the cooking time has elapsed, leave the doors open. closed for an additional three minutes. 12 ... - Page 16 en Disposal 12.2 Information on display panel Fault Cause and troubleshooting The display shows An error has occurred. the error message If the display shows an error message, switch the appliance off and on again. "Exxx" a If the display no longer shows the error message, it was a one-off problem. If the display continues to show or repeatedly shows the error message, contact cus- tomer service and provide them with the error code.
-
Page 17: How It Works
How it works en 15 How it works Here, you can find the ideal settings for various dishes Place the cookware in the middle on the cooking as well as the best accessories and cookware. We compartment floor. have tailored these recommendations to your appli- The food will then absorb the microwaves from all ance. - Page 18 en How it works Food Weight Microwave output Cooking time Minced meat, mixed 500 g 1. 180 W 1. 5 mins 2. 90 W 2. 10-15 mins Minced meat, mixed 1000 g 1. 180 W 1. 15 mins 2. 90 W 2. 10-15 mins Poultry or poultry portions 600 g 1. 180 W 1.
- Page 19 How it works en 15.3 Heating With your appliance you can heat food. Heating food in the microwave Observe the recommended settings for using the mi- ATTENTION! crowave to heat food. Metal touching the wall of the cooking compartment will cause sparks, which may damage the appliance or WARNING ‒ Risk of scalding! the inner door pane.
- Page 20 en How it works ¡ Distribute the food flat in the cookware. Food which lies flat cooks more quickly than food which is piled high. ¡ Place the cookware on the bottom of the cooking compartment. ¡ The food transfers heat to the cookware. The cookware can become very hot. Use oven gloves. ¡...
-
Page 21: Installation Instructions
Installation instructions en Food Weight Microwave output Cooking time 2, 3, 4 Fresh vegetables 500 g 600 W 10-15 mins 2, 3, 4 Potatoes 250 g 600 W 8-10 mins 2, 3, 4 Potatoes 500 g 600 W 10-15 mins 2, 3, 4 Potatoes 750 g 600 W 15-22 mins Rice 125 g 1. 600 W 1. -
Page 22: 16.2 Safe Installation
en Installation instructions 16.1 Scope of delivery WARNING ‒ Risk of injury! Parts that are accessible during installation After unpacking all parts, check for any damage in transit and completeness of the delivery. may have sharp edges and may lead to cut- ting injuries. ▶... - Page 23 Installation instructions en 16.5 Installation in an upper cabinet 16.6 Installation in a tall unit Observe the installation dimensions and the safety Observe the installation dimensions and the safety clearances in a tall unit. clearances in a tall unit. Do not fit the appliance too high up; it must be pos- Do not fit the appliance too high up;...
- Page 24 en Installation instructions Check the clearance to the adjacent appliances. Remove any shavings from the cooking compart- ment. Screw the appliance to the unit on the side with the hinges. ATTENTION! When opening the appliance door, the appliance may tilt forwards. Hold the appliance in position when opening the Remove any packaging material and adhesive film ▶...
- Page 28 Valid within Great Britain: Imported to Great Britain by BSH Home Appliances Ltd. Grand Union House Old Wolverton Road Wolverton, Milton Keynes MK12 5PT United Kingdom *9001654809* 9001654809 Constructa-Neff Vertriebs-GmbH Carl-Wery-Straße 34 010624 81739 München GERMANY...