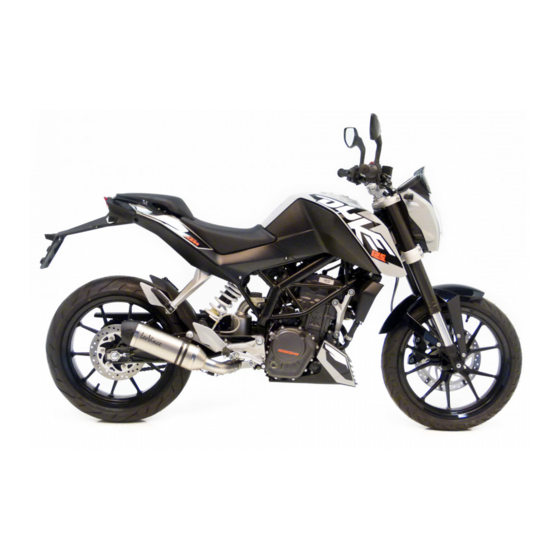
KTM 125 DUKE Setup Instructions
Hide thumbs
Also See for 125 DUKE:
- Repair manual (267 pages) ,
- Owner's manual (198 pages) ,
- Installation instructions manual (17 pages)
Advertisement
Quick Links
Advertisement

Related Manuals for KTM 125 DUKE


Summary of Contents for KTM 125 DUKE
- Page 1 SETUP INSTRUCTIONS 2021 125 DUKE Art. no. 3214431en...
- Page 3 KTM accepts no liability for delivery options, deviations from fig- ures and descriptions, misprints, and other errors. The models portrayed partly contain special equipment that does not belong to the regular scope of supply.
-
Page 4: Means Of Representation
1 MEANS OF REPRESENTATION Symbols used The meaning of specific symbols is described below. Indicates an expected reaction (e.g. of a work step or a function). Indicates an unexpected reaction (e.g. of a work step or a function). Indicates a page reference (more information is provided on the specified page). Indicates information with more details or tips. - Page 5 SETUP 2 Unpacking and setting up the vehicle – Remove the straps and the box. A00034-10 – Remove the adhesive tape in the upper area of the motorcycle. A00035-10 – Roll down the film at the sides. Info To avoid damaging the motorcycle during unpacking, leave the other films on the vehicle until you have fin- ished work on the vehicle.
- Page 6 2 SETUP The lettering on the handlebar is in the middle of the han- dlebar clamp. – Position all controls in their exact positions on the handlebar. Tighten all screws. A00036-10 – Make sure that the clutch cable is attached to the clutch release lever and secured.
- Page 7 Remove the remaining film, padding, the corrugated card- board, and the other packaging material. – Refuel. ( p. 13) – Check the headlight setting. ( p. 14) – Prepare the vehicle according to the specifications in the KTM Dealer.net for handover to the customer.
- Page 8 3 WORK Checking the clutch lever play Note Clutch damage If there is no free travel by the clutch lever, the clutch will begin to slip. – Check the free travel of the clutch lever each time before using the motorcycle. –...
- Page 9 WORK 3 Checking the play in the throttle cable – Check the throttle grip for smooth operation. – Move the handlebar to the straight-ahead position. Turn the throttle grip back and forth slightly and determine the play in throttle cable 3 …...
- Page 10 3 WORK Mounting the passenger seat – Attach hooks on the passenger seat to seat mounting on the subframe, and lower it at the rear while pushing for- ward. – Press the passenger seat downward until it clicks into place. Warning Danger of accidents The seat can come loose from the anchoring if it is not mounted correctly.
-
Page 11: Charging The 12-V Battery
WORK 3 Disconnecting the negative cable of the 12-V battery Preparatory work – Remove the passenger seat. ( p. 7) – Remove the front rider's seat. ( p. 8) Main work – Disconnect negative cable of the 12-V battery. V01273-10 3.10 Connecting the negative cable of the 12-V battery Main work... - Page 12 3 WORK Note Environmental hazard Hazardous substances cause environmental damage. – Dispose of oils, grease, filters, fuel, cleaning agents, brake fluid, etc., correctly and in compliance with the applicable regulations. Info Even when there is no load on the 12-V battery, it discharges steadily each day. The charging level and the method of charging are very important for the service life of the 12-V battery.
- Page 13 WORK 3 3.12 Installing the 12-V battery Main work – Position the 12-V battery in the battery compartment. 12-V battery (ETZ-9-BS) – Attach rubber strap – Position positive cable and mount and tighten the screw. – Position positive terminal cover V01274-11 –...
- Page 14 3 WORK Setting the date – Press UP or DOWN button until the date is marked. – Press SETbutton. The day flashes and is underlined. – Press UP or DOWN button until the current day is set. – Press SETbutton. The month flashes and is underlined.
- Page 15 WORK 3 – Remove the ignition key. 3.15 Closing the fuel tank filler cap Warning Fire hazard Fuel is highly flammable, toxic and a health hazard. – Check that the fuel tank filler cap is locked cor- rectly after closing. – Change your clothing if fuel spills on them.
-
Page 16: Checking The Headlight Setting
3 WORK – Switch off the engine. – Open the fuel tank filler cap. ( p. 12) – Fill the fuel tank with fuel up to the lower edge of the fuel filler. Total fuel tank 11 l Super unleaded capacity, approx. - Page 17 WORK 3 3.18 Adjusting the headlight range Preparatory work – Check the headlight setting. ( p. 14) Main work – Turn adjusting screw to adjust the headlight range. Info Turn clockwise to increase the headlight range; turn counterclockwise to reduce the headlight range. If you have a payload, you may have to correct the headlight range.
-
Page 18: Technical Data
4 TECHNICAL DATA Chassis tightening torques EJOT PT Screw, chain guard ® K60x30 7 Nm (5.2 lbf ft) Remaining screws, chassis 4 Nm (3 lbf ft) Remaining nuts, chassis 5 Nm (3.7 lbf ft) Remaining screws, chassis 5 Nm (3.7 lbf ft) Screw, chain guard 7 Nm (5.2 lbf ft) Loctite... - Page 19 TECHNICAL DATA 4 Screw, main silencer retaining 9 Nm (6.6 lbf ft) bracket Screw, protective plate 8 Nm (5.9 lbf ft) Screw, radiator holder 10 Nm (7.4 lbf ft) Screw, radiator shield 7 Nm (5.2 lbf ft) Screw, rear splash protector 9 Nm (6.6 lbf ft) Screw, shift lever linkage 11 Nm (8.1 lbf ft)
- Page 20 4 TECHNICAL DATA Nut, left rear mirror 16 Nm (11.8 lbf ft) Remaining nuts, chassis 45 Nm (33.2 lbf ft) Remaining screws, chassis 45 Nm (33.2 lbf ft) Screw, engine bearer 49 Nm (36.1 lbf ft) Loctite ® 243™ Fitting, handlebar support M10x1.25 20 Nm (14.8 lbf ft) Fitting, shock absorber, bottom...
- Page 21 SUBSTANCES 5 Super unleaded (ROZ 95) Standard/classification – DIN EN 228 (ROZ 95) Guideline – Only use super unleaded fuel that matches or is equivalent to the specified standard. – Fuel with an ethanol content of up to 10% (E10 fuel) is safe to use. Info Do not use fuel containing methanol (e.g., M15, M85, M100) or more than 10% ethanol (e.g., E15, E25, E85, E100).
- Page 22 *3214431en* 3214431en 01/2021 KTM Sportmotorcycle GmbH 5230 Mattighofen/Austria Photo: Mitterbauer/KISKA/KTM http://www.ktm.com...