Table of Contents
Advertisement
Quick Links
Advertisement
Table of Contents

Related Manuals for Dell Venue Pro


Summary of Contents for Dell Venue Pro
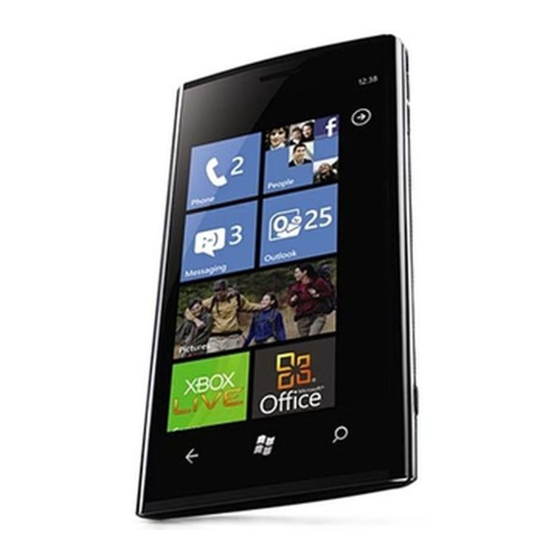
- Page 1 Dell™ Venue Pro User's Manual OMMENT...
- Page 2 Reproduction of these materials in any manner whatsoever without the written permission of Dell Inc. is strictly forbidden. Trademarks used in this text: Dell™ and the DELL logo are trademarks of Dell Inc. Microsoft®, Windows®, Excel®, Powerpoint®, Windows Live®, Hotmail®, Xbox Live®, Zune®, and SharePoint®...
-
Page 3: Table Of Contents
Contents 1 Package Contents 2 Getting to Know Your Dell™ Venue Pro 3 Setting Up Your Dell™ Venue Pro Getting Your Phone Ready for Use Turning On Your Phone Turning Off Your Phone Turning On the Screen First-Time Setup 4 Using Your Dell™ Venue Pro... - Page 4 Using Maps Marketplace Games and Xbox LIVE 7 Customizing Your Dell™ Venue Pro 70 Contents .......
- Page 5 8 Applications Camera ......Pictures ......Playing Music and Video Using Zune Listening to FM Radio Using Zune Calendar...
-
Page 6: Package Contents
Check the contents of your package to verify that you have the following: NOTE: The contents of your package may vary based on your region. U.S.A Dell Venue Pro phone Battery Getting Started Guide Safety, Environmental, and Regulatory Information Warranty and Support Information... -
Page 7: Getting To Know Your Dell™ Venue Pro
• Close an on-screen keyboard or a menu. • Touch to return to the Start screen from anywhere on the phone, including from a running application. • Touch and hold for speech commands. Getting to Know Your Dell™ Venue Pro... - Page 8 Marketplace. Proximity sensor Detects and turns off the screen when you bring the phone close to your ear to make or receive calls, in order to prevent unintentional touch on the screen. Getting to Know Your Dell™ Venue Pro...
- Page 9 • Connects to a USB cable to transfer files to a computer. • Connects to a charger to charge the phone. Secures the battery in place. For using flash while capturing photos and videos. Connects to headphones. Getting to Know Your Dell™ Venue Pro...
- Page 10 Feature Volume control buttons Camera button Getting to Know Your Dell™ Venue Pro Function(s) During a phone call or while playing media such as music, FM radio, and video: • Press to increase or decrease the volume by one level.
-
Page 11: Setting Up Your Dell™ Venue Pro
Setting Up Your Dell™ Venue This section provides information on setting up your Dell Venue Pro phone for the first time. Getting Your Phone Ready for Use 1 Remove the back cover Slide the back cover up towards the top of the phone. - Page 12 3 Insert the battery Align the metal contacts on the battery with the contacts on the battery holder and place the battery. Setting Up Your Dell™ Venue Pro...
- Page 13 Align the tabs on the back cover with the slots on the phone. Place the cover onto the back of the phone, and then slide the cover towards the bottom of the phone to secure the cover in place. Setting Up Your Dell™ Venue Pro...
-
Page 14: Turning On Your Phone
3 If your SIM card is locked by a Personal Identification Number (PIN), type the PIN by touching corresponding number keys on the on-screen keypad. Touch the enter button to confirm your input. Setting Up Your Dell™ Venue Pro NOTE: The phone is fully charged within four hours when connected to a power outlet. -
Page 15: Turning Off Your Phone
Signing in to Windows Live also synchronizes all your Windows Live e-mails and contacts on your phone. 5 The phone is ready for use when the Start Screen appears. ® Messenger Hotmail Setting Up Your Dell™ Venue Pro ® ® , Zune , and Xbox... -
Page 16: Using Your Dell™ Venue Pro
Using Your Dell™ Venue Pro Physical QWERTY Keyboard You can use the physical QWERTY keyboard to type text into a text field in your phone. To access the keyboard Slide the phone up to access the keyboard. NOTE: The on-screen keyboard closes automatically when the physical QWERTY keyboard is active. - Page 17 Caps Lock mode, as the icon again to disable the Caps Lock icon will show up in the status bar to confirm this Using Your Dell™ Venue Pro...
-
Page 18: Start Screen
Twitter, Facebook, and Windows Live. To open the Start screen From any phone activities, touch Start Using Your Dell™ Venue Pro key to enter a new line of text. key to confirm your text input. key to delete a typed character, symbol, or a space. - Page 19 NOTE: To stop the Start screen from moving, touch anywhere on the Start screen. 2 Touch the tile to open the associate application or feature. in the application bar at the bottom to pin the Using Your Dell™ Venue Pro...
- Page 20 1 Touch Start 2 Under system, select theme. 3 Touch the Background list box. 4 From the Background list box, touch dark or light to change the background color. Using Your Dell™ Venue Pro → applications → → applications →...
-
Page 21: Touch Screen Gestures
• Start applications. • Input text using the on-screen keyboard or numeric keypad. • Stop any type of screen content from scrolling, for example the Applications list or a web page. Using Your Dell™ Venue Pro... - Page 22 Flick or swipe Slide a finger quickly in the direction you want the screen content to move. Using Your Dell™ Venue Pro Allows you to: “Pin” an application, media item, or favorite contact to the Start screen to add it as a tile.
- Page 23 • Move a tile somewhere else on Start at a controlled rate. Touch and hold the tile, then move it wherever you'd like. • Scroll through lists, menus, or pages. Pinch Zoom-out on websites, maps, or pictures. Using Your Dell™ Venue Pro...
- Page 24 Stretch or Zoom-In Move two fingers away from each other on the screen to zoom-in. Double-tap Tap the screen quickly twice. Using Your Dell™ Venue Pro Allows you to: Stretch Zoom-in on websites, maps, or pictures. Toggle between the zoom-in and zoom-out states of a screen view, such as a picture or web page.
-
Page 25: Screen Orientation
The Start screen and Applications list always appear in portrait mode. Landscape mode is not supported on certain applications or while the physical QWERTY keyboard is open. NOTE: Certain applications downloaded from the Internet may not support automatic screen orientation to portrait or landscape. Using Your Dell™ Venue Pro... -
Page 26: Applications List
1 Flick or pan the Applications list upwards or downwards until it displays the desired application. NOTE: To stop the Applications list from moving, touch anywhere on the screen. 2 Touch the application to open it. Using Your Dell™ Venue Pro to open the Start screen. or flick... -
Page 27: Status Bar
Connected to a 3G (HSPA) data network Connected to a Wi-Fi network Silent mode is enabled Battery status Current time SIM card is locked Vibrate mode is enabled Phone is charging Airplane mode is enabled Using Your Dell™ Venue Pro... -
Page 28: Wallpaper
Touch the done push button. To change the wallpaper Using the Settings option 1 Touch Start 2 Under system, touch lock & wallpaper. 3 Touch change wallpaper. Using Your Dell™ Venue Pro → applications Settings. → applications Settings. → applications →... - Page 29 3 To set the date and time automatically according to the carrier network, touch or flick the Set automatically toggle switch to enable the function. to set the picture as wallpaper. → Pictures. to set the picture as wallpaper. → Settings. Using Your Dell™ Venue Pro...
-
Page 30: Navigating Applications
When you flick or pan the panoramic screen, the four layers forming the panoramic screen move horizontally at different speeds: Panorama title The panorama title is the title of the overall panoramic application. It lets you identify the application in use. Using Your Dell™ Venue Pro... -
Page 31: On-Screen Controls
– Touch, flick, or drag the top right or top left corner of the application bar menu. – Touch outside the application bar menu. up, or touch, flick, or drag the left or right end Using Your Dell™ Venue Pro if additional tasks... - Page 32 NOTE: You can change the toggle switch color by changing the accent color. For information on changing the accent color, see To change the tile color. Using Your Dell™ Venue Pro , or...
- Page 33 Slider Track Controls music or video playback using a slider track. Touch or drag the track or the progress indicator inside the track. Using Your Dell™ Venue Pro...
-
Page 34: Text Box
To highlight a word or move the cursor between words Touch the space where you want to place the cursor. The cursor then moves to that space. Touch a word you want to highlight. The cursor becomes a color marker to highlight the word. Using Your Dell™ Venue Pro... -
Page 35: On-Screen Keyboard
Input Text Text message Web address E-mail address Keyboard layout QWERTY layout with the emoticon and line feed keys QWERTY layout with the .com and enter keys QWERTY layout with the .com and @ keys Using Your Dell™ Venue Pro... - Page 36 • Touch space to include a space. • Touch space twice to insert a period that immediately follows the text typed in the text box. Using Your Dell™ Venue Pro Keyboard layout QWERTY layout with a search key 12-number keypad layout...
- Page 37 • Touch and hold To configure the keyboard settings 1 Touch the Start 2 Under system, select keyboard. 3 Touch the settings you want to enable or disable. to quickly delete typed text. → applications → Using Your Dell™ Venue Pro Settings.
-
Page 38: Communicating With People Using Your Dell™ Venue Pro
You can also touch the Email setup tile from the Start screen to sign in with an existing e-mail account. The tile then becomes the one for that account. Communicating With People Using Your Dell™ Venue Pro → People tile → flick to what’s new, or touch →... - Page 39 6 Touch the sign-in button to enable your account using the new settings. Communicating With People Using Your Dell™ Venue Pro → Settings.
-
Page 40: Using E-Mail
To clear a selected e-mail thread, touch the check box. Touch to open the editing screen to compose and send a new e- mail. Communicating With People Using Your Dell™ Venue Pro to delete e-mail, or touch on the Start to move it to another... - Page 41 The screen displays the matching e- mail and highlights the text that matches the text you have entered in the text box. Communicating With People Using Your Dell™ Venue Pro on the Start screen. and type the...
- Page 42 Communicating With People Using Your Dell™ Venue Pro button to send a new message. , and then choose a contact.
-
Page 43: Calling
Communicating With People Using Your Dell™ Venue Pro , or touch Start , or touch Start People to open the People application. - Page 44 Touch the answer button to answer an incoming call. To cancel dialing or end an active call Touch the end call push button. Communicating With People Using Your Dell™ Venue Pro → Phone tile , or touch Start from the application bar to add the phone number →...
- Page 45 See To adjust call settings for information on how to save your voicemail number. To manage ongoing calls Touch Touch to open the call history. Communicating With People Using Your Dell™ Venue Pro , or touch Start on the application bar at the to end a call. → applications...
- Page 46 2 Touch or drag the application bar upwards→ call settings. My phone number Voicemail number Communicating With People Using Your Dell™ Venue Pro Ensure that you turn off the speakerphone before → Phone tile , or touch Start You can store your own phone number here.
- Page 47 Show my caller ID to Call forwarding International assist Communicating With People Using Your Dell™ Venue Pro Touch the list box and select to show your caller ID to everyone, no one, or only your contacts as you call them.
- Page 48 SIM security Communicating With People Using Your Dell™ Venue Pro Protect your SIM card against unauthorized use with a personal identification number (PIN). After a PIN is enabled to lock your SIM, you will need to type the PIN each time you turn on the phone in order to unlock your SIM.
-
Page 49: Managing Contacts Using The People Application
• Touch , type the phone number, and touch save to save the number to a new or an existing contact. Communicating With People Using Your Dell™ Venue Pro , or touch Start , or touch Start People. - Page 50 2 Locate the contact that you want to call, mail, or send a message (for more information, see To quickly locate a contact). 3 Touch the name or number of the desired contact. 4 You could either: Communicating With People Using Your Dell™ Venue Pro → People tile , or touch Start →...
- Page 51 5 Touch choose a contact to open the list of contacts. 6 Touch the contact that you want to link to the current contact. Communicating With People Using Your Dell™ Venue Pro , or touch Start People.
- Page 52 People application, their pictures are displayed in the Pictures application, and your own feeds pop up in your Me tile. Communicating With People Using Your Dell™ Venue Pro → People tile , or touch Start →...
-
Page 53: Messaging
Select the desired contact in the list that appears. • Touch , then flick to see the desired contacts, and touch to select the contact. To add more recipients, touch Communicating With People Using Your Dell™ Venue Pro button. → Settings→ flick to applications→ or touch Start button in the messaging screen. - Page 54 Touch to compose your message. Touch to open a list of contacts, and select the one you want to send the message. Communicating With People Using Your Dell™ Venue Pro to send the message. and then select any file saved...
- Page 55 • Phone number—touch it to open the Phone application and call the number. • E-mail address—touch the e-mail address to open the e-mail application and compose an e-mail to send to the address. Communicating With People Using Your Dell™ Venue Pro to open a list of conversations...
- Page 56 3 To delete a message within a conversation, touch and hold a message text box appears, touch delete→ delete button to confirm deletion. Communicating With People Using Your Dell™ Venue Pro → Messaging tile → Messaging. to forward the message.
- Page 57 4 To delete all the messages with the contact, touch or drag the application bar upward to bring up the application bar menu. Touch delete conversation→ delete button to confirm deletion. Communicating With People Using Your Dell™ Venue Pro...
-
Page 58: Internet
Internet NOTE: To connect to the Internet using your phone, you require an active Wi-Fi or mobile data connection (GPRS, EDGE, 3G, or HSPA). For more information about configuring your phone for Internet connectivity, see Connectivity settings. Using bing Search You can use the bing search Box to find websites and other Internet content such as news feeds. -
Page 59: Browsing The Internet
Touch the displayed information to start the browser and view web content, or to start the Maps application to locate a place associated with the information. Touch the square to display information relevant to the current bing picture. The matching web links and news feeds are displayed in separate sections. - Page 60 To use the browser NOTE: For information on the touch gestures used for viewing a web page, see Touch Screen Gestures. Touch to reload the current page. Touch the add button list. Touch the favorites button history of last visited web pages. Touch a web page link to open the web page.
- Page 61 Touch the tabs button windows. The number of available browser windows is displayed on the tabs button. • To switch from one browser window to another, touch the thumbnail of the browser window you want to view. The window is then displayed in full screen.
-
Page 62: Using Maps
Using Maps Maps helps you find your current location, view real-time traffic situations, and get directions to your destination. You can also locate addresses or places of interest on a map. NOTE: To connect to the Internet using your phone, you require an active Wi-Fi or mobile data connection (GPRS, EDGE, 3G, or HSPA). - Page 63 To find a location on the map → applications 1 Touch Start 2 On the Maps screen, touch search 3 To search by typing, type the name of the place you want to find in the search box and touch or country, or a type of business or organization such “restaurant”...
- Page 64 Touch to locate a place of interest on the map. The map displays colored lines along the roads where real-time traffic data can be collected. Green lines indicate good traffic speeds, yellow ones indicate slower speeds, and red ones indicate congested traffic. The place you found on the map is marked.
- Page 65 To view the details of a place → applications 1 Touch Start 2 Find a desired location on the map (see To find a location on the map). 3 Touch the name of the place. Touch to open the map displaying the location of the place. Touch to obtain directions (see To get directions to your destination).
- Page 66 3 Type the starting point in the Start text box and your destination in the End text box. NOTE: By default, your current location is the starting point, and the place you found on the map is your destination. • The map moves and displays matching locations along the route as you scroll the list of directions below.
-
Page 67: Marketplace
Marketplace Use Marketplace to download music and install applications and games on your phone. CAUTION: Applications downloaded from the Internet can be from unknown sources. To protect your phone and personal data, download applications only from trusted sources such as Marketplace. NOTE: Applications downloaded from Marketplace may not support automatic screen orientation to portrait or landscape. - Page 68 7 Follow the instructions on the screen to proceed with the installation. To download music from Marketplace The Marketplace downloader allows you to browse, search, purchase, download, and play music available from its music store. 1 Touch Start applications 2 From the Marketplace main screen, flick to the featured artists or albums, or touch music to find out more choices.
-
Page 69: Games And Xbox Live
8 Follow the instructions on the screen to complete downloading. Games and Xbox LIVE All of the games you downloaded from Marketplace are stored in the Games application. You can also play on-line games on Xbox LIVE using an Internet connection. To open Games →... -
Page 70: Customizing Your Dell™ Venue Pro
1 Touch Start 2 Flick to the system section to choose from the following settings. Display settings theme lock & wallpaper Customizing Your Dell™ Venue Pro → applications → • Background: Change the background color to Light or Dark. • Accent color: Change the color of the tiles and the toggle switches. - Page 71 • Vibrate: Touch or drag to set the vibrate mode. • You can select the ringtone and alert sounds, and decide whether to play a sound for reminders, notifications, key presses, and lock and unlock actions. Customizing Your Dell™ Venue Pro...
- Page 72 Connectivity settings airplane mode Wi-Fi Customizing Your Dell™ Venue Pro Turning on the airplane mode disables all mobile, Wi-Fi, and Bluetooth connections. This feature is useful when wireless connectivity is strictly prohibited, such as on an airplane. • To enable the airplane mode, touch or drag the toggle switch to set Status to On.
- Page 73 If a Wi-Fi connection is currently available, the phone automatically uses the Wi-Fi connection to access the Internet. The Internet connection over GPRS, EDGE, 3G, or HSPA becomes temporarily inactive, until the Wi-Fi connection ends. Customizing Your Dell™ Venue Pro...
- Page 74 Bluetooth Customizing Your Dell™ Venue Pro Bluetooth lets your phone connect wirelessly within a short range to other Bluetooth-enabled devices for data exchange. • To pair and connect a Bluetooth device: Touch or drag the Status toggle switch to turn on Bluetooth.
- Page 75 • If you have a preferred region variant used for displaying the browser and search application language, touch the Browser & search language box and pick a language variant from the list of choices. Customizing Your Dell™ Venue Pro...
- Page 76 1 Touch Start 2 Under system, touch about. 3 Touch the reset your phone button. Customizing Your Dell™ Venue Pro Teletypewriter (TTY/TTD) mode: Enable this mode to let the user with speech or hearing disabilities conduct phone conversations by typing.
-
Page 77: Applications
Applications NOTE: If you have an application tile on your Start Screen, you will be able to access that application simply by touching the tile. For all other applications that are not pinned to your Start Screen, you will need to go to the applications list to access them. - Page 78 On-screen camera controls Touch to select from the following flash modes: Auto flash is enabled. Flash is disabled. Flash is enabled. Touch to zoom out. Touch to zoom in. Touch to switch between the camera mode and camcorder mode. To capture pictures 1 Ensure that the camera mode is enabled as 2 Focus on the object in the viewfinder screen.
- Page 79 add to favorites delete upload to SkyDrive share... use as wallpaper To capture videos 1 Ensure that the camcorder mode is enabled as 2 Frame your subject on the viewfinder. 3 Press the camera button to start recording. 4 Press the camera button to stop recording. To manage captured videos 1 Flick the viewfinder away to view captured videos.
-
Page 80: Pictures
Pictures → applications Touch Start Use the pictures application to view pictures captured using the phone camera, downloaded from visited websites, or posted by your on-line friends to your web accounts such as Hotmail. To view pictures 1 Flick to browse the thumbnails of the pictures just added, or touch all, date, or favorites to view the pictures inside the selected category. -
Page 81: Playing Music And Video Using Zune
Playing Music and Video Using Zune NOTE: Zune will only work on PCs that support Windows 7, XP, or Vista. The Zune software is a media player platform developed by Microsoft. It combines the Zune Marketplace to provide music, TV shows, movies, podcasts, and music videos available for download to your phone. - Page 82 To play music 1 Touch Start applications 2 From the Zune main screen, touch music under zune. 3 Flick to the category such as artists or albums to find your song. 4 Touch a desired song to open the music playback screen and play the song.
- Page 83 • Touch hold to rewind or fast-forward playback with preview. • Touch to pause playback. • Touch to resume playback. NOTE: Press the volume up button or volume down button to adjust playback volume. to rewind or fast-forward playback; touch and Applications...
-
Page 84: Listening To Fm Radio Using Zune
Listening to FM Radio Using Zune 1 Touch Start applications 2 Flick to the zune section and touch radio. NOTE: Your phone uses headphones as an FM radio antenna. To listen to FM radio, connect headphones to your phone. Touch to add the current station or touch your favorites list. -
Page 85: Calendar
Calendar Use the calendar to schedule and manage your events and appointments. You can also send meeting notices to others using e- mail. To open the calendar → applications Touch Start To use the calendar → applications Touch Start Flick to day to view the daily calendar. •... - Page 86 Touch to enable or disable the Windows Live calendar, and choose the display color for the color bar and text of an appointment. Touch to create a new appointment. Touch to display the monthly calendar view. Flick to agenda to view the list of appointments in time order. •...
- Page 87 To view appointment details → applications 1 Touch Start 2 Touch an appointment on the calendar to view the details. Flick to view the details or the attendees of the appointment. Touch to edit the appointment. Touch to delete the appointment. Touch and select reply to e-mail the meeting organizer of this appointment;...
-
Page 88: Alarms
Alarms → applications Touch Start Your phone can work as an alarm clock. You can set as many alarms as you require. To set an alarm 1 From the application bar touch 2 Enter the following settings: Time Repeats Sound Name 3 Touch to set the alarm. -
Page 89: Voice Recognition
Voice Recognition From anywhere on your phone, touch and hold Start voice recognition application, which lets you use speech commands to call people, start applications, and search the Internet without using your hands. • To call the mobile of someone named John, use this speech command Call <Name>, mobile, and say “Call John, mobile”... - Page 90 OneNote OneNote Mobile lets you take notes with pictures or voice memos using your phone. You can also sync your notes to your Windows Live SkyDrive account and Microsoft SharePoint Server 2010, so that you can use your phone and your computer to access the same files you created.
- Page 91 Touch or drag the application bar to undo or redo actions, apply bulleted lists, increase or decrease indent, or apply text formats. The attached picture. Touch to play the attached audio recording. The note is saved automatically when you touch Back To open a note →...
- Page 92 Editing tools and commands for a Word document • Touch text and type using the on-screen keyboard or the physical keyboard. • Double-tap, pinch, or stretch on the editing screen to zoom text in or out. Touch or drag the application bar upward to: •...
- Page 93 Touch find text in the document. Type the text to find in the search box. The screen will mark the matching text by a color box. Touch to find the next matching text. to a Touch pply a text format to highlighted text or the text you are going to type.
- Page 94 Editing tools and commands for an Excel worksheet To enter numbers and text into a selected cell using the on-screen keyboard or the physical keyboard: Touch the formula bar next to Type a number or text, and then touch Enter Touch a cell to select it.
- Page 95 Touch to find text in the document. Type the text to find in the search box. The screen will mark the cell containing matching text by the color frame. Touch Double-tap, pinch, or stretch on the spread sheet to zoom it in or out. Touch and hold a cell and from the context menu that appears, you can: •...
- Page 96 To view a PowerPoint file Touch a PowerPoint file that you can access on your phone. The PowerPoint application opens automatically. • You can flick to the slide you want to view. • Double-tap the picture to switch between fixed zoomed-in and zoomed-out views.
- Page 97 To edit a PowerPoint file Touch the text box to open the slide composing screen and edit the text within the text box. Touch the heading or body text to move the text box to the text you want to edit. Touch the edit button to open the slide composing screen and edit the text within the text box.
-
Page 98: Troubleshooting
Troubleshooting Problem Call-related problems SIM card error Poor reception Troubleshooting Possible causes SIM card malfunction or damage. The SIM card is inserted improperly. Dirt or dust on the SIM card’s metal contacts. The network signal is too weak at your current location, for example, in a basement or near a tall building. - Page 99 Problem You cannot make outgoing calls You cannot answer incoming calls Unable to add contacts to the phone Echo or noise Noises during a call Possible causes The SIM card is not installed. Install a valid SIM card in Poor signal. Your phone is in airplane mode with no wireless connectivity.
- Page 100 Problem You cannot enable certain call features PIN Code is blocked System problems Battery does not charge Unable to turn the phone on. Troubleshooting Possible causes Your service provider does not support these features, or you have not applied for services that provide these features.
- Page 101 Problem Shortened standby time Messaging problems Unable to send or receive text messages. Possible causes The length of standby time is affected by your service provider’s system configuration. The same phone used with different service providers' systems does not have the same length of standby time.
- Page 102 Problem Unable to send or receive multimedia messages. Unable to send or receive e-mail. Internet problems Troubleshooting Possible causes Your phone is in airplane mode with no wireless connectivity. No MMS service is available. Subscribe to the MMS Your MMS settings are not configured properly.
- Page 103 Problem Unable to connect to the Internet. Media problems Windows Media Player on my computer cannot play the sounds of the video captured using the phone. Possible causes Your phone is in airplane mode with no wireless connectivity. You are not within the network’s service area.
-
Page 104: Index
Index Account setup, 38 Airplane mode, 72 Alarms, 88 Application List, 26 Applications, 77 Navigate, 30 Back cover Close, 13 Remove, 11 Battery Charge, 14 Insert, 12 bing Search, 58 Bluetooth, 74 Brightness, 71 Button Back, 7 Camera, 10 Power and Sleep/Wake, 9 Search, 8 Start, 7 Volume control, 10... - Page 105 Date, 75 Disability settings, 76 Disable all connections, 72 Display Brightness, 71 theme, 70 E-mail, 40 Factory reset, 76 Features, 7 First-Time Setup, 15 FM Radio, 84 Games, 69 Internet Browse, 59 Internet Explorer, 59 Keyboard On-Screen, 35 Physical, 16 Language, 75 List box, 35 Maps, 62...
- Page 106 Phone, 43 Customize, 70 Overview, 7 Reset, 76 Setup, 11 Turn off, 15 Turn on, 14 Physical Keyboard, 16 Pictures, 80 Change, 48 Enable, 48 Push button, 32 Radio button, 33 Ringtones and sounds, 71 Screen Orientation, 25 Turn on, 15 Search, 58 Settings account setup, 38...
- Page 107 Lock, 71 Browse, 59 Wi-Fi, 72 Xbox LIVE, 69 Zune FM Radio, 84 Music and video, 81 Index...