Advertisement
Table of Contents
Advertisement
Table of Contents

Related Manuals for AEG BES355010M


Summary of Contents for AEG BES355010M
- Page 1 BES355010M User Manual Oven USER MANUAL...
-
Page 2: Table Of Contents
13. ENERGY EFFICIENCY..................33 FOR PERFECT RESULTS Thank you for choosing this AEG product. We have created it to give you impeccable performance for many years, with innovative technologies that help make life simpler – features you might not find on ordinary appliances. Please spend a few minutes reading to get the very best from it. - Page 3 ENGLISH responsible for any injuries or damage that are the result of incorrect installation or usage. Always keep the instructions in a safe and accessible location for future reference. 1.1 Children and vulnerable people safety This appliance can be used by children aged from 8 •...
-
Page 4: Safety Instructions
WARNING: Ensure that the appliance is switched off • before replacing the lamp to avoid the possibility of electric shock. Do not use the appliance before installing it in the • built-in structure. Do not use a steam cleaner to clean the appliance. - Page 5 ENGLISH installation. Make sure that there is access to the mains plug after the Height of the back of 576 mm installation. the appliance • If the mains socket is loose, do not connect the mains plug. Width of the front of 595 mm •...
- Page 6 • Do not put flammable products or Contact the Authorised Service items that are wet with flammable Centre. products in, near or on the appliance. • Be careful when you remove the door from the appliance. The door is...
-
Page 7: Product Description
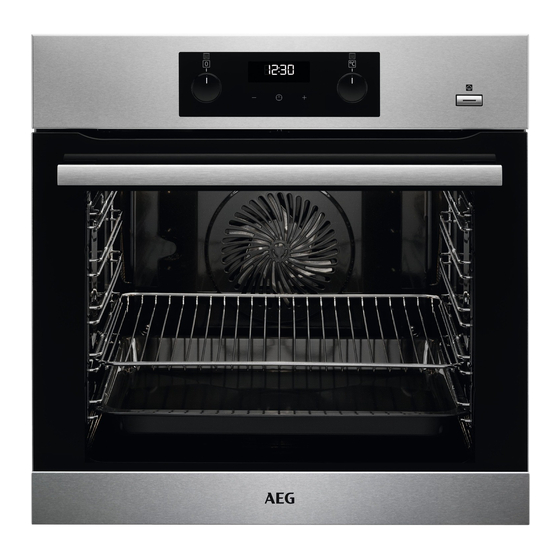
ENGLISH 3. PRODUCT DESCRIPTION 3.1 General overview Control panel Knob for the heating functions Power lamp / symbol Display Control knob (for the temperature) Temperature indicator / symbol Plus Steam Heating element Lamp Shelf support, removable Cavity embossment - Aqua cleaning container Shelf positions 3.2 Accessories... -
Page 8: Before First Use
4.2 Sensor fields / Buttons To set the time. To set a clock function. To set the time. To turn the True Fan Cooking PLUS function on and off. 4.3 Display A. Clock functions B. Timer 5. BEFORE FIRST USE WARNING! Refer to Safety chapters. -
Page 9: Daily Use
ENGLISH 6. DAILY USE WARNING! Step 2 Turn the control knob to select Refer to Safety chapters. the temperature. 6.1 How to set: Heating Step 3 When the cooking ends, turn function the knobs to the off position to turn off the oven. Step 1 Turn the knob for the heating functions to select a heating... - Page 10 6.3 Heating functions Heating func‐ Application tion Heating func‐ Application tion This function is designed to save energy during The oven is off. cooking. When you use Moist Baking this function, the temper‐ Off position ature in the cavity may differ from the set tem‐...
-
Page 11: Clock Functions
ENGLISH 7. CLOCK FUNCTIONS 7.1 Clock functions Clock function Application To set, change or check the time of day. Time of Day To set how long the oven works. Duration To set a countdown. This function has no effect on the op‐ eration of the oven. -
Page 12: Using The Accessories
How to set: Minute Minder Step 2 - press to set the time. The function starts automatically after 5 sec. When the set time ends, the signal sounds. Step 3 Press any button to stop the signal. Step 4 Turn the knobs to the off position. -
Page 13: Additional Functions
ENGLISH Deep pan: Push the tray between the guide bars of the shelf support. Wire shelf, Deep pan: Push the tray between the guide bars of the shelf support and the wire shelf on the guide bars above. 8.2 Trivet and Grill- / Roasting pan Step 1 Put the trivet into a deep pan. -
Page 14: Hints And Tips
10. HINTS AND TIPS WARNING! Refer to Safety chapters. 10.1 Cooking recommendations The temperature and cooking times in the tables are guidelines only. They depend on the recipes and the quality and quantity of the ingredients used. Your oven may bake or roast differently to the oven you had before. The tables below show recommended settings for temperature, cooking time and shelf position for specific types of the food. - Page 15 ENGLISH FROZEN READY MEALS (°C) (min) Croissants 170 - 180 15 - 25 Lasagne, use 200 ml 180 - 200 35 - 50 Use 100 ml of water. Set the temperature to 110 °C. FOOD REGENERATION (min) Bread rolls 10 - 20 Bread 15 - 25 Focaccia...
- Page 16 10.5 Tips on baking Baking results Possible cause Remedy The bottom of the cake The shelf position is incor‐ Put the cake on a lower shelf. is not baked sufficiently. rect. The cake sinks and be‐ The oven temperature is too Next time set slightly lower oven comes soggy or streaky.
- Page 17 ENGLISH CAKES / PASTRIES / BREADS (°C) (min) Cake with crumble topping 150 - 160 20 - 40 Fruit flans (made of yeast dough / sponge 35 - 55 cake mixture), use a deep pan Fruit flans made of short pastry 160 - 170 40 - 80 Preheat the empty oven.
- Page 18 BISCUITS (°C) (min) Short pastry biscuits True Fan Cooking 150 - 160 10 - 20 Rolls, preheat the empty True Fan Cooking 10 - 25 oven Biscuits made of sponge True Fan Cooking 150 - 160 15 - 20...
- Page 19 ENGLISH CAKES / PASTRIES (°C) (min) 2 positions Cream puffs / 160 - 180 25 - 45 1 / 4 Eclairs, preheat the empty oven Dry streusel cake 150 - 160 30 - 45 1 / 4 BIS‐ CUITS / SMALL (°C) (min) 2 positions...
- Page 20 BEEF (°C) (min) Pot roast 1 - 1.5 kg Conventional 120 - 150 Cooking Roast beef or fillet, per cm of thick‐ Turbo Grilling 190 - 200 5 - 6 rare, preheat the ness empty oven Roast beef or fillet, per cm of thick‐...
- Page 21 ENGLISH VEAL Use the function: Turbo Grilling. (kg) (°C) (min) Veal knuckle 1.5 - 2 160 - 180 120 - 150 LAMB Use the function: Turbo Grilling. (kg) (°C) (min) Lamb leg / Roast 1 - 1.5 150 - 170 100 - 120 lamb Lamb saddle...
- Page 22 POULTRY Use the function: Turbo Grilling. (kg) (°C) (min) Poultry, portions 0.2 - 0.25 each 200 - 220 30 - 50 Chicken, half 0.4 - 0.5 each 190 - 210 35 - 50 Chicken, poulard 1 - 1.5 190 - 210...
- Page 23 ENGLISH PIZZA PIZZA Use the first shelf position. Preheat the empty oven before cooking. (°C) (min) Use the second shelf position. Vegetable 160 - 180 50 - 60 (°C) (min) Unleavened 230 - 250 10 - 20 PIZZA bread Puff pastry 160 - 180 45 - 55 flan...
- Page 24 GRILL Use the function: Grill (°C) (min) (min) 1st side 2nd side Veal loin 210 - 230 30 - 40 30 - 40 Lamb saddle 210 - 230 25 - 35 20 - 25 Whole fish, 0.5 210 - 230...
- Page 25 ENGLISH 10.14 Defrost the oven cavity. Put the food in a deep dish and set it on top of the plate inside Remove the food packaging and put the the oven. Remove the shelf supports if food on a plate. necessary.
- Page 26 For a better result, stop the oven halfway through the drying time, open the door and let it cool down for one night to STONE complete the drying. FRUIT (min) (min) For 1 tray use the third shelf position.
- Page 27 ENGLISH 10.18 Moist Baking For the best results follow suggestions listed in the table below. (°C) (min) Bread sticks, 0.5 kg in total 190 - 200 50 - 60 Baked scallops in shells 180 - 200 30 - 40 Whole fish in salt, 0.3 - 0.5 kg 190 - 200 45 - 50 Whole fish in parchment, 0.3 - 0.5 kg...
- Page 28 BAKING ON ONE LEVEL. Biscuits Use the third shelf position. (°C) (min) Short bread / Pastry strips True Fan Cooking 25 - 40 Short bread / Pastry strips, Conventional Cooking 20 - 30 preheat the empty oven Small cakes, 20 per tray,...
-
Page 29: Care And Cleaning
ENGLISH GRILL Preheat the empty oven for 5 minutes. Grill with the maximum temperature setting. (min) Beef steak, turn halfway Grill 24 - 30 through 11. CARE AND CLEANING WARNING! Refer to Safety chapters. 11.1 Notes on cleaning Clean the front of the oven with a soft cloth with warm water and a mild detergent. - Page 30 Step 1 Step 2 Step 3 Pour: 250 ml of white vine‐ Let the vinegar dissolve the Clean the cavity with warm gar into the cavity emboss‐ limestone residue at the am‐ water and a soft cloth. ment. Use maximum 6% vin‐...
- Page 31 ENGLISH Step 1 Fully open the door. Step 2 Fully press the clamping levers (A) on the two door hinges. Step 3 Close the oven door to the first opening position (approximately 70° angle). Hold the door at both sides and pull it away from the oven at an upwards an‐ gle.
-
Page 32: Troubleshooting
Top lamp Step 1 Turn the glass cover to remove Step 2 Clean the glass cover. Step 3 Replace the lamp with a suitable 300 °C heat-resistant lamp. Step 4 Install the glass cover. 12. TROUBLESHOOTING WARNING! Problem Check if... -
Page 33: Energy Efficiency
ENGLISH 13. ENERGY EFFICIENCY 13.1 Product Information and Product Information Sheet* Supplier's name Model identification BES355010M 944188329 Energy Efficiency Index 95.3 Energy efficiency class Energy consumption with a standard load, conven‐ 0.99 kWh/cycle tional mode Energy consumption with a standard load, fan-forced 0.81 kWh/cycle... - Page 34 Moist Baking Function designed to save energy during cooking. 14. ENVIRONMENTAL CONCERNS appliances marked with the symbol Recycle materials with the symbol with the household waste. Return the Put the packaging in relevant containers product to your local recycling facility or to recycle it.
- Page 36 www.aeg.com/shop...