Table of Contents
Advertisement
Available languages
Available languages
Quick Links
Advertisement
Table of Contents

Summary of Contents for MTX TX2275
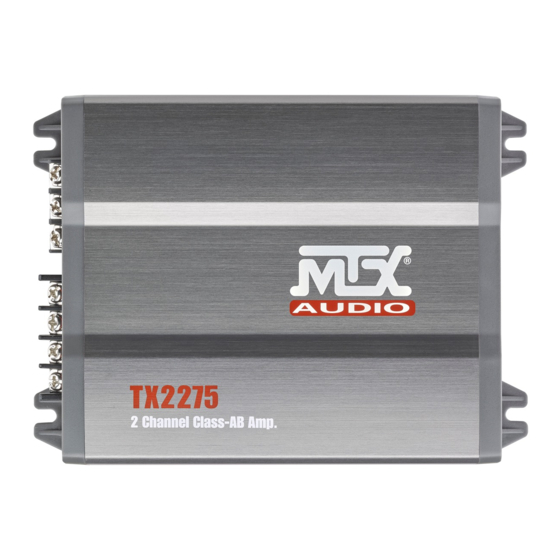
- Page 1 TX2275 TX2450 2-channel Class-AB Amplifier 4-channel Class-AB Amplifier 660W Peak - 2x75W RMS 900W Peak - 4x50W RMS Designed by MTX in Phoenix, AZ - USA mtxaudio.eu twitter.com/MTXEurope facebook.com/MTXEurope...
-
Page 2: Specifications
200mV output for proper operation of the amplifier). MTX recommends only high quality twisted pair cables (such as MTX ZNX) to decrease the possibility of radiated noise entering the system. Gain Control (Gain) : The gain control matches the input sensitivity of the amplifier to the source unit being used. The operating range varies... -
Page 3: Installation And Mounting
Connect the opposite end of the ground wire to the (GND) terminal on the MTX amplifier. 6. Connect a Remote Turn-on wire from the head unit to the MTX amplifier’s Remote terminal. If the head unit does not have a dedicated Remote Turn-on lead, you may connect to the head unit’s Power Antenna lead. -
Page 4: Caractéristiques
3. Augmenter le potentiomètre «Gain» jusqu’à entendre de la distorsion (son dégradé) Merci d’avoir fait confiance à MTX en achetant un amplificateur hautes performances de la série TX2. Une bonne installation combinée à des subwoofers MTX 4. Diminuer le niveau d’une heure sur le potentiomètre adaptés donnera des résultats hallucinants. -
Page 5: Installation Et Montage
Kit à l’avant + parleurs. Kit à l’avant TX2450 TX2450 2. Déterminez l’ e mplacement de votre amplificateur MTX. Sa position idéale est à plat, le logo orienté vers le haut. Il faut que l’air puisse bien HP X-Over LP X-Over X-Over OFF... -
Page 6: Vielen Dank
Gebrückter Betrieb : TX2275 : Wenn der Verstärker überbrücken , verwenden Sie den Kan.1 positiven Anschluss und dem Kanal 2 negativen Anschluss nur. TX2450 : Wenn der Verstärker Überbrückung für die beiden ersten Kanäle, verwenden Sie den Kan.1 positiven Anschluss und dem Kanal 2 negativen Anschluss nur. -
Page 7: Problemlösung
Sie den Anschluss für die elektrische Antenne. 7. Schliessen Sie die Cinchkabel Ihres Radios an die RCA Eingänge Ihres MTX Verstärkers an. Verlegen Sie das Kabel nicht in der Nähe von Strom- kabeln oder der Fahrzeugelektronik. Kreuzende Kabel verlegen Sie im 90° Winkel. Verwenden Sie hochwertiges Kabel. Dadurch vermeiden Sie Störgeräusche im Audiosignal. - Page 8 Modo ponte : TX2275 : quando colocar o amplificador em ponte, utilize apenas o terminal positivo do canal 1 e o terminal negativo do terminal 2. TX2450 : quando colocar o amplificador em ponte, para os dois primeiros canais, utilize apenas o terminal positivo do canal 1 e o terminal negativo do canal 2.
-
Page 9: Instalação E Montagem
Ligue o extremo oposto do cabo de massa ao terminal (GND) do amplificador MTX. 6. Conecte um cabo remoto desde o auto-rádio até ao terminal remoto do amplificador MTX. Se o auto-rádio não tiver um cabo remoto, pode usar o fio de antena motorizada. - Page 10 4. Ruota lentamente indietro il controllo del gain fino a che la distorsione scompare Grazie per aver scelto MTX per ottenere il massimo dal vostro impianto audio. Un amplificatore MTX, abbinato a subwoofers ed altopatlanti MTX, 5. L’amplificatore adesso è calibrato sull’uscita della sorgente.
-
Page 11: Installazione E Montaggio
Ingressi RCA al contrario Rimettili al posto giusto Frequenze basse deboli Altoparlanti collegati in controfase Altoparlanti collegati in controfase Non stai usando subwoofers MTX Compra subwoofer MTX Si bruciano i fusibili Livelli di uscita troppo alti Abbassa il volume Amplificatore difettoso Porta l’amplificatore a chi te la venduto... -
Page 12: Технические Характеристики
Спасибо ! • В положении «Off» кроссовер выключен. Благодарим Вас за покупку усилителя MTX Audio серии TX2 класса High-End . Правильная установка динамиков и сабвуферов MTX обеспечивают превосходный звук и производительность для бесконечных часов бодрствования соседей. Поздравляем и желаем Управление частотами кроссовера (X-Over): Используется для выбора необходимой частоты кроссовера (X-OVER). Частота регулировки: наслаждения... -
Page 13: Устранение Неисправностей
X-Over OFF Фронт: Фронт: 2. Определите место монтажа вашего усилителя MTX. Имейте в виду, что места вокруг усилителя, должно быть достаточно для воздушного потока компонентная компонентная и надлежащего охлаждения. Отметьте монтажные отверстия усилителя. Перед сверлением убедитесь, что все провода автомобиля, топливные... - Page 14 RCA Intrări (Inputs) : Aceste intrări RCA sunt utilizate cu unități centrale, care au RCA sau nivel de linie iesiri (unitățile centrale au nevoie de un nivel minim de 200 mV de ieșire pentru funcționarea corectă a amplificatorului) . MTX recomandă numai cabluri RCA de înaltă calitate pentru a reduce posibilitatea parazitilor si zgomotului de fond de a intra în sistem.
- Page 15 Conectați capătul opus al firului de masă la (GND) terminalul de pe amplificator MTX. 6. Conectați un fir de la unitatea centrala la terminalul termoinalul Remote al amplificatorului MTX. În cazul în care unitatea centrala nu are un fir dedicat “”Remote””...
-
Page 16: Panel De Control
Modo Puente : TX2275: Cuando la reducción de la amplificador, utilice el terminal positivo Canal 1 y sólo el terminal negativo canal 2. TX2450: Cuando la reducción de la amplificador, para los dos primeros canales, utilice el terminal positivo Ch.1 y sólo el terminal negativo Ch.2. -
Page 17: Instalación Y Montaje
X-Over OFF la parte delantera + front + coaxials at 2. Determina el lugar de montaje del amplificador MTX. Recuerda que tiene que haber suficiente ventilación en la parte de los disipadores del amplificador para subwoofer / recinto the back. - Page 19 Designed and Engineered by Mitek in Phoenix - AZ, USA - Assembled in Korea. © 2016 Mitek. All rights reserved. MTX is a registered trademarks of Mitek. Due to continual product development, all specifications are subject to change without notice.


