Datavideo DAC-2 Quick Setup Manual
Datavideo dac-2 digital video coverter: quick setup
Hide thumbs
Also See for DAC-2:
- Installation manual (13 pages) ,
- Supplementary manual (5 pages) ,
- Supplementary manual (13 pages)
Advertisement
Quick Links
Download this manual
See also:
Installation Manual
DAC-2 Quick Setup with Adobe Premiere 6.5 on Windows
This setup guide will cover four specific areas:
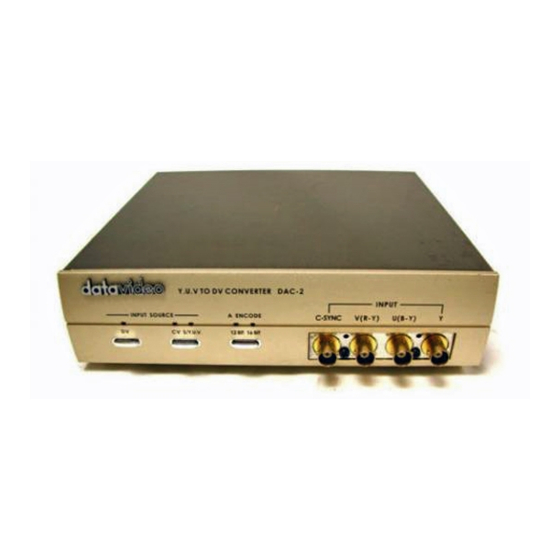
A. Explanation of front panel functions
B.
Verify which EPROM is in the DAC-2
C. Preview Monitor Connections
D. Initial Software configuration
A. Explanation of front panel functions
Button Functions
DV Input
The DV Button, has two functions:
Select/Reset
It selects DV as the input source and is also a reset.
Resetting the DAC-2 will put it into its default setting based on its Firmware version.
Composite
This button is for analog input source selection: Composite video (RCA), S-Video
Video, S-
(Y/C), and Y.U.V. (Component)
Video, Y.U.V.
12/16 bit
The A Encode button has two important functions; it selects the encoding audio
Audio/Mode
frequency between 12 bit (32 KHz) or 16 bit (48 KHz) and if it is held down for 3
Selection
seconds it switches modes.
B. Verify which EPROM is in the DAC-2.
On the underside of the DAC-2 there is a serial number sticker, which has a version number on it, the version
number is stamped or on a sticker.
Please find your version number in the table below:
Advertisement

Related Manuals for Datavideo DAC-2


Summary of Contents for Datavideo DAC-2
- Page 1 B. Verify which EPROM is in the DAC-2. On the underside of the DAC-2 there is a serial number sticker, which has a version number on it, the version number is stamped or on a sticker.
- Page 2 The CV and S/YUV LED's will alternate as a confirmation. If the encode button is pressed and held again the DAC-2 will go back Mode 1”. It is confirmed by the 12 bit and 16 bit encode LED's staying lit for 2 seconds.
- Page 3 D. Initial Software configuration Adobe Premiere 6.5 in Windows (Windows XP Screen shots are shown for reference only)